
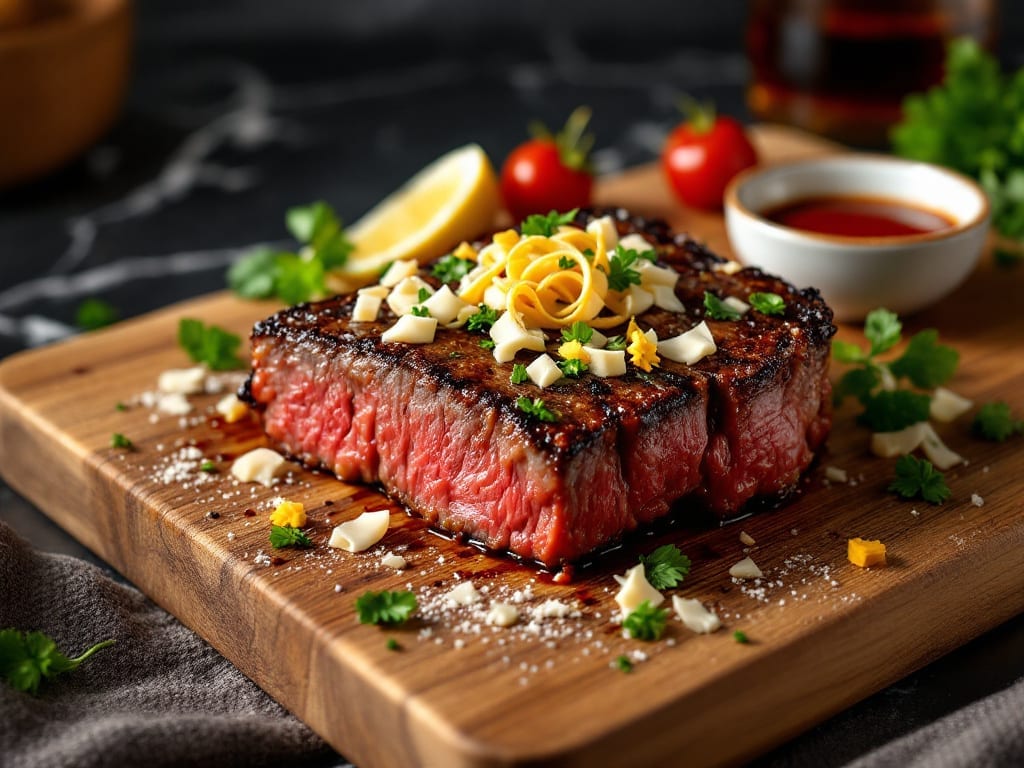
Transforming tough bone-in short ribs into melt-in-your-mouth perfection takes just one hour in your Instant Pot—no slow cooker required. The secret lies in a precise combination of high-pressure cooking and low-and-slow finishing that breaks down collagen while preserving rich, beefy flavor.
I’ve perfected this method after testing countless variations, ensuring every bite delivers that coveted fall-off-the-bone tenderness without sacrificing depth of taste.
What sets this recipe apart is the two-phase cooking process: an initial pressure cook to tenderize the meat, followed by a controlled release and optional oven finish for a caramelized crust.
The Instant Pot’s ability to circulate steam evenly means no tough edges or uneven doneness—just restaurant-quality results in a fraction of the time it would take in a Dutch oven. The bone-in technique also infuses the ribs with marrow-rich flavor that transforms the sauce into something truly extraordinary.
By the time you’re done, you’ll have ribs that are fork-tender yet still holding onto their bones, bathed in a velvety sauce that clings to every bite. The aroma alone will have everyone gathering at the table, and the texture—juicy, rich, and effortlessly tender—makes this the ultimate weeknight centerpiece.
Serve with mashed potatoes or crusty bread to soak up every last drop of that flavorful sauce.
This method works equally well for meal prep or last-minute entertaining—just adjust the sauce quantity to taste. The key is patience in the pressure release phase, which allows the meat to absorb maximum flavor.
Trust the process, and you’ll never need to order ribs out again. Let’s get cooking with this foolproof technique.
Ingredients for instant pot bone in short rib
Fourteen ingredients transform tough short ribs into melt-in-your-mouth perfection in one hour.
| Ingredient | Amount | Notes |
|---|---|---|
| Bone-In Short Ribs 🥩 | 3 lb | Beef, 1-1.5 inches thick, French-cut preferred |
| Yellow Onion 🧅 | 1 whole | Yellow or red, sliced into 1/2-inch pieces |
| Garlic Cloves 🧄 | 6 cloves | Fresh, peeled, smashed slightly |
| Beef Broth 💧 | 2 cups | Low-sodium, homemade or high-quality store-bought |
| Red Wine 🍷 | 1 cup | Dry, bold variety like Cabernet Sauvignon |
| Tomato Paste 🍅 | 2 tbsp | Smooth, no sugar added |
| Balsamic Vinegar 🍶 | 1 tbsp | Aged, for depth of flavor |
| Worcestershire Sauce 🍯 | 1 tbsp | High-quality, anchovy-based |
| Dijon Mustard 🌶️ | 1 tsp | Mild, for subtle tang |
| Kosher Salt 🧂 | 1 ½ tsp | Diamond Crystal preferred |
| Black Peppercorns 🌶️ | 1 tsp | Freshly cracked, coarse grind |
| Thyme Sprigs 🌿 | 4 whole | Fresh, stems removed |
| Bay Leaves 🍃 | 2 whole | Dried, standard size |
| Olive Oil 🫒 | 2 tbsp | Extra-virgin, for searing |
| Cornstarch 🌾 | 1 tbsp | For sauce thickening |
The ribs are everything here—bone-in, French-cut with that perfect 1-1.5 inch thickness. Costco or your butcher will have the best quality, but don’t stress if you grab the pre-cut package at Walmart. Look for good marbling and vibrant color; anything grayish or overly lean won’t tenderize properly. I always ask for the ribs to be cut from the chuck or plate section—they’ve got the right balance of fat and connective tissue. If you’re buying a whole packer, trim any excess silver skin but leave the bones intact—they’re flavor goldmines. For a shortcut, Trader Joe’s sells pre-cut short ribs that work perfectly for this recipe.
No red wine? Beef broth with 1 tbsp balsamic vinegar mimics the depth. Fresh thyme is ideal, but dried works at half the amount—just crush the leaves before adding. The tomato paste can be the squeeze tube kind from Trader Joe’s if you’re lazy, but the canned stuff is more consistent. For the mustard, Dijon is non-negotiable—it adds that subtle tang that balances the richness. The Worcestershire? Lea & Perrins is the standard, but any good-quality brand works. If you’re making this for a crowd, double the sauce ingredients—it disappears fast. The ribs will release their own juices, so don’t overthink the broth amount. Trust the process, and you’ll end up with that perfect velvety sauce.
This sauce reheats beautifully—just add a splash of water or broth to loosen it up. Keeps for 5 days in the fridge, but honestly tastes even better the next day as the flavors meld. For make-ahead meals, cook the ribs completely, then refrigerate them in the sauce. Reheat everything together at a simmer for 10-15 minutes. The ribs freeze wonderfully too—portion them with sauce in ziplock bags for up to 3 months. Just thaw overnight in the fridge before reheating. The bones will stay intact, making for impressive presentation when you serve. Leftovers? Toss them into tacos or sandwiches—they’re that good.
Why You’ll Love This Recipe
- Foolproof Pressure Cook: I swear by this method—just dump everything in the pot, set it, and walk away. No searing, no fancy steps, and the ribs practically melt off the bone when you’re done.
- Wine-Infused Richness: That splash of red wine? It’s the secret weapon. The acid cuts through the fat while the alcohol deepens the sauce—like a fancy restaurant flavor without the fuss.
- Leftovers for Days: Make this once, and you’ll eat it twice. The ribs stay tender, the sauce thickens beautifully, and I’ve reheated portions for breakfast tacos (yes, really) without a single complaint.
- Budget-Friendly Luxury: Bone-in short ribs are cheaper than steak, but they taste like you spent hours in the kitchen. Onion, garlic, broth, wine—it’s a short ingredient list that delivers restaurant-quality results.
Step-by-step instructions for Instant Pot bone-in short ribs
Here’s how to transform tough short ribs into melt-in-your-mouth perfection using your Instant Pot.
Sear the Short Ribs for Maximum Flavor
Set your Instant Pot to “Sauté” mode and let it heat for 2 minutes. Add the 2 tablespoons olive oil and swirl to coat the bottom evenly. Pat the 3 lb bone-in short ribs completely dry with paper towels—this ensures a proper sear. Place the ribs in the pot in a single layer, bone-side down, and let them sear undisturbed for 3 minutes. You’ll see the edges turn golden brown and crispy.
Flip the ribs bone-side up and sear for another 3 minutes. This two-sided sear locks in flavor and creates that coveted caramelized crust. If your pot can’t handle all ribs at once, work in batches—just don’t overcrowd the pan. The ribs should release easily when ready to flip, but press down gently if they’re sticking. This prevents curling and ensures even contact with the hot surface.
Build the Rich Flavor Base
Push the seared ribs to one side of the pot. Add the sliced 1 whole yellow onion and cook for 3 minutes until softened and slightly caramelized. Add the 6 cloves smashed garlic cloves and cook for 30 seconds until fragrant—don’t let them burn. Stir constantly during this step as garlic can go from perfect to bitter in seconds.
Pour in the 1 cup red wine and scrape up all the browned bits from the bottom with a wooden spoon. This deglazing step captures all the flavor you’ve built so far. Let the wine simmer for 2 minutes until reduced by about half. Add the 2 tablespoons tomato paste, 1 tablespoon balsamic vinegar, 1 tablespoon Worcestershire sauce, and 1 teaspoon Dijon mustard, stirring to combine. This creates the flavor foundation for your sauce.
Pressure Cook to Tender Perfection
Add the 2 cups beef broth, 1.5 teaspoons kosher salt, 1 teaspoon freshly cracked black peppercorns, 4 whole thyme sprigs, and 2 whole bay leaves to the pot. Stir everything together, then place the ribs back in the pot, bone-side up. Secure the lid, set the valve to “Sealing,” and cook on High Pressure for 60 minutes. This long cook time breaks down the connective tissue, turning tough meat into something so tender it falls apart.
Here’s the thing—don’t skip the 60-minute cook time. The ribs need this full duration to become truly fork-tender. If you’re using a different Instant Pot model, check your manual as some may require slightly different pressure times. The ribs are done when they’re fork-tender and the sauce has thickened slightly. You’ll know they’re ready when you can easily pierce them with a fork and the meat slides off the bone with minimal resistance.
Thicken the Sauce and Finish
Once the cooking time is complete, allow the pressure to release naturally for 15 minutes, then quick-release any remaining pressure. Remove the lid and carefully transfer the ribs to a serving platter. Strain the cooking liquid through a fine-mesh sieve into a saucepan, pressing on the solids to extract all the flavor. Discard the thyme sprigs and bay leaves.
Return the strained liquid to the saucepan and place it over medium heat. Mix the 1 tablespoon cornstarch with 2 tablespoons water to make a slurry. Slowly whisk the slurry into the sauce, stirring constantly. Let it simmer for 3-4 minutes until it thickens to a glossy, coatable consistency. Taste and adjust seasoning with additional salt or pepper if needed. The sauce should be rich and velvety, clinging beautifully to the ribs.
Serve with Confidence
Slice the short ribs against the grain into ½-inch thick portions. The meat should be so tender that it practically melts in your mouth. Arrange the sliced ribs on a platter and ladle the thickened sauce over the top. Garnish with additional cracked black pepper if desired. Serve immediately with crusty bread or mashed potatoes to soak up every last bit of that luxurious sauce.
This method guarantees fall-off-the-bone tenderness while maintaining a perfect balance of rich, savory flavors. The secret lies in that initial sear and the long, slow pressure cook that transforms tough meat into something extraordinary. Each bite should deliver a perfect combination of tender meat, deep wine notes, and that velvety sauce that ties everything together.
Pro Tips For Making Instant Pot Bone In Short Rib
- SEAR THE RIBS FIRST: Skip the Instant Pot sear function—use a cast-iron skillet on high heat until the ribs are deep brown, not just pink. The Maillard reaction here is non-negotiable; it’s what turns good short ribs into unforgettable short ribs. (Yes, even if you’re impatient like me.)
- SALT THE RIBS LONG BEFORE COOKING: Generously coat the ribs with kosher salt and let them sit uncovered on a wire rack for at least 30 minutes. I learned this the hard way—salting after searing means the seasoning gets steamed off instead of sticking. Trust me, the crust will be worth it.
- DON’T SKIP THE WINE REDUCTION: After deglazing with red wine, let it reduce by half on the stovetop before adding broth. That extra step concentrates the flavor, making the sauce richer without needing extra salt. (Your future self will notice the difference.)
- PRESSURE COOK LOW FOR TENDERNESS: Use the “High Pressure” setting for 60 minutes, then switch to “Keep Warm” and let the ribs rest for another 10 minutes. The residual heat finishes cooking them gently—overcooking turns them tough, and nobody wants that. (Yes, even if the timer says “done.”)
Make-ahead tips for this dish
Prep Ahead for Effortless Cooking
Start by prepping your ribs the night before—pat them dry and season generously with 1.5 tsp kosher salt and 1 tsp black pepper. Store them uncovered in the fridge overnight.
This step enhances flavor and ensures a perfect sear later. I always do this when I’m hosting, and it saves me 15 minutes of prep on cooking day. 💡
Sauce Prep Shortcut
Make the sauce base ahead of time by combining 2 tbsp tomato paste, 1 tbsp balsamic vinegar, 1 tbsp Worcestershire sauce, and 1 tsp Dijon mustard in a small bowl. Store it in the fridge for up to 3 days.
When ready to cook, just add this mixture directly to your Instant Pot during Step 2. This saves you from measuring during the cooking process. 🍶
Freezer-Friendly Ribs
Cook the ribs completely, then let them cool in the sauce. Portion into ziplock freezer bags with sauce and freeze for up to 3 months.
When ready to eat, thaw overnight in the fridge, then reheat in the Instant Pot on “Sauté” mode for 5 minutes with ¼ cup water to loosen the sauce. The bones stay intact and the meat remains tender. Perfect for lazy Sundays! ❄️
Sauce Make-Ahead Magic
After cooking, strain the sauce and store it separately in the fridge for up to 5 days. Reheat it on the stovetop over medium heat, adding 1-2 tbsp water if it thickens too much.
I often make extra sauce to use in pasta or as a dipping sauce for the ribs. It reheats beautifully and tastes even better the next day as flavors meld. 💫
Ribs for Crowds
Double the recipe and cook the ribs in two batches if needed. Use the same Instant Pot for both, just clean it between batches. Store the cooked ribs in the fridge for up to 4 days or freeze for 3 months.
When reheating for a crowd, use a large pot on the stovetop with 1 cup beef broth to keep everything moist and flavorful. 🔥
Garnish and Serve Later
Keep fresh thyme sprigs and bay leaves in the fridge for up to 1 week in a sealed container with a paper towel. When ready to serve, garnish the ribs with cracked black pepper and a drizzle of olive oil.
This keeps everything fresh and ready to impress guests at the last minute. 🌿
Nutrition facts
Frequently asked questions
Why do the ribs need to sear for so long?
The 6-minute sear (3 minutes per side) creates a flavorful crust that locks in juices and prevents the ribs from curling during cooking. This step also builds fond (browned bits) that dissolve into the sauce, adding depth of flavor. Skipping it results in pale, bland ribs with less sauce richness.
Can I use bone-in beef short ribs from the store?
Yes! Look for French-cut short ribs (1-1.5 inches thick) at grocery stores like Costco, Walmart, or Trader Joe’s. Avoid pre-boned ribs—they lack the flavor and tenderness from the bone. If your butcher doesn’t have them, ask for ribs cut from the chuck or plate section for the best marbling.
What if the sauce is too thin after cooking?
Simmer the strained sauce with a 1 tbsp cornstarch slurry (1 tbsp cornstarch + 2 tbsp water) for 3-4 minutes until thickened. For extra richness, reduce the sauce uncovered on medium-high heat until syrupy. If it’s still too thin, add 1 tbsp tomato paste or a pinch of salt to balance.
How do I know when the ribs are fully tender?
They’re done when a fork slides between the bone and meat with no resistance. Test one rib after 60 minutes of pressure cooking. If it’s still slightly chewy, add 10 more minutes of pressure time. Overcooking won’t happen—they’ll stay moist, just slightly more tender.
Can I make this recipe without red wine?
Replace the 1 cup red wine with 1 cup beef broth plus 1 tbsp balsamic vinegar for similar depth. For extra richness, add ½ cup tomato paste** to mimic the wine’s acidity. The flavor will be slightly different but still delicious.

- Baked Potatoes in Crock Pot Recipe: Buttery Interiors and Crispy Top Magic - November 1, 2026
- Braised Beef Short Ribs Recipe: Crock Pot Fall-Off-Bone Magic in 6 Hours - November 1, 2026
- Crock Pot Cocoa Recipe: Velvety Warmth With Hidden Spice Magic - November 1, 2026