
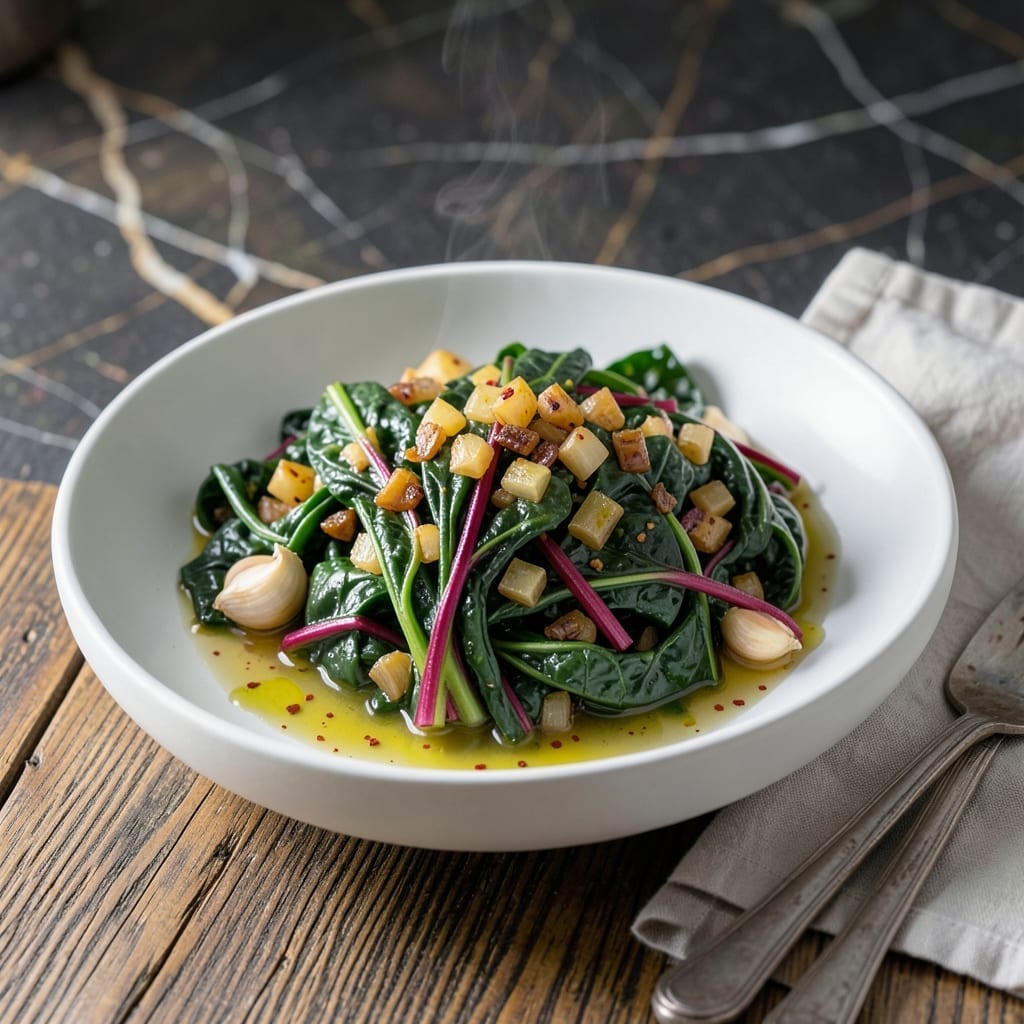
Cooking chard in an Instant Pot preserves its vibrant color and tender texture while infusing it with rich, garlicky flavor. This method delivers perfectly wilted greens in minutes without sacrificing depth.
The pressure cooker locks in nutrients and intensifies the natural sweetness of chard. A splash of vegetable broth and minced garlic transform this simple dish into something extraordinary.
You’ll end up with tender stems and leaves that still have a slight bite, all soaked in a light, aromatic broth. The Instant Pot makes it effortless to achieve restaurant-quality results at home.
Serve as a side to roasted meats or as a base for grains. This recipe works with any chard variety, from Swiss to rainbow.
Ingredients for Instant Pot Chard
Fresh chard, bold garlic, and bright citrus transform into tender, nutrient-packed greens.
| Ingredient | Amount | Notes |
|---|---|---|
| Swiss Chard 🥬 | 1 ½ lb | Stems and leaves separated, chopped |
| Vegetable Broth 🥣 | 1 cup | Low-sodium preferred |
| Garlic Cloves 🧄 | 6 cloves | Minced finely |
| Extra-Virgin Olive Oil 🫒 | 2 tbsp | For sautéing and depth |
| Yellow Onion 🧅 | 1 whole | Medium, finely diced |
| Red Pepper Flakes 🌶️ | ½ tsp | Adjust to spice preference |
| Sea Salt 🧂 | 1 tsp | Divided for layering flavor |
| Freshly Ground Black Pepper 🌶️ | ½ tsp | To taste |
| Lemon Juice 🍋 | 1 tbsp | Freshly squeezed for brightness |
| Balsamic Vinegar 🍷 | 1 tbsp | For depth and balance |
| Nutritional Yeast 🧀 | 2 tbsp | Optional for cheesy note |
The chard quality is key here. Look for firm stems and vibrant leaves—avoid wilted or yellowing bunches. Swiss or rainbow chard both work beautifully, and farmers markets often have the freshest options. Organic isn’t mandatory, but it does reduce pesticide residues. The vegetable broth should be low-sodium so you can control the seasoning. I prefer Imagine or Pacific Foods brands for their clean flavor.
No fresh garlic? Garlic powder at one-quarter the amount works in a pinch. Skip the onion if you’re short on time, but add an extra pinch of salt to compensate. For a nutty finish, toasted pine nuts or slivered almonds (add after cooking) elevate the dish. The lemon juice can be swapped with apple cider vinegar, but reduce the amount by half since it’s more assertive.
Cooked chard keeps 4-5 days in the fridge, stored in an airtight container with a bit of its cooking liquid. It freezes well too—up to 3 months—though the texture softens slightly. Reheat gently to preserve the vibrant color and tender bite.
Why You’ll Love This Recipe
- Set and Forget: The Instant Pot handles everything while I sip my coffee—just toss in the chard, broth, and garlic.
- Garlic-Infused Depth: That first bite with the caramelized onion and garlic in the olive oil? Ridiculously good.
- Weeknight Lifesaver: I throw this together after work when I need something green on the table fast.
- Budget-Friendly Batch: A big bunch of chard cooks down to feed us for days, and it costs pennies. Honestly, my wallet loves it.
Step-by-Step Instructions for Instant Pot Chard
Here’s the method. Straightforward, tested, works every time.
Step 1: Sauté Aromatics for Flavor Foundation
Set the Instant Pot to Sauté mode and add the 2 tbsp extra-virgin olive oil. When it shimmers, add the finely diced yellow onion and cook for 3-4 minutes until translucent and just beginning to caramelize at the edges.
Add the 6 cloves minced garlic cloves and 0.5 tsp red pepper flakes, stirring constantly for 30-45 seconds until the garlic turns golden but not brown. This builds the aromatic base that infuses the greens with depth. Season with ½ tsp sea salt and 0.5 tsp freshly ground black pepper at this stage.
Step 2: Deglaze and Add Chard Stems
Pour in the 1 cup vegetable broth and scrape the bottom of the pot with a wooden spoon to release any browned bits. This deglazing step prevents burning and incorporates all the flavor into the cooking liquid.
Add the chopped swiss chard stems (about half of the 1.5 lb swiss chard total weight) to the pot. Secure the lid, set the valve to Sealing, and cook on High Pressure for 2 minutes. The stems need this head start to become tender before adding the delicate leaves.
Step 3: Pressure Cook the Greens
After the stems have cooked, perform a quick release by turning the valve to Venting. Once the pressure has fully released, carefully open the lid and add the remaining swiss chard leaves. Stir to combine with the stems and liquid.
Secure the lid again, set the valve to Sealing, and cook on High Pressure for an additional 1 minute. The leaves will wilt dramatically under pressure, reducing in volume while absorbing the garlicky broth. You’ll notice the vibrant green color deepen as they cook.
Step 4: Finish with Bright Acidic Notes
Release the pressure once more and open the lid. Stir in the 1 tbsp balsamic vinegar and 1 tbsp lemon juice, which add the promised brightness to balance the rich garlic and earthy chard. Taste and adjust seasoning with the remaining ½ tsp sea salt if needed.
Sprinkle the 2 tbsp nutritional yeast over the top and stir to incorporate. This adds a subtle cheesy depth that complements the dish’s savory profile. The mixture should be glossy and the stems tender but not mushy, while the leaves retain some texture.
Pro Tips For Making Instant Pot Chard
- Sauté Onion First: Cook the yellow onion in olive oil until soft before adding garlic—about 3 minutes on the sauté function. I learned this the hard way when my garlic burned because I threw everything in at once.
- Chop Stems Separately: Cut chard stems into 1-inch pieces and cook them for 2 minutes before adding the leaves, since they take longer to soften. Sounds fussy, but it actually changes the outcome.
- Skip Overfilling: Never fill the Instant Pot more than halfway with chard, as it wilts down dramatically. After burning a batch from overpacking, I now stick to 1 large bunch max.
- Use High Pressure: Set the Instant Pot to high pressure for just 2 minutes—any longer turns the chard to mush. My grandmother swore by this timing, and she was right.
Regional Styles of instant pot chard
Mediterranean Style
In Greece, chard is often cooked with lemon zest and fresh dill. I add 1 tsp lemon zest with the garlic and finish with 2 tbsp chopped fresh dill after cooking. The citrus brightens the earthy greens beautifully.
Southern Italian Approach
Italian cooks often add ½ cup canned white beans and 1 tsp dried oregano to their chard. Stir these in with the broth for a heartier dish. I love how the beans soak up the garlicky liquid. 💛
North African Flavor
For a Moroccan twist, add 1 tsp ground cumin and ½ tsp smoked paprika when sautéing the onion. Finish with 2 tbsp chopped cilantro and a squeeze of extra lemon. The spices add warmth without overpowering.
Spanish Influence
In Spain, chard often includes ¼ cup raisins and 2 tbsp pine nuts. Add the raisins with the stems, then stir in toasted pine nuts at the end. The sweetness contrasts wonderfully with the bitter greens.
French Provençal
Herbes de Provence transforms this dish. Add 1 tbsp herbes de Provence with the garlic. For extra richness, I sometimes stir in 2 tbsp crumbled goat cheese at the finish. The herbs add a floral note that’s purely Provençal.
Nutrition Facts
Frequently Asked Questions
Can I use frozen chard instead?
Yes, but thaw and drain it first to avoid excess liquid. Frozen chard may require 1-2 extra minutes of pressure cooking to reach the same tenderness as fresh.
Why cook stems and leaves separately?
Stems need 2 minutes of pressure cooking to soften, while leaves only need 1 minute. This prevents mushy leaves and ensures even doneness throughout.
How do I store leftovers?
Keep in an airtight container with some cooking liquid for up to 4-5 days in the fridge. Reheat gently on the stovetop to preserve texture.
Can I make this spicier?
Increase red pepper flakes to 1 tsp or add ½ tsp cayenne with the garlic. For heat lovers, a dash of hot sauce at the end works too.

- 6 Oz Chocolate Chip Cookie Recipe: Perfectly Balanced Crispy Edges and Chewy Hearts - September 25, 2026
- 6-Inch Coffee Cake Recipe: Vanilla Bean Swirls and Buttery Streusel Topping - September 25, 2026
- 1 Hour Soup Recipe: Velvety Richness Without the Wait - September 25, 2026