
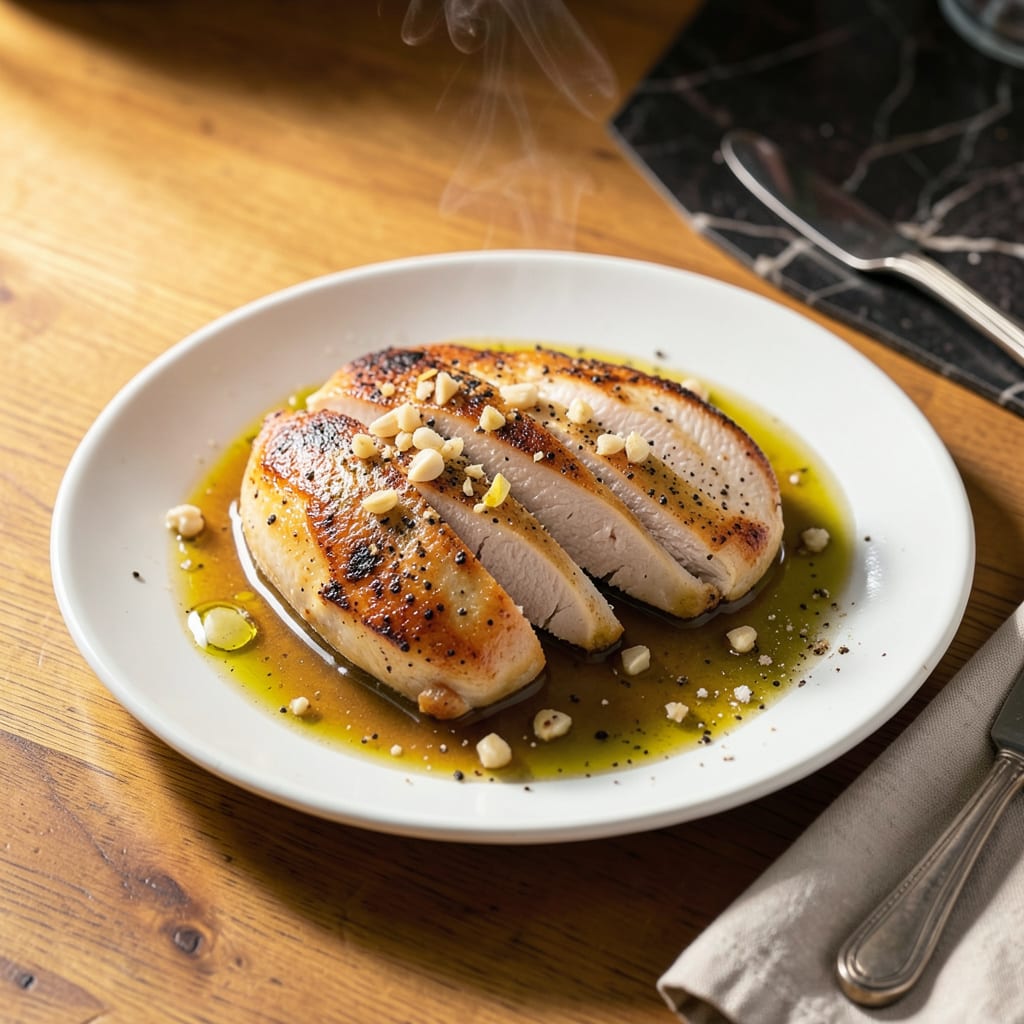
The Instant Pot transforms ordinary chicken breast into juicy, tender perfection in just 20 minutes—no dry, rubbery results here. This method delivers consistent, restaurant-quality chicken with minimal effort, making it ideal for busy weeknights or meal prep sessions.
With precise liquid ratios and a quick pressure release, you’ll achieve perfectly cooked chicken every time. Whether you’re shredding for tacos, slicing for salads, or serving as a simple protein, this recipe guarantees moist, flavorful results without fail.
Ingredients for Instant Pot Chicken Breast
Optimal ingredients for achieving restaurant-quality Instant Pot chicken with guaranteed juicy results every time.
| Ingredient | Amount | Notes |
|---|---|---|
| Boneless, Skinless Chicken Breasts 🍗 | 1 ½ lb | Uniform thickness for even cooking |
| Chicken Broth 🥄 | 1 cup | Low-sodium preferred for control |
| Extra-Virgin Olive Oil 🫒 | 1 tbsp | Divided for searing and finishing |
| Kosher Salt 🧂 | 1 tsp | Diamond Crystal brand recommended |
| Freshly Ground Black Pepper 🌶️ | ½ tsp | Coarse grind for texture |
| Garlic Powder 🧄 | 1 tsp | Not garlic salt substitute |
| Onion Powder 🧅 | 1 tsp | Enhances savory depth |
| Dried Thyme 🌿 | ½ tsp | Or substitute 1 tsp fresh |
| Bay Leaf 🌿 | 1 whole | Remove before serving |
| Lemon Juice 🍋 | 1 tbsp | Freshly squeezed preferred |
| Unsalted Butter 🧈 | 1 tbsp | Optional for finishing richness |
| Fresh Parsley 🌿 | 2 tbsp | Chopped, for garnish |
The chicken breasts are the foundation—select uniform 6-8 oz portions for even cooking. Costco’s Kirkland Signature or Whole Foods organic offer consistent quality. For the broth, Swanson’s low-sodium provides reliable flavor without overpowering. Olive oil should be California Olive Ranch or similar mid-range EVOO; avoid cheap blends. Precision in salt matters: Diamond Crystal kosher salt (half the density of table salt) ensures proper seasoning without oversalting.
Substitutions must maintain moisture balance. Vegetable broth works equally well, though chicken broth enhances depth. Fresh garlic (3 minced cloves) can replace garlic powder, but reduce to ½ tsp to avoid bitterness. No thyme? ½ tsp dried oregano provides comparable earthiness. For dairy-free finishing, olive oil replaces butter 1:1. The lemon juice is non-negotiable—it brightens the final flavor profile and prevents dryness.
Store raw chicken in its original packaging on the bottom fridge shelf (prevents cross-contamination) and use within 2 days. Cooked chicken keeps 4-5 days refrigerated or 4 months frozen in airtight containers. Broth can be pre-measured and stored in silicone ice cube trays for precise 1-tbsp portions. Fresh parsley stays vibrant 5-7 days when stems are trimmed and stored upright in a water-filled jar.
Why You’ll Love This Recipe
- Set It and Forget: I toss the chicken breasts in with broth, salt, and pepper—then the Instant Pot does all the work. No babysitting, no flipping, just perfectly cooked chicken while I fold laundry or help with homework.
- Juicy Every Time: Here’s what sold me—the high-pressure steam locks in moisture so even lean chicken breasts stay tender. No more dry, rubbery disasters, just fork-tender bites with that subtle savory depth from the broth.
- Meal Prep MVP: I make a batch Sunday and suddenly I’ve got protein for salads, wraps, or stir-fries all week. Honestly, it’s the only way I survive busy weeks without takeout.
- Budget’s Best Friend: Boneless chicken breasts on sale? Grab them. This recipe turns affordable cuts into something crave-worthy with zero fancy ingredients—just pantry staples and 20 minutes. (Yes, even on a Tuesday night.)
Step-by-Step Instructions for Instant Pot Chicken Breast
This method delivers perfectly tender, juicy chicken breasts with minimal effort and maximum flavor.
Step 1: Prepare and Season the Chicken Breasts
Begin by patting the 1.5 lb boneless, skinless chicken breasts completely dry with paper towels. This step is crucial for achieving a good sear and preventing excess moisture in the Instant Pot. If your chicken breasts vary significantly in thickness, use a sharp knife to cut them into uniform pieces for even cooking.
Season both sides generously with the 1 tsp kosher salt, 0.5 tsp freshly ground black pepper, 1 tsp garlic powder, 1 tsp onion powder, and 0.5 tsp dried thyme. I recommend rubbing the seasoning into the meat to ensure it adheres well and penetrates the surface. This creates a flavorful crust that will infuse the chicken during cooking.
Step 2: Sear the Chicken for Enhanced Flavor
Set your Instant Pot to the “Sauté” function on normal heat. Add 1 tbsp extra-virgin olive oil and allow it to heat until shimmering. Place the seasoned chicken breasts in the pot, being careful not to overcrowd. Sear for 2-3 minutes per side until you achieve a golden brown crust.
The searing process creates the Maillard reaction, developing complex flavors that will carry through the entire dish. Don’t move the chicken around too much during this step—let it develop that beautiful crust. Once seared, remove the chicken to a plate and set aside temporarily.
Step 3: Deglaze and Pressure Cook
With the Instant Pot still on “Sauté,” pour in the 1 cup chicken broth and use a wooden spoon to scrape up all the browned bits from the bottom of the pot. These fond particles contain concentrated flavor that will enrich your cooking liquid. Add the 1 whole bay leaf and 1 tbsp lemon juice to the broth.
Return the seared chicken breasts to the pot, ensuring they’re submerged in the liquid. Secure the lid, set the valve to “Sealing,” and cook on “High Pressure” for 8 minutes. The Instant Pot will take about 10 minutes to come to pressure before the cooking time begins. This precise timing ensures perfectly cooked chicken that’s tender but not overdone.
Step 4: Natural Release and Finishing Touches
Once the cooking cycle completes, allow the pressure to release naturally for 5 minutes, then carefully switch the valve to “Venting” to release any remaining pressure. This gradual release helps maintain the chicken’s juiciness by preventing rapid temperature changes that can cause the meat to seize up.
Remove the chicken breasts to a serving platter. For added richness, stir the 1 tbsp unsalted butter into the remaining cooking liquid until melted. This creates a simple pan sauce that you can spoon over the chicken. Discard the bay leaf before serving.
Step 5: Rest and Serve
Let the chicken rest for 3-5 minutes before slicing or serving. This brief resting period allows the juices to redistribute throughout the meat, ensuring each bite is moist and flavorful. The internal temperature should register 165°F when checked with an instant-read thermometer.
Garnish with the 2 tbsp fresh parsley before serving. The bright green color provides a beautiful contrast to the golden chicken, and the fresh herb flavor complements the savory notes perfectly. Serve immediately while hot, accompanied by your favorite sides or over rice to soak up the flavorful juices.
Serving Suggestions for Leftovers
Simple Sliced Salads
Slice the chicken into ¼-inch strips and serve over mixed greens with cherry tomatoes, cucumber, and avocado. I love drizzling with a lemon vinaigrette (3 tbsp olive oil, 1 tbsp lemon juice, 1 tsp Dijon) to complement the chicken’s savory notes. The warmth of the chicken slightly wilts the greens for perfect texture. 🥗
Taco Night Ready
Shred the chicken with two forks and toss with 2 tbsp of the cooking liquid to keep it moist. Warm corn tortillas and top with shredded cabbage, diced onions, and a squeeze of lime. I always keep cotija cheese and pickled red onions on hand for extra flavor layers.
Comforting Rice Bowls
Serve sliced chicken over steamed jasmine rice with a drizzle of the buttery pan sauce. Add quick-pickled carrots (toss shredded carrots with rice vinegar and sugar) and a fried egg on top. The runny yolk creates a luxurious sauce that ties everything together. ✨
Pasta Perfection
Toss shredded chicken with 8 oz cooked penne, ¼ cup reserved cooking liquid, and 2 tbsp grated Parmesan. Finish with fresh basil and red pepper flakes. This 10-minute meal tastes like it simmered all day—the Instant Pot chicken absorbs the pasta flavors beautifully.
Meal Prep Magic
Portion sliced chicken into glass containers with quinoa and roasted veggies for grab-and-go lunches. I layer the components separately to prevent sogginess. The chicken stays juicy for 4 days when stored with a lemon wedge in each container.
Sandwich Star
Pile sliced chicken onto toasted ciabatta with arugula and garlic aioli (mix mayo with minced garlic). Press lightly and wrap in parchment for easy handling. The chicken’s moisture stands up to the bread without making it soggy—ideal for picnics or work lunches. 💛
Nutrition Facts
Frequently Asked Questions
Why does my chicken turn out rubbery?
Overcooking is the main culprit. Stick to 8 minutes on high pressure for 1.5 lbs of chicken, followed by a 5-minute natural release. Thicker breasts may need slightly more time, but never exceed 10 minutes total.
Can I skip the searing step?
You can, but searing adds depth of flavor through the Maillard reaction. If short on time, at least season the chicken well before pressure cooking. The 2-3 minute sear makes a noticeable difference in the final taste.
What if my chicken isn’t fully submerged?
Add ¼ cup more broth to ensure proper coverage. The liquid creates steam for pressure cooking, so it’s essential. Never exceed the Instant Pot’s ⅔ fill line to avoid clogging the valve.
How do I prevent the “burn” notice?
Always deglaze thoroughly after searing to lift fond from the bottom. Use at least 1 cup liquid and avoid tomato-based sauces (they burn easily). A trivet can also help elevate chicken above potential stuck bits.
Can I double the recipe?
Yes, but don’t stack chicken pieces. Cook in batches if needed, keeping cook time the same. For 3 lbs, use 1.5 cups broth and maintain the 8-minute cook time. The Instant Pot needs space for proper circulation.

- 8 Bean Soup Recipe Crock Pot: Hearty Vegetable Medley in One Pot - September 25, 2026
- 4C Bread Crumbs Meatballs Recipe: Crispy Crust and Juicy Centers - September 25, 2026
- 6 Oz Chocolate Chip Cookie Recipe: Perfectly Balanced Crispy Edges and Chewy Hearts - September 25, 2026