
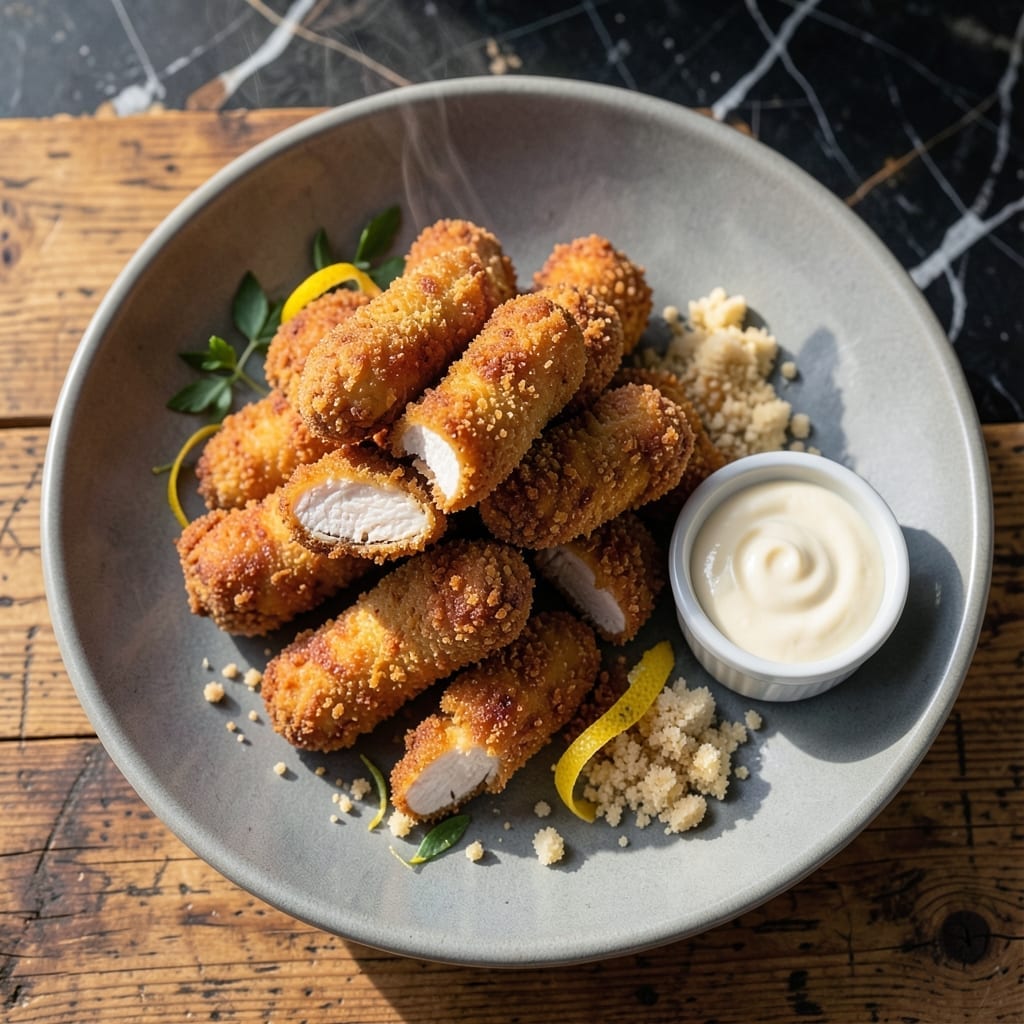
I’ve mastered the art of making crispy chicken fingers in the Instant Pot—no deep frying required. This method delivers golden, crunchy results with minimal oil and maximum flavor.
Using the Instant Pot’s air fryer function, the breading cooks evenly and stays crispy without the mess of a traditional fryer. It’s a foolproof way to achieve restaurant-quality texture at home.
The secret lies in a two-step breading process and precise cooking time. Each bite offers a tender interior with a perfectly crispy exterior that holds up to dipping.
Serve with your favorite sauces for a meal that’s quick, satisfying, and sure to please a crowd. Here’s how to make it happen.
Ingredients for Instant Pot Chicken Fingers
Pantry staples plus chicken form the base of this crowd-pleasing dish. Simple and satisfying.
| Ingredient | Amount | Notes |
|---|---|---|
| Boneless Chicken Breasts 🍗 | 1 ½ lb | Cut into 1-inch thick strips |
| All-Purpose Flour 🌾 | 1 cup | For initial dredging |
| Large Eggs 🥚 | 2 whole | Beaten for egg wash |
| Panko Breadcrumbs 🍞 | 1 ½ cups | For crispy coating |
| Grated Parmesan Cheese 🧀 | ½ cup | Freshly grated for best flavor |
| Garlic Powder 🧄 | 1 tsp | For savory depth |
| Onion Powder 🧅 | 1 tsp | Adds subtle sweetness |
| Paprika 🌶️ | 1 tsp | Sweet or smoked |
| Salt 🧂 | 1 tsp | Divided for seasoning |
| Black Pepper 🌶️ | ½ tsp | Freshly ground preferred |
| Olive Oil 🫒 | 2 tbsp | For air frying spray |
| Cooking Spray 💧 | 1 can | For greasing basket |
The chicken is key here. Boneless, skinless breasts work best—cut them into even strips so they cook uniformly. I grab mine from Costco for the best value, but any supermarket will do. Look for pieces that are similar in size (about 6 oz each) so they finish at the same time. Panko is non-negotiable for that extra crispy texture—regular breadcrumbs just won’t cut it.
No Panko? Crush cornflakes or saltine crackers for a similar crunch. Swap Parmesan for Pecorino Romano if you’ve got it—more bite, same melt. The egg wash can be replaced with buttermilk or even water in a pinch (though the breading might not cling as well). Fresh out of paprika? Cayenne or chili powder adds a kick, but go light—you don’t want to overpower the chicken.
Prep the chicken the night before—keeps it 2 days in the fridge before cooking. Cooked fingers stay crispy for 2-3 days in an airtight container (reheat in the air fryer). Freeze uncooked breaded strips for up to 3 months on a tray first, then transfer to a bag.
Why You’ll Love This Recipe
- One Pot Magic: The Instant Pot does all the work—just coat, cook, and crisp in one go.
- Crispy Perfection: That panko and parmesan crust gives a golden crunch with every bite.
- Crowd Pleaser: Kids devour them, and adults sneak seconds. (Yes, even on a Tuesday night)
- Budget Friendly: Boneless chicken breasts stretch far, and leftovers reheat beautifully.
Step-by-Step Instructions for Instant Pot Chicken Fingers
Here’s the method I use to get that perfect crunch without the deep fryer mess.
Step 1: Prep and Season the Chicken Strips
Cut the 1.5 lb Boneless Chicken Breasts into 1-inch thick strips. I like to pat them dry with paper towels first—this helps the coating stick better. Season both sides lightly with 1 tsp Salt and 0.5 tsp Black Pepper.
This step ensures every bite is flavorful from the start. Don’t skip drying the chicken; excess moisture creates a gummy coating instead of a crisp one.
Step 2: Set Up the Breading Station
In a shallow bowl, combine the 1 cup All-Purpose Flour, 1 tsp Garlic Powder, 1 tsp Onion Powder, and 1 tsp Paprika. In a second bowl, beat the 2 whole Large Eggs until smooth. In a third bowl, mix the 1.5 cups Panko Breadcrumbs with the 0.5 cup Grated Parmesan Cheese.
I arrange these in order from left to right—flour, egg, breadcrumb mix. This assembly line keeps the process clean and efficient. The Panko and Parmesan combo is what gives that extra crispy, cheesy crunch.
Step 3: Coat the Chicken Evenly
Dredge each chicken strip in the flour mixture, shaking off any excess. Then dip it into the beaten eggs, letting any extra drip back into the bowl. Finally, press it firmly into the Panko-Parmesan mix, turning to coat all sides completely.
Here’s the thing—press hard enough that the crumbs adhere well but don’t squash the chicken. Place the breaded strips on a plate and let them rest for 5 minutes before cooking. This helps the coating set and prevents it from falling off.
Step 4: Cook in the Instant Pot with Crispy Finish
Lightly grease the Instant Pot’s air fryer basket with cooking spray. Arrange half the breaded strips in a single layer, ensuring they don’t touch. Spritz the tops lightly with the 2 tbsp Olive Oil for extra crispiness.
Air fry at 390°F for 8-10 minutes, flipping halfway through, until golden brown and the internal temperature reaches 165°F. Work in batches if needed—overcrowding steams instead of crisps. Repeat with remaining strips.
Step 5: Serve Immediately for Maximum Crunch
Transfer the cooked chicken fingers to a wire rack or paper towel-lined plate. Let them cool for 2 minutes—just long enough to handle but still piping hot. The rack prevents the bottoms from getting soggy.
Serve right away while they’re at their crispiest. I promise the Panko-Parmesan crust stays crunchy longer than you’d expect, but they’re best fresh out of the Instant Pot. Pair with your favorite dipping sauce and enjoy!
Pro Tips For Making Instant Pot Chicken Fingers
- Cut Even Strips: Slice the boneless chicken breasts into uniform 1-inch thick strips so they cook evenly in the Instant Pot. I learned this the hard way—uneven pieces led to some dry, some undercooked. —
- Double-Coat the Chicken: Dip each strip in flour, then egg, then panko mixed with parmesan, and repeat the egg and panko step. Sounds tedious, but it gives that extra-crispy crust that holds up to pressure cooking. —
- Use the Trivet: Place the trivet in the Instant Pot and arrange the chicken strips on top to keep them out of the liquid. After a soggy first attempt, I finally figured out this keeps the coating crisp. —
- Quick Release Carefully: Let the pressure release naturally for 2 minutes, then quick release the rest. This prevents the sudden steam burst from making the breading fall off.
Creative Variations of This instant pot chicken fingers
Spicy Kick Variation
Add 1 tsp cayenne pepper to your flour mixture for heat lovers. I also mix ½ tsp chipotle powder into the Panko for smoky depth. The spice level builds beautifully without overpowering the chicken. 🌶️
Cheesy Twist
Swap Parmesan for ½ cup shredded cheddar in the breading mix. This creates a gooey, melty layer that kids adore. For extra richness, add ¼ cup powdered Parmesan to the flour stage.
Gluten-Free Option
Use 1:1 gluten-free flour for dredging and gluten-free Panko for coating. I recommend Kikkoman gluten-free Panko for best texture. The results are just as crispy as the original.
Herb-Infused Crust
Mix 1 tbsp dried Italian seasoning into your Panko-Parmesan blend. Fresh herbs work too—add 2 tbsp chopped parsley to the egg wash. This adds a bright, aromatic note that pairs well with garlic aioli.
Extra Crunch Layer
For maximum texture, double-dip in egg and Panko after the first coating. Press crushed cornflakes onto the second layer. This creates an ultra-thick, shatteringly crisp crust that stays crunchy longer.
Sweet and Spicy
Add 1 tbsp brown sugar to the flour mix and ½ tsp cinnamon to the Panko. The sweetness caramelizes slightly, creating a unique flavor profile. Serve with a honey mustard dipping sauce. 💛
Nutrition Facts
Frequently Asked Questions
Can I use chicken tenders instead of breasts?
Chicken tenders work perfectly and often require no cutting. They cook slightly faster, so check for 165°F internal temperature at 8 minutes.
How do I keep the breading from falling off?
Press firmly when coating and let breaded strips rest for 5 minutes before cooking. Also, pat chicken completely dry first to help adhesion.
Can I bake these in the oven instead?
Yes! Bake at 400°F for 12-15 minutes, flipping halfway. Use a wire rack for air circulation to maintain crispiness.
What dipping sauces pair well?
Classics like honey mustard, BBQ, or ranch work great. For a twist, try sriracha mayo or garlic aioli for extra flavor.

- 4C Bread Crumbs Meatballs Recipe: Crispy Crust and Juicy Centers - September 25, 2026
- 6 Oz Chocolate Chip Cookie Recipe: Perfectly Balanced Crispy Edges and Chewy Hearts - September 25, 2026
- 6-Inch Coffee Cake Recipe: Vanilla Bean Swirls and Buttery Streusel Topping - September 25, 2026