
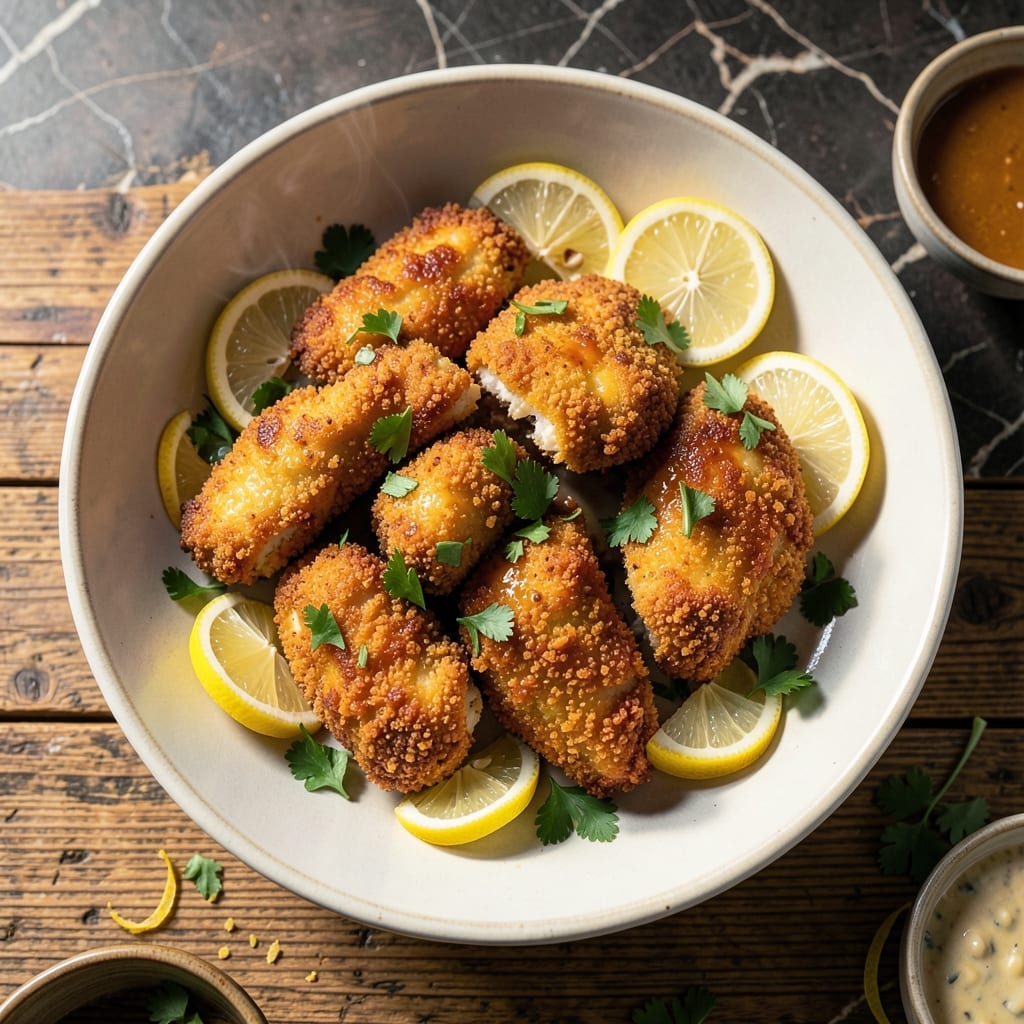
Achieving crispy chicken tenders without deep frying is possible with this proven Instant Pot method. The pressure cooker locks in moisture while a quick finishing step delivers the perfect texture.
This technique produces tender meat every time, with a golden exterior that satisfies that classic crunch craving. The process is streamlined yet delivers restaurant-quality results at home.
You’ll start with simple ingredients and finish with juicy, flavorful tenders that hold their own as a main course or in sandwiches. The method ensures consistent results with minimal effort.
No special equipment beyond your Instant Pot is required. The recipe scales easily for families or meal prep.
Ingredients for Instant Pot Chicken Tenders
Simple ingredients transform into golden, juicy tenders with this pressure cooker method.
| Ingredient | Amount | Notes |
|---|---|---|
| Chicken Tenderloins 🍗 | 1 ½ lb | Boneless, skinless, uniform size |
| All-Purpose Flour 🌾 | 1 cup | For initial dredging layer |
| Large Eggs 🥚 | 2 whole | Beaten for binding coating |
| Panko Breadcrumbs 🍞 | 1 ½ cups | Japanese-style for extra crispiness |
| Cornstarch 🌾 | 2 tbsp | Mixed with flour for crunch |
| Garlic Powder 🧄 | 1 tsp | For seasoning the coating |
| Onion Powder 🧅 | 1 tsp | Adds depth to breading |
| Paprika 🌶️ | 1 tsp | Sweet or smoked for color |
| Salt 🧂 | 1 ½ tsp | Divided for seasoning layers |
| Black Pepper 🌶️ | ¾ tsp | Freshly ground preferred |
| Olive Oil 🫒 | 2 tbsp | For sautéing and finishing |
| Chicken Broth 💧 | ½ cup | Low-sodium for pressure cooking |
| Buttermilk 🥛 | ½ cup | For marinating chicken |
The chicken tenderloins are non-negotiable here—look for uniform pieces at Whole Foods or Costco to ensure even cooking. Panko breadcrumbs (find them in the Asian aisle at Kroger) deliver that restaurant-quality crunch. For the buttermilk, full-fat works best, but low-fat in a pinch. The cornstarch is the secret to extra crispiness, so don’t skip it.
No buttermilk? Whole milk plus 1 tbsp vinegar makes a quick substitute. Panko can be swapped for regular breadcrumbs, but texture will differ. Almond flour at a 1:1 ratio works for gluten-free. For extra flavor, add 1 tsp Cayenne to the breading mix. The olive oil can be any neutral oil like avocado or vegetable.
Store raw chicken in the fridge for up to 2 days or freeze for 3 months. Cooked tenders keep 3-4 days refrigerated, but they’re best fresh. Reheat in the air fryer for 5 minutes to revive crispiness.
Why You’ll Love This Recipe
- Set It and Forget: I toss the coated tenders in, press a button, and walk away—no babysitting the skillet.
- Crispy Outside, Juicy Inside: That panko-cornstarch crust gives a satisfying crunch while the instant pot keeps the chicken tender.
- Weeknight Hero: Honestly, it’s my go-to for picky eaters and last-minute dinners alike.
- Budget Stretcher: One bag of tenderloins feeds my family of four with leftovers for lunches.
Step-by-Step Instructions for Instant Pot Chicken Tenders
Master the technique for achieving crispy, tender results with minimal oil and maximum flavor.
Step 1: Marinate and Season the Chicken Tenderloins
Begin by placing the 1.5 lb Chicken Tenderloins in a bowl with the 0.5 cup Buttermilk. I always add 1 tsp Salt and 0.75 tsp Black Pepper to this mixture—this initial seasoning penetrates the meat and ensures flavor in every bite.
Let the chicken marinate at room temperature for 15-20 minutes. You’ll notice the buttermilk starts to tenderize the meat almost immediately, which is crucial for achieving that melt-in-your-mouth texture. Don’t skip this step; it’s the foundation of both tenderness and flavor development.
Step 2: Prepare the Breading Station with Precise Layers
In a shallow dish, combine the 1 cup All-Purpose Flour with the 2 tbsp Cornstarch, 1 tsp Garlic Powder, 1 tsp Onion Powder, 1 tsp Paprika, and the remaining 0.5 tsp Salt. This flour mixture creates the first crispy layer and helps the egg wash adhere properly.
In a second dish, beat the 2 whole Large Eggs until smooth. For the final layer, place the 1.5 cups Panko Breadcrumbs in a third dish. I’ve found that keeping each component separate prevents clumping and ensures even coating on every tenderloin.
Step 3: Bread the Chicken with Careful Technique
Remove each chicken tenderloin from the buttermilk, letting excess drip off, then dredge it thoroughly in the flour mixture. Press firmly to ensure full coverage—this step creates the base for the crispy exterior. Shake off any excess flour before moving to the next step.
Dip the floured tenderloin into the beaten eggs, coating completely, then transfer to the panko breadcrumbs. Press the breadcrumbs into the chicken, turning to coat all sides. The panko should adhere in an even, generous layer. Place breaded pieces on a wire rack while you finish the batch—this prevents sogginess.
Step 4: Pressure Cook and Finish for Crispiness
Set your Instant Pot to Sauté mode and add 1 tbsp Olive Oil. When the oil is hot but not smoking, add half the breaded chicken tenderloins in a single layer. Sear for 2-3 minutes per side until the coating is golden brown—this initial sear creates the crispy texture we’re after.
Pour in the 0.5 cup Chicken Broth, then arrange all breaded tenderloins in the pot in a single layer using a steamer basket. Secure the lid, set the valve to Sealing, and cook on High Pressure for 5 minutes. When finished, quick-release the pressure and carefully remove the lid.
For maximum crispiness, transfer the cooked tenders to a baking sheet, drizzle with the remaining 1 tbsp Olive Oil, and broil for 2-3 minutes until they reach your desired level of golden perfection. Serve immediately while hot and crispy.
Pro Tips For Making Instant Pot Chicken Tenders
- Pat Dry First: I learned this the hard way—wet chicken tenders won’t crisp up. Use paper towels to dry each piece thoroughly before dredging in flour, or the panko will just slide right off.
- Use Cornstarch Slurry: Mix 1 tablespoon cornstarch with 1/4 cup cold water and stir it into the Instant Pot after pressure cooking. It thickens the juices into a light gravy that clings to the tenders beautifully.
- Skip Overcrowding: Resist the urge to cram all the tenders into the pot at once. Cook in batches if needed, or they’ll steam instead of brown when you sear them post-pressure.
- Double Dredge: After the egg wash, roll the tenders in panko, then dip them back in egg and panko again. Sounds tedious, but it creates that extra-crispy crust that stays put even after pressure cooking.
Flavor Customization for This Recipe
Spicy Heat Boost
Add 1 tsp Cayenne pepper to your flour mixture for a subtle kick that builds with each bite. For serious heat lovers, mix ½ tsp crushed red pepper flakes into the panko breadcrumbs. I find this adds complexity without overwhelming the dish.
Herb-Infused Flavor
Stir 1 tbsp dried Italian seasoning into the panko for a Mediterranean twist. Alternatively, add 1 tsp dried rosemary and 1 tsp dried thyme to the flour mix. The herbs toast beautifully during pressure cooking, releasing aromatic oils.
Cheesy Crunch Layer
Mix ½ cup grated Parmesan cheese into your panko breadcrumbs. This creates a savory, umami-rich crust that browns perfectly. For extra indulgence, sprinkle ¼ cup shredded cheddar on top before the final broiling step.
I love how the cheese melts into the breading, creating little crispy bits.
Citrus Zing
Add 1 tsp lemon zest and 1 tsp orange zest to your flour mixture. The citrus brightens the rich chicken flavor beautifully. A squeeze of fresh lemon juice over the finished tenders adds a final pop of freshness. 💛
Smoky Depth
Swap the regular paprika for 1 tsp smoked paprika in your breading. This simple change adds a subtle BBQ-like quality. For more intensity, add ¼ tsp chipotle powder to the flour mix. The smokiness pairs wonderfully with the buttermilk marinade.
Sweet and Tangy
Mix 1 tbsp powdered sugar into your panko for a sweet contrast to the savory chicken. Alternatively, add 1 tsp onion powder and 1 tsp garlic powder to the flour for a more pronounced tang. 🔥
Nutrition Facts
Frequently Asked Questions
Can I use frozen chicken tenders?
Yes, but thaw them first in the fridge overnight. Pressure cooking from frozen can lead to uneven cooking. Pat them completely dry before breading to ensure the coating sticks properly.
Why do we need the broiling step?
The pressure cooker keeps them juicy but softens the breading. Broiling for 2-3 minutes restores that essential crispiness. Skip it only if you prefer a softer texture.
Can I make this gluten-free?
Swap all-purpose flour for 1:1 gluten-free flour and use gluten-free panko. Almond flour works too but may brown faster—watch closely during broiling.
How do I keep them crispy when storing?
Cool completely on a wire rack, then store in a single layer. Reheat in an air fryer at 375°F for 5 minutes to revive the crunch. Avoid microwaving.

- 6 Oz Chocolate Chip Cookie Recipe: Perfectly Balanced Crispy Edges and Chewy Hearts - September 25, 2026
- 6-Inch Coffee Cake Recipe: Vanilla Bean Swirls and Buttery Streusel Topping - September 25, 2026
- 1 Hour Soup Recipe: Velvety Richness Without the Wait - September 25, 2026