
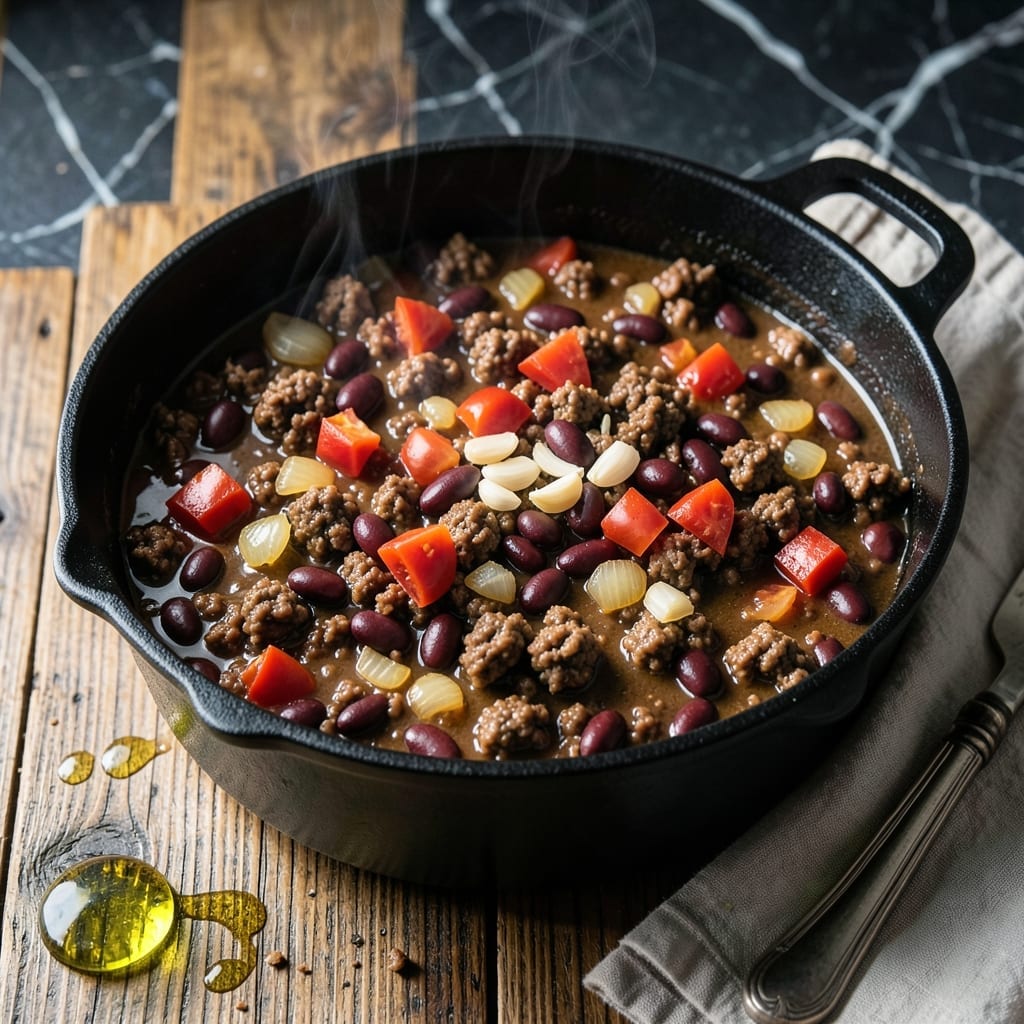
This Instant Pot method transforms chile from an all-day project into a 30-minute meal without sacrificing depth of flavor. The pressure cooker intensifies spices and tenderizes meat in a fraction of traditional time.
Browning the meat first builds a flavor foundation, while sautéing onions and garlic creates complexity. The sealed environment locks in moisture, ensuring each bite is rich and satisfying.
What emerges is a hearty dish with perfectly tender beans and meat swimming in a thick, aromatic sauce. The flavors meld together as if they’ve been simmering for hours.
Ideal for busy weeknights when you crave comfort food fast. This technique delivers results that taste like they took all day.
Ingredients for Instant Pot Chile
Bold spices, tender meat, and beans create a hearty dish ready in minutes.
| Ingredient | Amount | Notes |
|---|---|---|
| Ground Beef 🥩 | 1 ½ lb | 80/20 lean-to-fat ratio preferred |
| Dried Kidney Beans 🫘 | 1 can | 15 oz can, drained and rinsed |
| Diced Tomatoes 🍅 | 2 cans | 14.5 oz cans, undrained |
| Yellow Onion 🧅 | 1 whole | Medium, finely diced |
| Garlic Cloves 🧄 | 4 cloves | Minced for depth of flavor |
| Beef Broth 💧 | 2 cups | Low-sodium preferred |
| Tomato Paste 🍅 | 2 tbsp | For concentrated tomato flavor |
| Chili Powder 🌶️ | 2 tbsp | Use a high-quality blend |
| Ground Cumin 🌿 | 1 tbsp | Toasted for enhanced aroma |
| Dried Oregano 🍃 | 1 tsp | Mediterranean variety preferred |
| Cayenne Pepper 🔥 | ¼ tsp | Adjust for desired heat level |
| Salt 🧂 | 1 tsp | Kosher or sea salt recommended |
| Black Pepper 🌶️ | ½ tsp | Freshly ground for best results |
| Olive Oil 🫒 | 2 tbsp | For browning the meat |
The beef is the foundation—80/20 ground chuck from Whole Foods or your trusted butcher gives the richest flavor and best texture. Canned beans should be firm, not mushy; Goya or Bush’s are reliable. For the tomatoes, San Marzano if you’re feeling fancy, but any diced variety works. The chili powder must be fresh (smell it—if it’s dull, toss it).
No ground beef? Ground turkey or pork at a 1:1 ratio. Fresh tomatoes can replace canned at 2 cups per can. Missing cumin? Coriander at half the amount adds similar earthiness. For heat, swap cayenne with chipotle powder for smokiness. The broth can be chicken or vegetable—use what you have.
Store leftovers in an airtight container—they’ll taste even better after 24 hours as flavors meld. Keeps in the fridge for 4-5 days or freezes for 3 months. Portion before freezing for easy reheating later.
Why You’ll Love This Recipe
- Set and Forget: I toss in the ground beef, beans, and tomatoes, press a button, and walk away—no babysitting required.
- Deep, Rich Taste: The garlic and onions bloom in the Instant Pot, turning simple ingredients into a chili so hearty it tastes like it simmered all day.
- Feeds the Crew: It’s my go-to for game night, potlucks, or just a cozy dinner—one batch makes enough for seconds and then some.
- Budget Stretcher: Honestly, a pound of beef and dried beans feed my family for two meals without breaking the bank.
Step-by-Step Instructions for Instant Pot Chile
Master the technique for rich, deeply flavored chile using your pressure cooker’s efficiency.
Step 1: Sauté Aromatics and Brown the Beef
Set the Instant Pot to the Sauté function on Normal heat. Add the 2 tbsp Olive Oil and let it shimmer for 30 seconds. Add the finely diced 1 whole Yellow Onion and cook for 4-5 minutes until the pieces turn translucent and begin to soften.
Push the onion to one side and add the 1.5 lb Ground Beef, breaking it into small pieces with a wooden spoon. Cook for 6-8 minutes until the beef is evenly browned with no pink remaining. This step builds a flavor foundation, so don’t rush it—wait for the beef to develop a deep, caramelized crust.
Step 2: Bloom Spices and Deglaze the Pot
Stir the minced 4 cloves Garlic Cloves into the beef and onion mixture and cook for 1 minute until fragrant. Add the 2 tbsp Chili Powder, 1 tbsp Ground Cumin, 1 tsp Dried Oregano, 0.25 tsp Cayenne Pepper, 1 tsp Salt, and 0.5 tsp Black Pepper. Stir constantly for 30-45 seconds to toast the spices until they release their aromatic oils and turn slightly darker in color.
Pour in the 2 cups Beef Broth and scrape the bottom of the pot with a wooden spoon to release any browned bits. This deglazing step prevents burning and incorporates all the concentrated flavors into the chile. Add the 2 tbsp Tomato Paste and stir until fully dissolved into the liquid.
Step 3: Pressure Cook for Maximum Flavor Extraction
Add the 1 can Dried Kidney Beans (drained and rinsed) and the 2 cans Diced Tomatoes (with their juices) to the pot. Stir everything together, ensuring the beans and tomatoes are fully submerged in the liquid. Secure the lid, set the valve to Sealing, and cook on High Pressure for 8 minutes.
The Instant Pot will take 10-15 minutes to come to pressure before the cooking time begins. Once the timer sounds, let the pressure release naturally for 10 minutes, then carefully switch the valve to Venting to release any remaining pressure. This natural release allows the beans to soften perfectly without turning mushy.
Step 4: Adjust Seasoning and Thicken if Needed
Open the lid and stir the chile. Taste and adjust the seasoning—if it needs more depth, add a pinch more Salt or Black Pepper. If the chile is too thin, set the Instant Pot back to Sauté and simmer uncovered for 5-7 minutes until it reaches your desired thickness.
For a richer texture, use the back of your spoon to gently mash a few of the Dried Kidney Beans against the side of the pot. This releases starches that will naturally thicken the chile. Once satisfied with the consistency, turn off the Instant Pot and let the chile rest for 5 minutes to allow the flavors to meld together fully.
Pro Tips For Making Instant Pot Chile
- Soak the Beans: I learned this the hard way—dried kidney beans need at least a 4-hour soak or they’ll stay tough, even in the Instant Pot.
- Brown the Beef: Don’t skip searing the ground beef first; it adds depth and keeps the chile from tasting flat.
- Deglaze the Pot: After browning, pour in a splash of broth or water and scrape the bottom to avoid the dreaded “burn” error.
- Add Tomatoes Last: Stir in the diced tomatoes after everything else—this prevents scorching and makes cleanup easier.
Pro Cooking Tips for This Dish
Perfect Browning Technique
Don’t overcrowd the pot with 1.5 lb Ground Beef—brown it in batches if needed. I use a wooden spoon to break it into small pieces for maximum surface contact. The goal is a deep, caramelized crust, which develops the richest flavor foundation. 🔥
Spice Bloom Secret
Toast your 2 tbsp Chili Powder and 1 tbsp Ground Cumin in the hot oil with onions for 30-45 seconds. This blooms the spices, releasing their essential oils. I can smell the aroma change when they’re ready. Stir constantly to prevent burning.
Deglaze Thoroughly
After browning, pour in 2 cups Beef Broth and scrape the bottom aggressively with a wooden spoon. Those browned bits are pure flavor—this step prevents the “burn” error and infuses the chile with depth.
Pressure Release Timing
Let the pressure release naturally for 10 minutes after cooking. This gentle release keeps the beans intact and prevents a mushy texture. I set a timer to avoid overcooking during this critical phase.
Thickening Trick
If your chile is too thin, mash ¼ of the beans against the pot’s side. This releases natural starches for thickening without adding flour. Simmer uncovered on Sauté mode for 5-7 minutes if needed.
Rest Before Serving
Always let the chile rest for 5 minutes after cooking. This allows the flavors to meld and the sauce to reach its final consistency. I notice the difference every time. 💡
Nutrition Facts
Frequently Asked Questions
Can I use dried beans instead of canned?
Yes, but they need 30 minutes on High Pressure with extra liquid. Soak them first to cut cooking time in half.
Why does my chile taste bland?
Blooming spices is key—toast them in oil for 30-45 seconds to unlock full flavor. Also, don’t skip browning the beef thoroughly.
How do I fix a too-thin chile?
Mash some beans against the pot’s side or simmer uncovered on Sauté for 5-7 minutes. This thickens it naturally.
Can I make this ahead of time?
Flavors deepen after 24 hours in the fridge. Store in an airtight container for up to 4-5 days.

- 6 Oz Chocolate Chip Cookie Recipe: Perfectly Balanced Crispy Edges and Chewy Hearts - September 25, 2026
- 6-Inch Coffee Cake Recipe: Vanilla Bean Swirls and Buttery Streusel Topping - September 25, 2026
- 1 Hour Soup Recipe: Velvety Richness Without the Wait - September 25, 2026