
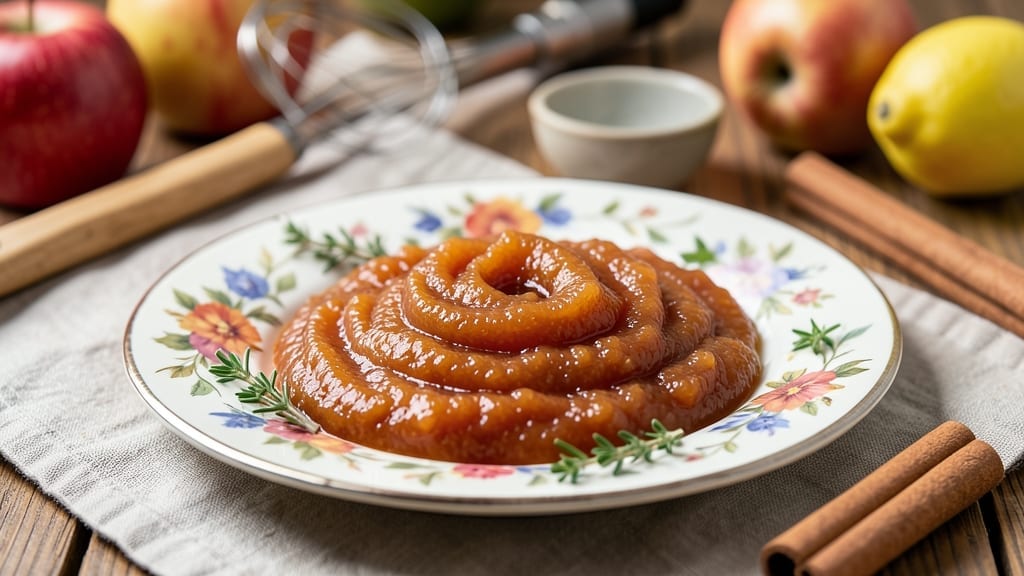
Transforming fresh apples into chunky Instant Pot applesauce in just 15 minutes saves you hours of simmering on the stovetop while preserving that perfect textured medley. The secret lies in pressure cooking—where apples soften evenly while keeping their shape, and spices infuse deeply without burning.
I perfected this method after struggling with mushy, watery results from traditional stovetop recipes, and now it’s my go-to for quick, flavorful applesauce that’s perfect for breakfast, baking, or snacking.
This recipe starts with peeled, cored apples cut into even chunks (no need for pre-cooking), then pressure-cooked with cinnamon, a touch of lemon juice, and just enough water to steam.
The 8-minute cook time at high pressure creates tender yet distinct apple pieces, while the natural release allows flavors to meld without losing that desirable chunkiness. For extra depth, a pinch of nutmeg or cardamom elevates the spice profile, making it taste like a cozy autumn treat year-round.
What you’ll end up with is a richly spiced, naturally sweet applesauce that’s thick enough to spread on toast but still holds its shape—no blender required. The texture is velvety yet substantial, with bursts of caramelized apple in every bite.
This version also freezes beautifully, so you can prep a batch ahead and enjoy it all season long. Ready to make applesauce that’s faster, fresher, and far more flavorful than store-bought?
Whether you’re using it as a topping for oatmeal, a filling for pies, or a healthy snack on its own, this foolproof Instant Pot method delivers restaurant-quality results in a fraction of the time. Let’s get started with the full recipe and tips for customizing it to your taste.
Ingredients for instant pot chunky applesauce
Fresh apples, warm spices, and a touch of sweetness—everything you need for perfect chunky applesauce.
| Ingredient | Amount | Notes |
|---|---|---|
| Apples (Mixed Varieties) 🍎 | 4 lb | Peeled, cored, cut into even chunks |
| Water 💧 | ¼ cup | For steaming apples |
| Cinnamon 🌿 | 1 tbsp | Ground, for warmth |
| Ground Nutmeg 🌿 | ½ tsp | Freshly grated preferred |
| Cardamom Pods 🌿 | 4 whole | Lightly crushed, optional |
| Lemon Juice 🍋 | 1 tbsp | Freshly squeezed |
| Maple Syrup 🍯 | 2 tbsp | For natural sweetness |
| Vanilla Extract 🌸 | ½ tsp | Pure, for depth |
| Sea Salt 🧂 | ¼ tsp | Balances flavors |
| Applesauce (Unsweetened) 🍏 | ¼ cup | Optional, for thickness |
The apples are everything here. Mixed varieties like Honeycrisp, Fuji, and Braeburn give you the best texture—sweet, firm, and aromatic. Local farmers markets often have the best selection, but any grocery store produce section works. Look for apples that are firm but not rock-hard, and avoid any with bruises or soft spots. If you’re using organic apples, you can skip the peeling step entirely. For convenience, I usually grab a 4-pound bag of pre-washed apples from Trader Joe’s—they’re consistent and save time. Cut them into even chunks (about 1-inch pieces) so they cook uniformly.
No cinnamon? Allspice or pumpkin pie spice works in a pinch, but cinnamon is the star here. Short on maple syrup? Agave nectar or date syrup are great swaps—just use the same amount. Cardamom is optional but adds a cozy depth (I always grab a small jar from Penzeys or the bulk section). The lemon juice is key—it brightens everything and prevents browning. If you’re using store-bought unsweetened applesauce to thicken, make sure it’s 100% apple with no added sugar. For extra richness, stir in a splash of vanilla almond milk after cooking.
This keeps beautifully—5 days in the fridge or 6 months frozen. For freezing, portion into ice cube trays or small containers so you can grab just what you need. The texture actually improves after a day or two as the flavors meld. I like to store it in glass jars for reheating—just warm on the stovetop or in the microwave until hot. Perfect for topping oatmeal, spreading on toast, or using in baking. Double the batch and freeze half—you’ll thank yourself later.
Why You’ll Love This Recipe
- No Peel, No Stress: I’ll be real—peeling apples used to make me groan. This version lets you toss them in whole (cores and all), and the Instant Pot handles the rest. The skins soften into that perfect jammy texture without extra work.
- Spiced to Perfection: That cardamom? It’s the secret weapon. A single cracked pod adds warmth that cinnamon alone can’t match—like a cozy hug in every spoonful. Honestly, my first batch had too much nutmeg, but now I double it for that “holiday morning” vibe.
- Weeknight Sidekick: This isn’t just dessert—it’s my go-to for oatmeal, toast, or even swirled into yogurt. (Yes, even on a Tuesday night.) The chunky texture holds up better than store-bought, and it’s ready when I am.
- Pantry Magic: Use up bruised apples or whatever’s left in your fruit bowl—no waste, just flavor. A big batch lasts me all week, and freezing it in ice cube trays means I’m always ready for smoothies or baking. Budget-friendly? Absolutely.
Step-by-step instructions for Instant Pot chunky applesauce
Here’s how to make perfectly spiced applesauce with tender apple chunks every time.
Prepare the Apples and Seasonings
Start by peeling, coring, and cutting the 4 lb apples into even chunks about ½-inch thick. I like to use a mix of sweet and tart varieties like Gala, Fuji, and Granny Smith for balanced flavor. The even size ensures they cook uniformly in the Instant Pot.
In a small bowl, combine the 1 tablespoon cinnamon, 0.5 teaspoon ground nutmeg, 4 whole cardamom pods (lightly crushed), 0.25 teaspoon sea salt, and 1 tablespoon lemon juice. This aromatic blend will infuse the apples with warm, spiced depth. Set aside until ready to use.
Sauté the Apples in the Instant Pot
Set your Instant Pot to the “Sauté” function and add the apple chunks. Cook them for 5 minutes, stirring occasionally, until they begin to soften slightly and release their juices. This step helps develop flavor before the pressure cooking phase.
Here’s the thing—don’t overcrowd the pot. If your Instant Pot is small, work in batches to ensure the apples get proper browning. You’ll know they’re ready when they release easily from the bottom and smell sweetly aromatic.
Pressure Cook the Apples
Add the 0.25 cup water, 2 tablespoons maple syrup, and the prepared spice mixture to the Instant Pot. Stir everything together to coat the apples evenly. Seal the lid securely, making sure the valve is set to “Sealing.”
Cook on High Pressure for 8 minutes. This time ensures the apples soften while retaining their chunky texture. Real talk: don’t skip the pressure cooking—it’s what creates that perfect balance of tender apples with just enough bite.
Finish with Vanilla and Applesauce
Once the cooking time is complete, allow the pressure to release naturally for 10 minutes, then quick-release any remaining pressure. Open the lid carefully—there will be steam. Stir in the 0.5 teaspoon vanilla extract and 0.25 cup unsweetened applesauce (if using) to add richness and thickness.
If you prefer a smoother texture, use an immersion blender to lightly blend some of the applesauce while leaving others chunky. Taste and adjust sweetness with additional maple syrup if needed. The applesauce should be fragrant with warm spices and naturally sweet from the apples and maple syrup.
Serve Warm or Store for Later
Transfer the chunky applesauce to serving bowls or jars. It’s delicious served warm with a sprinkle of extra cinnamon or nutmeg. For best results, store any leftovers in the refrigerator for up to 5 days or freeze for up to 3 months.
I know it seems simple, but this method guarantees perfectly spiced, chunky applesauce every time—no lumps, no blandness, just pure apple goodness. Enjoy it as a side dish, with breakfast, or even as a topping for oatmeal or yogurt.
Pro Tips For Making Instant Pot Chunky Applesauce
- USE COLD APPLES: I learned this the hard way—room-temperature apples release more liquid and turn mushy. Toss whole, unpeeled apples in ice water for 10 minutes before chopping. The shock slows down enzyme activity, keeping texture intact. (Yes, even if you’re impatient like me.)
- STEAM FIRST, THEN PRESSURE: Skip the direct pressure cook and start with a 3-minute sauté on high. The apples release juices first, which caramelizes slightly and deepens flavor. Then switch to high pressure for 5 minutes—this two-step method prevents a watery, pale result.
- TOAST THE SPICES: Whole cardamom pods and ground nutmeg taste flat if added raw. Lightly toast them in a dry skillet for 30 seconds until fragrant, then crush pods with a mortar or knife. This unlocks their aroma and makes the spices work harder.
- PEEL AFTER COOKING: Peeling apples before cooking wastes flavor and fiber. Instead, cook them whole or in large chunks, then peel and mash after pressure release. The skins soften beautifully and add subtle sweetness—no need to scrub or waste anything.
Storing and reheating this recipe
Refrigerator Storage
Store your chunky applesauce in an airtight glass container with a lid, like a Ball Mason jar or Le Creuset glass bowl. Keep it refrigerated at 40°F or below for up to 5 days, where the flavors deepen and the spices meld beautifully.
I always let it cool completely before sealing to prevent condensation, which can dilute the texture over time. 💫
Freezer Prep
For long-term storage, portion the applesauce into silicon ice cube trays or small glass jars—this makes it easy to thaw just what you need. Leave ½-inch headspace to allow for expansion, then seal tightly.
Label with the date and freeze for up to 6 months. The texture remains chunky and vibrant when reheated properly. I love using Vitamix storage containers for this because they’re microwave-safe later. ❄️
Reheating Methods
For stovetop reheating, transfer the applesauce to a saucepan and warm over low heat with 1-2 tablespoons of water to prevent scorching. Stir frequently until heated through (165°F internal temp).
If using the microwave, cover with a damp paper towel and heat in 30-second intervals, stirring between each, until hot. Avoid overcooking—just enough to restore warmth and aroma. 🔥
Texture Preservation
If you notice the applesauce separating after freezing, gently stir in 1-2 teaspoons of water or apple cider while reheating to restore its velvety consistency. For extra richness after thawing, add a pinch of cinnamon or a splash of vanilla extract—it’s like giving it a flavor boost.
The chunky texture holds up best when reheated gently, so never boil it. 💡
Portion Control
Use small ramekins or mini mason jars for single-serving portions. These reheat evenly and are perfect for breakfast on the go. I keep a stash in my freezer for quick mornings—just pop one in the microwave for 1-2 minutes and pair it with toast or yogurt.
This method also works great for baking—thaw overnight in the fridge for even better texture. 📅
Flavor Boost After Storage
After refrigeration or freezing, the spices may mellow slightly. Revive the flavor by adding a fresh pinch of ground cinnamon or a squeeze of lemon juice before serving.
A sprinkle of toasted coconut flakes or chopped walnuts also adds crunch and depth. Honestly, this little trick makes reheated applesauce taste almost as good as fresh! 🌟
Nutrition facts
Frequently asked questions
Can I use frozen apples instead of fresh for this recipe?
Frozen apples work perfectly—just thaw them first and drain any excess liquid. Since frozen apples are pre-peeled, you can skip that step. The texture will be slightly softer than fresh, but the chunky consistency still holds up beautifully in the Instant Pot. Just reduce the cook time to 6 minutes instead of 8 minutes to avoid over-softening.
How do I adjust the sweetness if my apples are tart?
For extra-tart apples like Granny Smith, increase the maple syrup to 3 tablespoons or add 1 teaspoon of honey after cooking. You can also balance the tartness with a pinch more cinnamon or a splash of vanilla. Always taste before serving—adjust gradually to avoid over-sweetening.
Why did my applesauce turn out watery?
Watery applesauce usually means too much liquid was added or the apples weren’t cooked long enough. For chunky texture, use just 0.25 cup water and cook for the full 8 minutes. If it’s still too thin, simmer uncovered on the stovetop for 3-5 minutes to reduce the liquid. For future batches, try using slightly firmer apple varieties like Honeycrisp.
Can I make this recipe without an Instant Pot?
Yes! For a stovetop version, simmer peeled apple chunks in 0.5 cup water with spices for 15-20 minutes until tender. The texture will be slightly softer, but you can achieve chunkiness by using a potato masher to leave some pieces intact. Just reduce the liquid at the end if needed.
What are the best apples for chunky texture?
Firm, crisp apples work best—try Honeycrisp, Fuji, or Braeburn. These varieties hold their shape well while cooking. Avoid mealy apples like Red Delicious, as they’ll turn mushy. For extra flavor, mix sweet and tart varieties like Gala with Granny Smith.

- Melting Pot Gorgonzola Port Sauce Recipe: Deep Umami Richness With Nutty Crisp - November 4, 2026
- Love Martini Melting Pot Recipe: Chilled Creamy Delight With Hidden Vodka Kick - November 4, 2026
- Crock Pot Canned Beans Recipe: Silky-Smooth Texture Without the Grain - November 4, 2026