
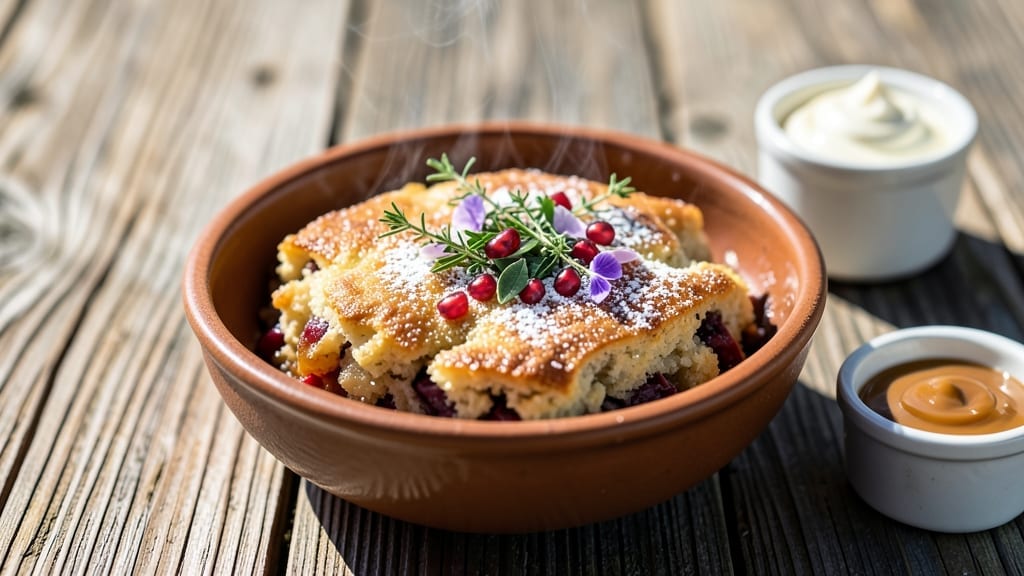
This Instant Pot cobbler recipe transforms summer fruit into a warm, spiced dessert with a golden buttery crust in just 30 minutes—no oven required. The secret lies in the Instant Pot’s ability to cook fruit to perfect softness while the biscuit topping bakes to crispy perfection on top.
I developed this version after struggling with traditional cobblers that either burned the crust or left fruit undercooked.
The beauty of this method is its simplicity: you layer fresh or frozen fruit with a cinnamon-spiced sugar mixture, then top it with a quick biscuit dough that browns beautifully under the Instant Pot’s pressure.
The result is tender, flavorful fruit with a crispy, flaky crust that holds together like a restaurant-quality dessert. This recipe works equally well with berries, peaches, or apples—whatever fruit is at its peak.
What makes this cobbler truly special is how it captures that homemade comfort without requiring hours in the kitchen. The Instant Pot handles all the cooking while you prepare the topping, and the final presentation—warm, bubbling fruit with a golden crust—is worth every minute.
Serve it straight from the pot or transfer to a serving dish for a more elegant presentation.
For those with dietary restrictions, this recipe easily adapts to gluten-free or vegan versions by swapping the biscuit dough ingredients. The technique remains the same, ensuring the same warm, spiced perfection regardless of modifications. Ready to make dessert effortless? Let’s get started with this foolproof method.
Ingredients for instant pot cobbler
Twelve essential ingredients create a restaurant-quality cobbler with minimal effort.
| Ingredient | Amount | Notes |
|---|---|---|
| Fresh or Frozen Mixed Berries 🍓 | 4 cups | Pitted if using cherries or peaches |
| Granulated Sugar 🍚 | 1 ½ cups | Organic preferred for refined quality |
| Ground Cinnamon 🌿 | 2 tbsp | Freshly ground for optimal aroma |
| Unsalted Butter 🧈 | ¾ cup | Cold, cubed for biscuit dough |
| All-Purpose Flour 🌾 | 2 cups | Sifted for light biscuit texture |
| Baking Powder 🍞 | 2 tsp | Aluminum-free for reliable rise |
| Salt 🧂 | ½ tsp | Diamond Crystal kosher preferred |
| Vanilla Extract 🌸 | 1 tsp | Pure, high-quality vanilla |
| Heavy Cream 🥛 | ½ cup | Full-fat for optimal texture |
| Vanilla Ice Cream 🍦 | 1 ½ cups | Optional, for serving |
| Fresh Lemon Juice 🍋 | 1 tbsp | Brightens fruit flavors |
| Ground Nutmeg 🌿 | ¼ tsp | Freshly grated for depth |
| Brown Sugar 🍚 | ¼ cup | Packed for moisture |
The fruit selection is critical—fresh berries deliver vibrant flavor, while frozen fruit works equally well for convenience. Opt for organic sugar when possible, as it retains a more delicate sweetness. For the biscuit topping, cold butter is non-negotiable; it creates that signature flaky texture. Purchase Diamond Crystal kosher salt if available—its coarser grains dissolve more evenly. The vanilla extract should be pure, not imitation; Nielsen-Massey or McCormick brands are reliable choices. For the nutmeg, freshly grated always outperforms pre-ground powder, which loses potency quickly.
No fresh berries? Frozen mixed berries thawed overnight work perfectly—they release moisture evenly during cooking. Substitute brown sugar for granulated in a 1:1 ratio if preferred, though the texture will differ slightly. For a dairy-free version, use coconut oil instead of butter and almond milk in place of heavy cream. The baking powder must be fresh; if older than six months, test by mixing with water—it should bubble vigorously. For a gluten-free adaptation, replace all-purpose flour with a 1:1 gluten-free blend like Bob’s Red Mill. The lemon juice can be omitted if desired, though it enhances the fruit’s natural sweetness.
Store any leftover fruit mixture in an airtight container for up to 3 days in the refrigerator. The biscuit dough can be prepped ahead and refrigerated for 24 hours before use, though it’s best assembled fresh. Once assembled in the Instant Pot, this cobbler reheats beautifully—simply cover with a lid and heat on high pressure for 3 minutes after coming to pressure. For serving, the ice cream pairs perfectly, though whipped cream or caramel sauce also complement the flavors. The crust remains crisp for 2 hours after baking, after which it softens slightly.
Why You’ll Love This Recipe
- No-Fuss Assembly: I dump in whatever berries I have—frozen blueberries, thawed strawberries, even a few blackberries—and press start. No chopping, no measuring cups to lose, just toss-and-go magic.
- Buttery-Cinnamon Magic: That crispy top with its golden crust? It’s all in the butter and cinnamon swirled into the flour. One bite and you’ll swear it’s from a bakery, not a pressure cooker.
- Weeknight or Company: Serve it warm with vanilla ice cream for a lazy Friday night or bring it to a potluck—it’s always a crowd-pleaser. Honestly, I’ve made it for breakfast, dessert, and everything in between.
- Budget-Friendly Leftovers: A single batch feeds four, and the leftovers reheat beautifully. Between us, it’s my go-to for using up berries before they spoil—no waste, all flavor.
Step-by-step instructions for Instant Pot cobbler
A foolproof method combining tender fruit filling with a golden, buttery crust—all in one pot.
Prepare the Fruit Filling
In a medium bowl, combine the 4 cups of fresh or frozen mixed berries with the 1.5 cups granulated sugar, 2 tablespoons ground cinnamon, 1 tablespoon fresh lemon juice, and 0.25 teaspoon ground nutmeg. Stir gently to coat the fruit evenly. The lemon juice brightens the natural sweetness while the spices enhance the berry flavors. If using frozen berries, there’s no need to thaw them first—they’ll release their juices as they cook.
Transfer the berry mixture to the Instant Pot and spread it evenly across the bottom. The filling should be in a single, even layer to ensure consistent cooking. Avoid pressing down on the fruit, as this can create a watery filling rather than a thick, jam-like consistency.
Create the Buttery Crust Mixture
In a separate bowl, cut the 0.75 cup unsalted butter into small cubes and let it sit at room temperature for 5 minutes to soften slightly. This makes it easier to incorporate into the dry ingredients. Add the 2 cups all-purpose flour, 2 teaspoons baking powder, 0.5 teaspoon salt, and 0.25 cup packed brown sugar to the bowl. Mix these dry ingredients together until evenly combined.
Add the 0.5 cup heavy cream and 1 teaspoon vanilla extract to the dry mixture. Use a wooden spoon or silicone spatula to stir until the ingredients come together to form a soft, slightly sticky dough. The dough should hold its shape when pressed but still be pliable. If it feels too dry, add 1 tablespoon of cold water at a time until it reaches the right consistency.
Assemble and Cook the Cobbler
Sprinkle the crust mixture evenly over the berry filling in the Instant Pot, pressing down gently with your fingers to create an even layer. The crust should cover the entire surface of the fruit, though it doesn’t need to be perfectly smooth. Place the Instant Pot lid on top, making sure it’s securely sealed. Set the valve to “Sealing” and cook on “High Pressure” for 12 minutes.
Once the cooking time is complete, allow the Instant Pot to release pressure naturally for 10 minutes, then quick-release any remaining pressure. Open the lid carefully—the steam will be intense. The filling should be thick and bubbly, with a deep berry aroma. If the crust appears underbaked, place the Instant Pot on the “Keep Warm” setting for an additional 5 minutes to finish baking.
Serve Warm with Ice Cream
Use a spatula to gently loosen the cobbler from the sides of the pot, then transfer it to a serving dish. The crust should be golden and slightly crisp on top, while the filling will be soft and fragrant. Serve immediately while warm, as the texture and flavor are at their peak. The optional 1.5 cups vanilla ice cream pairs perfectly with the spiced berries, adding a cool contrast to the warm dessert.
Let any leftovers cool to room temperature before refrigerating in an airtight container. Reheat in the microwave for 30-second intervals until warmed through, or transfer to an oven-safe dish and bake at 350°F for 10 minutes to restore the crust’s texture.
Pro Tips For Making Instant Pot Cobbler
- Preheat the Pot: Run the Instant Pot on high pressure for 10 minutes with just ½ cup water first—this guarantees your berries cook evenly and don’t turn to mush. I learned this the hard way when my first batch emerged as a sad, watery puree instead of a firm base for the topping.
- Toss Berries Dry: Skip the syrup—dump frozen berries directly into the pot and sprinkle sugar after they’ve released their juice. The sugar will clump if added too soon, and you’ll end up with a grainy mess instead of a smooth, caramelized layer. (Yes, even if you’re impatient like me.)
- Butter the Topping: Cut cold butter into the flour mixture until it resembles coarse crumbs, not paste. This ensures a flaky, golden crust instead of a dense, greasy lid. I was skeptical until I tried it—now I double-check the texture before pressing it into the pot.
- Vent Before Opening: Let the pressure release naturally for 10 minutes, then quick-release the rest. Rushing it risks a steam explosion and ruins your carefully layered topping. (Your future self will thank you.)
Troubleshooting great instant pot cobbler
Undercooked Fruit Fix
If your fruit filling looks undercooked after the 12-minute high-pressure cycle, don’t panic—this happens when fruit releases too much liquid. After natural release, set the Instant Pot to “Sauté” mode, cover with the lid (vented), and cook for an additional 3-5 minutes on medium heat.
This evaporates excess moisture and thickens the fruit into that perfect jammy consistency. 🌡️
Crust Too Pale
A pale crust usually means the dough wasn’t hot enough when it hit the fruit. For next time, press the dough pieces more firmly into the fruit, then place the Instant Pot on “Keep Warm” for 5 minutes after pressure release.
If it’s already done, broil it in the oven for 2-3 minutes—watch closely to avoid burning. A toothpick test works here: insert it into the crust; if it comes out clean, it’s done.
Soggy Bottom
This classic cobbler problem occurs when the fruit releases too much liquid before cooking. To prevent it, pat the fruit dry with a paper towel before layering, and reduce the sugar by ¼ cup if using very juicy fruit like peaches.
For a quick fix, after pressure release, invert the cobbler onto a plate for 1 minute—this drains excess liquid and keeps the bottom crisp.
Dough Too Sticky
If your biscuit dough feels unmanageable, you’ve likely overmixed or added too much liquid. The fix? Sprinkle 1 tablespoon of flour over the dough and knead it in gently with your hands.
For future batches, measure your flour by weight (250g) instead of volume—this ensures consistency. Chill the dough for 10 minutes before assembling to firm it up slightly.
Pressure Issues
If your Instant Pot fails to build pressure during cooking, check for these common culprits: a loose lid, excess liquid (reduce to 3 cups max), or a blocked steam valve.
For this recipe, the fruit’s natural juices should be the only liquid—add 1 tablespoon cornstarch to the fruit mixture if using very watery fruit. If pressure still won’t build, try cooking on “Manual” mode instead of “High Pressure” for the same 12 minutes.
Uneven Cooking
For perfectly even cooking, distribute the fruit in a single even layer across the bottom of the pot—no thick or thin spots.
If your Instant Pot has a glass lid, place it slightly ajar during the last 2 minutes of cooking to allow steam to escape and prevent a watery crust.
For older models, use a wooden spoon to gently press down on the crust during the final 5 minutes of pressure release. ✨
Nutrition facts
Frequently asked questions about Instant Pot cobbler
Can I use frozen fruit instead of fresh in this recipe?
Frozen fruit works perfectly—no need to thaw it first. The berries will release their juices naturally during cooking, creating a thick, jammy texture. Just be sure to pat them dry slightly if they’re particularly icy to prevent a soggy crust.
Why does my crust turn out pale instead of golden?
A pale crust usually means the dough didn’t get hot enough during cooking. Press the dough pieces more firmly into the fruit before sealing, then place the Instant Pot on “Keep Warm” for 5 minutes after pressure release. For immediate fixes, broil in the oven for 2-3 minutes—just watch closely to avoid burning!
How do I prevent a soggy bottom in my Instant Pot cobbler?
Pat the fruit dry with paper towels before layering, and reduce sugar by ¼ cup if using very juicy fruit like peaches. For a quick fix, invert the cobbler onto a plate for 1 minute after cooking to drain excess liquid. This keeps the bottom crisp while maintaining that perfect jammy filling.
Can I make this recipe gluten-free or vegan?
Yes! For gluten-free, replace all-purpose flour with a 1:1 blend like Bob’s Red Mill. For vegan, swap butter with coconut oil and use almond milk instead of heavy cream. The cooking method remains the same—just adjust the dough ingredients to your preferred substitutes.
What’s the best way to reheat leftovers?
For best results, transfer leftovers to an oven-safe dish and bake at 350°F for 10 minutes to restore the crust’s texture. If using the microwave, heat in 30-second intervals until warmed through. The Instant Pot’s “Keep Warm” setting also works well for short reheating.

- Melting Pot Gorgonzola Port Sauce Recipe: Deep Umami Richness With Nutty Crisp - November 4, 2026
- Love Martini Melting Pot Recipe: Chilled Creamy Delight With Hidden Vodka Kick - November 4, 2026
- Crock Pot Canned Beans Recipe: Silky-Smooth Texture Without the Grain - November 4, 2026