
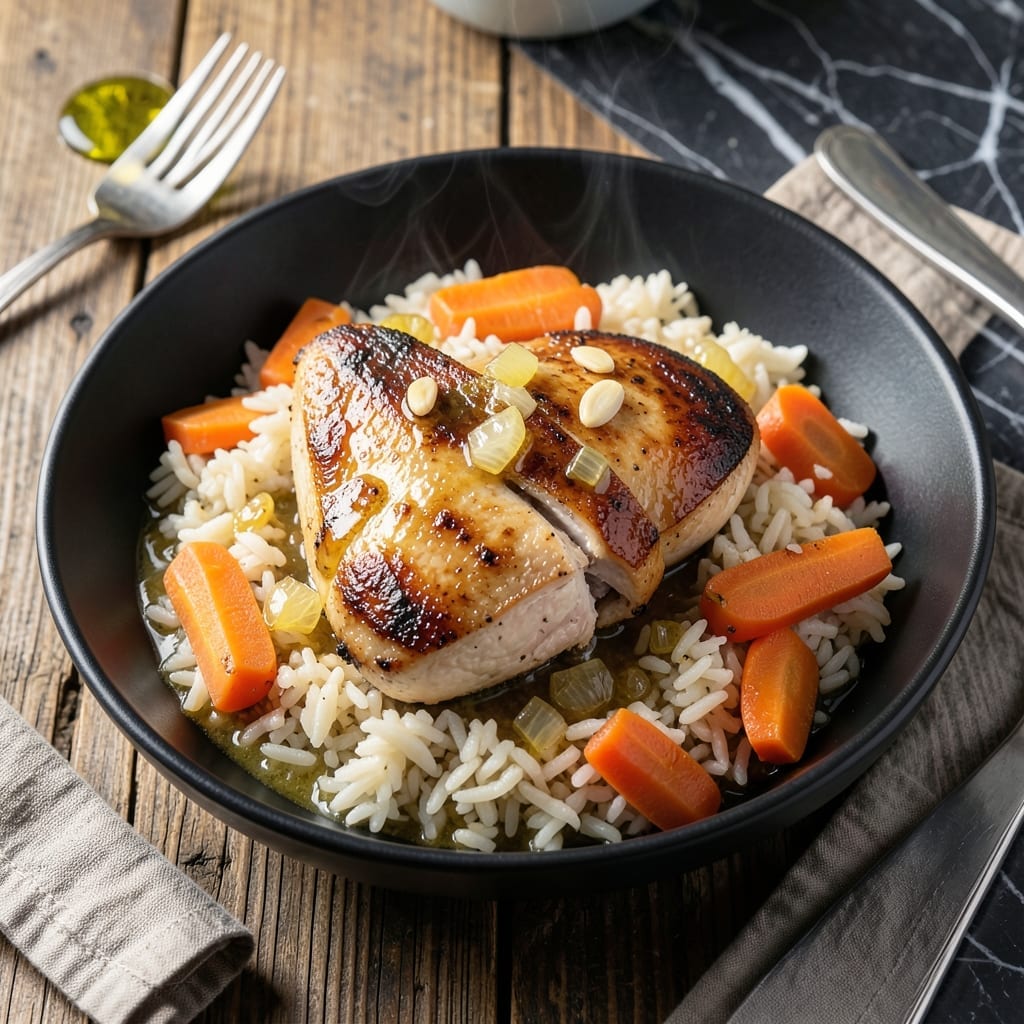
Busy evenings call for meals that practically cook themselves, and this Instant Pot dinner delivers just that. The hands-off approach means you can focus on other tasks while dinner prepares in the background.
With simple ingredients and minimal prep, this recipe transforms everyday staples into a flavorful, satisfying meal. The pressure cooker locks in moisture and infuses every bite with rich, deep flavors.
What you get is a complete, well-balanced dish ready in a fraction of the time it would take on the stovetop. It’s the kind of meal that makes weeknights feel effortless.
Perfect for families or anyone short on time, this method guarantees consistent, delicious results every time.
Ingredients for Instant Pot Dinner
Simple staples transform into a complete, flavorful meal with minimal effort from your pantry and fridge.
| Ingredient | Amount | Notes |
|---|---|---|
| Boneless Chicken Thighs 🍗 | 1 ½ lb | Skinless, trimmed of excess fat |
| Long-Grain White Rice 🍚 | 1 ½ cups | Uncooked, rinsed before use |
| Chicken Stock 💧 | 2 ½ cups | Low-sodium preferred for control |
| Yellow Onion 🧅 | 1 whole | Medium-sized, finely diced |
| Garlic Cloves 🧄 | 4 cloves | Minced for even distribution |
| Carrots 🥕 | 2 whole | Peeled, sliced into rounds |
| Celery Stalks 🌿 | 2 whole | Diced, leaves reserved for garnish |
| Diced Tomatoes 🍅 | 1 can | 14.5 oz can, undrained |
| Tomato Paste 🍅 | 2 tbsp | For concentrated umami depth |
| Dried Thyme 🌿 | 1 tsp | Rubbed between fingers to release oils |
| Dried Oregano 🍃 | 1 tsp | Mediterranean variety preferred |
| Bay Leaf 🍃 | 1 whole | Removed before serving |
| Kosher Salt 🧂 | 1 ½ tsp | Diamond Crystal brand recommended |
| Black Pepper 🌶️ | ½ tsp | Freshly ground for best flavor |
| Olive Oil 🫒 | 2 tbsp | Extra-virgin for sautéing aromatics |
The chicken thighs are non-negotiable for this Instant Pot dinner. Boneless, skinless ensures even cooking and rich flavor without excess grease. Costco and Whole Foods carry high-quality options, but any supermarket will do—just check the date. For the rice, jasmine or basmati work if you prefer, though long-grain white gives that classic fluffy texture. Always rinse it first to remove excess starch (worth the extra minute).
No chicken stock? Water plus bouillon cubes at a 1:1 ratio gets you close. Short on fresh aromatics? Frozen diced onions and minced garlic (from Trader Joe’s) are lifesavers. Dried minced garlic at half the amount works in a pinch, but fresh is ideal. For the tomatoes, San Marzano canned tomatoes elevate the flavor, though any diced variety will do. The bay leaf is subtle but adds depth—don’t skip it.
Leftovers keep beautifully in the fridge for 4-5 days and reheat like a dream. Freezes solid for up to 3 months—portion before freezing for easy grab-and-go meals. The flavors actually deepen overnight, making it taste even better the next day (don’t skip the resting time).
Why You’ll Love This Recipe
- Set It and Forget: I toss in the chicken, rice, and stock, then walk away—20 minutes later, dinner’s ready.
- Garlic-Infused Comfort: The onion and garlic simmering in the stock fill the house with that cozy, can’t-wait-to-eat smell.
- Weeknight Lifesaver: Between us, this is my go-to after soccer practice when everyone’s starving and cranky.
- Leftovers for Days: One batch makes enough for dinner tonight and lunch tomorrow—my wallet and my schedule thank me.
Step-by-Step Instructions for a Hands-Off Weeknight Meal
This method ensures tender chicken and perfectly cooked rice with minimal active time.
Step 1: Sauté the Aromatics and Brown the Chicken
Set your Instant Pot to the Sauté function and add the 2 tbsp Olive Oil. Once hot, add the 1 whole Yellow Onion (finely diced) and cook for 2-3 minutes until translucent. Stir in the 4 cloves Garlic Cloves (minced) and cook for 30 seconds until fragrant—don’t let it burn.
Add the 1.5 lb Boneless Chicken Thighs and sear for 3-4 minutes until lightly browned on both sides. This step builds depth of flavor, so resist the urge to skip it. Use a wooden spoon to scrape up any browned bits from the bottom of the pot.
Step 2: Build the Flavor Base with Vegetables and Spices
Stir in the 2 whole Carrots (peeled and sliced into rounds), 2 whole Celery Stalks (diced), 1 can Diced Tomatoes (undrained), and 2 tbsp Tomato Paste. Cook for 2 minutes, stirring constantly, to let the tomato paste caramelize slightly and deepen the flavor profile.
Add the 1 tsp Dried Thyme, 1 tsp Dried Oregano, 1 whole Bay Leaf, 1.5 tsp Kosher Salt, and 0.5 tsp Black Pepper. Stir well to distribute the spices evenly. The aromatics should be fully integrated with the vegetables at this stage, creating a rich, cohesive base for the rice and chicken.
Step 3: Add Rice and Liquid for Pressure Cooking
Pour in the 1.5 cups Long-Grain White Rice and stir to combine with the vegetable and chicken mixture. Ensure the rice is evenly distributed so it cooks uniformly. Then, add the 2.5 cups Chicken Stock and give everything a final stir.
Double-check that no rice grains are stuck to the sides or bottom of the pot, as this can cause burning. Secure the lid, set the valve to Sealing, and cancel the Sauté function. The liquid should just cover the rice and chicken mixture—this is the ideal ratio for perfect texture.
Step 4: Pressure Cook and Let the Instant Pot Work Its Magic
Select the High Pressure setting and set the timer for 8 minutes. The Instant Pot will take 10-15 minutes to come to pressure before the cooking time begins. This hands-off process allows the flavors to meld while the chicken becomes fall-apart tender and the rice absorbs all the savory liquid.
Once the cooking cycle completes, let the pressure release naturally for 10 minutes, then carefully switch the valve to Venting to release any remaining pressure. Avoid quick-releasing entirely, as this can lead to undercooked rice or tough chicken.
Step 5: Rest and Serve
Remove the lid and discard the 1 whole Bay Leaf. Let the dish sit for 5 minutes to allow the rice to finish absorbing any remaining liquid. Gently fluff the rice with a fork to combine it with the chicken and vegetables.
Taste and adjust seasoning if needed, though the 1.5 tsp Kosher Salt and 0.5 tsp Black Pepper should provide a well-balanced flavor. Garnish with the reserved celery leaves for a fresh finish. Serve warm, straight from the pot for a true one-pot meal.
Pro Tips For Making Instant Pot Dinner
- Sear the Thighs: I learned this the hard way—browning the chicken thighs for 3-4 minutes per side before pressure cooking adds depth of flavor the Instant Pot can’t replicate on its own.
- Use the Right Ratio: For perfect rice every time, stick to 1 cup long-grain white rice to 1.25 cups chicken stock—any more and you’ll end up with mush.
- Skip the Pre-Sauté Onions: Sounds weird, but it works: just toss chopped onion and garlic on top of the chicken and rice, they’ll cook perfectly under pressure without burning.
- Let It Rest: After cooking, give it a full 10-minute natural release—this keeps the chicken juicy and prevents the rice from turning to paste when you open the lid.
Pro Cooking Tips for This Recipe
Layer Your Flavors
I always start by blooming the dried herbs in hot oil with the aromatics. This wakes up the thyme and oregano before the liquid goes in, preventing that dull, flat taste that plagues many Instant Pot dishes. 🌿
Prevent the Burn Notice
After adding the 1.5 cups rice, deglaze the pot thoroughly with a splash of the 2.5 cups chicken stock. Scrape every browned bit from the bottom—this is your flavor foundation. I use a flat wooden spatula for this.
Perfect Rice Texture
Never exceed the 1:1.5 rice-to-liquid ratio in your Instant Pot. For this recipe, that’s 1.5 cups rice to 2.5 cups stock. Any more liquid and you’ll end up with mushy rice. I measure with the same cup for accuracy.
Natural Release Matters
That 10-minute natural release is non-negotiable. It lets the rice finish steaming gently and prevents the chicken from seizing up. I set a timer so I don’t accidentally overcook it while waiting.
Rest Before Serving
Let the dish sit uncovered for 5 minutes after pressure releases. This lets excess moisture evaporate and the rice grains firm up. I use this time to set the table or prep a simple side.
Gently fluff with a fork to separate the grains. The chicken will be so tender it’ll fall apart at the touch. 💪
Nutrition Facts
Frequently Asked Questions
Can I use chicken breast instead of thighs?
Yes, but reduce the pressure cook time to 5 minutes to prevent dryness. Chicken breast cooks faster and can become tough if overcooked. For best results, check the internal temperature reaches 165°F before serving.
What if my Instant Pot gives a burn notice?
Quickly release pressure, open the lid, and scrape the bottom thoroughly. Add 1/4 cup extra liquid (water or stock) and stir well. This usually resolves the issue by preventing food from sticking.
How do I store leftovers?
Cool completely, then transfer to an airtight container. Refrigerate for up to 4 days or freeze for 3 months. Reheat in the microwave with a splash of water to restore moisture.
Can I double this recipe?
Not recommended. Instant Pots work best when not overfilled (never exceed 2/3 full). For larger batches, cook in two separate sessions to ensure even cooking and safety.

- 4C Bread Crumbs Meatballs Recipe: Crispy Crust and Juicy Centers - September 25, 2026
- 6 Oz Chocolate Chip Cookie Recipe: Perfectly Balanced Crispy Edges and Chewy Hearts - September 25, 2026
- 6-Inch Coffee Cake Recipe: Vanilla Bean Swirls and Buttery Streusel Topping - September 25, 2026