
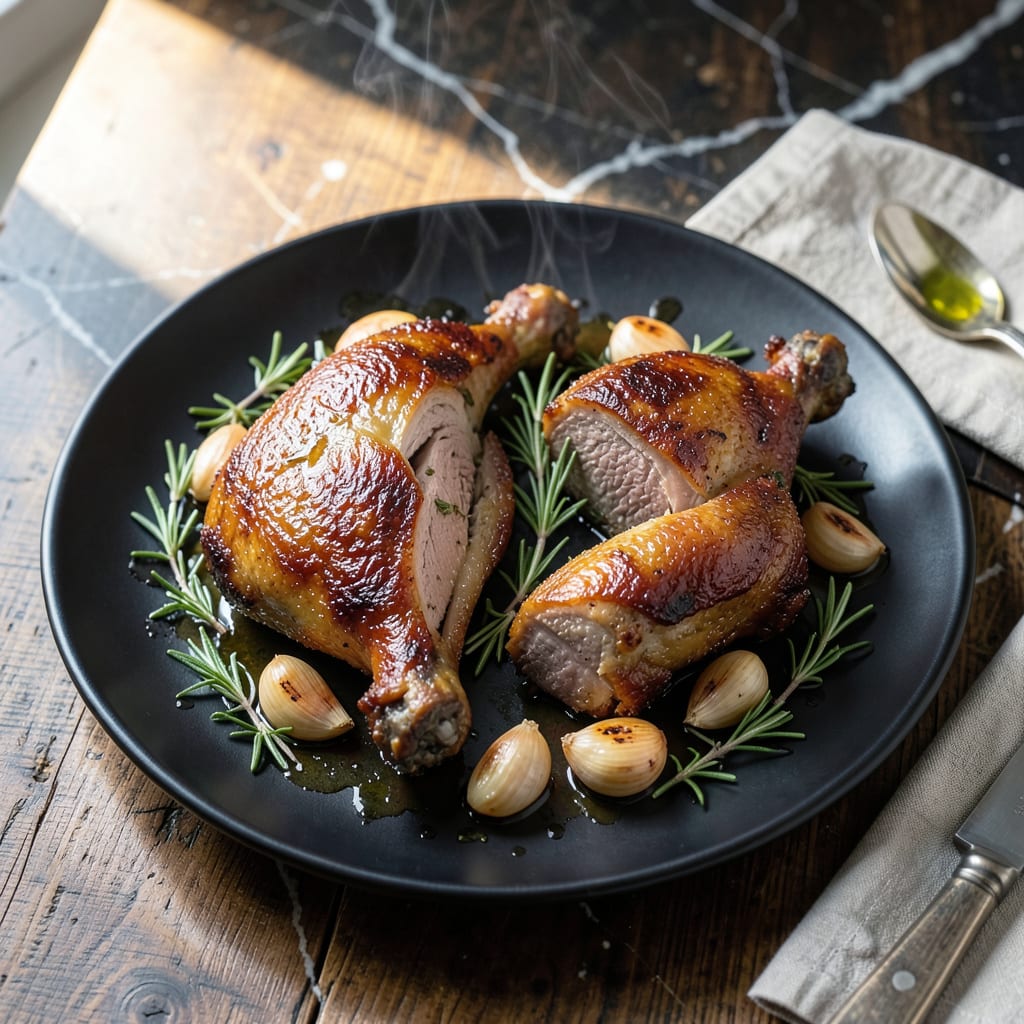
Cooking duck has never been more accessible than with this Instant Pot method, delivering fall-off-the-bone tenderness in a fraction of traditional time. The pressure cooker locks in rich flavors while breaking down the meat effortlessly.
This technique ensures a succulent result every time, with crispy skin achieved through a quick finish in the oven or air fryer. Perfect for a special dinner without the all-day commitment.
Ingredients for Instant Pot Duck
Rich, succulent duck requires just a few quality ingredients and your Instant Pot.
| Ingredient | Amount | Notes |
|---|---|---|
| Duck Legs 🦆 | 4 whole | Skin-on, excess fat trimmed |
| Kosher Salt 🧂 | 1 ½ tsp | Diamond Crystal preferred |
| Black Pepper 🌶️ | 1 tsp | Freshly cracked for best flavor |
| Garlic Cloves 🧄 | 6 cloves | Smashed, unpeeled |
| Fresh Thyme Sprigs 🌿 | 4 whole | Or 1 tsp dried thyme |
| Fresh Rosemary Sprigs 🍃 | 2 whole | Or 1 tsp dried rosemary |
| Duck Stock 🍲 | 1 cup | Or substitute chicken stock |
| Dry White Wine 🍷 | ½ cup | Sauvignon Blanc or Pinot Grigio |
| Honey 🍯 | 1 tbsp | Optional for glazing |
| Orange Zest 🍊 | 1 tsp | From 1 medium orange |
| Olive Oil 🫒 | 1 tbsp | For searing duck legs |
| Bay Leaves 🌿 | 2 whole | Dried for depth of flavor |
| Shallot 🧅 | 1 whole | Finely minced for sauce |
The duck legs are the foundation—look for skin-on from a reputable butcher or specialty grocer like Whole Foods. Size matters: aim for 1.5-2 lbs each for even cooking. Trim excess fat (save it for roasting potatoes later). Diamond Crystal kosher salt is ideal for its clean flavor and even distribution. The herbs? Fresh thyme and rosemary elevate the dish, but dried works in a pinch.
No duck stock? Chicken stock plus a splash of soy sauce mimics the depth. White wine can be swapped for apple cider vinegar diluted with water (not as complex, but functional). Fresh herbs unavailable? Dried at one-third the amount. For a sweeter glaze, maple syrup replaces honey. The orange zest? Lemon works too—just use a bit less.
Duck legs keep in the fridge 2-3 days before cooking. After pressure cooking, the meat stays tender for 4 days refrigerated or 3 months frozen. The rendered fat? Strain and save—it’s liquid gold for roasting potatoes or cooking eggs.
Why You’ll Love This Recipe
- I’ll be real: the meat pulls apart so effortlessly that it’s perfect for sandwiches or tacos the next day.
- Set It and Forget: I toss in the duck legs, garlic, and thyme, seal the lid, and walk away—no babysitting required.
- Crispy Meets Tender: The pressure cooker turns the skin golden while keeping the meat fall-off-the-bone juicy, with that garlic-thyme aroma filling the kitchen.
- Date Night or Tuesday: Honestly, it feels fancy enough for guests but is just as easy to make on a random weeknight when I crave something special.
Step-by-Step Instructions for Instant Pot Duck
Master this technique to achieve fall-off-the-bone tenderness with rich, complex flavors in a fraction of the time.
Step 1: Season and Sear the Duck Legs
Pat the 4 whole Duck Legs dry with paper towels, then season both sides evenly with 1.5 tsp Kosher Salt and 1 tsp Black Pepper. This dry brine step ensures the skin crisps properly during searing and enhances the meat’s natural flavors.
Heat the 1 tbsp Olive Oil in the Instant Pot using the Sauté function set to Normal heat. When the oil shimmers, add the duck legs skin-side down. Sear undisturbed for 5-6 minutes until the skin is deep golden brown and crispy. Flip and sear the other side for 3-4 minutes until equally browned. Transfer the legs to a plate and set aside.
Step 2: Build the Aromatic Base
With the Instant Pot still on Sauté, add the finely minced Shallot to the rendered duck fat. Cook for 2 minutes, stirring frequently, until softened and translucent. Add the 6 cloves Garlic Cloves, 4 whole Fresh Thyme Sprigs, 2 whole Fresh Rosemary Sprigs, and 2 whole Bay Leaves. Sauté for 1 minute until the garlic is fragrant but not browned.
Pour in the 0.5 cup Dry White Wine and scrape the bottom of the pot with a wooden spoon to deglaze, releasing all the flavorful browned bits. This step is crucial to prevent burning and to build a rich sauce foundation. Let the wine reduce by half, about 2-3 minutes.
Step 3: Pressure Cook to Perfection
Return the seared duck legs to the Instant Pot, skin-side up. Pour in the 1 cup Duck Stock, ensuring the liquid covers the bottom but doesn’t submerge the skin. Secure the lid, set the valve to Sealing, and cook on High Pressure for 20 minutes.
Once the cooking cycle completes, allow a natural pressure release for 10 minutes, then quick-release any remaining pressure. The duck should be fork-tender, with the meat easily pulling away from the bone. This method ensures the connective tissue breaks down completely without drying out the meat.
Step 4: Glaze and Serve
Carefully transfer the duck legs to a serving platter. Skim excess fat from the surface of the cooking liquid, then stir in the 1 tbsp Honey and 1 tsp Orange Zest. Switch the Instant Pot back to Sauté mode and simmer the sauce for 3-4 minutes until it thickens slightly into a glossy glaze.
Pour the glaze over the duck legs just before serving. The honey adds a subtle sweetness that balances the rich, savory flavors, while the orange zest brightens the dish with a hint of citrus. Serve immediately while hot, with the sauce spooned generously over each portion.
Pro Tips For Making Instant Pot Duck
- Sear First: I learned this the hard way—skipping the sear leaves you with pale, sad duck. Crank the Instant Pot to “Sauté” and brown those legs skin-side down for 4-5 minutes until deep golden.
- Salt the Night Before: Dry-brine the duck legs with kosher salt 12-24 hours ahead. It pulls out moisture first, then reabsorbs it with seasoning deep into the meat.
- Skip the Overcrowding: Resist the urge to cram in all four legs at once—two at a time max, or they’ll steam instead of sear. I used to rush this and ended up with rubbery skin.
- Use Natural Release: After pressure cooking, let it sit for a full 10-minute natural release. Quick-releasing can make the meat tough, and the duck needs that gentle finish to stay fall-off-the-bone tender.
Wine and Beer Pairings for instant pot duck
White Wine Pairings
A crisp Sauvignon Blanc from New Zealand mirrors the dish’s brightness with its citrus and herbal notes. I love how its acidity cuts through the duck’s richness. For a French option, try a Sancerre with its mineral character and zesty finish. 🍷
Red Wine Options
A medium-bodied Pinot Noir from Oregon’s Willamette Valley offers red fruit flavors that complement without overpowering. The earthy notes in a Burgundy also pair beautifully with the herb-crusted duck.
Beer Pairings
For beer lovers, a malty Amber Ale like Fat Tire provides caramel notes that match the honey glaze. A Belgian Dubbel with its dark fruit and spice complexity also works surprisingly well. 🍺
Non-Alcoholic Choices
Sparkling apple cider with its effervescence cleanses the palate between bites. I also enjoy a chilled hibiscus tea with its tart cranberry-like flavor that echoes the orange zest in the dish.
Nutrition Facts
Frequently Asked Questions
What if my duck skin isn’t crispy after pressure cooking?
Finish under a broiler for 3-4 minutes or in an air fryer at 400°F for 5 minutes. This step restores the crispiness lost during pressure cooking.
Can I use duck breast instead of legs?
Yes, but reduce pressure time to 8-10 minutes to prevent toughness. Duck breast cooks faster than legs due to lower connective tissue.
How do I prevent the “burn” notice on my Instant Pot?
Always deglaze the pot thoroughly after searing and ensure you have at least 1 cup liquid. This prevents food from sticking to the bottom.
Can I make this recipe ahead of time?
Yes! Cook and store in the fridge for up to 4 days. Reheat in the oven at 350°F for 15-20 minutes.

- 4C Bread Crumbs Meatballs Recipe: Crispy Crust and Juicy Centers - September 25, 2026
- 6 Oz Chocolate Chip Cookie Recipe: Perfectly Balanced Crispy Edges and Chewy Hearts - September 25, 2026
- 6-Inch Coffee Cake Recipe: Vanilla Bean Swirls and Buttery Streusel Topping - September 25, 2026