
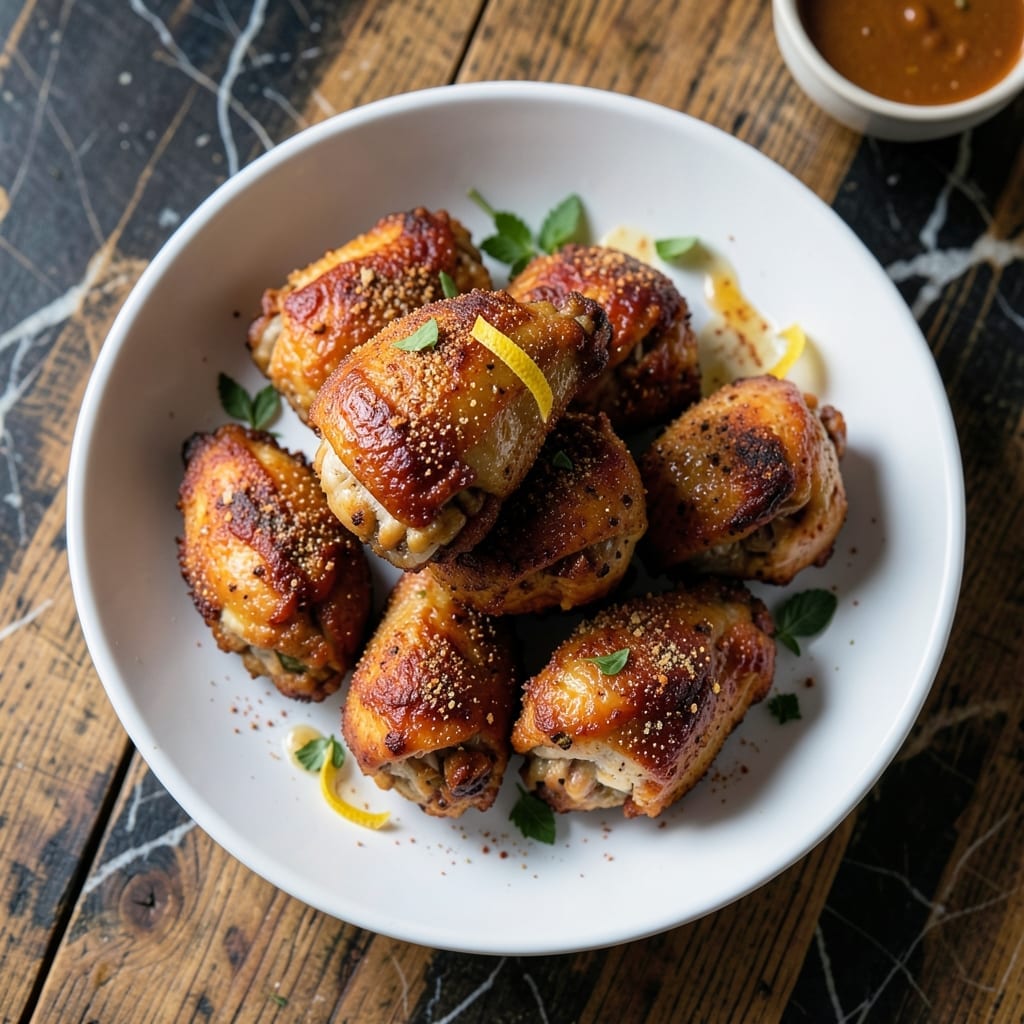
Achieving perfect fried chicken without deep frying is possible with this proven pressure-cooker method. The Instant Pot locks in moisture while creating a crispy exterior that rivals traditional frying.
This technique combines pressure cooking for tender meat with a quick crisping step for the signature texture. You’ll get juicy, flavorful chicken with a golden, shatteringly crispy coating every time.
The process is streamlined yet delivers authentic results. Seasoned flour and a brief air-fry or oven finish ensure that classic fried chicken experience without the mess.
Ready in under an hour, this method proves you can have restaurant-quality fried chicken at home with minimal effort and maximum flavor.
Ingredients for Instant Pot Fried Chicken
Quality ingredients create that signature crispy, juicy texture without the deep fryer mess.
| Ingredient | Amount | Notes |
|---|---|---|
| Chicken Thighs 🍗 | 2 lb | Boneless, skinless, patted dry |
| Buttermilk 🥛 | 1 cup | Full-fat for tenderness |
| All-Purpose Flour 🌾 | 2 cups | For crispy coating |
| Cornstarch 🌾 | ½ cup | For extra crunch |
| Paprika 🌶️ | 1 tbsp | Sweet or smoked variety |
| Garlic Powder 🧄 | 1 tbsp | Not garlic salt |
| Onion Powder 🧅 | 1 tbsp | Fresh ground preferred |
| Salt 🧂 | 1 ½ tsp | Diamond Crystal kosher |
| Black Pepper 🌶️ | 1 tsp | Freshly ground preferred |
| Cayenne Pepper 🔥 | ½ tsp | Adjust for heat preference |
| Vegetable Oil 🫒 | 2 tbsp | For pressure cooking |
| Large Eggs 🥚 | 2 whole | Beaten for egg wash |
| Hot Sauce 🌶️ | 1 tbsp | Optional for buttermilk marinade |
The chicken thighs are non-negotiable here—bone-in works too but boneless ensures even cooking under pressure. Organic or antibiotic-free from Whole Foods or your local butcher delivers superior flavor and texture. Buttermilk quality matters too; avoid the low-fat version as the full-fat contributes to the tenderness. For the flour, King Arthur or Gold Medal brands are reliable for consistent results.
No buttermilk? Whole milk with 1 tbsp lemon juice works in a pinch. Swap cornstarch for arrowroot powder at a 1:1 ratio if needed. The paprika can be omitted, but it adds that classic color and mild depth. For extra heat, increase the cayenne or add a pinch of crushed red pepper flakes. If avoiding eggs, use 3 tbsp aquafaba as a binder—works surprisingly well.
Marinate the chicken in buttermilk for up to 12 hours for maximum tenderness. Store leftovers in an airtight container for 3-4 days in the fridge or freeze for 2 months. Reheat in the air fryer to restore crispiness.
Why You’ll Love This Recipe
- One Pot Magic: I toss everything in the Instant Pot and let it do the work—no frying splatter, no messy stove.
- Crispy & Juicy: That buttermilk soak keeps the thighs tender while the cornstarch gives it the perfect crunch.
- Weeknight Hero: Between us, this is my Tuesday night lifesaver when I need dinner fast.
- Budget Friendly: Chicken thighs stay cheap, and one batch feeds my family for two meals.
Step-by-Step Instructions for Pressure-Crisped Fried Chicken
Here’s the method. Straightforward, tested, works every time.
Step 1: Marinate the Chicken in Buttermilk
In a large bowl, whisk together the 1 cup Buttermilk and 1 tbsp Hot Sauce. Add the 2 lb Chicken Thighs and turn to coat completely. Cover and refrigerate for at least 4 hours, or preferably overnight.
This buttermilk marinade tenderizes the chicken while the acid in the hot sauce breaks down proteins for maximum juiciness. The longer it marinates, the more flavorful and tender your final product will be. Don’t skip this step—it’s the foundation of perfect texture.
Step 2: Prepare the Crispy Coating
In a large shallow dish, combine the 2 cups All-Purpose Flour, 0.5 cup Cornstarch, 1 tbsp Paprika, 1 tbsp Garlic Powder, 1 tbsp Onion Powder, 1.5 tsp Salt, 1 tsp Black Pepper, and 0.5 tsp Cayenne Pepper. Whisk until evenly distributed.
The cornstarch is the secret to extra crunch, while the combination of paprika, garlic powder, and onion powder creates that classic fried chicken flavor profile. The cayenne adds just enough heat to balance the richness without overpowering.
Step 3: Coat and Pressure Cook the Chicken
Remove the chicken from the buttermilk, letting excess drip off. In a separate bowl, beat the 2 whole Large Eggs. Dip each piece first in the beaten eggs, then dredge thoroughly in the flour mixture, pressing firmly to adhere. Let the coated pieces rest on a wire rack for 10 minutes.
Heat the 2 tbsp Vegetable Oil in your Instant Pot using the Sauté function. Working in batches, add the chicken pieces in a single layer. Cancel the Sauté function, secure the lid, and pressure cook on High for 8 minutes. Allow a natural release for 5 minutes, then quick-release any remaining pressure.
Step 4: Crisp the Chicken to Perfection
Carefully remove the chicken from the Instant Pot. Return the pot to Sauté mode and add the chicken back in a single layer. Cook for 3-4 minutes per side until golden brown and crispy. The internal temperature should reach 165°F.
Watch closely during this step—you want that deep golden color that signals perfect crispness. The residual heat from pressure cooking means the chicken will finish quickly. Transfer to a wire rack set over a baking sheet to maintain crispness while you finish the remaining batches.
Pro Tips For Making Instant Pot Fried Chicken
- Double Dredge Thighs: After the buttermilk soak, coat the thighs in flour once, rest 5 minutes, then dredge again—this builds a thicker, crispier crust that holds up in the Instant Pot.
- Use Cold Buttermilk: I learned this the hard way—room temp buttermilk makes the coating slide right off, while ice-cold helps it cling to the chicken like it should.
- Don’t Overcrowd Pot: Resist the urge to cram all the thighs in at once; cook in batches if needed or they’ll steam instead of crisp.
- Add Cornstarch Last: Mix the cornstarch into your flour right before dredging—it prevents clumping and gives that extra crunch without a gummy texture.
Pro Cooking Tips for Great instant pot fried chicken
Batch Cooking Strategy
Never overcrowd your Instant Pot—cook in 2-3 batches max for even crisping. I use my 6-quart Instant Pot Duo and find 4-5 pieces per batch works perfectly. Overcrowding steams the coating instead of crisping it. 🔥
Double-Dredging Technique
For extra crunch, repeat the egg and flour dredge after the initial 10-minute rest. This builds up the coating for maximum crispiness. Press the flour mixture firmly into the chicken each time—this creates those beautiful craggy edges.
Temperature Control
Monitor the Sauté function carefully—it runs hotter than most stovetops. If your chicken is browning too quickly, add 1-2 tbsp water to the pot to moderate the heat. The goal is steady browning, not burning.
Resting for Crispiness
After pressure cooking, let the chicken rest on a wire rack for 5 minutes before crisping. This allows the coating to set slightly, preventing it from falling off during the final browning step. I learned this trick after my first few attempts had coating issues.
Oil Selection
Use a neutral oil with a high smoke point like avocado oil or refined coconut oil instead of vegetable oil for better flavor. Add 1 additional tbsp between batches if the pot looks dry.
Crisping Alternative
For even better results, transfer the pressure-cooked chicken to an air fryer at 400°F for 4-5 minutes. This gives you that all-over crispiness that’s hard to achieve in the Instant Pot alone. My Ninja Foodi handles this beautifully.
Nutrition Facts
Frequently Asked Questions
Can I use chicken breasts instead of thighs?
Yes, but reduce pressure cooking time to 6 minutes to prevent dryness. Thighs stay juicier, but breasts work if that’s your preference. Always check internal temp reaches 165°F.
Why does my coating fall off during cooking?
This usually happens if the chicken wasn’t patted completely dry before dredging. Also, let coated pieces rest 10 minutes before cooking to help the coating adhere better.
Can I make this ahead of time?
Pressure cook and cool completely, then refrigerate uncrisped. Reheat in air fryer at 400°F for 5-6 minutes to restore crispiness. Avoid microwaving as it makes coating soggy.

- 4C Bread Crumbs Meatballs Recipe: Crispy Crust and Juicy Centers - September 25, 2026
- 6 Oz Chocolate Chip Cookie Recipe: Perfectly Balanced Crispy Edges and Chewy Hearts - September 25, 2026
- 6-Inch Coffee Cake Recipe: Vanilla Bean Swirls and Buttery Streusel Topping - September 25, 2026