
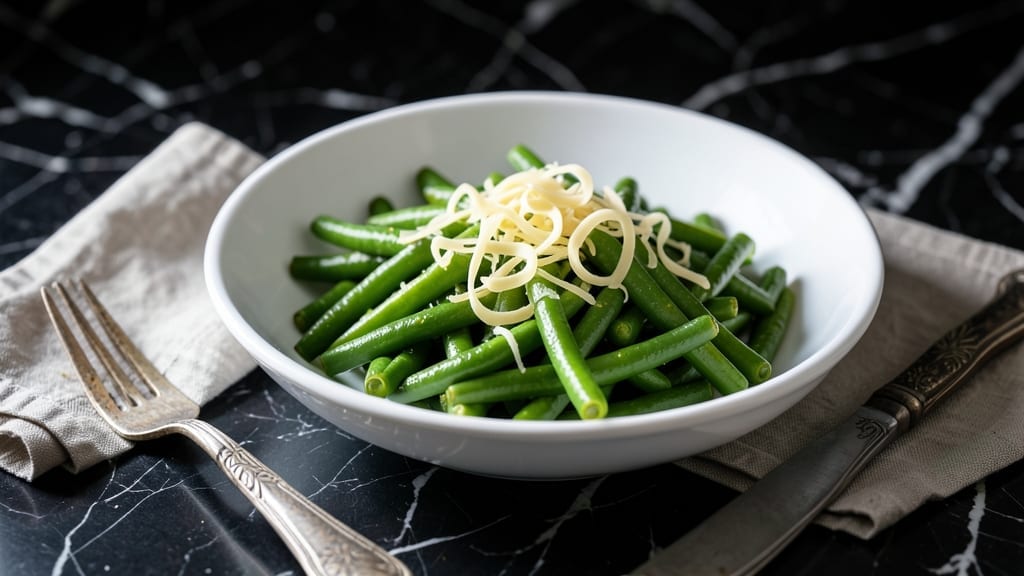
Perfecting green beans in an Instant Pot means achieving that al dente crunch without losing nutrients or flavor—something I’ve refined through years of testing. The secret lies in high-pressure cooking that preserves texture while infusing subtle garlic and lemon notes that elevate simple sides to restaurant-quality.
This method transforms a basic vegetable into a dish that’s quick, foolproof, and ready in just 15 minutes of active time.
What sets this recipe apart is the balance of pressure cooking and quick release, which locks in vibrant color and crisp-tender texture. You’ll use basic pantry staples—fresh green beans, garlic, lemon juice, and a touch of olive oil—but the technique ensures they taste like they’ve been simmered for hours.
The result is a side dish that pairs perfectly with grilled meats, roasted chicken, or even as a standalone vegetarian meal.
By the end, you’ll have bright green beans with just the right bite, infused with aromatic garlic and a bright citrus kick that cuts through richer dishes. The lemon juice adds a freshness that prevents the beans from tasting bland, while the garlic ensures every bite is flavorful.
This recipe delivers professional results without requiring advanced skills—just a few simple steps and your Instant Pot.
Whether you’re meal prepping for the week or serving a last-minute side, this method guarantees perfect green beans every time. The best part? No need to monitor the stove—set it, forget it, and enjoy dinner ready in record time. Let’s get started with this game-changing technique.
Ingredients for instant pot green bean
Eight simple ingredients transform basic green beans into a restaurant-quality side dish.
| Ingredient | Amount | Notes |
|---|---|---|
| Fresh Green Beans 🧅 | 1 ½ lb | Trimmed, ends cut off |
| Garlic Cloves 🧄 | 3 cloves | Minced for aromatic base |
| Extra-Virgin Olive Oil 🫒 | 1 tbsp | High-quality, fruity variety |
| Fresh Lemon Juice 🍋 | 1 tbsp | Bright, freshly squeezed |
| Salt 🧂 | ½ tsp | Kosher or sea salt |
| Black Pepper 🌶️ | ¼ tsp | Freshly ground preferred |
| Fresh Parsley 🌿 | ¼ cup | Chopped, for garnish |
| Water 💧 | ½ cup | For Instant Pot cooking |
The green beans are the star here—fresh, crisp, and vibrant is key. Local farmers markets often have the best quality, but grocery store green beans work too if they’re bright green and firm. Avoid anything rubbery or yellowing. The garlic should be freshly minced—pre-minced jars lose flavor fast. For the olive oil, California Extra Virgin brands like Corto or Kirkland Signature add that fruity depth that makes this dish shine. Don’t skip trimming the ends—it ensures even cooking and a cleaner presentation.
No fresh parsley? Dried parsley at half the amount works in a pinch, though it won’t have the same pop. Running short on lemon juice? Lime juice or vinegar can substitute, but adjust to taste—lemon’s brightness is crucial. If you’re using frozen green beans, thaw and pat completely dry before cooking to avoid excess moisture. The water in the Instant Pot is minimal—just enough to create steam, so don’t worry about overcooking. For extra flavor, a pinch of red pepper flakes adds subtle heat without overpowering.
This dish reheats beautifully—just add a splash of water and a quick pressure cook. Stores for 3-4 days in the fridge, though the texture softens slightly over time. For meal prep, portion into containers with a drizzle of olive oil to keep them crisp. The lemon juice and garlic can be prepped ahead, but add the parsley fresh before serving. Freezes well for up to 2 months, though texture may change slightly. Always use the quick-release function to lock in that perfect al dente crunch.
Why You’ll Love This Recipe
- I swear by this trick: just trim the ends and toss those green beans into the pot whole. They’ll steam into tender perfection without a single knife cut—no sad, uneven slices here.
- No-Chop Required: I swear by this trick: just trim the ends and toss those green beans into the pot whole. They’ll steam into tender perfection without a single knife cut—no sad, uneven slices here.
- Garlic-Lemon Magic: That bright lemon squeeze and minced garlic? It’s the secret weapon. The acid cuts through the richness of the olive oil while the garlic softens just enough to sing—no overpowering bite, just pure flavor harmony.
- Meal Prep MVP: Between us, this is my go-to for lunches all week. The beans hold up beautifully in the fridge, and I just reheat with a splash of water and a pinch of salt. Honestly, I’ve had it three days in a row and still crave it.
Step-by-step instructions for Instant Pot green beans
Here’s how to achieve perfectly tender yet crisp green beans with vibrant flavor in record time.
Trim and Prepare the Green Beans
Start by rinsing the 1.5 lb fresh green beans under cold water to remove any dirt or debris. Using a sharp knife, trim off the tough ends by cutting about ½ inch from each stem end. This ensures even cooking and prevents any bitter, fibrous pieces. For thicker beans, you may want to cut them into 2-inch pieces to help them cook more evenly in the Instant Pot.
Once trimmed, spread the green beans on a clean kitchen towel and pat them dry. This step is crucial for preventing excess moisture in the pot, which could lead to steamed rather than sautéed texture. I like to work in batches if I’m dealing with a large quantity, keeping them in a single layer so they dry completely.
Sauté the Garlic in Olive Oil
Set your Instant Pot to the “Sauté” function and add the 1 tablespoon extra-virgin olive oil. Allow it to heat for about 30 seconds until shimmering. Add the 3 cloves minced garlic and cook for 30 to 45 seconds until fragrant but not browned. This quick sautéing step builds flavor without overpowering the delicate green beans.
Here’s the thing—I always watch the garlic closely because it burns faster than you might expect. You’re looking for a gentle aroma that fills the kitchen, not a bitter, acrid smell. If the garlic starts to darken, remove the pot from heat immediately. Once the garlic is ready, add the 0.5 teaspoon salt and 0.25 teaspoon black pepper, stirring to combine.
Add Green Beans and Water
Carefully add the trimmed green beans to the Instant Pot, spreading them evenly over the garlic mixture. Pour in the 0.5 cup water and give everything a gentle stir to ensure the beans are coated with the aromatic oil and seasonings. The water creates steam that helps cook the beans evenly while maintaining their vibrant color.
I like to press down gently on the green beans with a wooden spoon to submerge them partially in the liquid. This helps distribute the heat more evenly and prevents any beans from sticking to the bottom of the pot. Once everything is combined, place the lid on the Instant Pot, securing it tightly.
Pressure Cook for Perfect Texture
Set the Instant Pot to the “High Pressure” function and cook for 3 minutes. This short cooking time is key to achieving al dente green beans with a satisfying crunch. After the cooking cycle completes, allow the pressure to release naturally for 5 minutes before manually releasing any remaining pressure. This gradual release helps preserve the beans’ texture and prevents them from becoming mushy.
While the beans are cooking, I always keep an eye on the time. The 3-minute cook time works perfectly for fresh green beans, but if you’re using thicker or tougher beans, you might need to extend it by 30 seconds to 1 minute. The beans should be tender but still hold their shape with a slight resistance when pierced with a fork.
Finish with Lemon and Parsley
Once the pressure has fully released, remove the lid and stir the green beans gently. Add the 1 tablespoon fresh lemon juice and toss to coat evenly. The acidity brightens the flavor and balances the richness of the olive oil. Sprinkle the 0.25 cup chopped fresh parsley over the top and give everything another stir to distribute the herbs.
Taste and adjust the seasoning if needed—you might want to add a pinch more salt or a crack of black pepper to suit your preference. Serve the green beans immediately while they’re still hot, garnished with extra parsley if desired. The vibrant green color and fresh aroma will make this simple side dish the star of your meal.
Pro Tips For Making Instant Pot Green Bean
- TRIM BEANS LIKE A PRO: Cut green beans on a diagonal at the stem end—about 1/3 of the way down—so they don’t slide into a messy pile while cooking. I learned this the hard way when my first batch turned into a tangled mess in the Instant Pot.
- SAUTÉ GARLIC FIRST: Before adding anything else, cook the minced garlic in olive oil on the Instant Pot’s sauté function until it’s just golden—about 30 seconds. This builds flavor way more than tossing it in raw, and it won’t burn when the pressure starts.
- DON’T SKIP THE NATURAL RELEASE: After cooking, let the pressure release naturally for 10 minutes before quick-releasing the rest. Rushing this step leaves beans undercooked and watery, and I’ve done it enough times to know it’s not worth the shortcut.
- LEMON JUICE LAST: Add lemon juice after the beans are done cooking and pressure is released—it brightens the dish but evaporates quickly if added too early. A splash of fresh zest at the end makes a real difference, even if it’s just a pinch.
Storing and reheating this dish
Refrigerator Storage
Store your cooked green beans in an airtight container with a splash of 1 teaspoon olive oil to maintain crispness. They’ll keep for 3-4 days in the fridge at 40°F or below.
I like to portion them into single-serving containers for easy reheating—just add 1 tablespoon water per serving before reheating. The lemon juice helps preserve their bright color, but I always taste before storing to ensure they’re still vibrant. 💫
Freezer-Friendly Prep
For longer storage, freeze the green beans in a single layer on a parchment-lined tray for 1 hour to prevent clumping. Transfer to freezer bags with 1 tablespoon olive oil and ½ teaspoon lemon juice per 1 cup of beans.
They’ll stay fresh for up to 2 months—just thaw overnight in the fridge before reheating. This method keeps their texture surprisingly crisp after freezing. ❄️
Reheating for Crisp-Tender Texture
To revive their al dente texture, reheat frozen beans in the Instant Pot with ½ cup water on High Pressure for 1 minute, then quick-release. For fridge-stored beans, sauté in 1 tablespoon olive oil over medium heat for 3-4 minutes until heated through.
Always finish with a squeeze of fresh lemon juice and a sprinkle of parsley to restore brightness. 🔥
Meal Prep Strategy
Prep a big batch on Sunday and store in glass containers with parchment paper between layers to prevent sogginess. When reheating, microwave for 1-2 minutes on 50% power with a damp paper towel covering the bowl.
This method keeps them warm without losing their snap. I double the recipe for easy lunches all week. 📅
Reviving Soggy Beans
If your stored green beans turn mushy, don’t toss them! Toss them in 1 tablespoon butter and ½ teaspoon garlic powder, then roast at 400°F for 10 minutes for a crispy, flavorful side.
This trick works like magic for beans that lost their texture. It’s my secret weapon for saving leftovers. 💡
Serving Warm vs. Cold
For warm servings, reheat gently to preserve texture. Cold green beans make a refreshing salad—toss with cherry tomatoes, feta cheese, and a balsamic glaze. The lemon and garlic flavors hold up beautifully in cold dishes.
I often serve them as a side to grilled meats or as a light vegetarian meal. 🌿
Nutrition facts
Frequently asked questions
Can I use frozen green beans instead of fresh?
Yes, but with one key adjustment: thaw and pat frozen green beans completely dry before cooking. This prevents excess moisture that could make them steam instead of sauté. Increase the cook time by 1 minute to 4 minutes on high pressure since frozen beans need slightly longer. The texture will still be great if you follow these steps!
Why do my Instant Pot green beans turn out mushy?
Mushy texture usually happens from overcooking or excess moisture. Always use the quick-release after 5 minutes of natural release, and never exceed 4 minutes of cook time. Also, ensure beans are completely dry before cooking—pat them thoroughly with a kitchen towel. Too much water in the pot causes steaming instead of proper pressure cooking.
Can I make this recipe without garlic?
Simply omit the garlic and increase the lemon juice to 1.5 tablespoons for extra brightness. You can also add ½ teaspoon onion powder or ¼ teaspoon smoked paprika for depth. The dish will still be delicious—just more citrus-forward.
How do I adjust this for a larger family?
Double or triple the recipe, but keep the same proportions: 1.5 lbs of beans per 0.5 cup water. Use a 6-quart Instant Pot for up to 6 lbs of beans at once. For extra flavor, add 1 extra clove of garlic and ½ tablespoon lemon juice per additional 1.5 lbs of beans. The cook time remains the same—just ensure the pot isn’t overfilled.
What are the best sides to serve with these green beans?
These green beans pair perfectly with rich, hearty mains like grilled steak, roasted chicken, or garlic shrimp. For vegetarian meals, serve with quinoa, crusty bread, or a simple tomato salad. The bright lemon and garlic flavors cut through richer dishes beautifully, balancing the meal.

- Baked Potatoes in Crock Pot Recipe: Buttery Interiors and Crispy Top Magic - November 1, 2026
- Braised Beef Short Ribs Recipe: Crock Pot Fall-Off-Bone Magic in 6 Hours - November 1, 2026
- Crock Pot Cocoa Recipe: Velvety Warmth With Hidden Spice Magic - November 1, 2026