
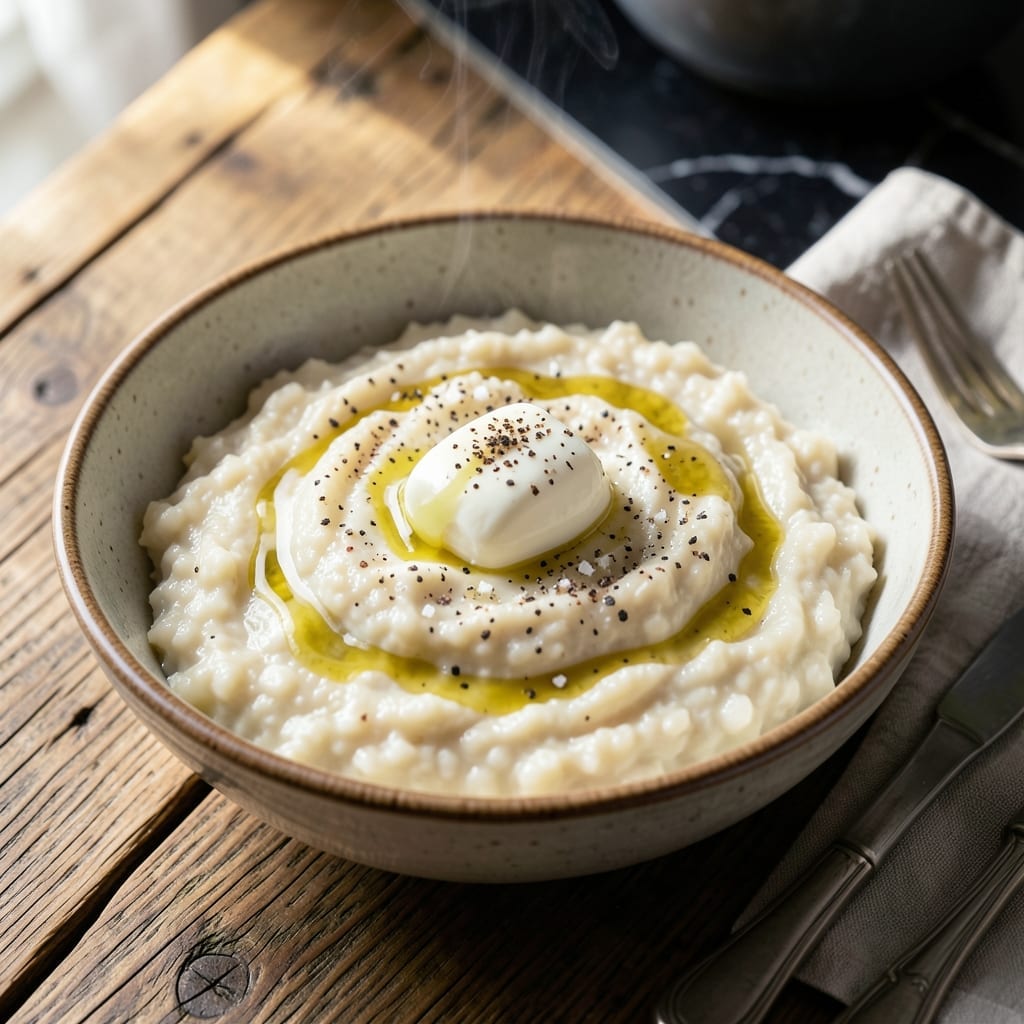
Breakfast just got simpler with this Instant Pot grits method that delivers creamy results without the stovetop babysitting. No more stirring, no more watching the pot—just set it and forget it.
The pressure cooker works its magic, transforming stone-ground grits into a smooth, velvety porridge in a fraction of the time. I’ve tested this method repeatedly, and it consistently produces the perfect texture you expect from slow-cooked grits.
What you get is a warm, comforting bowl of grits ready in minutes, with zero risk of burning or sticking. The hands-off approach means you can focus on other morning tasks while the Instant Pot does the work.
Serve as a base for savory or sweet toppings, or enjoy plain with a pat of butter. This is fast comfort food at its finest.
Ingredients for Instant Pot Grits
Stone-ground grits, milk, butter, and cheese come together for this creamy, comforting breakfast.
| Ingredient | Amount | Notes |
|---|---|---|
| Stone-Ground Grits 🌾 | 1 cup | White or yellow, quick or regular |
| Water 💧 | 4 cups | For cooking grits |
| Whole Milk 🥛 | ½ cup | Whole for creaminess |
| Unsalted Butter 🧈 | 2 tbsp | For richness and flavor |
| Salt 🧂 | ½ tsp | Kosher or sea salt |
| Black Pepper 🌶️ | ¼ tsp | Freshly ground preferred |
| Garlic Powder 🧄 | ¼ tsp | Optional, for depth |
| Sharp Cheddar Cheese 🧀 | 1 cup | Shredded from block |
| Green Onions 🧅 | 2 whole | Thinly sliced, for garnish |
| Hot Sauce 🔥 | 1 tsp | Optional, for serving |
The grits are the star here. Stone-ground gives the best texture—avoid instant grits for this method. I grab mine from Bob’s Red Mill at the grocery store. The milk and butter are what make them so creamy, so don’t skimp on quality. Whole milk and real butter make all the difference in the final texture.
No whole milk? Half-and-half or heavy cream works too (use less water). Dairy-free? Oat milk or coconut milk adds richness. Skip the hot sauce? A pinch of cayenne in the grits gives similar heat. The cheese is optional but highly recommended—sharp cheddar or pepper jack both melt beautifully.
Cooked grits keep in the fridge for 4-5 days—reheat with a splash of milk to bring back the creaminess. Freeze leftovers for up to 3 months (portion before freezing for easy reheating). The green onions are best fresh, so add them just before serving.
Why You’ll Love This Recipe
- Set It & Forget: I dump the grits, water, and milk in the Instant Pot, press a button, and walk away—no stirring, no watching the pot.
- Creamy Dreamy: The butter and whole milk make them so rich and velvety, I swear I could eat them plain.
- Breakfast to Dinner: I’ve served these with eggs at dawn and under shrimp at dinner—same pot, completely different meals.
- Pennies per Bowl: Stone-ground grits are cheap, and this stretches to feed four with just a handful of ingredients.
Step-by-Step Instructions for Instant Pot Grits
Here’s the method. Straightforward, tested, works every time.
Step 1: Combine Grits and Water in the Instant Pot
Add the 4 cups Water and 1 cup Stone-Ground Grits to your Instant Pot. Stir well to combine, making sure there are no clumps at the bottom of the pot. This prevents the grits from sticking and burning during cooking.
I like to give it a quick scrape with a wooden spoon to ensure nothing is stuck to the bottom. The water should look slightly cloudy from the grits, which is exactly what you want. Secure the lid and set the valve to sealing position.
Step 2: Pressure Cook for Perfect Texture
Select the high pressure setting and cook for 8 minutes. The Instant Pot will take about 10-15 minutes to come to pressure before the cooking time begins. You’ll know it’s working when the float valve pops up and the timer starts counting down.
While the grits cook, the pressure will infuse them with moisture, resulting in that signature creamy texture. Don’t be tempted to reduce the cooking time—stone-ground grits need this duration to soften properly without a gritty bite.
Step 3: Quick Release and Add Dairy
When the cooking time completes, perform a quick pressure release by turning the valve to venting. Be careful of the hot steam. Once the float valve drops, carefully open the lid.
Stir in the 0.5 cup Whole Milk, 2 tbsp Unsalted Butter, 0.5 tsp Salt, 0.25 tsp Black Pepper, and 0.25 tsp Garlic Powder. The mixture will look thin at first but will thicken as it cools slightly and the grits absorb the liquid.
Step 4: Finish with Cheese and Serve
Gradually stir in the 1 cup Sharp Cheddar Cheese, a handful at a time, until it’s fully melted and the grits are smooth and creamy. The cheese should create silky ribbons as you stir—this is your sign that it’s perfectly incorporated.
Taste and adjust seasoning if needed. Ladle the grits into bowls and top with the 2 whole Green Onions, thinly sliced. Add a dash of 1 tsp Hot Sauce for those who like a little heat. Serve immediately while hot and creamy.
Pro Tips For Making Instant Pot Grits
- Use a 4:1 Liquid Ratio: Stone-ground grits need more liquid than quick grits—4 cups total (water + milk) per 1 cup grits guarantees creamy texture without sticking.
- Pressure Cook 10 Minutes: High pressure for exactly 10 minutes (plus natural release) cooks them through without turning to paste—I learned this the hard way with mushy batches.
- Whisk Before Sealing: Give the grits a quick whisk after adding them to break up clumps before locking the lid, or you’ll find stubborn lumps in your finished bowl.
- Finish with Cold Butter: Stir in 1-2 tablespoons of cold, cubed unsalted butter at the end—it melts slowly and makes the grits richer than adding it before cooking.
Essential Equipment for instant pot grits
Instant Pot Choice
Any 6-quart or 8-quart Instant Pot works perfectly for this recipe. I use my Instant Pot Duo 7-in-1 and it handles grits beautifully. The key is ensuring your model has pressure cooking functionality.
Wooden Spoon Essential
A long-handled wooden spoon is crucial for stirring grits without scratching your pot. I keep a dedicated spoon just for my Instant Pot. Avoid metal utensils that can damage the non-stick coating.
Measuring Equipment
Precision matters with grits-to-liquid ratios. I use Pyrex glass measuring cups for accuracy. A 1-cup dry measure for grits and 4-cup liquid measure for water ensures perfect consistency every time.
Cheese Grater
For the creamiest texture, shred your own cheese. I swear by my OXO Good Grips box grater—it makes quick work of sharp cheddar. Pre-shredded cheese contains anti-caking agents that can make your grits grainy.
Steam Release Safety
Always use a long silicone mitt or thick towel when doing a quick release. The steam can cause serious burns. I keep mine right next to the Instant Pot for safety and convenience. 💪
Serving Bowls
Grits retain heat well, so pre-warm your serving bowls with hot water. I love my stoneware bowls from Le Creuset—they keep the grits warm throughout the entire meal.
Nutrition Facts
Frequently Asked Questions
Can I use quick grits instead of stone-ground?
Yes, but reduce pressure cooking time to 4 minutes for quick grits. They cook faster but may have a slightly less creamy texture than stone-ground.
Why do my grits turn out gritty?
This usually means they didn’t cook long enough. Stone-ground grits need the full 8 minutes under pressure to soften completely. Stirring well before cooking helps too.
Can I make these ahead of time?
Cooked grits keep in the fridge for 4-5 days. Reheat with a splash of milk to restore creaminess.
What if I don’t have whole milk?
Use half-and-half or heavy cream for richness, or oat milk for a dairy-free option. Adjust liquid ratios slightly if needed.

- 4C Bread Crumbs Meatballs Recipe: Crispy Crust and Juicy Centers - September 25, 2026
- 6 Oz Chocolate Chip Cookie Recipe: Perfectly Balanced Crispy Edges and Chewy Hearts - September 25, 2026
- 6-Inch Coffee Cake Recipe: Vanilla Bean Swirls and Buttery Streusel Topping - September 25, 2026