
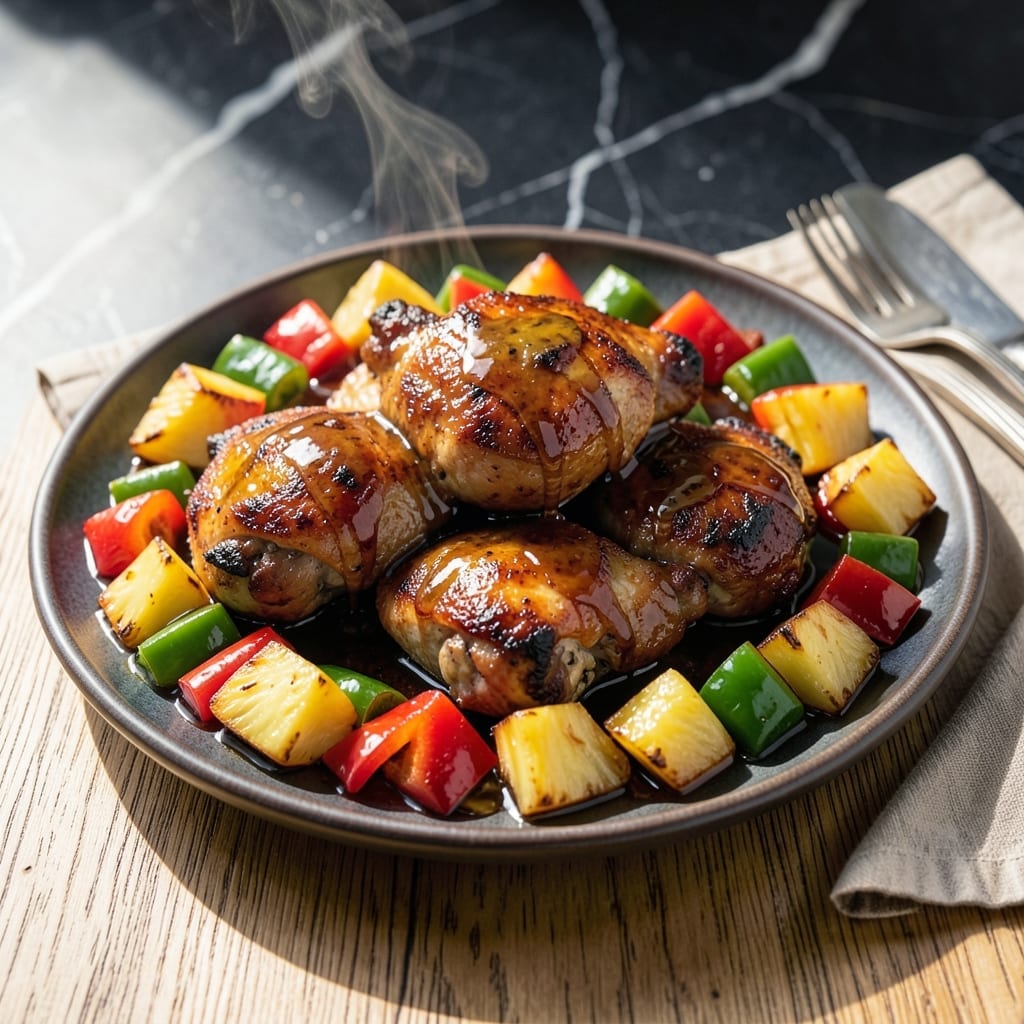
This Instant Pot recipe transforms chicken into a sweet and tangy Hawaiian-inspired dish with minimal effort. The pressure cooker locks in flavors and moisture, creating tender meat infused with tropical notes.
Pineapple and bell peppers add freshness while the sauce delivers a perfect balance of savory and sweet. The entire meal comes together in under 30 minutes, making it ideal for busy weeknights.
What sets this apart is the blend of soy sauce, brown sugar, and ginger that creates a complex flavor profile. The result is juicy chicken with a glossy, flavorful glaze.
Serve over rice for a complete, family-friendly meal that tastes like a vacation in a bowl.
Ingredients for Instant Pot Hawaiian Chicken
Tender chicken, sweet pineapple, and bold flavors come together in this tropical dish.
| Ingredient | Amount | Notes |
|---|---|---|
| Boneless, Skinless Chicken Thighs 🍗 | 1 ½ lb | Cut into bite-sized pieces |
| Pineapple Chunks 🍍 | 2 cups | Fresh or canned, drained |
| Bell Peppers 🌶️ | 2 whole | Any color, sliced into strips |
| Soy Sauce 🫒 | ½ cup | Low-sodium preferred |
| Brown Sugar 🍚 | ½ cup | Packed, light or dark |
| Fresh Ginger 🌿 | 1 tbsp | Peeled and minced |
| Garlic Cloves 🧄 | 3 cloves | Minced finely |
| Rice Vinegar 🍯 | 3 tbsp | Or apple cider vinegar |
| Cornstarch 🌾 | 2 tbsp | For thickening the sauce |
| Chicken Broth 🥣 | ½ cup | Low-sodium or homemade |
| Olive Oil 🫒 | 1 tbsp | For sautéing aromatics |
| Salt 🧂 | ½ tsp | Or to taste |
| Black Pepper 🌶️ | ¼ tsp | Freshly ground |
| Green Onions 🧅 | 3 whole | Thinly sliced for garnish |
The chicken is the foundation here. Thighs stay juicier than breasts under pressure—look for skinless, boneless at Costco or your butcher. Fresh pineapple adds brightness (the canned kind works in a pinch, just drain well). For the bell peppers, any color brings visual appeal, but red adds a touch of sweetness that complements the dish beautifully.
Swap soy sauce for tamari if you need gluten-free. Brown sugar can be replaced with coconut sugar at a 1:1 ratio. No fresh ginger? Ground ginger at one-third the amount works, though fresh is brighter. If you’re missing rice vinegar, apple cider vinegar is a fine stand-in. The cornstarch is key for that glossy sauce—don’t skip it.
Leftovers keep in the fridge for 4-5 days or freeze for up to 3 months. The flavors deepen overnight, so it’s even better the next day. Reheat gently on the stove with a splash of water to thin the sauce if needed.
Why You’ll Love This Recipe
- I’ll be real: it tastes even better the next day, and the flavors deepen overnight. Plus, it reheats like a dream.
- Dump and Run: I toss everything in the Instant Pot, press a button, and walk away—no babysitting, no stirring, just tender chicken and juicy pineapple waiting for me.
- Sweet-Savory Magic: The brown sugar and soy sauce caramelize into this sticky, crave-worthy glaze that coats every bite of chicken and bell pepper.
- Weeknight Hero: Honestly, it’s my Tuesday lifesaver—equally great over rice, in lettuce wraps, or straight from the pot when I’m too hungry to plate it.
Step-by-Step Instructions for Instant Pot Hawaiian Chicken
This method delivers tender chicken and a perfectly balanced sweet-tangy sauce every time.
Step 1: Sauté Aromatics and Brown Chicken
Set your Instant Pot to the Sauté function and add the 1 tbsp olive oil. When hot, add the 1 tbsp fresh ginger and 3 cloves garlic cloves, stirring constantly for 30 seconds until fragrant. Be careful not to let them burn—this builds the flavor foundation.
Add the 1.5 lb boneless, skinless chicken thighs (cut into bite-sized pieces) and sear for 2-3 minutes until the pieces are lightly browned on all sides. The chicken doesn’t need to cook through at this stage—just develop some color for depth of flavor.
Step 2: Pressure Cook with Liquid Ingredients
Pour in the 0.5 cup soy sauce, 0.5 cup brown sugar, 3 tbsp rice vinegar, 0.5 cup chicken broth, 0.5 tsp salt, and 0.25 tsp black pepper. Stir well to dissolve the brown sugar and combine all the ingredients. The sugar should be fully incorporated before pressure cooking begins.
Add the 2 cups pineapple chunks and 2 whole bell peppers (sliced into strips). Secure the lid and set the valve to Sealing. Cook on High Pressure for 8 minutes. The pressure cooker will take about 10-15 minutes to come to pressure before the timer starts.
Step 3: Release Pressure and Thicken the Sauce
Once the cooking time is complete, allow the pressure to release naturally for 5 minutes, then switch the valve to Venting to release any remaining pressure. Open the lid carefully once the float valve drops.
In a small bowl, mix the 2 tbsp cornstarch with 2 tbsp water to create a slurry. Stir this into the Instant Pot and set the function to Sauté again. Cook for 2-3 minutes while stirring until the sauce thickens to a glossy, syrupy consistency.
Step 4: Finish and Serve
Taste and adjust seasoning if needed—you may want a touch more soy sauce for saltiness or brown sugar for sweetness. The sauce should coat the back of a spoon with a slight sheen.
Garnish with the 3 whole green onions (thinly sliced) and serve immediately over steamed rice. The dish should have a vibrant, slightly sticky sauce with tender chicken and crisp-tender bell peppers. Each bite should deliver a balance of sweet, tangy, and savory flavors.
Pro Tips For Making Instant Pot Hawaiian Chicken
- Sear the Thighs: I learned this the hard way—skip searing and your chicken will taste boiled. Use the sauté function for 3-4 minutes per side until golden before pressure cooking.
- Use Fresh Pineapple: Canned pineapple works in a pinch, but fresh chunks add a brighter, more vibrant flavor that balances the soy and brown sugar better.
- Don’t Overfill: Resist the urge to double the recipe—your Instant Pot needs at least 1/3 empty space to pressure cook properly, or you’ll get uneven results.
- Thicken the Sauce: After cooking, switch to sauté mode and let the sauce reduce for 5-7 minutes—it’ll coat the chicken instead of pooling at the bottom.
Health Benefits of This Recipe
Rich in Vitamins
This dish delivers a serious dose of vitamin C from the 2 cups pineapple chunks and 2 bell peppers. One serving covers about 150% of your daily needs, supporting immune function and skin health. The pineapple also provides manganese, crucial for bone health.
Lean Protein Source
The 1.5 lb chicken thighs provide high-quality protein—about 30 grams per serving. While slightly higher in fat than breasts, thighs contain more iron and zinc, essential minerals for energy and immunity. I always choose thighs for their juiciness and nutrient density.
Antioxidant Boost
Pineapple is packed with bromelain, an enzyme that aids digestion and reduces inflammation. The fresh ginger and 3 cloves garlic add their own antioxidants, supporting overall health. Together, they make this meal as nourishing as it is delicious. 💪
Low-Calorie Option
Each serving contains roughly 350-400 calories, making it a balanced choice for those watching their intake. The dish is naturally low in saturated fat, especially if you trim visible fat from the chicken thighs. The bell peppers add volume with minimal calories.
Digestive Benefits
The combination of pineapple and ginger promotes healthy digestion. Pineapple’s fiber supports gut health, while ginger soothes the digestive tract. I notice I feel lighter after eating this compared to heavier meals. 🌟
Nutrition Facts
Frequently Asked Questions
Can I use chicken breasts instead of thighs?
Yes, but reduce pressure cook time to 6 minutes to prevent dryness. Thighs stay juicier, but breasts work if you prefer leaner meat.
What if I don’t have rice vinegar?
Substitute apple cider vinegar or white vinegar with a pinch of sugar to mimic the tangy-sweet balance of the original.
How can I make this dish spicier?
Add 1/2 tsp red pepper flakes with the aromatics or stir in 1 tbsp sriracha at the end for heat without overpowering the Hawaiian flavors.
Can I double the recipe?
Yes, but don’t exceed 2/3 full capacity in your Instant Pot. Increase all ingredients proportionally and maintain the 8 minutes cook time.

- 6 Oz Chocolate Chip Cookie Recipe: Perfectly Balanced Crispy Edges and Chewy Hearts - September 25, 2026
- 6-Inch Coffee Cake Recipe: Vanilla Bean Swirls and Buttery Streusel Topping - September 25, 2026
- 1 Hour Soup Recipe: Velvety Richness Without the Wait - September 25, 2026