
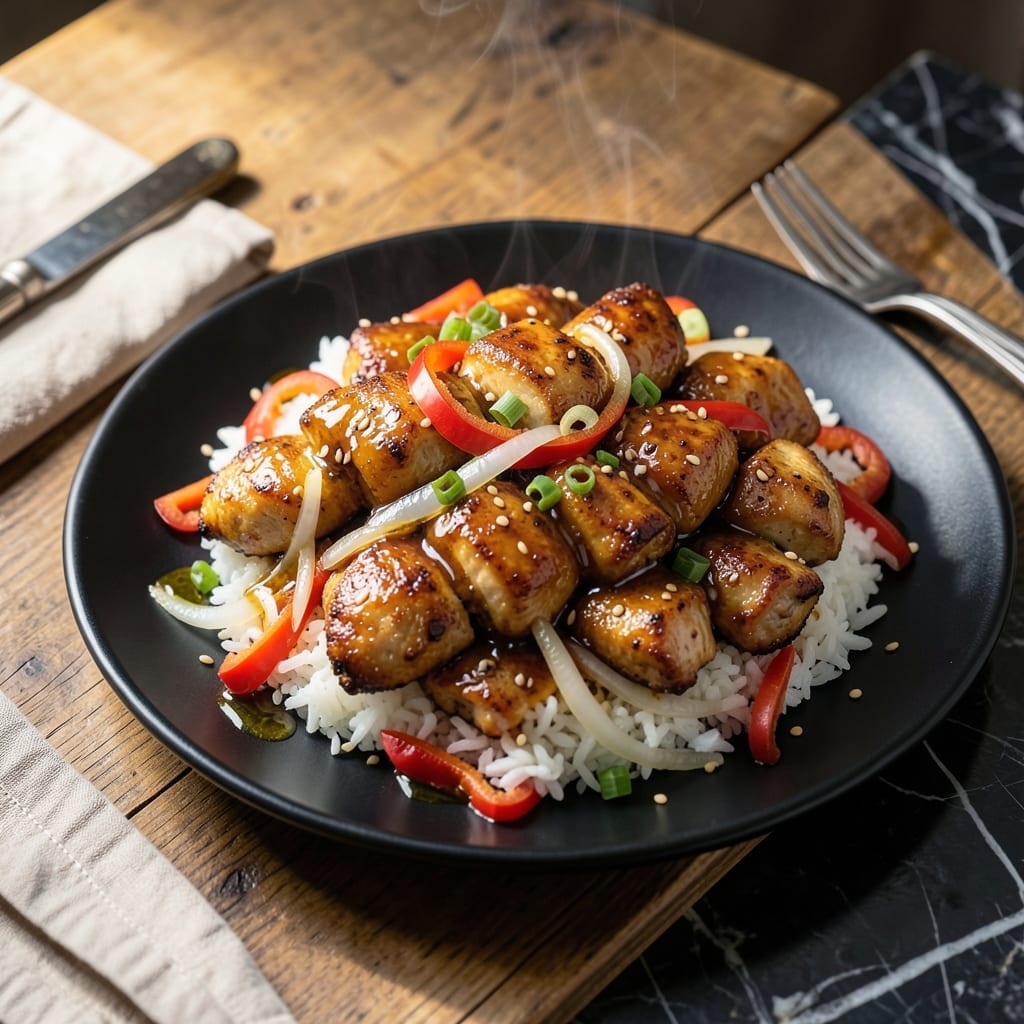
Japanese steakhouse flavors come alive in your Instant Pot with this foolproof hibachi chicken recipe. The pressure cooker locks in moisture while infusing the meat with that signature savory-sweet taste.
This method cuts traditional cooking time without sacrificing authenticity. Tender chicken absorbs the umami-rich sauce, creating the same caramelized edges you’d find at your favorite hibachi grill.
With minimal prep and no special equipment, you’ll have a complete meal ready in under 30 minutes. The secret lies in the sauce timing—added at just the right moment for maximum flavor.
Serve over steamed rice with sautéed vegetables for the full experience. The results are consistently restaurant-quality, every single time.
Ingredients for Instant Pot Hibachi Chicken
Every ingredient here delivers that authentic hibachi flavor without the restaurant wait.
| Ingredient | Amount | Notes |
|---|---|---|
| Boneless Skinless Chicken Thighs 🍗 | 1 ½ lb | Cut into bite-sized pieces |
| Soy Sauce 🥢 | ½ cup | Low-sodium preferred |
| Brown Sugar 🍚 | ¼ cup | Light or dark variety |
| Rice Vinegar 🍯 | 2 tbsp | Unseasoned variety |
| Garlic Cloves 🧄 | 4 cloves | Minced for maximum flavor |
| Fresh Ginger 🌿 | 1 tbsp | Peeled and grated |
| Sesame Oil 🫒 | 1 tbsp | Toasted for depth |
| Cornstarch 🌾 | 1 tbsp | For thickening sauce |
| Water 💧 | ¼ cup | For pressure cooking |
| Vegetable Oil 🫒 | 1 tbsp | Neutral high-smoke point |
| Sesame Seeds 🌰 | 2 tsp | Toasted for garnish |
| Green Onions 🧅 | 4 whole | Thinly sliced for garnish |
| White Onion 🧅 | ½ whole | Diced for sauce base |
| Ground Black Pepper 🌶️ | ½ tsp | Freshly ground preferred |
The chicken is key—thighs stay juicier than breasts in the Instant Pot. Look for boneless, skinless to save prep time. Most grocery stores carry them pre-cut, but whole thighs are often cheaper (and you can trim them yourself). For soy sauce, Kikkoman low-sodium is my go-to, but any brand works as long as it’s fresh.
No rice vinegar? Apple cider vinegar at half the amount works in a pinch. Brown sugar can be swapped for coconut sugar or honey (though that’s less traditional). If you’re missing fresh ginger, ground ginger at a quarter the amount is fine. The sesame oil is non-negotiable though—it’s what gives that signature aroma.
This keeps beautifully for 4-5 days in the fridge. The sauce thickens as it cools, so stir in a splash of water when reheating. Freezes for up to 3 months (portion before freezing for easy meals).
Why You’ll Love This Recipe
- Set It and Forget: The Instant Pot does all the work while I prep a side or pour a glass of wine.
- Sweet-Savory Magic: Brown sugar caramelizes with soy sauce and garlic for that sticky, umami-packed glaze.
- Meal Prep Hero: I make a double batch on Sunday and it tastes just as good reheated on Wednesday.
- Budget Stretch: Chicken thighs stay juicy and cheap, and a little goes a long way with rice.
Step-by-Step Instructions for Instant Pot Hibachi Chicken
Here’s how I create that signature Japanese steakhouse flavor right in my kitchen.
Step 1: Sear and Sauté the Aromatics
Set your Instant Pot to the sauté function and add the vegetable oil. Once hot, add the 1.5 lb Boneless Skinless Chicken Thighs and sear for 3-4 minutes per side until golden brown. I cut the thighs into bite-sized pieces first for more even cooking.
Remove the chicken and set aside. In the same pot, add the diced 0.5 whole White Onion, minced 4 cloves Garlic Cloves, and grated 1 tbsp Fresh Ginger. Sauté for 2-3 minutes until the onion becomes translucent and fragrant.
Step 2: Build the Flavor Base
Pour in the 0.5 cup Soy Sauce, 0.25 cup Brown Sugar, and 2 tbsp Rice Vinegar. Stir well to dissolve the sugar completely—this creates that perfect sweet-savory balance hibachi is known for.
Add the 1 tbsp Sesame Oil and 0.5 tsp Ground Black Pepper, then return the chicken to the pot. Pour in the 0.25 cup Water and give everything a good stir. The liquid should just cover the bottom of the pot for proper pressure cooking.
Step 3: Pressure Cook and Thicken
Secure the lid, set the valve to sealing, and cook on high pressure for 8 minutes. Once done, let the pressure release naturally for 5 minutes, then quick-release any remaining pressure. The chicken should be tender and cooked through at this point.
In a small bowl, mix the 1 tbsp Cornstarch with 2 tbsp of the cooking liquid to create a slurry. Stir this into the pot and set the Instant Pot back to sauté mode. Cook for 2-3 minutes until the sauce thickens to a glossy consistency that coats the back of a spoon.
Step 4: Finish and Serve
Turn off the heat and stir in half of the thinly sliced 4 whole Green Onions. Taste and adjust seasoning if needed—though I find the balance is usually perfect at this point.
Transfer to serving plates and garnish with the remaining green onions and 2 tsp Sesame Seeds. The sauce should be thick enough to cling to the chicken, with a beautiful sheen that makes it look just like the restaurant version.
Pro Tips For Making Instant Pot Hibachi Chicken
- Sear the Thighs First: I learned this the hard way—skipping the sear leaves the chicken bland. Crisp the thighs for 2-3 minutes per side in the Instant Pot on SAUTE before pressure cooking to lock in flavor.
- Mince the Garlic: Sounds obvious, but whole cloves won’t infuse the sauce the same way. Finely mince the garlic so it distributes evenly and melts into the sauce.
- Skip the Overcrowding: Resist the urge to dump all the thighs in at once. Leave space between them when searing, or they’ll steam instead of brown.
- Use Natural Release: After burning a batch, I now let the pressure release naturally for 10 minutes. Quick release can make the sauce thin and the chicken dry.
Make-Ahead Tips for This Dish
Prep Ahead Strategy
Chop all your 1.5 lb Boneless Skinless Chicken Thighs and aromatics the night before. Store them in separate airtight containers in the fridge. This saves 10 minutes on cooking day and keeps flavors fresh. 💡
Sauce Mixing
Combine your 0.5 cup Soy Sauce, 0.25 cup Brown Sugar, and 2 tbsp Rice Vinegar in a jar. Shake well and refrigerate. The flavors meld overnight, creating a deeper taste profile when cooked.
Batch Cooking
Double the recipe and freeze half in quart-size freezer bags for up to 3 months. Thaw overnight in the fridge before reheating. The sauce thickens when chilled, so add 2 tbsp water when reheating.
Instant Pot Prep
Measure your 0.25 cup Water and 1 tbsp Sesame Oil the night before. Keep them at room temperature so they’re ready to add immediately when cooking. This prevents any delay in the sautéing process.
Garnish Prep
Slice your 4 whole Green Onions and toast your 2 tsp Sesame Seeds up to 2 days ahead. Store them separately in small containers. Fresh garnishes make a big difference in presentation. ✨
Reheating Tips
Use the Instant Pot’s sauté function to reheat leftovers. Add a splash of water, cover, and heat for 3-4 minutes. Stir occasionally to prevent sticking and restore that glossy sauce consistency.
Nutrition Facts
Frequently Asked Questions
Can I use chicken breasts instead of thighs?
Yes, but thighs stay juicier. If using breasts, reduce pressure time to 6 minutes and add 1/4 cup extra water to prevent drying. Thighs are more forgiving and absorb flavors better.
How do I make the sauce thicker?
Mix 1 tbsp cornstarch with 2 tbsp cold water for a slurry. Stir into the pot during the last 2-3 minutes of sautéing. Cook until glossy and coatable.
What if my Instant Pot says “burn”?
This usually means not enough liquid. Add 1/4 cup water, scrape the bottom to release stuck bits, then restart. Always deglaze after searing.
Can I double the recipe?
Yes, but don’t exceed 2/3 full capacity. Increase pressure time to 10 minutes for double batches. Cook in batches if needed for best results.

- 4C Bread Crumbs Meatballs Recipe: Crispy Crust and Juicy Centers - September 25, 2026
- 6 Oz Chocolate Chip Cookie Recipe: Perfectly Balanced Crispy Edges and Chewy Hearts - September 25, 2026
- 6-Inch Coffee Cake Recipe: Vanilla Bean Swirls and Buttery Streusel Topping - September 25, 2026