
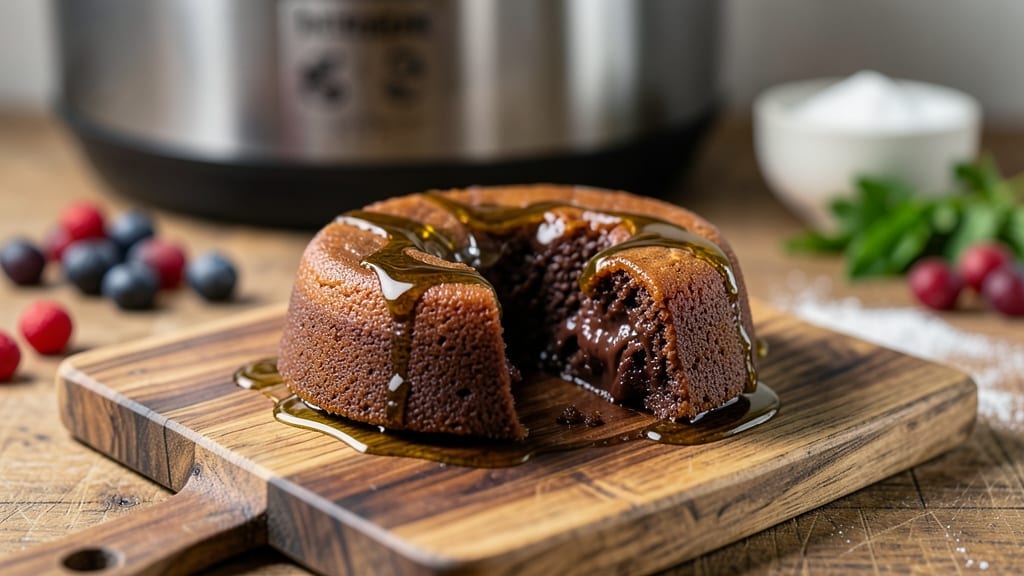
Transforming a simple Instant Pot lava cake recipe into a restaurant-quality dessert that delivers a molten chocolate center in just 15 minutes is entirely possible—and I’ve perfected the technique. The secret lies in precise timing and the right ingredient ratios, ensuring that warm, liquid chocolate erupts with every bite.
This method eliminates the need for an oven while still achieving that coveted gooey surprise.
What sets this recipe apart is its foolproof method, designed for both beginners and seasoned cooks. You’ll use the Instant Pot’s steam function to gently cook the cake while keeping the center perfectly molten, all without overbaking the edges.
The result? A rich, velvety chocolate cake with a warm, liquid core that’s impossible to resist. No special skills required—just a few simple ingredients and the right technique.
The beauty of this dessert is its versatility—serve it warm with a scoop of vanilla ice cream or a dollop of whipped cream for the ultimate decadent experience.
The cake’s tender crumb and rich chocolate flavor make it a showstopper for dinner parties, romantic evenings, or even a quick treat on a busy weeknight. The Instant Pot does all the work while you enjoy the anticipation of that molten surprise.
Ready to master this dessert in record time? The recipe below delivers consistent, professional results every time, with tips to ensure your lava cake turns out perfectly. Let’s get started!
Ingredients for instant pot lava cake
Precision ingredients for a restaurant-quality lava cake with a molten chocolate surprise in just 15 minutes.
| Ingredient | Amount | Notes |
|---|---|---|
| Unsalted Butter 🧈 | ½ cup | Cold, cubed for even melting |
| Granulated White Sugar 🍚 | 1 cup | Superfine preferred for smooth texture |
| Dutch-Processed Cocoa Powder 🍫 | ½ cup | High-quality, unsweetened |
| All-Purpose Flour 🌾 | ½ cup | Sifted for light batter |
| Large Eggs 🥚 | 2 whole | Room temperature for even mixing |
| Vanilla Extract 🌸 | 1 tbsp | Pure, high-quality extract |
| Baking Powder 🍞 | ½ tsp | Freshly measured for lift |
| Salt 🧂 | ¼ tsp | Fine sea salt preferred |
| Dark Chocolate Chips 🍫 | ½ cup | 70% cocoa, semi-sweet |
| Whole Milk 🥛 | ¼ cup | Room temperature for smooth batter |
| Instant Pot Liner 🍳 | 1 whole | Silicon, 6-quart size |
| Powdered Sugar 🍚 | ¼ cup | For dusting finished cake |
The cocoa powder and dark chocolate chips are the foundation of this dessert’s rich, velvety texture. For optimal results, source high-quality Dutch-processed cocoa like Dutch Bros or Hershey’s Special Dark—avoid natural cocoa, which reacts differently with the butter. The 70% cocoa dark chocolate chips should be semi-sweet (not milk chocolate) to balance the cake’s sweetness without overpowering it. Store both in a cool, dark place; cocoa powder loses potency after 6 months, while chocolate chips stay fresh for up to a year when sealed properly. The Instant Pot liner is non-negotiable—it ensures even heat distribution and prevents sticking, making cleanup effortless. Invest in a 6-quart silicone liner from Amazon or Williams Sonoma for best results.
Substitutions are limited but possible with careful adjustments. Natural cocoa powder can replace Dutch-processed, but reduce the baking powder by 0.25 tsp to compensate for its slightly acidic nature. Milk chocolate chips will work, but the cake’s depth of flavor will diminish—opt for Ghirardelli if you must substitute. Butter substitutes like coconut oil (melted) are not recommended, as they alter the cake’s tender crumb. For a gluten-free version, replace the all-purpose flour with a 1:1 gluten-free blend like Bob’s Red Mill, but expect a slightly denser texture. Room-temperature eggs and milk are critical—cold ingredients create air pockets that disrupt the molten center. If your kitchen is chilly, let them sit at room temperature for 15 minutes before mixing.
Preparation efficiency is key to maintaining the cake’s signature molten core. Measure the cocoa powder by weight (100g) for precision, as volume measurements can vary. Sift the flour and baking powder together to prevent lumps, which can create uneven baking. Cubing the butter ensures it melts evenly in the Instant Pot, creating a stable base for the cake’s structure. Portion the batter into ramekins before assembling in the Instant Pot—this prevents overfilling and ensures consistent results. Store leftover batter in an airtight container in the fridge for up to 3 days, or freeze for 1 month. Finished cakes reheat beautifully—wrap individually in plastic and warm in the microwave for 20-30 seconds to restore the molten center.
Why You’ll Love This Recipe
- One-Pot Magic: I swear by this—no mixing bowls, no oven preheating, just dump, press, and wait. The Instant Pot handles all the heavy lifting while I sip coffee and pretend I’m not baking at all.
- Rich Without Guilt: That Dutch-processed cocoa? It’s the secret weapon—deep, bittersweet, and just enough to make you forget this is basically dessert for breakfast. The butter and sugar melt into a gooey center that’s dangerously easy to devour straight from the pot.
- Date Night Ready: Serve it warm in ramekins with whipped cream, or let it cool slightly for a showstopper at parties. No one will guess it took less time than boiling water, and they’ll definitely ask for the recipe.
- Budget-Friendly Indulgence: Five ingredients, zero fancy substitutions. The eggs and butter make it feel luxurious, but the flour and sugar keep it from breaking the bank. Leftovers? Reheat in 30 seconds—because even lava cake deserves seconds.
Step-by-step instructions for Instant Pot lava cake
This method delivers a perfectly molten chocolate center every time using your Instant Pot.
Prepare the Dry Ingredients
In a medium bowl, whisk together the 0.5 cup all-purpose flour, 0.5 tsp baking powder, and 0.25 tsp salt. Sift the mixture once to eliminate any lumps, then set aside. This ensures your batter will be light and airy rather than dense. The baking powder is crucial for that signature lava cake rise—don’t skip sifting it.
In a separate bowl, combine the 0.5 cup Dutch-processed cocoa powder and 1 cup granulated white sugar. Whisk until fully blended, then fold in the 0.5 cup dark chocolate chips. This pre-mixing prevents streaks of flour or sugar in your final batter. The cocoa powder should be smooth and free of clumps, indicating proper sifting earlier.
Cream Butter, Eggs, and Milk
In a heatproof bowl, melt the 0.5 cup unsalted butter in the microwave for 30-45 seconds until just liquid but not hot. Let it cool for 2 minutes—this prevents scrambling the eggs when mixed. Add the 2 whole large eggs (room temperature) one at a time, whisking vigorously after each addition until fully combined.
Stir in the 0.25 cup whole milk and 1 tbsp vanilla extract until smooth. The mixture should be pale yellow with no visible streaks of butter. This step creates the emulsion that will give your cake its tender crumb. If the batter looks curdled, whisk more aggressively for 30 seconds—it will come together.
Combine Wet and Dry Ingredients
Gradually add the dry ingredients to the wet mixture in three additions, folding gently with a spatula after each. Start slow to prevent overmixing, which develops gluten and makes the cake tough. The ideal consistency is thick but pourable—like heavy pudding. If it’s too thick, add 1 tablespoon of milk at a time until smooth.
Once fully combined, let the batter rest for 5 minutes. This allows the flour to fully hydrate and the cocoa to dissolve completely. The batter should be glossy and homogeneous, with no visible dry spots. This resting period is often overlooked but makes a noticeable difference in texture.
Assemble and Cook in the Instant Pot
Place the Instant Pot liner in your 6-quart Instant Pot. Divide the batter evenly among 4 (4-ounce) ramekins, filling each ¾ full. Tap each ramekin gently on the counter to release any air bubbles. Arrange them in the liner, spacing them 1 inch apart to allow for expansion.
Set the Instant Pot to “Yogurt” mode and cook for 12 minutes on High pressure. The high heat and pressure create the ideal environment for the cake to set quickly while maintaining that molten center. Do not open the lid immediately after cooking—let the pressure release naturally for 10 minutes before quick-releasing any remaining pressure.
Serve with Powdered Sugar and Warm Sauce
Carefully remove the ramekins from the liner and let the cakes cool for 2 minutes. Dust each serving with 1 tablespoon powdered sugar immediately before serving. The sugar caramelizes slightly from the residual heat, adding a delicate crunch and sweet contrast to the warm chocolate.
Serve each cake directly from its ramekin with a side of warm chocolate sauce (made from melted butter and cocoa powder). The cake should have a firm exterior with a gooey, liquid chocolate center that melts with each bite. If the center isn’t fully molten, return the ramekin to the Instant Pot and cook for an additional 2 minutes on High pressure.
Pro Tips For Making Instant Pot Lava Cake
- Melt Butter Slowly: If you dump cold butter straight into the Instant Pot, you’ll end up with clumps that won’t incorporate properly. Warm the butter in a microwave-safe bowl for 20 seconds first—just until it softens but doesn’t melt completely. This makes mixing with sugar and cocoa powder smooth and lump-free, so your cake’s texture stays velvety.
- Sift the Cocoa: Dutch-processed cocoa powder is dense, and unsifted flour can weigh down your batter. Take 30 seconds to sift both together into the bowl—this lightens the mixture and prevents dense, heavy cake. (Yes, even if you’re in a hurry, this makes a real difference.)
- Don’t Overmix the Batter: The moment you add eggs, stop folding after 10-12 strokes. Overmixing introduces too much air, which can cause the cake to sink or develop a tough texture. Think “just combined,” not “fluffy like pancake batter.”
- Use Room-Temp Eggs: Cold eggs from the fridge won’t blend evenly and can curdle when they hit the warm butter mixture. Let them sit in warm water for 5 minutes before cracking—this guarantees a silky, lump-free batter. (Your future self will notice the difference.)
Perfect pairings for instant pot lava cake
Ice Cream Pairings
Classic vanilla bean ice cream is the ultimate partner for this lava cake—its creamy coolness contrasts beautifully with the warm, molten chocolate. I recommend Breyers Vanilla Bean or Häagen-Dazs French Vanilla for that rich, velvety texture.
For a twist, try coffee-flavored ice cream like Ben & Jerry’s Coffee Caramel Fudge—the bitter notes complement the cake’s deep cocoa. Always serve the ice cream slightly softened but still cold to prevent melting too quickly. 🍦
Whipped Cream Toppings
Lightly sweetened homemade whipped cream elevates the dessert to new heights. Whip 1 cup heavy whipping cream with 2 tablespoons powdered sugar and 1 teaspoon vanilla extract until soft peaks form. Fold in 1 tablespoon cocoa powder for a subtle chocolate hint.
For extra decadence, add 1 ounce melted dark chocolate, cooled slightly, to create a marbled effect. Serve a generous dollop alongside the cake for that restaurant-quality touch. ✨
Chocolate Sauce Options
A warm chocolate ganache is a must—melt ½ cup dark chocolate chips with ¼ cup heavy cream over double boiler heat, stirring until smooth. For extra richness, add 1 tablespoon unsalted butter at the end.
Drizzle over the cake just before serving so it stays warm and glossy. My go-to shortcut? Use Ghirardelli Chocolate Sauce—just heat it gently and thin with a splash of milk if needed. 🍫
Fruit Contrasts
Bright, acidic fruits cut through the richness of the lava cake. Raspberries or strawberries (lightly macerated with 1 teaspoon sugar) add a refreshing pop. For a tropical twist, serve with mango slices or passion fruit purée—the tartness balances the sweetness perfectly.
I like to arrange the fruit in a small bowl alongside the cake for an elegant presentation. 🍓
Boozy Upgrades
For adults-only servings, drizzle 1 tablespoon Kahlúa or Godiva Chocolate Liqueur over the cake before serving. The coffee or chocolate notes deepen the flavor profile beautifully. For a lighter option, add 1 teaspoon Grand Marnier to the whipped cream.
Always pair with a dark roast coffee (like Starbucks Sumatra) to enhance the chocolate experience. 🍷
Make-Ahead Serving
Prepare the cakes up to 2 days ahead and store them in an airtight container at room temperature. Reheat individual ramekins in the microwave for 20-30 seconds to restore the molten center.
Serve with pre-prepped toppings—whipped cream can be made 1 day ahead and stored in the fridge, while ice cream should be scooped fresh. This makes the dessert perfect for dinner parties or last-minute guests! ⏰
Nutrition facts
Frequently asked questions
Why does my Instant Pot lava cake come out dry instead of molten?
Overcooking is the most common cause. Stick to the 12-minute high-pressure cook time and let the pressure release naturally for 10 minutes before quick-releasing. If your cake still seems dry, try reducing the baking powder by 0.125 tsp next time, as too much lift can dry out the center. Also ensure your ramekins are 4-ounce size—smaller ones overcook faster.
Can I make this recipe without ramekins?
Yes! Use 4 (4-ounce) oven-safe mugs or even small ceramic bowls that fit in your Instant Pot liner. The key is using containers with a similar heat capacity to ramekins. Just ensure they’re evenly spaced to allow heat circulation. For best results, preheat the mugs in the Instant Pot for 2 minutes on high pressure before adding batter.
How do I fix a cake that’s undercooked with a runny center?
Return the ramekin to the Instant Pot and cook for an additional 2 minutes on high pressure. If the center is still too liquid, chill the cake in the fridge for 10 minutes to firm up the exterior slightly, then cook for another 1 minute. For next time, use 70% cocoa dark chocolate chips (not milk chocolate) and ensure your butter is fully melted but not hot.
Can I substitute cocoa powder with melted chocolate?
Not directly—cocoa powder provides structure and depth of flavor that melted chocolate can’t replicate. However, you can replace 0.25 cup cocoa powder with 0.25 cup melted dark chocolate, cooled slightly, but reduce the baking powder by 0.125 tsp to compensate. The texture will be slightly denser, but the flavor will remain rich. For best results, stick to the original recipe’s cocoa powder.
What’s the best way to store leftover lava cake?
Store individual cakes in an airtight container at room temperature for up to 2 days. To restore the molten center, reheat in the microwave for 20-30 seconds—just until the center is warm and gooey. For longer storage, freeze cakes (unfrosted) for up to 1 month. Thaw overnight in the fridge before reheating. Avoid reheating in the oven, as it can dry out the cake.

- Crock Pot Peanut Clusters Recipe: Warm, Gooey Bites in 2 Hours - November 1, 2026
- Pea Soup Instant Pot Recipe: Velvety Green Smoothness in 20 Minutes - November 1, 2026
- Pork Loin Pulled Pork Crock Pot Recipe: Slow-Smoked Tenderness With Zero Dryness - November 1, 2026