
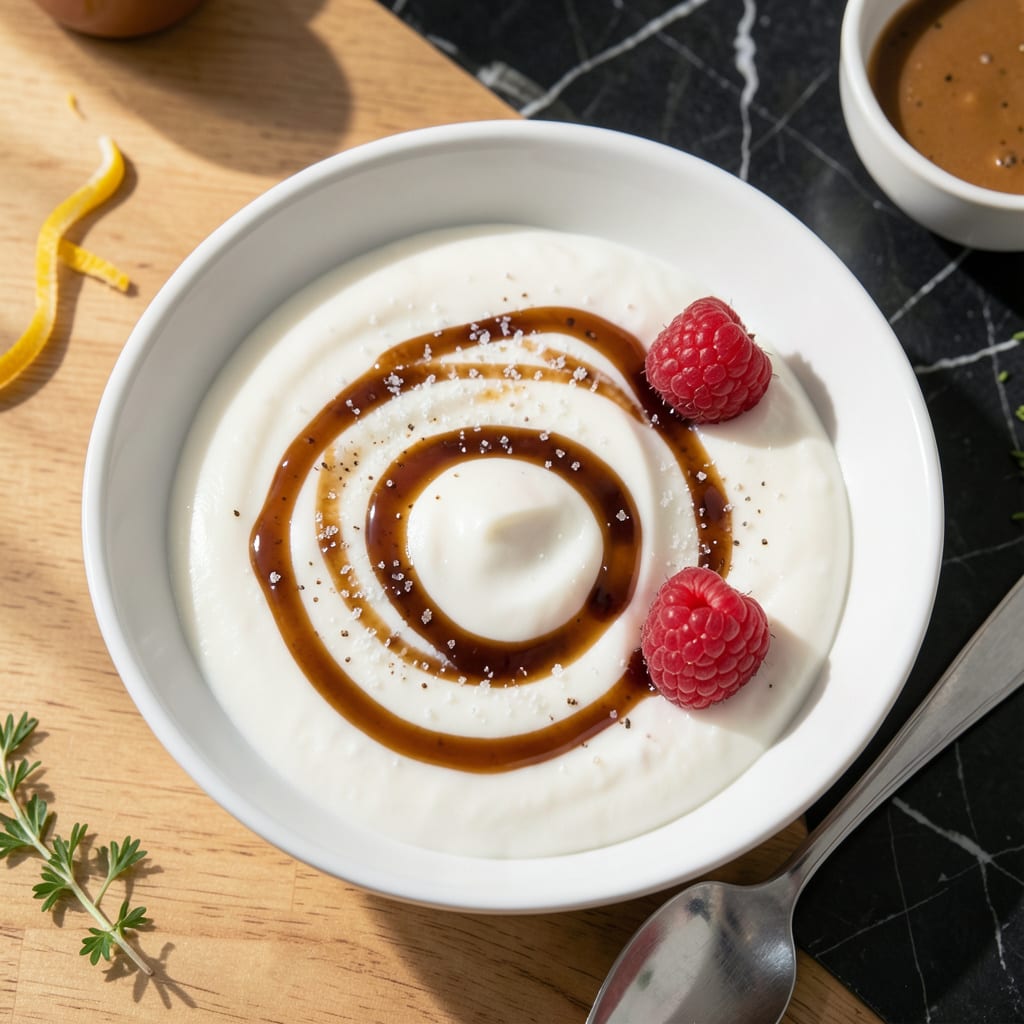
Making perfect yogurt at home is easier than you think with this hands-off method. The Instant Pot provides consistent heat for thickening while maintaining a smooth texture.
This technique delivers thick and tangy results every time. The process is simple, with precise temperature control ensuring professional-quality yogurt without special equipment.
Ingredients for Instant Pot Low Fat Yogurt
Minimal ingredients, maximum flavor. Professional results with everyday staples.
| Ingredient | Amount | Notes |
|---|---|---|
| Whole Milk 🥛 | 1 cup | Low-fat or 2% for consistency |
| Plain Yogurt Starter 🥣 | 2 tbsp | Live active cultures required |
| Granulated Sugar 🍚 | 1 tsp | Optional for slight sweetness |
| Vanilla Extract 🌿 | ½ tsp | Pure extract preferred |
| Water 💧 | 1 cup | For steam and rinsing |
| Non-Fat Dry Milk Powder 🥛 | ¼ cup | Boosts thickness and protein |
| Honey 🍯 | 1 tbsp | Optional for natural sweetener |
| Cornstarch 🌾 | 1 tsp | Thickening agent alternative |
| Lemon Juice 🍋 | ½ tsp | Freshly squeezed for tang |
| Salt 🧂 | 0.125 tsp | Fine grain for even distribution |
The milk is critical here. Organic or high-quality 2% yields the smoothest texture—avoid ultra-pasteurized as it resists culturing. Fairlife or Organic Valley are reliable brands. For the starter, use plain, unsweetened yogurt with live cultures (check the label). Greek yogurt works but may produce a thicker final product. The Instant Pot’s consistent heat eliminates the need for a yogurt maker.
No starter yogurt? Use a commercial yogurt packet—just follow the package instructions. For sweeter yogurt, maple syrup or agave substitute well for honey. The dry milk powder adds body without fat—Carnation is a standard brand. Skip the cornstarch if you prefer natural thickening. Vanilla can be omitted for plain yogurt, or swapped for almond extract.
Fresh yogurt keeps for 7-10 days in the fridge. For longer storage, freeze in portions for up to 3 months. The texture may separate slightly after thawing—just stir vigorously. Always use clean utensils to scoop to prevent contamination.
Why You’ll Love This Recipe
- Set It and Forget: I just dump whole milk and a spoonful of yogurt starter in the Instant Pot, press a button, and walk away—no babysitting required.
- Velvety Vanilla: Honestly, the vanilla extract turns the tangy yogurt into something so smooth and slightly sweet I eat it straight from the jar.
- Breakfast for Days: One batch gives me a week’s worth of grab-and-go yogurt that’s way cheaper than store-bought.
- No Strain, No Pain: I skip the cheesecloth mess—this method thickens right in the pot, so cleanup is just a quick rinse.
Step-by-Step Instructions for Instant Pot Low Fat Yogurt
This hands-off method delivers consistently thick, tangy yogurt with minimal effort and maximum precision.
Step 1: Prepare and Sterilize the Equipment
Begin by thoroughly cleaning your Instant Pot insert and all utensils with hot, soapy water. This eliminates any bacteria that could compete with your yogurt cultures. I always use 1 cup Water to rinse the pot after cleaning—this ensures no soap residue remains.
Add the 1 cup Water to the Instant Pot, then place the trivet inside. The water creates the steam environment needed for the yogurt-making process. Close the lid and set the valve to “Sealing” to prepare for sterilization.
Step 2: Heat and Temper the Milk Mixture
In a separate bowl, whisk together the 1 cup Whole Milk, 0.25 cup Non-Fat Dry Milk Powder, 1 tsp Granulated Sugar, 1 tsp Cornstarch, and 0.125 tsp Salt until fully dissolved. The dry milk powder and cornstarch work synergistically to create a thicker final product.
Pour this mixture into a clean, heat-safe jar that fits inside your Instant Pot. I use a 1-quart mason jar for this quantity. Secure the lid loosely (or use a specialized yogurt jar lid) to allow steam to escape while preventing contamination.
Step 3: Pasteurize and Cool the Base
Place the jar on the trivet inside the Instant Pot. Select the “Yogurt” function, then press “Adjust” until you reach the “Boil” setting. This will heat the milk to 180°F, effectively pasteurizing it to kill any unwanted bacteria.
Once the cycle completes (about 20-25 minutes), carefully remove the jar using oven mitts. The mixture should reach 180°F—verify with an instant-read thermometer. Let it cool to 110°F; this temperature is critical for the cultures to thrive without being destroyed.
Step 4: Inoculate and Incubate
When the mixture reaches 110°F, stir in the 2 tbsp Plain Yogurt Starter, 0.5 tsp Vanilla Extract, 1 tbsp Honey, and 0.5 tsp Lemon Juice. The starter contains the live cultures that will ferment the milk, while the honey and vanilla add subtle sweetness and depth.
Return the jar to the Instant Pot, ensuring the lid is secure but not airtight. Select the “Yogurt” function again, this time setting it for 8-10 hours. The longer the incubation, the tangier the yogurt will become. I’ve found 9 hours hits the perfect balance of thickness and flavor.
Step 5: Chill and Finish
After incubation, the yogurt should have a custard-like consistency. Carefully transfer the jar to the refrigerator and let it chill for at least 4 hours or overnight. This final step halts the fermentation process and allows the yogurt to set completely.
The texture will firm up significantly as it cools. Once chilled, stir the yogurt gently—it will be thick, creamy, and ready to enjoy. The result should be smooth with a pleasant tang and just the right amount of sweetness from the honey and sugar.
Pro Tips For Making Instant Pot Low Fat Yogurt
- Boil Milk First: I learned this the hard way—always heat the whole milk to 180°F in the Instant Pot before cooling to 110°F to pasteurize and create a better texture.
- Use Fresh Starter: Skip old or expired plain yogurt starter; fresh, active cultures guarantee a thicker, tangier low-fat yogurt every time.
- Avoid Temperature Swings: After burning two batches, I finally figured out that keeping the milk between 110-115°F during fermentation prevents grainy yogurt.
- Sweeten After Fermenting: Sounds weird, but it works: mix in granulated sugar and vanilla extract only after the yogurt sets to avoid interfering with the cultures.
Essential Equipment for Perfect Results
Instant Pot Selection
Any 6-quart or 8-quart Instant Pot works perfectly for this recipe. I use my Instant Pot Duo Crisp + Air Fryer because it has precise temperature controls. The yogurt function is standard on most models, including the basic Lux and Duo series.
Jar Requirements
You’ll need heat-safe glass jars that fit inside your Instant Pot. I recommend wide-mouth pint or quart mason jars—they’re durable and easy to clean. Avoid thin glass that might crack under heat. Always check that your jar fits with the lid on before starting.
Thermometer Essentials
A reliable instant-read thermometer is crucial for monitoring temperatures. I use the ThermoWorks Thermapen for its accuracy and speed. Digital models work best, but any food-safe thermometer with 1°F precision will do. 🌡️
Whisk and Utensils
A small wire whisk helps dissolve the dry milk powder completely. I keep a dedicated silicone spatula for stirring the yogurt mixture—it won’t scratch your jars. Wooden spoons work too, but avoid metal utensils that could react with acidic ingredients.
Cooling Setup
To cool the milk quickly to 110°F, prepare an ice bath in a large bowl. I use a stainless steel mixing bowl that fits my jar perfectly. You’ll also need a clean kitchen towel to dry the jar after cooling—moisture can dilute your yogurt.
Storage Containers
For storing finished yogurt, I prefer glass containers with airtight lids. The OXO Good Grips set is my go-to. Plastic works too, but glass won’t absorb odors. Always date your containers—homemade yogurt stays fresh for about 10 days in the fridge. ❄️
Nutrition Facts
Frequently Asked Questions
What kind of milk works best?
Use 2% milk or low-fat milk for best results. Whole milk makes creamier yogurt but adds fat. Fairlife or Organic Valley brands work well. Avoid ultra-pasteurized milk as it resists culturing.
How long does homemade yogurt last?
Fresh yogurt stays good for 7-10 days in an airtight container in the fridge. For longer storage, freeze in portions for up to 3 months. Stir well after thawing.
Why is my yogurt too thin?
Use dry milk powder or cornstarch to thicken. Incubate for the full 8-10 hours. Chilling overnight firms it up. Avoid opening the lid during incubation.
Can I make yogurt without a starter?
Yes, use a commercial yogurt packet with live cultures. Follow package instructions for amount. Plain store-bought yogurt with live cultures also works.

- 8 Bean Soup Recipe Crock Pot: Hearty Vegetable Medley in One Pot - September 25, 2026
- 4C Bread Crumbs Meatballs Recipe: Crispy Crust and Juicy Centers - September 25, 2026
- 6 Oz Chocolate Chip Cookie Recipe: Perfectly Balanced Crispy Edges and Chewy Hearts - September 25, 2026