
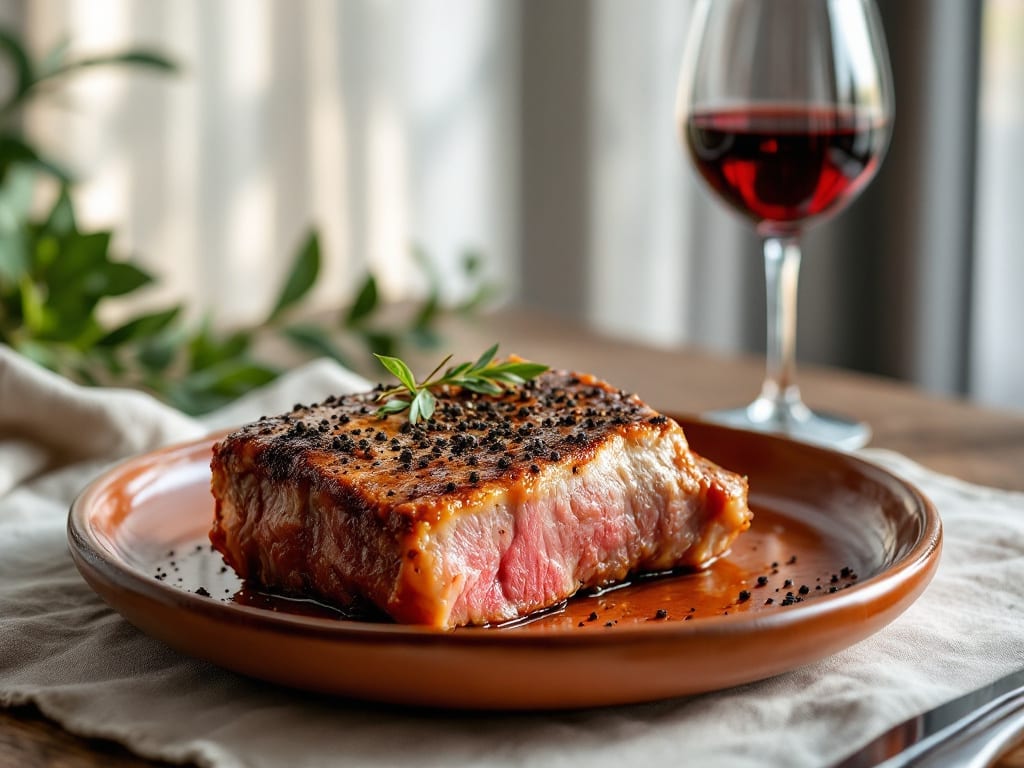
Transforming a simple neck bone into a rich, umami-packed broth in your Instant Pot proves that pressure cooking can deliver restaurant-quality depth at home. The key lies in rendering fat properly before pressure cooking—this creates layers of flavor that traditional stovetop methods can’t match.
My version builds on old-school techniques while adapting them for modern kitchens, ensuring you get maximum extraction without hours of simmering.
This recipe delivers bold, savory broth with tender meat that practically falls apart, all in under an hour. The secret is the two-phase cooking process: first browning the bone to develop the Maillard reaction, then pressure cooking with aromatics to infuse flavor into every drop of liquid.
No need for fancy equipment—just your Instant Pot and a few basic ingredients that work together like a well-rehearsed symphony.
What you’ll end up with is a deeply flavorful broth that’s perfect for soups, stews, or even as a base for risotto. The meat becomes so tender it shreds easily, adding richness to any dish.
The best part? This method preserves all the collagen and gelatin that give traditional bone broths their signature thickness and body, but with a fraction of the effort.
Pair this with crusty bread, roasted vegetables, or fresh herbs for a complete meal that feels indulgent yet requires minimal active time. Let’s get started on creating broth that rivals your favorite restaurant’s version—but with the convenience of pressure cooking.
Ingredients for instant pot neck bone
Rich umami starts with these simple yet powerful ingredients—bone-in beef, aromatic vegetables, and herbs that build depth.
| Ingredient | Amount | Notes |
|---|---|---|
| Beef Neck Bones 🦴 | 2 lb | Raw, uncooked, with marrow |
| Yellow Onion 🧅 | 1 whole | Cut into 4 wedges, skin on |
| Carrots 🥕 | 4 whole | Large, roughly chopped |
| Celery Stalks 🌿 | 4 whole | Cut into 2-inch pieces |
| Garlic Cloves 🧄 | 6 cloves | Smashed, skin on |
| Fresh Rosemary 🌿 | 2 sprigs | Or 1 tbsp dried |
| Fresh Thyme 🌿 | 2 sprigs | Or 1 tsp dried |
| Black Peppercorns 🌶️ | 1 tbsp | Crushed, not ground |
| Bay Leaves 🍃 | 2 whole | Dried, standard size |
| Apple Cider Vinegar 🍎 | 2 tbsp | For collagen extraction |
| Diamond Crystal Kosher Salt 🧂 | 1 tsp | For seasoning, not preservation |
| Water 💧 | 6 cups | Filtered preferred |
| Extra-Virgin Olive Oil 🫒 | 1 tbsp | For searing bones |
The neck bones are the foundation—look for marrow-rich bones at your butcher or Costco for the best flavor. Whole Foods or local farmers markets often carry high-quality beef bones too. Avoid pre-cut bones without marrow—they lack the gelatin that creates that silky texture. For maximum flavor, choose bones with visible fat marbling. If you’re buying from a regular grocery store, check the meat section or ask the butcher for ‘beef neck bones’—they’re often sold in bulk bins. The more surface area you can sear, the better the flavor development.
No fresh rosemary or thyme? Dried works at one-third the amount, but fresh gives that bright herbal note. Running short on carrots? Substitute with parsnips or turnips—they add sweetness too. The apple cider vinegar is non-negotiable though—it helps break down collagen faster. No vinegar? Lemon juice works in a pinch, but reduce to 1 tbsp. For the olive oil, avocado oil has a higher smoke point if you’re worried about burning, but extra-virgin olive oil adds great flavor. The black peppercorns should be crushed between your fingers—not ground in a spice grinder—to release their oils fully.
This broth gets better with time—48 hours in the fridge lets the flavors meld perfectly. Store in airtight containers with a layer of fat on top to preserve freshness. Freezes beautifully for up to 6 months—portion into ice cube trays for easy thawing. The meat will shred easily after cooking; save it for soups, tacos, or sandwiches. If you’re making a big batch, double the recipe—broth freezes well in quart-sized bags, flat and labeled with the date.
Why You’ll Love This Recipe
- Dump-and-Go Magic: I swear, the hardest part is peeling the carrots—then it’s just boom, dump everything in, walk away. No fancy searing, no constant stirring, just that rich broth building while you handle whatever else life throws at you.
- Deep, Caramelized Goodness: That neck bone? It melts into the pot, leaving behind a sauce so rich it makes store-bought gravy look sad. The onions and garlic turn golden and sweet, while the celery adds this subtle earthiness—like a hug in a bowl.
- Leftovers That Feel Like a Treat: Honestly, I make this on Sundays just so I can reheat it all week. The bones get even more tender, and the broth gets deeper—perfect for quick lunches or feeding a crowd without stress. (Yes, even on a Tuesday night.)
- Budget Bone Broth Gold: Between us, this is how I stretch my grocery budget without sacrificing flavor. Neck bones are cheap, and one pot feeds my family for days—no takeout, no guilt. Plus, the veggies add nutrients without costing extra. Win-win.
Step-by-step instructions for Instant Pot neck bone broth
Here’s how to extract maximum flavor from your beef neck bones using pressure cooking.
Sear the Bones for Deep Flavor
Place the 2 lb beef neck bones in your Instant Pot and add the 1 tablespoon extra-virgin olive oil. Set the valve to “Venting” and select the “Sauté” function. Increase heat to medium-high and let the bones sear undisturbed for 8-10 minutes until they develop a rich, golden-brown crust.
Here’s the thing—this searing step is non-negotiable. The Maillard reaction that occurs creates complex flavors that dissolve into your broth. I like to turn the bones occasionally to ensure even browning on all sides. You’ll know it’s ready when the oil shimmers and the bones release easily from the pot.
Add Aromatics and Vinegar for Umami Boost
Once the bones are well-seared, add the 1 whole yellow onion (cut into wedges), 4 whole carrots (roughly chopped), 4 whole celery stalks (cut into 2-inch pieces), 6 smashed garlic cloves (skin on), 2 sprigs fresh rosemary, 2 sprigs fresh thyme, 1 tablespoon crushed black peppercorns, and 2 whole bay leaves. Pour in the 2 tablespoons apple cider vinegar and sprinkle with 1 teaspoon diamond crystal kosher salt.
The vinegar plays a crucial role here—it helps extract collagen from the bones and bones, giving your broth that signature depth. I always add the vinegar after searing so it doesn’t cook off before the pressure phase begins. Give everything a quick stir to distribute the aromatics evenly around the bones.
Pressure Cook for Maximum Collagen Extraction
Pour in the 6 cups water, making sure all the bones and vegetables are submerged. Secure the lid and set the valve to “Sealing.” Select the “High Pressure” function and cook for 2 hours. This longer cook time is essential for breaking down the connective tissue and extracting gelatinous collagen that gives bone broth its signature richness.
Real talk: Don’t be tempted to skip this time. The collagen needs 2 hours to fully dissolve. You’ll know it’s working when you see the broth turn cloudy and develop a thick, jelly-like consistency after cooling. The Instant Pot will automatically switch to “Keep Warm” mode when done.
Strain and Reduce for Concentrated Flavor
Once the cooking cycle completes, allow the pressure to release naturally for 15 minutes before carefully opening the lid. Line a fine-mesh strainer with cheesecloth or a coffee filter and strain the broth into a clean pot or bowl. Discard the solids—you’ve extracted all the flavor you need from them.
Return the strained broth to the Instant Pot and select the “Sauté” function. Simmer uncovered on medium heat for 15-20 minutes to reduce the broth slightly. This reduction intensifies the flavor and creates that velvety texture we all love. You’ll know it’s ready when the volume reduces by about 20% and the aroma becomes even more concentrated.
Pro Tips For Making Instant Pot Neck Bone
- Sear Bones First: I learned this the hard way—skipping the sear means flavor gets stuck in the pot instead of coating every bite. Use high heat for 3-4 minutes per side until deep brown, even if it looks messy. That crust is where the magic lives.
- Chop Veggies Evenly: Big onion chunks? Uneven carrots? They’ll cook at different speeds and turn to mush. Cut everything—onions, celery, carrots—into 1-inch pieces. Garlic? Smash those cloves instead of mincing; they’ll infuse better without burning.
- Skip the Overcrowding: Stuffing the pot too full traps steam and keeps the neck bones tough. Start with a layer of bones, then half the veggies, then liquid. If it looks packed, add a quick sauté to the veggies first—they’ll shrink down fast.
- Pressure Cook Low: High pressure = rubbery bones. After searing, set the Instant Pot to low pressure for 90 minutes. The extra time at gentler heat breaks down collagen without turning the meat to shoe leather. (Yes, even if the timer feels slow.)
Flavor customization for this instant pot neck bone
Spicy Kick
Add 1-2 tablespoons of gochujang or 1-2 tsp of cayenne pepper during the pressure cook phase for a fiery broth that pairs perfectly with noodle dishes. I like to balance it with 1 tablespoon of honey or maple syrup after cooking to mellow the heat slightly while adding depth.
This variation works especially well with Asian-inspired meals like pho or ramen. 🌶️
Herbal Infusions
Swap out the rosemary and thyme for fresh sage or tarragon to create an herbal variation that tastes like a French countryside stew. Add 1 sprig of each herb during the pressure cook phase, then strain them out after cooking.
For a citrus twist, toss in 2 orange peels (no pith) when adding aromatics—they’ll infuse the broth with bright, zesty notes.
Mushroom Depth
Add 8 oz of shiitake mushrooms (stems removed) to the Instant Pot during the searing phase. The mushrooms will release their umami-rich juices into the broth, creating a deeper, earthier flavor profile.
I recommend using dried shiitakes for maximum intensity—just rehydrate them in hot water first. This variation works beautifully with Asian-inspired soups or as a base for mushroom risotto.
Smoky Char
For a smoky twist, add 1 smoked paprika and ½ teaspoon of liquid smoke during the pressure cook phase. This creates a deep, campfire-like flavor that pairs perfectly with hearty dishes like chili or beef stew.
I like to finish with a sprinkle of smoked sea salt for an extra layer of complexity. This variation is ideal for fall and winter meals when you crave comforting, smoky flavors. 🔥
Creamy Finish
After straining the broth, stir in ½ cup of coconut milk or ¼ cup of heavy cream during the reduction phase for a velvety texture. This creates a luxurious broth perfect for creamy soups or as a base for risotto.
For extra richness, add 1 tablespoon of butter at the end. This variation transforms your broth into a versatile ingredient for indulgent dishes.
Citrus Brightness
Add 1 lemon or lime (cut into wedges) along with the aromatics to infuse the broth with bright, citrusy notes. The acidity helps balance the richness of the beef while adding a refreshing twist.
I like to finish with a squeeze of fresh juice and a sprinkle of zest before serving. This variation works beautifully with seafood dishes or as a refreshing summer broth. ✨
Nutrition facts
Frequently asked questions
Why do I need to sear the neck bones before pressure cooking?
The searing step is crucial because it creates the Maillard reaction, which develops deep, complex flavors that dissolve into your broth. When you brown the bones, you’re building a rich, caramelized crust that adds layers of umami and savory notes. Skipping this step means missing out on that restaurant-quality depth, even with pressure cooking.
Can I use frozen neck bones in this recipe?
No, frozen bones won’t work well here. The 2-hour pressure cook time relies on even cooking and proper collagen extraction, which frozen bones can’t achieve safely. Always use fresh or thawed bones—pat them dry before searing to ensure a good crust. If you must thaw, do it overnight in the fridge, never at room temperature.
How do I know when the broth is ready?
Your broth is ready when it develops a cloudy, jelly-like consistency after cooling. The meat should shred easily, and the aroma should be intensely rich and savory. If you reduce it further, the volume should decrease by about 20% and the flavor will become even more concentrated. For extra assurance, chill it overnight—the fat will solidify on top, indicating proper collagen extraction.
What can I do with the leftover meat after straining?
The shredded meat is packed with flavor—use it in tacos, sandwiches, or grain bowls! It’s also perfect for adding to soups, stews, or even as a topping for mashed potatoes. For extra richness, toss it back into the broth before serving. If you won’t use it immediately, store it in the fridge for up to 4 days or freeze it for 3 months. Every bite will taste like you’ve been simmering for hours.
Can I make this recipe with chicken or pork neck bones instead?
While you can use chicken or pork neck bones, beef delivers the deepest flavor and richest collagen. Chicken bones cook faster (1 hour instead of 2 hours) but yield a lighter broth, while pork bones can become greasy. If you prefer poultry, try a 1.5-hour cook time and add extra aromatics. For pork, reduce the cook time to 1.5 hours and strain carefully to remove excess fat.

- Baked Potatoes in Crock Pot Recipe: Buttery Interiors and Crispy Top Magic - November 1, 2026
- Braised Beef Short Ribs Recipe: Crock Pot Fall-Off-Bone Magic in 6 Hours - November 1, 2026
- Crock Pot Cocoa Recipe: Velvety Warmth With Hidden Spice Magic - November 1, 2026