
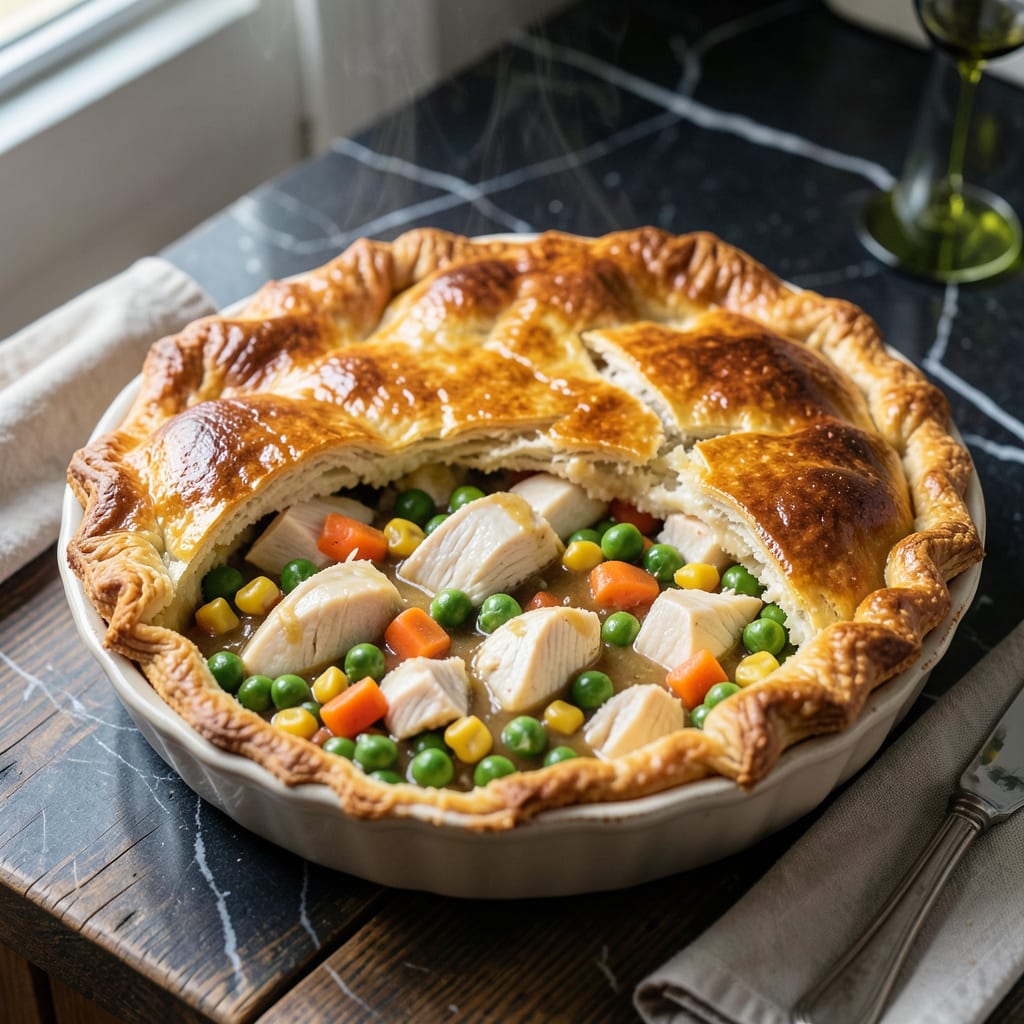
Achieving a flaky crust with savory filling in an Instant Pot is absolutely possible with the right technique.
This pressure-cooked method delivers tender, rich results without the fuss of traditional baking. The key is layering ingredients properly to maintain texture throughout.
Ingredients for Instant Pot Pie
A flaky crust and hearty filling come together effortlessly in your pressure cooker.
| Ingredient | Amount | Notes |
|---|---|---|
| All-Purpose Flour 🌾 | 2 cups | Plus extra for dusting |
| Unsalted Butter 🧈 | ¾ cup | Cold, cubed for flakiness |
| Ice Water 💧 | ¼ cup | Plus 1 tbsp as needed |
| Salt 🧂 | ½ tsp | Divided for crust and filling |
| Boneless Chicken Breast 🍗 | 1 lb | Cut into 1-inch cubes |
| Frozen Mixed Vegetables 🥕 | 1 ½ cups | Peas, carrots, corn blend |
| Chicken Broth 🍲 | 1 ¼ cups | Low-sodium preferred |
| Heavy Cream 🥛 | ½ cup | Full-fat for richness |
| Onion Powder 🧅 | 1 tsp | For savory depth |
| Garlic Powder 🧄 | 1 tsp | Balances the filling |
| Black Pepper 🌶️ | ½ tsp | Freshly ground preferred |
| Dried Thyme 🍃 | ½ tsp | Crushed between fingers |
| Egg 🥚 | 1 whole | For egg wash on crust |
| Cornstarch 🌾 | 1 tbsp | Thickens the filling |
The crust demands cold ingredients. King Arthur Flour is my go-to for consistent results, and Plugrá or Kerrygold butter gives superior flakiness. Keep the butter and water ice-cold until the moment of use—this prevents the fat from melting prematurely, which is essential for that flaky texture promised in the title. Most supermarkets carry these brands, but specialty grocers like Whole Foods often have higher-quality options.
No chicken? Turkey breast or firm tofu works well. Out of mixed vegetables? Use frozen peas and diced carrots in equal parts. For a richer filling, swap the heavy cream for half-and-half at double the quantity. The broth can be vegetable-based if preferred. If you don’t have cornstarch, all-purpose flour at 1.5 times the amount will thicken the filling, though the result may be slightly less glossy.
Assemble the pie just before cooking—don’t let the crust sit assembled or it’ll get soggy. Leftovers keep 3-4 days in the fridge, though the crust softens over time. Reheat in the Instant Pot with a splash of broth to revive the filling, or crisp the crust under a broiler for 2-3 minutes.
Why You’ll Love This Recipe
- One Pot Wonder: I toss everything in the Instant Pot and walk away—no rolling pins, no messy counters, just flaky crust and tender chicken.
- Buttery Perfection: The unsalted butter in the crust melts into layers so good, I catch myself sneaking bites before it’s even cooled.
- Feeds the Crew: Between us, this stretches to four generous servings, so it’s my go-to for Sunday dinner or leftovers on Monday.
- Budget Friendly: Honestly, chicken breast and basic pantry staples keep this dish light on the wallet but heavy on satisfaction.
Step-by-Step Instructions for Instant Pot Pie
Master the pressure cooker method for a golden crust and rich, creamy filling in one pot.
Step 1: Prepare the Flaky Crust Dough
In a food processor, pulse the 2 cups all-purpose flour with 0.5 tsp salt to combine. Add the 0.75 cup unsalted butter, cubed and chilled, and pulse until the mixture resembles coarse crumbs with pea-sized butter pieces visible.
With the processor running, drizzle in the 0.25 cup ice water through the feed tube until the dough just begins to come together. Turn it out onto a lightly floured surface and gently press into a cohesive ball. Avoid overworking—this ensures the butter stays cold for maximum flakiness. Wrap in plastic and refrigerate for 30 minutes.
Step 2: Pressure-Cook the Savory Filling
Set the Instant Pot to “Sauté” and add the 1 lb boneless chicken breast, cut into 1-inch cubes. Season with 0.5 tsp salt, 1 tsp onion powder, 1 tsp garlic powder, 0.5 tsp black pepper, and 0.5 tsp dried thyme. Sear for 3-4 minutes until the chicken begins to brown.
Stir in the 1.5 cups frozen mixed vegetables, 1.25 cups chicken broth, and 1 tbsp cornstarch until fully combined. Secure the lid, set the valve to “Sealing,” and cook on “High Pressure” for 5 minutes. Allow a natural pressure release for 5 minutes, then quick-release any remaining pressure.
Step 3: Thicken the Filling and Add Cream
Set the Instant Pot back to “Sauté” mode. Stir in the 0.5 cup heavy cream and simmer for 3-4 minutes until the filling thickens to a gravy-like consistency. Taste and adjust seasoning if needed—the sauce should coat the back of a spoon without being gluey.
This step develops the rich, velvety texture that defines the dish. The cornstarch ensures the filling holds its shape when sliced, while the cream adds a luxurious finish. Keep the heat at a gentle simmer to prevent curdling.
Step 4: Assemble and Pressure-Cook the Pie
Roll out the chilled dough to a 12-inch circle on a lightly floured surface. Transfer the filling to a heatproof dish that fits inside your Instant Pot (a 6-cup oven-safe bowl works well). Top with the dough, crimping the edges to seal. Cut a few small slits in the center for steam to escape.
Place the trivet in the Instant Pot with 1 cup water, then carefully lower the dish onto the trivet. Secure the lid, set the valve to “Sealing,” and cook on “High Pressure” for 12 minutes. Allow a natural release for 10 minutes before opening the lid.
Step 5: Finish and Serve
Carefully remove the dish from the Instant Pot. Brush the crust with a beaten egg for a golden sheen, then broil in the oven for 2-3 minutes until deep golden brown. Let it rest for 5 minutes before slicing—this allows the filling to set slightly.
The crust should be flaky and tender, with a rich, creamy filling that holds its shape. Serve warm, ensuring each portion has a generous amount of crust and filling for the perfect balance of textures.
Pro Tips For Making Instant Pot Pie
- Chill the Dough: Pop your flour and butter mixture in the fridge for 15 minutes before adding ice water—I learned this the hard way after my first three crusts turned tough.
- Cube the Chicken: Cut the boneless chicken breast into 1-inch pieces so it cooks evenly and fast in the Instant Pot, about 8-10 minutes on high pressure.
- Skip Overworking: Mix the dough just until it comes together; overworking it makes the crust chewy instead of flaky.
- Use Cold Butter: Keep your butter ice cold and cut it into small cubes before mixing with flour—this guarantees a crust that’s actually crispy, not greasy.
Wine and Beer Pairings for This Dish
Creamy Wine Pairings
This rich dish pairs beautifully with a buttery Chardonnay from California—its creamy texture complements the filling. I love Kendall-Jackson Vintner’s Reserve for its balance of oak and citrus notes. The wine’s acidity cuts through the richness perfectly. 🍷
Crisp White Options
A dry Sauvignon Blanc from New Zealand offers zesty acidity that refreshes your palate between bites. Oyster Bay is an affordable choice with bright grapefruit and herbal notes. Serve it slightly chilled for best results.
Light Red Choices
If you prefer red, go for a light-bodied Pinot Noir from Oregon. Meiomi delivers soft tannins and red fruit flavors that won’t overpower the dish. Avoid heavy Cabernets—they’ll clash with the creamy filling.
Beer Pairings
A crisp American Lager like Samuel Adams cleanses your palate with its light, refreshing profile. For craft beer lovers, a Belgian-style Witbier with citrus notes complements the savory filling beautifully. 🍺
Non-Alcoholic Options
For non-drinkers, sparkling apple cider offers effervescence that mimics wine. I recommend Martinelli’s Gold—its sweet-tart flavor balances the dish’s richness. Serve it ice-cold for maximum refreshment.
Nutrition Facts
Frequently Asked Questions
Can I use store-bought pie crust?
Yes! Use 1 refrigerated pie crust for convenience. Unroll it to cover your dish, sealing edges tightly. Homemade tastes better, but store-bought saves 20 minutes of prep.
Why did my filling turn out watery?
Likely not enough thickening time. After adding cream, simmer for the full 3-4 minutes and ensure cornstarch is fully dissolved. Natural release also helps the filling set.
Can I make this vegetarian?
Swap chicken for 14 oz firm tofu or 2 cups chickpeas. Use vegetable broth and add 1 tsp soy sauce for depth. The cooking time remains the same.

- 4C Bread Crumbs Meatballs Recipe: Crispy Crust and Juicy Centers - September 25, 2026
- 6 Oz Chocolate Chip Cookie Recipe: Perfectly Balanced Crispy Edges and Chewy Hearts - September 25, 2026
- 6-Inch Coffee Cake Recipe: Vanilla Bean Swirls and Buttery Streusel Topping - September 25, 2026