
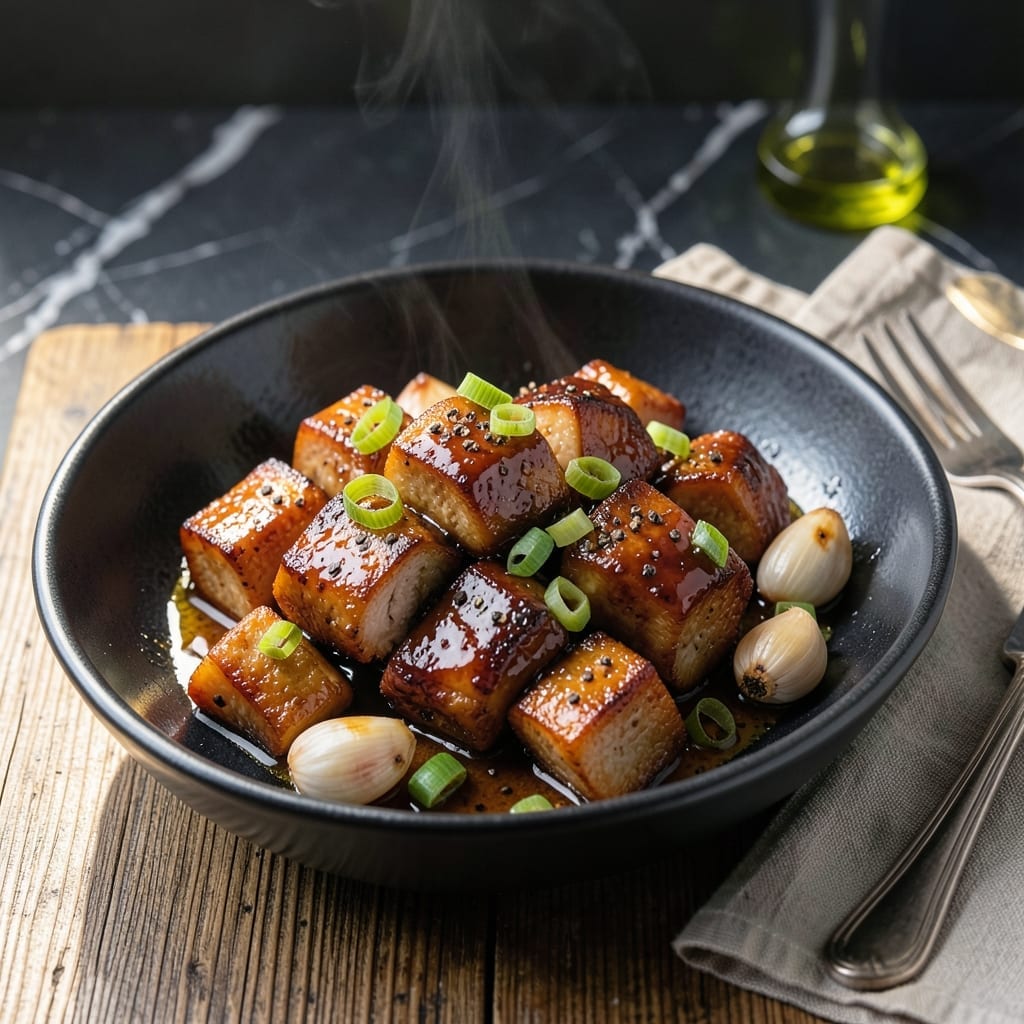
Achieving both crispy edges and tender meat with pork belly is a culinary challenge worth mastering. This method delivers restaurant-quality results without the long braising time.
The Instant Pot transforms tough pork belly into melt-in-your-mouth bites in a fraction of the time. A quick sear before pressure cooking creates that coveted crispy exterior while locking in juices.
What sets this apart is the dual texture—fatty layers become silky, while the skin develops a satisfying crunch. The pressure cooker infuses the meat with deep, caramelized flavors.
Perfect for rice bowls or tacos, this technique ensures every bite delivers on both tender richness and crispy contrast. The results speak for themselves.
Ingredients for Instant Pot Pork Belly
Transform pork belly into crispy, tender bites with these essential ingredients for pressure-cooked perfection.
| Ingredient | Amount | Notes |
|---|---|---|
| Pork Belly 🥓 | 1 ½ lb | Skin-on, cut into 1-inch cubes |
| Kosher Salt 🧂 | 1 tbsp | Diamond Crystal preferred |
| Black Pepper 🌶️ | 1 tsp | Freshly ground for best flavor |
| Garlic Cloves 🧄 | 4 cloves | Minced finely for even distribution |
| Soy Sauce 🫒 | ½ cup | Low-sodium for controlled seasoning |
| Brown Sugar 🍚 | ¼ cup | Light or dark variety |
| Rice Vinegar 🍯 | 2 tbsp | Balances sweet and savory |
| Sesame Oil 🫒 | 1 tbsp | Toasted for nutty aroma |
| Ginger 🌿 | 1 tbsp | Fresh, finely grated |
| Green Onions 🧅 | ½ cup | Thinly sliced for garnish |
| Water 💧 | 1 cup | For pressure cooking |
| Cornstarch 🌾 | 2 tbsp | For crispy coating |
| Vegetable Oil 🫒 | 2 tbsp | High smoke point for searing |
The pork belly quality is paramount. Look for skin-on cuts with even fat marbling at Whole Foods or your local butcher—avoid pre-cut pieces with inconsistent fat layers. Asian markets often carry superior quality at better prices. The skin should be intact and smooth, not tough or wrinkled. For the soy sauce, Kikkoman or Pearl River Bridge offer consistent flavor profiles that balance the dish perfectly.
No pork belly? Pork shoulder with fat cap can work in a pinch, though texture differs. Swap brown sugar for coconut sugar at equal amounts. If avoiding gluten, use tamari instead of soy sauce. Fresh ginger is ideal, but ground ginger at half the quantity works too. The sesame oil is non-negotiable for authentic flavor—Kadoya brand is a reliable choice at most Trader Joe’s locations.
Store raw pork belly in the coldest part of your fridge for up to 3 days. Once cooked, leftovers keep for 4-5 days refrigerated or 3 months frozen. Reheat in the air fryer to restore crispiness—microwaving makes it soggy.
Why You’ll Love This Recipe
- I’ll be real: it tastes even better the next day, and I always make extra for sandwiches or fried rice.
- Set It and Forget: I throw everything in the Instant Pot, press a button, and walk away—no babysitting required.
- Garlic-Soy Magic: Honestly, the soy sauce and garlic transform the pork belly into something ridiculously good.
- Weeknight Hero: Between us, it’s my go-to for busy evenings when I need dinner fast but still want it to feel special.
Step-by-Step Instructions for Instant Pot Pork Belly
This method delivers fall-apart tenderness with a crispy finish, using precise pressure cooking and finishing techniques.
Step 1: Season and Sear the Pork Belly
Pat the 1.5 lb pork belly cubes dry with paper towels. Season all sides with 1 tbsp kosher salt and 1 tsp black pepper. This ensures even flavor penetration and a well-seasoned foundation.
Heat 2 tbsp vegetable oil in the Instant Pot on sauté mode until shimmering. Working in batches to avoid crowding, sear the pork belly cubes until deep golden brown on all sides, about 3-4 minutes per batch. This step builds a flavorful crust and renders some fat.
Step 2: Build the Flavor Base
After removing the seared pork belly, reduce heat to medium. Add 4 cloves minced garlic cloves and 1 tbsp grated ginger to the pot. Sauté for 30-45 seconds until fragrant but not browned—burnt garlic turns bitter.
Pour in 0.5 cup soy sauce, 0.25 cup brown sugar, 2 tbsp rice vinegar, and 1 tbsp sesame oil. Stir to dissolve the sugar and deglaze the pot, scraping up any browned bits. These elements form a balanced sweet-savory-tangy sauce.
Step 3: Pressure Cook to Tenderness
Return the seared pork belly to the pot. Add 1 cup water—this provides the necessary liquid for pressure cooking. Stir gently to combine, ensuring the pork belly is mostly submerged in the liquid.
Secure the lid and set the Instant Pot to high pressure for 25 minutes. Once cooking completes, allow a natural pressure release for 10 minutes, then quick-release any remaining pressure. The pork belly should be fork-tender at this stage, with the meat easily pulling apart.
Step 4: Crisp and Finish
Transfer the cooked pork belly to a plate using a slotted spoon. In a bowl, toss the pork belly with 2 tbsp cornstarch until evenly coated. This starch layer is crucial for achieving that promised crispy exterior.
Heat a skillet over medium-high heat with a small amount of oil. Fry the coated pork belly in batches until deeply caramelized and crispy, about 3-4 minutes per side. The cornstarch will create a delicate, crackling crust that contrasts beautifully with the tender interior.
Garnish with 0.5 cup thinly sliced green onions and serve immediately while hot and crispy. The residual sauce from the Instant Pot can be reduced and drizzled over the top for added flavor.
Pro Tips For Making Instant Pot Pork Belly
- Score the Fat: Cut deep crosshatches into the pork belly skin—about 1/4 inch apart. I learned this the hard way: shallow scores shrink and disappear during cooking, leaving you with a chewy instead of crispy finish.
- Sear First: Use the sauté function to brown the pork belly well on all sides before pressure cooking. After burning three batches, I finally figured out that skipping this step means bland, pale meat.
- Use Enough Liquid: Add at least 1 cup of liquid—water, broth, or even a mix with soy sauce—to avoid the burn notice. Sounds weird, but it works: the pork belly releases fat, not moisture.
- Natural Release: Let the pressure release naturally for 10 minutes before quick-releasing. I was skeptical until I tried it—this prevents the pork from seizing up and drying out.
Storing and Reheating This Recipe
Refrigerator Storage
Let cooled pork belly rest for 30 minutes before storing. Transfer to airtight containers—I use glass Pyrex with snap-on lids. Refrigerate at 40°F or below for up to 4 days. The flavors deepen overnight as the sauce absorbs into the meat. ❄️
Freezer Storage
For longer storage, freeze in single layers on a tray first, then transfer to freezer bags. This prevents clumping. Label with the date and freeze for up to 3 months. Use quart-sized bags for portion control, leaving 1 inch headspace for expansion.
Air Fryer Reheating
This is my top method for restoring crispiness. Preheat air fryer to 375°F. Spread pork belly in a single layer and heat for 4-5 minutes, shaking halfway. The circulating air revives the crunch beautifully. I recommend Ninja or Cosori models for even results.
Oven Reheating
Preheat oven to 400°F and line a baking sheet with parchment. Arrange pork belly in a single layer and bake for 8-10 minutes, flipping once. This method works well for larger batches. Watch closely to prevent over-browning.
Sauce Storage
Store leftover sauce separately in a small jar. It keeps for up to 1 week refrigerated. Reheat gently in a saucepan with 1 tbsp water to thin if needed. Drizzle over reheated pork belly just before serving. 💡
Nutrition Facts
Frequently Asked Questions
Do I need to remove the skin before cooking?
No, the skin helps create that crispy texture. Just
Can I use a different cut of pork? Pork shoulder works in a pinch but won’t be as rich. Stick with skin-on belly for best results. The fat content and marbling are key to achieving that perfect tender-crispy balance.
Why did my pork belly turn out tough?
Undercooking is the most common cause. Ensure you pressure cook for the full 25 minutes plus natural release. Also, don’t skip the cornstarch coating before final crisping.
How do I make it extra crispy?
After pressure cooking, pat the pieces very dry before tossing in cornstarch. Then fry in medium-high heat oil until deeply golden. This double-crisp method guarantees a satisfying crunch.

- 4C Bread Crumbs Meatballs Recipe: Crispy Crust and Juicy Centers - September 25, 2026
- 6 Oz Chocolate Chip Cookie Recipe: Perfectly Balanced Crispy Edges and Chewy Hearts - September 25, 2026
- 6-Inch Coffee Cake Recipe: Vanilla Bean Swirls and Buttery Streusel Topping - September 25, 2026