
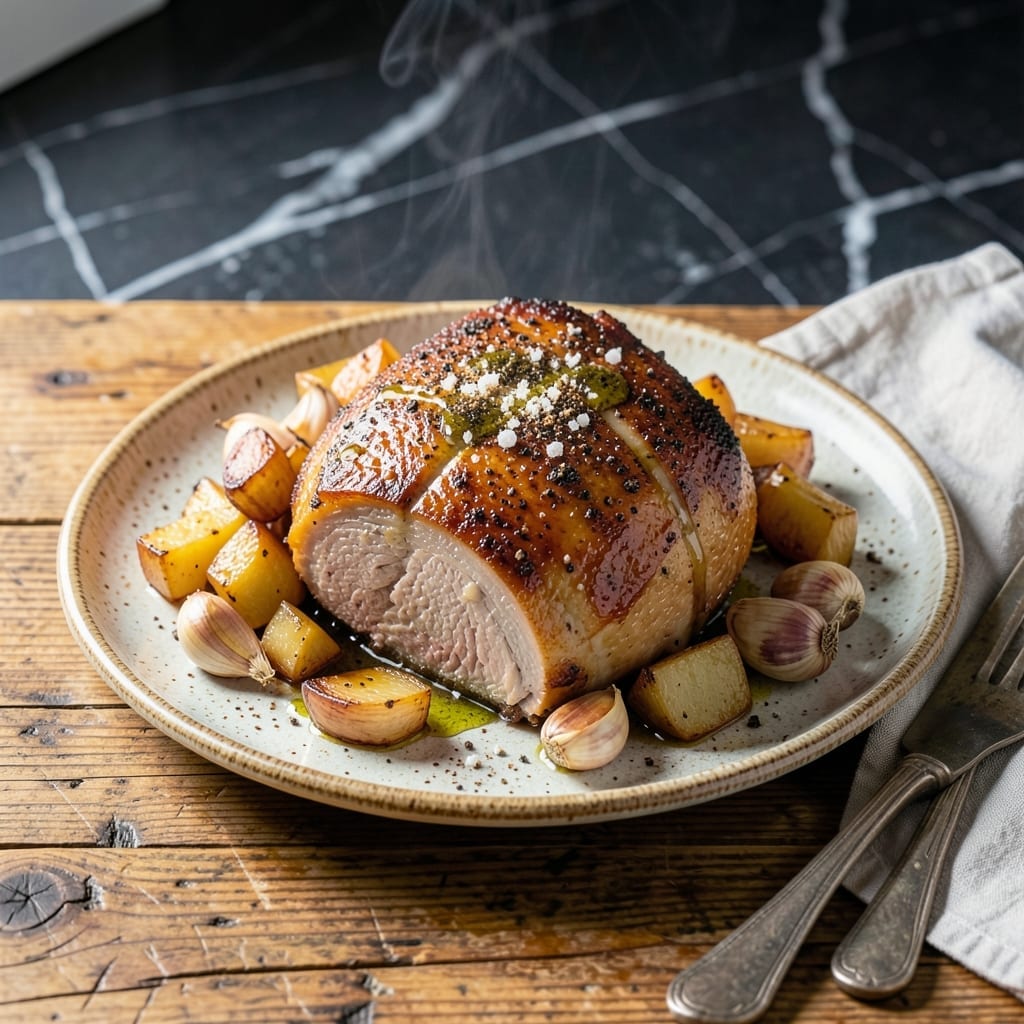
This Instant Pot method transforms tough pork picnic into fall-off-the-bone tenderness with minimal effort. The pressure cooker infuses smoky depth while locking in natural juices.
I developed this technique after years of struggling with dried-out pork. The key is searing the meat first, then pressure cooking with a flavorful liquid to create a self-basting environment.
You’ll end up with juicy, flavorful pork that shreds easily and absorbs every bit of the cooking liquid. It’s perfect for sandwiches, tacos, or serving over rice.
This foolproof approach delivers consistent results every time, making it ideal for busy weeknights or meal prep.
Ingredients for Instant Pot Pork Picnic
Transform tough pork picnic into tender perfection with these carefully selected ingredients.
| Ingredient | Amount | Notes |
|---|---|---|
| Pork Picnic Roast 🐖 | 3 lb | Bone-in, skin removed preferred |
| Olive Oil 🫒 | 2 tbsp | Divided for searing and cooking |
| Kosher Salt 🧂 | 1 ½ tsp | Diamond Crystal preferred |
| Black Pepper 🌶️ | 1 tsp | Freshly ground for best flavor |
| Smoked Paprika 🌶️ | 1 ½ tsp | For authentic smoky depth |
| Garlic Powder 🧄 | 1 tsp | Not garlic salt substitute |
| Onion Powder 🧅 | 1 tsp | Enhances savory base notes |
| Chicken Broth 🍲 | 1 ½ cups | Low-sodium for controlled seasoning |
| Apple Cider Vinegar 🍏 | ¼ cup | Balances richness with acidity |
| Brown Sugar 🍚 | 2 tbsp | Light or dark variety |
| Liquid Smoke 🔥 | 1 tsp | Optional for extra smokiness |
| Yellow Onion 🧅 | 1 whole | Medium-sized, diced |
| Fresh Garlic Cloves 🧄 | 4 cloves | Minced for aromatic base |
The pork picnic roast is non-negotiable here. Bone-in pieces from Costco or your butcher ensure the connective tissue breaks down beautifully under pressure. Look for pieces with good marbling—this isn’t the time for lean cuts. Diamond Crystal kosher salt is my go-to for seasoning; its flaky texture distributes more evenly than table salt.
No smoked paprika? Regular paprika plus a pinch of chipotle powder works in a pinch. Short on chicken broth? Vegetable broth with a dash of soy sauce adds similar depth. The apple cider vinegar might seem odd, but don’t skip it—it cuts through the richness. For the brown sugar, light and dark are interchangeable, though dark adds a touch more molasses flavor.
The cooked pork keeps beautifully in the fridge for 4-5 days and freezes for up to 3 months. Store the shredded meat in its cooking liquid to maintain moisture. Reheats perfectly for sandwiches or tacos throughout the week.
Why You’ll Love This Recipe
- Set It & Forget It: I toss the pork picnic in the Instant Pot with olive oil, salt, and smoked paprika, then walk away—dinner practically cooks itself.
- Smoky Depth: That smoked paprika gives the meat this rich, almost barbecue-like flavor that’s way deeper than your average roast.
- Feeds the Crew: One picnic roast makes enough for tacos, sandwiches, or a hearty dinner with sides—leftovers guaranteed.
- Budget Hero: Pork picnic is cheap, and with just five ingredients, I’m serving up a meal that tastes like I spent way more time and money.
Step-by-Step Instructions for Instant Pot Pork Picnic
This method delivers fall-apart tender meat with rich, smoky flavor in a fraction of traditional cooking time.
Step 1: Sear and Season the Pork Picnic Roast
Set your Instant Pot to the sauté function on high heat. Add 1 tbsp Olive Oil and allow it to get hot. Pat the 3 lb Pork Picnic Roast dry with paper towels, then rub it with the remaining 1 tbsp Olive Oil.
Sear the roast on all sides until deeply browned, about 3-4 minutes per side. This develops the Maillard reaction for complex flavor. Remove the roast and set it aside temporarily. The fond left in the pot will enhance the sauce.
Step 2: Build the Flavor Base
With the Instant Pot still on sauté, add the diced Yellow Onion and cook for 3-4 minutes until softened and starting to caramelize. Add the minced 4 cloves Fresh Garlic Cloves and cook for 30 seconds until fragrant.
Stir in the 1.5 tsp Kosher Salt, 1 tsp Black Pepper, 1.5 tsp Smoked Paprika, 1 tsp Garlic Powder, and 1 tsp Onion Powder. This dry rub creates a flavor foundation that penetrates the meat during pressure cooking.
Pour in the 0.25 cup Apple Cider Vinegar and use a wooden spoon to scrape up all the browned bits from the bottom of the pot. This deglazing step prevents burning and incorporates all those flavorful bits into the sauce.
Step 3: Add Liquids and Pressure Cook
Return the seared roast to the Instant Pot. Pour in the 1.5 cups Chicken Broth, 2 tbsp Brown Sugar, and 1 tsp Liquid Smoke. The liquid should come about halfway up the roast—this ensures proper pressure building without diluting flavors.
Secure the lid, set the valve to sealing, and cook on high pressure for 60 minutes. The pork is done when it reaches 195-200°F internally and shreds easily with a fork. The natural release period allows the meat to continue cooking gently in the residual heat.
Step 4: Natural Release and Rest
Let the pressure release naturally for 15 minutes, then carefully switch the valve to venting to release any remaining pressure. This gradual release prevents the meat from seizing up and becoming tough.
Remove the lid and transfer the pork to a cutting board. Let it rest for 10 minutes before shredding or slicing. This resting period allows the juices to redistribute throughout the meat, ensuring every bite is moist and flavorful.
Skimming the fat from the cooking liquid gives you a rich, concentrated sauce to serve with the pork. The resulting liquid can be reduced on the sauté function if you prefer a thicker consistency.
Pro Tips For Making Instant Pot Pork Picnic
- Sear the Roast: I learned this the hard way—skipping the sear leaves the pork bland. Use 2 tablespoons of olive oil in the Instant Pot on “Sauté” mode to brown the picnic roast on all sides before pressure cooking.
- Trim the Fat Cap: Pork picnic has a thick fat layer; leaving it all on makes the dish greasy. Trim to about 1/4-inch for flavor without excess oil pooling in the pot.
- Don’t Overfill the Pot: After burning a batch, I now know to never exceed the 2/3 max fill line—especially with this cut, which releases liquid as it cooks.
- Rest Before Shredding: Give the pork a solid 10 minutes under foil after cooking. It holds onto juices better, and shredding becomes effortless with two forks.
Make-Ahead Tips for Leftovers
Prep Ahead Strategy
You can prep all your ingredients the night before. Measure out the 1.5 tsp Kosher Salt, 1 tsp Black Pepper, and spices into a small bowl. Dice the Yellow Onion and mince the 4 cloves Fresh Garlic Cloves, storing them together in the fridge. 💡
Morning Assembly
In the morning, sear the 3 lb Pork Picnic Roast as directed, then add all prepped ingredients. This approach cuts active cooking time to just 20 minutes before pressure cooking. I often do this while making coffee.
Batch Cooking
Double the recipe and cook two roasts at once if your Instant Pot is large enough. The cooking time remains 60 minutes—just ensure the liquid covers both pieces. This gives you meals for the week with minimal extra effort.
Storage Before Cooking
The seasoned but uncooked roast can sit in the fridge for up to 24 hours. I place it in a zip-top bag with the dry rub, letting the flavors penetrate overnight. Just bring it to room temperature before searing.
Freezer Meal Option
Combine all ingredients except liquids in a freezer bag. Freeze for up to 3 months. Thaw overnight in the fridge, then add 1.5 cups Chicken Broth and cook as directed. 🥶
Post-Cook Storage
Shred the pork and store it in the cooking liquid in airtight containers. It keeps in the fridge for 4-5 days or freezes beautifully for up to 3 months. The liquid prevents drying when reheating.
Nutrition Facts
Frequently Asked Questions
Why sear the pork first?
Searing creates a flavorful crust via Maillard reaction and locks in juices. The browned bits (fond) dissolve into the sauce for deeper taste.
Can I skip the natural release?
No, a 15-minute natural release prevents toughness by allowing gradual pressure reduction. Quick-releasing can make the meat seize up.
What if my roast is larger than 3 lbs?
Increase cooking time to 70 minutes for 4 lbs. Ensure liquid covers at least halfway. Adjust seasoning proportionally for best flavor.
How do I thicken the cooking liquid?
After cooking, set Instant Pot to sauté and simmer the liquid for 5-10 minutes until reduced. Optional: mix 1 tbsp cornstarch with water and stir in.

- 6 Oz Chocolate Chip Cookie Recipe: Perfectly Balanced Crispy Edges and Chewy Hearts - September 25, 2026
- 6-Inch Coffee Cake Recipe: Vanilla Bean Swirls and Buttery Streusel Topping - September 25, 2026
- 1 Hour Soup Recipe: Velvety Richness Without the Wait - September 25, 2026