
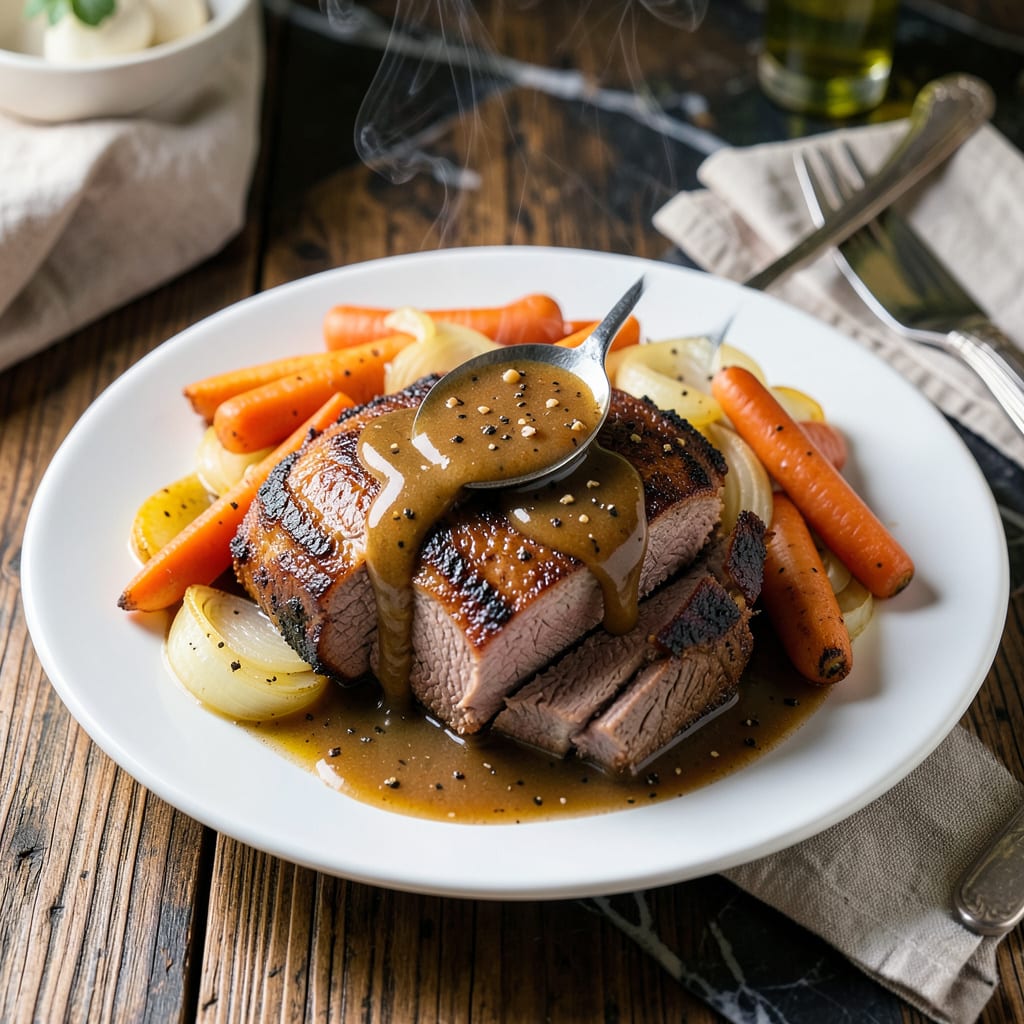
This pressure-cooked pot roast delivers melting tenderness with rich, savory gravy in a fraction of the time. The Instant Pot locks in moisture and flavor, transforming tough cuts into fork-tender perfection.
With simple ingredients and hands-off cooking, you’ll achieve a classic pot roast that’s juicy, flavorful, and ready to serve with its own thick, delicious gravy.
Ingredients for Instant Pot Pot Roast Recipe with Gravy
Nothing exotic here—just a well-seasoned chuck roast and some aromatics for the best pot roast you’ve made.
| Ingredient | Amount | Notes |
|---|---|---|
| Chuck Roast 🥩 | 3 lb | Well-marbled, cut into 3-4 pieces |
| Kosher Salt 🧂 | 2 tsp | Diamond Crystal preferred for even seasoning |
| Freshly Ground Black Pepper 🌶️ | 1 tsp | Coarse grind for texture |
| Garlic Cloves 🧄 | 6 cloves | Smashed for maximum flavor infusion |
| Yellow Onion 🧅 | 1 whole | Large, coarsely chopped |
| Carrots 🥕 | 3 whole | Peeled, cut into 2-inch chunks |
| Celery Stalks 🌿 | 3 whole | Cut into 2-inch pieces |
| Beef Broth 💧 | 2 cups | Low-sodium preferred for control |
| Worcestershire Sauce 🍶 | 2 tbsp | Adds umami depth to gravy |
| Soy Sauce 🥄 | 2 tbsp | For saltiness and color |
| Tomato Paste 🍅 | 2 tbsp | Thickens and enriches gravy |
| Dried Thyme 🌿 | 1 tsp | Crushed between fingers before adding |
| Dried Rosemary 🌿 | 1 tsp | Crushed to release aroma |
| Bay Leaves 🍃 | 2 whole | Removed before serving |
| Olive Oil 🫒 | 2 tbsp | For searing roast |
[recipeingredientscaler]
The chuck roast is non-negotiable here—look for good marbling at the store (that’s the fat that makes it tender). Costco has great pre-packaged chuck, or ask your butcher for a 3-pound piece to cube yourself. The beef broth should be low-sodium so you can control the salt. I grab Swanson or Better Than Bouillon—both work great in the Instant Pot.
No chuck roast? Brisket or bottom round are your next best bets. Out of fresh garlic? Garlic powder at one-third the amount (so 2 tsp instead of 6 cloves) works in a pinch. The Worcestershire adds depth, but if you’re avoiding anchovies, extra soy sauce with a dash of balsamic vinegar gets you close. Frozen mirepoix (onion, carrot, celery mix) saves chopping time—Trader Joe’s has a good one.
Leftovers taste even better the next day—store in the fridge for up to 4 days or freeze for 3 months. The gravy thickens as it cools, so thin with a splash of broth when reheating. Pro tip: shred the beef for sandwiches later.
Why You’ll Love This Recipe
- Set It and Forget: The instant pot does all the work—just sear the chuck roast, toss in the garlic and onion, and walk away.
- Sunday Dinner, Any Day: I make this for weeknight meals, but it feels fancy enough for company.
- Leftovers for Days: One roast feeds my family twice, and the gravy only gets better overnight.
Step-by-Step Instructions for Instant Pot Pot Roast With Gravy
Here’s the method that guarantees fall-apart tender meat with rich gravy every time.
Step 1: Sear the Chuck Roast for Deep Flavor
Set your Instant Pot to the Sauté function on Normal/High heat. Add the 2 tbsp Olive Oil and let it heat until shimmering. Pat the 3 lb Chuck Roast pieces dry with paper towels, then season all over with the 2 tsp Kosher Salt and 1 tsp Freshly Ground Black Pepper.
Working in batches if needed, sear the chuck roast on all sides for 3-4 minutes per side until deeply browned. Don’t rush this—you want a dark, flavorful crust. Transfer the seared meat to a plate and set aside. The fond (browned bits) left in the pot will become the base of your gravy.
Step 2: Build the Aromatic Base
In the same pot, add the coarsely chopped Yellow Onion, 2-inch chunks of Carrots, and 2-inch pieces of Celery Stalks. Cook for 3-4 minutes, stirring occasionally, until the onions start to soften and take on some color.
Add the 6 cloves Garlic Cloves (smashed) and cook for 30 seconds until fragrant. Stir in the 2 tbsp Tomato Paste, 1 tsp Dried Thyme, and 1 tsp Dried Rosemary (both crushed between your fingers) and cook for 1 minute to bloom the spices. This step intensifies their flavors and prevents a raw, herbal taste in the final dish.
Step 3: Pressure Cook to Tender Perfection
Pour in the 2 tbsp Worcestershire Sauce, 2 tbsp Soy Sauce, and 2 cups Beef Broth. Use a wooden spoon to scrape up any browned bits from the bottom of the pot. Return the seared chuck roast and any accumulated juices to the Instant Pot. Add the 2 whole Bay Leaves.
Secure the lid, set the valve to Sealing, and cook on High Pressure for 60 minutes. Let the pressure release naturally for 15 minutes, then quick-release any remaining pressure. The natural release prevents the meat from seizing up and ensures maximum tenderness.
Step 4: Finish with Rich, Silky Gravy
Carefully remove the lid and transfer the chuck roast to a serving platter. Discard the bay leaves. For the gravy, set the Instant Pot to Sauté on Normal/High heat and let the cooking liquid simmer for 5-7 minutes until reduced by about a third.
You can leave the vegetables in for a rustic gravy or strain them out for a smoother consistency. Taste and adjust seasoning if needed—remember, the soy sauce and Worcestershire already add saltiness. The gravy should coat the back of a spoon and have a deep, savory flavor that complements the melt-in-your-mouth chuck roast.
Pro Tips For Making Instant Pot Pot Roast Recipe With Gravy
- Sear the Chuck: Take the extra 5 minutes to brown the chuck roast on all sides using the sauté function—it builds a deep flavor base that simmering alone can’t achieve. I learned this the hard way when my first few pot roasts tasted flat.
- Chunk the Onions: Cut the yellow onion into large chunks rather than small dice so they hold their shape and add texture to the gravy. Sounds weird, but it works: tiny pieces just dissolve into mush.
- Deglaze Thoroughly: After browning the meat, pour in a cup of broth or water and scrape the bottom hard to lift all those browned bits. Skipping this means losing half your gravy’s richness.
- Rest Before Slicing: Let the roast sit for 10 minutes under foil before slicing—it reabsorbs the juices instead of bleeding them all over the cutting board. I was skeptical until I tried it and saw the difference in moisture.
Dietary Considerations for These Flavors
Gluten-Free Adaptation
This recipe is naturally gluten-free if you use tamari instead of soy sauce. I recommend San-J Tamari—it has the same rich flavor without any wheat. Also, verify your Worcestershire sauce is gluten-free, as some brands contain malt vinegar. 💪
Low-Carb Option
Skip the carrots and use 1 cup chopped mushrooms and 1 cup diced celery root instead. These lower-carb veggies soak up the flavors just as well. The gravy will still thicken naturally during cooking without any additional thickeners.
Dairy-Free Notes
This dish contains no dairy by default, making it perfect for lactose-intolerant diners. Just double-check your beef broth—some store-bought versions contain milk derivatives. I stick with Swanson Natural Goodness for guaranteed dairy-free results.
Low-Sodium Version
Use low-sodium beef broth and reduce the kosher salt to 1 tsp. Replace soy sauce with coconut aminos for 60% less sodium. The Worcestershire adds saltiness, so taste before adding extra seasoning at the end.
Keto-Friendly Adjustments
Follow the low-carb option above and add 1 tbsp apple cider vinegar to brighten the gravy. Serve over mashed cauliflower instead of potatoes. The pressure cooking keeps the meat juicy without any sugar-laden additives.
Allergen Considerations
This recipe is nut-free, egg-free, and can be soy-free with coconut aminos. For celery allergies, omit the celery and add 1 tsp celery seed to the aromatic base for similar depth. Always check labels on broths and sauces for hidden allergens. 🥗
Nutrition Facts
Frequently Asked Questions
What cut of beef works best if I can’t find chuck roast?
Brisket or bottom round are excellent substitutes. Both have good marbling and become tender with pressure cooking. Avoid lean cuts like sirloin, as they can dry out.
Why do I need to sear the meat first?
Searing creates a flavorful crust and browned bits (fond) that deepen the gravy’s taste. It also enhances the meat’s appearance and texture.
Can I make this ahead of time?
The flavors improve overnight. Store in the fridge for up to 4 days or freeze for 3 months. Reheat gently with a splash of broth.
How do I thicken the gravy if it’s too thin?
Mix 1 tbsp cornstarch with 1 tbsp cold water, then stir into simmering gravy. Cook for 1-2 minutes until thickened.

- 4C Bread Crumbs Meatballs Recipe: Crispy Crust and Juicy Centers - September 25, 2026
- 6 Oz Chocolate Chip Cookie Recipe: Perfectly Balanced Crispy Edges and Chewy Hearts - September 25, 2026
- 6-Inch Coffee Cake Recipe: Vanilla Bean Swirls and Buttery Streusel Topping - September 25, 2026