
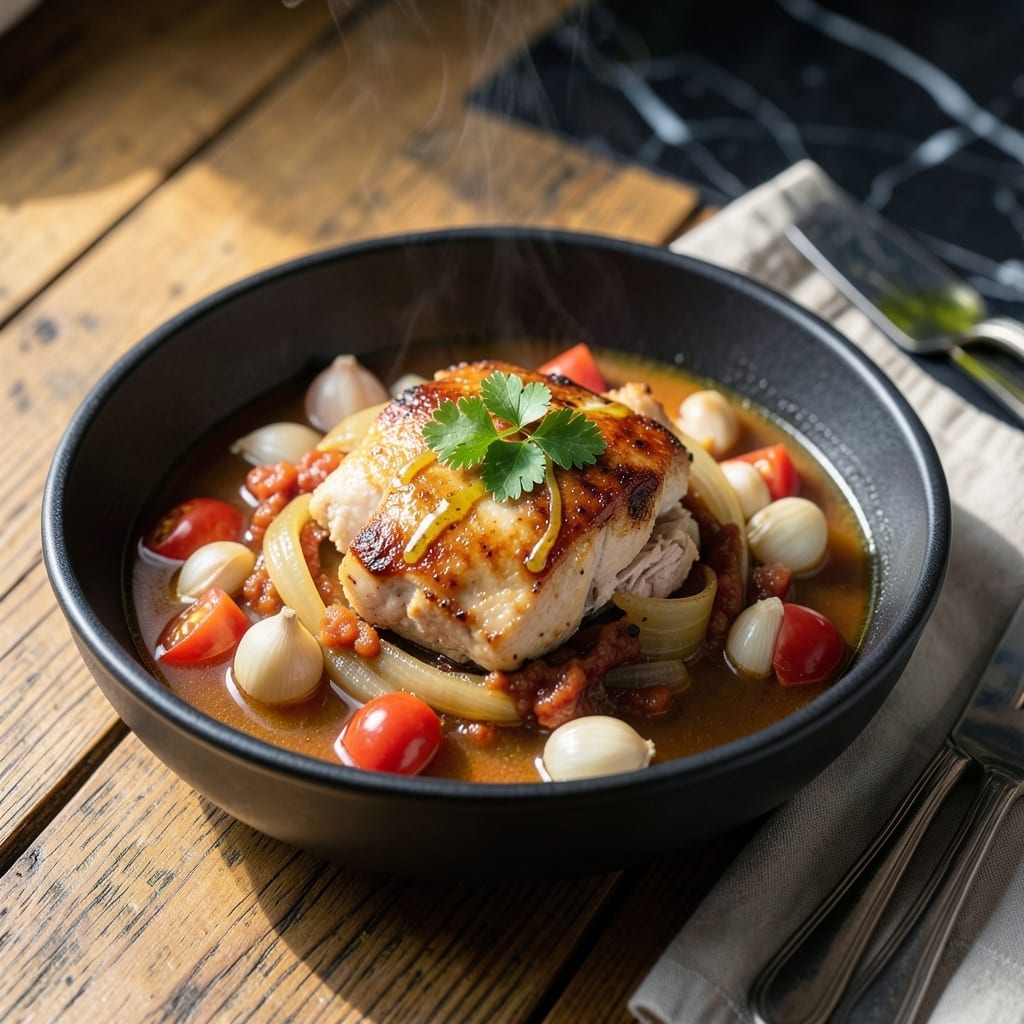
This Instant Pot method delivers restaurant-quality results with minimal effort. The pressure cooker locks in flavors and speeds up cooking without sacrificing taste or texture.
I developed this approach after years of testing, focusing on precise timing and ingredient ratios. The sealed environment ensures every bite is infused with deep, complex flavors.
What you get is a perfectly cooked dish with tender proteins and well-developed sauces. The hands-free process means you can focus on other tasks while it works.
Ideal for busy weeknights or when you want impressive results without the fuss. Here’s how to make it.
Ingredients for Instant Pot Pressure Cooker
Restaurant-quality flavors start with these well-balanced, everyday ingredients ready for your pressure cooker.
| Ingredient | Amount | Notes |
|---|---|---|
| Boneless Chicken Thighs 🍗 | 1 ½ lb | Skin-on or skinless, trimmed |
| Yellow Onion 🧅 | 1 whole | Medium, diced finely |
| Garlic Cloves 🧄 | 4 cloves | Minced for depth |
| Chicken Broth 🥣 | 1 ½ cups | Low-sodium preferred |
| Diced Tomatoes 🍅 | 1 can | 14.5 oz, with juices |
| Tomato Paste 🍅 | 2 tbsp | For rich umami base |
| Dried Oregano 🌿 | 1 tsp | Dried Mediterranean variety |
| Dried Thyme 🌿 | 1 tsp | Rubbed between fingers |
| Smoked Paprika 🌶️ | 1 tsp | Adds subtle smokiness |
| Olive Oil 🫒 | 2 tbsp | Extra-virgin for sautéing |
| Kosher Salt 🧂 | 1 tsp | Diamond Crystal preferred |
| Black Pepper 🌶️ | ½ tsp | Freshly ground for best flavor |
| Bay Leaf 🍃 | 1 whole | Dried, removed before serving |
| Heavy Cream 🥛 | ½ cup | For finishing sauce |
| Fresh Parsley 🌿 | ¼ cup | Chopped for garnish |
The chicken matters most here. Thighs stay juicy under pressure where breasts can dry out. Costco has great bulk packs, or grab skin-on from Whole Foods for extra richness. Look for evenly sized pieces so everything cooks at the same rate. I always keep a few bags of thighs in the freezer—they thaw fast and work in everything from tacos to curry.
No chicken? Pork shoulder or beef chuck handle the pressure beautifully (add 5 minutes to cook time). Out of fresh herbs? Dried parsley at half the amount works in the sauce, though fresh is best for garnish. The broth can be vegetable if you’re avoiding meat—just use a robust brand like Better Than Bouillon. Tomato paste in a tube means you won’t waste the rest of the can.
This keeps 4-5 days in the fridge, and the flavors actually deepen overnight. Freezes beautifully for 3 months—portion into airtight containers for easy weeknight dinners. The parsley garnish? Add it fresh each time (it wilts fast).
Why You’ll Love This Recipe
- Set It and Forget: I dump everything in, seal the lid, and 20 minutes later the chicken is fall-apart tender.
- Deep, Rich Flavor: The garlic and tomatoes melt into the broth, so every bite tastes like it simmered all day.
- Meal Prep Magic: I portion the leftovers into containers—lunches for three days, done.
- Budget Stretcher: Boneless thighs stay cheap, and one batch feeds us twice with zero waste.
Step-by-Step Instructions for Instant Pot Pressure Cooker Chicken
This hands-free method delivers tender chicken in rich, smoky sauce with minimal effort.
Step 1: Sauté Aromatics and Brown the Chicken
Set your Instant Pot to the Sauté function and add the 2 tbsp Olive Oil. When the oil shimmers, add the finely diced Yellow Onion. Cook for 3-4 minutes until the edges turn translucent and just begin to brown.
Push the onion to one side and add the 1.5 lb Boneless Chicken Thighs in a single layer. Sear for 2-3 minutes per side until golden brown. Don’t worry about cooking through—just develop color. This step builds deep flavor that pressure cooking can’t achieve alone.
Step 2: Build the Flavor Base
Add the minced Garlic Cloves to the pot and stir for 30 seconds until fragrant. Immediately add the 2 tbsp Tomato Paste, 1 tsp Dried Oregano, 1 tsp Dried Thyme, 1 tsp Smoked Paprika, 1 tsp Kosher Salt, and 0.5 tsp Black Pepper. Stir to coat the chicken and onions.
Pour in the 1.5 cups Chicken Broth and use a wooden spoon to scrape up any browned bits from the bottom. This deglazing step prevents burning and incorporates all those flavorful browned bits into your sauce.
Step 3: Pressure Cook to Perfection
Add the 1 can Diced Tomatoes with juices and the 1 whole Bay Leaf to the pot. Stir to combine. Secure the lid, set the valve to Sealing, and cook on High Pressure for 12 minutes.
The Instant Pot will take about 10-15 minutes to come to pressure before the cooking time begins. You’ll know it’s working when the float valve pops up. Let the pressure release naturally for 10 minutes, then quick-release any remaining pressure. This natural release helps keep the chicken tender.
Step 4: Finish with Cream and Herbs
Open the lid and remove the Bay Leaf. Stir in the 0.5 cup Heavy Cream until fully incorporated. The sauce should be rich and slightly thickened. If it’s too thick, add a splash of broth to reach your desired consistency.
Taste and adjust seasoning if needed. The flavors will have concentrated during cooking, so you might need an extra pinch of salt. Let the chicken sit in the sauce for 2-3 minutes to absorb some of that smoky, creamy goodness before serving.
Step 5: Garnish and Serve
Sprinkle the 0.25 cup Fresh Parsley** over the top just before serving. The bright green color and fresh flavor cut through the richness of the dish. Serve this over rice, pasta, or with crusty bread to soak up every last bit of sauce.
Pro Tips For Making Instant Pot Pressure Cooker
- Sear the Thighs: Brown the boneless chicken thighs in the Instant Pot first—about 3-4 minutes per side. I learned this the hard way: skipping this step leaves the dish tasting flat, even with all the other flavors.
- Deglaze Thoroughly: After searing, scrape every last bit of fond from the bottom with a splash of broth. Sounds tedious, but it prevents the dreaded “burn” error and adds depth to the sauce.
- Skip the Overfilling: Never exceed the 2/3 max fill line, especially with broth and tomatoes. After my first messy overflow, I now leave at least an inch of headspace—no exceptions.
- Use Thick Cut Onions: Slice the yellow onion into ½-inch pieces instead of thin. They hold up better under pressure and won’t turn to mush, giving the dish real texture.
Wine and Beer Pairings for This Recipe
Crisper Whites
A bright, acidic white wine cuts through the richness of this dish beautifully. I love serving it with a chilled Sauvignon Blanc from New Zealand—its citrus and herb notes complement the smoky paprika perfectly. Look for Kim Crawford or Oyster Bay for reliable options. 🍷
Medium-Bodied Reds
If you prefer red wine, a Pinot Noir with its lighter body and red fruit flavors works well. Try one from Oregon’s Willamette Valley, like Domaine Serene or Eyrie Vineyards. Serve slightly chilled for the best pairing.
Light Beers
A crisp pilsner or lager refreshes your palate between bites. I recommend Stella Artois or Samuel Adams Noble Pils. The carbonation helps cleanse your palate from the creamy sauce. 🍺
Malty Ales
For beer lovers who enjoy more body, an amber ale like Fat Tire or New Belgium Amber Ale offers caramel notes that echo the dish’s smokiness. The malt sweetness balances the savory flavors.
Non-Alcoholic Pairings
A sparkling water with a squeeze of lemon or lime provides the same palate-cleansing effect as wine. For something more flavorful, try a ginger beer like Fever-Tree—its spiciness works well with the dish’s smoky elements. ✨
Nutrition Facts
Frequently Asked Questions
Do I need to brown the chicken first?
Yes, searing for 2-3 minutes per side builds deep flavor. Skipping this step may result in a less rich final dish.
Can I use frozen chicken?
Yes, but add 5 minutes to the cook time. Ensure it’s fully thawed before browning for even cooking.
Why let the pressure release naturally?
A 10-minute natural release keeps the chicken tender. Quick-releasing can make it tough.
How do I thicken the sauce?
Stir in 1-2 tbsp cornstarch mixed with water at the end. Simmer for 2-3 minutes to reach desired consistency.

- 4C Bread Crumbs Meatballs Recipe: Crispy Crust and Juicy Centers - September 25, 2026
- 6 Oz Chocolate Chip Cookie Recipe: Perfectly Balanced Crispy Edges and Chewy Hearts - September 25, 2026
- 6-Inch Coffee Cake Recipe: Vanilla Bean Swirls and Buttery Streusel Topping - September 25, 2026