
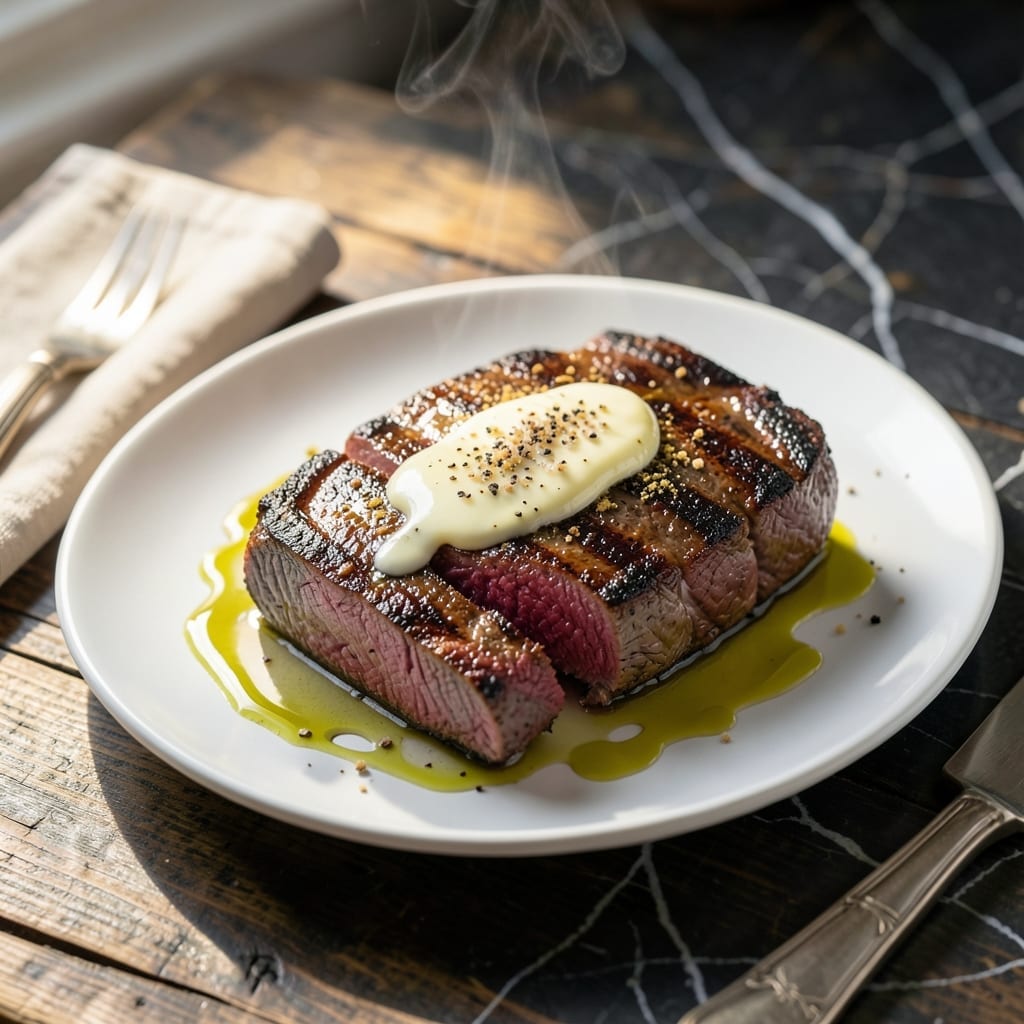
Achieving medium-rare rib eye with a perfect sear in an Instant Pot is absolutely possible. This method delivers tender, juicy steak with a caramelized crust, all without firing up the grill.
The key is using the sauté function to develop a deep sear before pressure cooking. A quick rest after cooking ensures the juices redistribute for maximum flavor in every bite.
You’ll get restaurant-quality results with minimal effort. The Instant Pot locks in moisture while creating that coveted crust that steak lovers crave.
Serve with roasted vegetables or mashed potatoes for a complete meal. This technique works for any cut of steak you prefer.
Ingredients for Instant Pot Rib Eye Steak
Quality rib eye, simple seasonings, and a few pantry staples create this perfect steak.
| Ingredient | Amount | Notes |
|---|---|---|
| Rib Eye Steak 🥩 | 2 lb | 1-inch thick, bone-in preferred |
| Kosher Salt 🧂 | 1 ½ tsp | Diamond Crystal preferred |
| Black Pepper 🌶️ | 1 tsp | Freshly ground, coarse |
| Garlic Powder 🧄 | 1 tsp | Not garlic salt |
| Olive Oil 🫒 | 2 tbsp | High smoke point preferred |
| Unsalted Butter 🧈 | 2 tbsp | For basting steak |
| Fresh Rosemary 🌿 | 2 sprigs | Optional for aroma |
| Fresh Thyme 🍃 | 2 sprigs | Optional for aroma |
| Beef Broth 💧 | ½ cup | Low-sodium preferred |
| Red Wine 🍷 | ¼ cup | Dry variety for deglazing |
| Water 💧 | ¼ cup | For pressure cooking |
The rib eye is non-negotiable here. USDA Choice or Prime with good marbling ensures that tender, juicy result. Costco and Whole Foods consistently carry quality cuts. Look for steaks about 1-inch thick—thinner cooks too fast, thicker needs adjustment. Bone-in adds flavor (that’s the rib part), but boneless works too. Don’t skip the kosher salt—Diamond Crystal is the professional standard for even seasoning.
No rib eye? New York strip or filet mignon work but cook faster—adjust time accordingly. Out of beef broth? Water plus a bouillon cube in a pinch. The red wine adds depth, but beef broth with a splash of balsamic vinegar mimics it. Fresh herbs are optional but recommended—dried at one-third the amount works. The butter is essential for that glossy finish, so don’t substitute here.
Cook immediately or store the steak in the fridge for up to 3 days (wrap tightly). Leftovers? Rare for steak, but they’ll keep 4-5 days refrigerated. Freezing cooked steak isn’t ideal—texture suffers. Always bring steak to room temperature before cooking for even results.
Why You’ll Love This Recipe
- No Fuss Cooking: I just rub the steak with salt, pepper, and garlic powder, then let the Instant Pot do the rest.
- Weeknight Hero: Honestly, it’s my go-to for busy evenings when I want something fancy without the effort.
- Leftovers? No Chance: Between us, there’s never any left—but if there were, it’d make an epic sandwich the next day.
Step-by-Step Instructions for Instant Pot Rib Eye Steak
Achieve perfect medium-rare results with a seared crust using this reliable method.
Step 1: Season the Rib Eye Steak Generously
Pat the 2 lb rib eye steak completely dry with paper towels to ensure a good sear. Season all sides evenly with the 1.5 tsp kosher salt, 1 tsp black pepper, and 1 tsp garlic powder.
Press the seasonings into the meat so they adhere well. Let the steak sit at room temperature for 30 minutes before cooking—this ensures even cooking throughout the thickness. The surface should look evenly coated with seasoning, ready for the hot oil.
Step 2: Sear the Steak to Develop a Crust
Set your Instant Pot to the Sauté function on Normal/Medium heat. Add the 2 tbsp olive oil and wait until it shimmers. Place the steak in the pot and sear for 4-5 minutes per side until a deep brown crust forms.
Add the 2 tbsp unsalted butter, 2 sprigs fresh rosemary, and 2 sprigs fresh thyme to the pot during the last 2 minutes of searing. Tilt the steak slightly and baste it with the melted butter and herbs repeatedly to build flavor and shine.
Step 3: Deglaze and Pressure Cook
Remove the steak and set it aside on a plate. Pour in the 0.25 cup red wine and use a wooden spoon to scrape up all the browned bits from the bottom of the pot—this adds depth to your sauce.
Let the wine reduce by half, about 2-3 minutes. Add the 0.5 cup beef broth and 0.25 cup water, then return the steak to the pot along with any accumulated juices. Secure the lid and set the Instant Pot to High Pressure for 6 minutes.
Step 4: Rest and Slice for Serving
Once the cooking cycle completes, allow a natural pressure release for 10 minutes, then quick-release any remaining pressure. Transfer the steak to a cutting board and tent loosely with foil.
Let it rest for 10 minutes before slicing against the grain into 1-inch thick pieces. This resting period allows the juices to redistribute, ensuring each slice is tender and moist. Serve immediately with the pan juices spooned over the top.
Pro Tips For Making Instant Pot Rib Eye Steak
- Sear First, Pressure Later: Always sear the rib eye in the Instant Pot first using the sauté function—about 3-4 minutes per side in olive oil until a deep crust forms. I learned this the hard way after my first few attempts came out gray and lifeless.
- Pat It Dry: Blot the steak thoroughly with paper towels before seasoning, or the salt and pepper won’t stick properly. Sounds tedious, but it’s the difference between a steakhouse crust and a sad, soggy surface.
- Skip the Overcrowding: If your Instant Pot isn’t wide enough for both steaks, cook them one at a time. Steaming from too much moisture ruins the sear—yes, even if you’re impatient like me.
- Rest Under Foil: Let the steak rest for at least 5-10 minutes under foil after cooking, or all those juices will end up on the cutting board. My grandmother swore by this, and she was right.
Perfect Pairings for This Recipe
Wine Pairings
This steak shines with a bold Cabernet Sauvignon—the tannins cut through the fat beautifully. I love a Napa Valley bottle like Caymus or Robert Mondavi. For a budget-friendly option, Josh Cellars delivers excellent quality. 🍷
Beer Options
A dark beer like Guinness or Newcastle Brown Ale complements the rich beef flavors. The roasted malt notes mirror the sear on the steak. For something lighter, a crisp IPA from Stone Brewing works surprisingly well.
Side Dish Ideas
Garlic mashed potatoes are my go-to for soaking up those juices. Use 2 lbs Yukon Gold potatoes and ½ cup heavy cream for the creamiest texture. Roasted asparagus with a squeeze of lemon adds freshness.
Sauce Pairings
A simple bearnaise sauce elevates this dish to restaurant level. I make mine with 3 egg yolks, ½ cup melted butter, and 1 tbsp tarragon. For a quick option, chimichurri with parsley, garlic, and red wine vinegar adds brightness.
Bread Options
A crusty sourdough or baguette is perfect for mopping up every last bit of sauce. Warm it in the oven at 375°F for 5 minutes. I also love a ciabatta roll for a more rustic presentation.
Vegetable Pairings
Creamed spinach adds a luxurious touch. Sauté 10 oz baby spinach with 2 cloves garlic and ¼ cup heavy cream. For something lighter, a simple arugula salad with shaved Parmesan balances the richness. 💫
Nutrition Facts
Frequently Asked Questions
Can I use a thinner or thicker steak?
For 1/2-inch steaks, reduce pressure time to 3 minutes. For 1.5-inch or thicker, increase to 8-10 minutes.
Why rest the steak after cooking?
Resting for 10 minutes lets juices redistribute. Slicing too soon causes dry meat and lost flavor on the cutting board.
Can I skip the red wine?
Yes, substitute with 1/2 cup beef broth plus 1 tbsp balsamic vinegar. The acidity mimics wine’s depth.
How do I get a better sear?
Pat steak very dry and ensure oil is hot before adding. Don’t move it for 4-5 minutes per side.

- 6 Oz Chocolate Chip Cookie Recipe: Perfectly Balanced Crispy Edges and Chewy Hearts - September 25, 2026
- 6-Inch Coffee Cake Recipe: Vanilla Bean Swirls and Buttery Streusel Topping - September 25, 2026
- 1 Hour Soup Recipe: Velvety Richness Without the Wait - September 25, 2026