
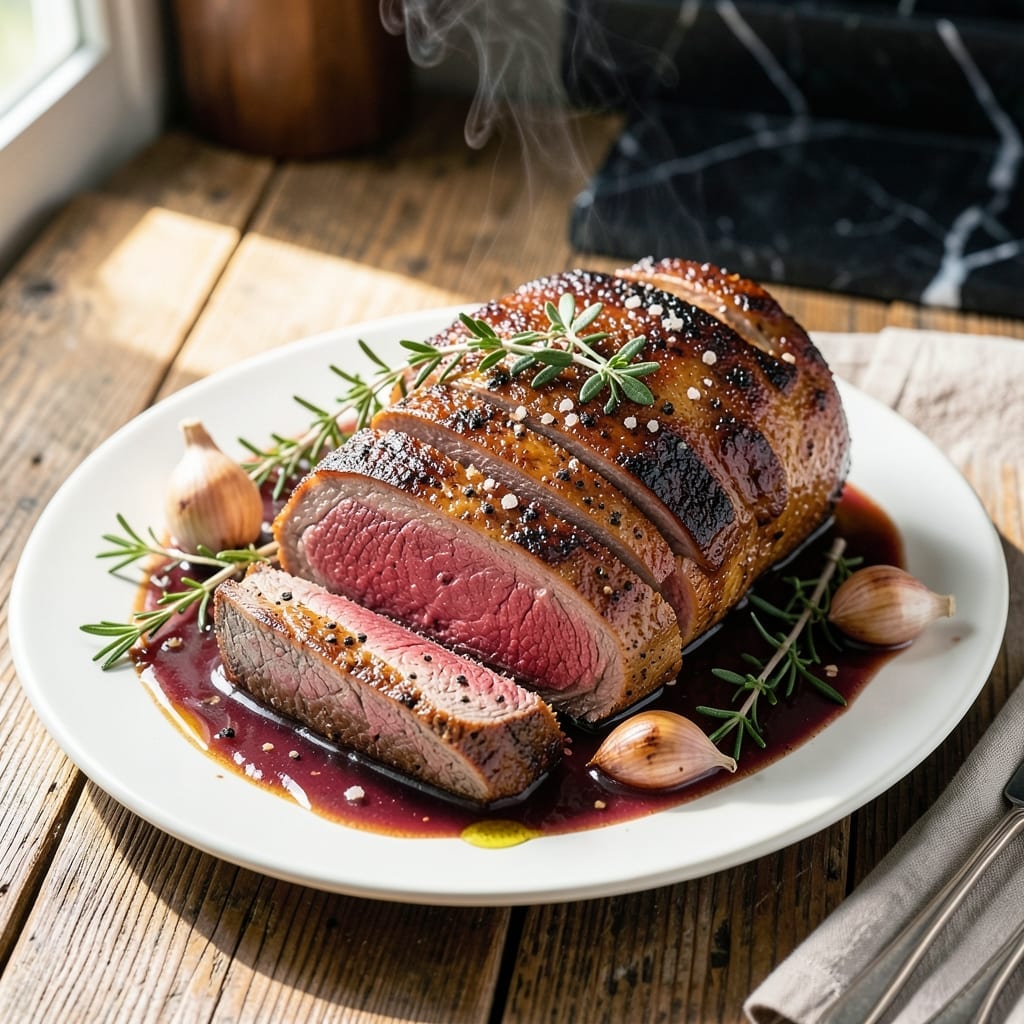
Achieving pressure-cooked perfection with a ribeye roast is simpler than you think. This method locks in juices while developing a rich garlic herb crust that elevates every bite.
The Instant Pot transforms tough cuts into tender, fall-apart meat in a fraction of traditional cooking time. No special skills required—just precise timing and quality ingredients.
You’ll get a roast with a caramelized exterior and moist interior, infused with aromatic garlic and herbs. The result is restaurant-quality beef without the restaurant effort.
Serve with roasted vegetables or mashed potatoes to complete the meal. The process is straightforward, the outcome is impressive.
Ingredients for Instant Pot Ribeye Roast
Quality beef and aromatic herbs create this pressure-cooked masterpiece with restaurant flair at home.
| Ingredient | Amount | Notes |
|---|---|---|
| Ribeye Roast 🥩 | 3 lb | Boneless, well-marbled preferred |
| Kosher Salt 🧂 | 1 ½ tsp | Diamond Crystal preferred for even seasoning |
| Freshly Ground Black Pepper 🌶️ | 1 tsp | Coarse grind for texture |
| Garlic Cloves 🧄 | 6 cloves | Minced for maximum flavor infusion |
| Fresh Rosemary 🌿 | 2 tbsp | Finely chopped, stems discarded |
| Fresh Thyme 🍃 | 2 tbsp | Leaves stripped from stems |
| Olive Oil 🫒 | 2 tbsp | Extra-virgin for richness |
| Beef Broth 💧 | 1 cup | Low-sodium preferred for control |
| Worcestershire Sauce 🍶 | 2 tbsp | Lea & Perrins recommended |
| Unsalted Butter 🧈 | 2 tbsp | For finishing the crust |
| Red Wine 🍷 | ½ cup | Dry variety like Cabernet Sauvignon |
| Dijon Mustard 🟡 | 1 tbsp | For garlic-herb paste |
| Shallot 🧅 | 1 whole | Finely minced for depth |
The ribeye roast is non-negotiable for this application. Well-marbled boneless cuts from Whole Foods or Costco yield superior texture and flavor. Avoid pre-cut stew meat—the uniform size of a whole roast ensures even cooking. The beef broth should be high-quality, low-sodium to prevent oversalting during reduction. For the herbs, fresh is mandatory; dried simply won’t deliver the same aromatic impact.
Substituting the ribeye? Chuck roast works but requires 30 minutes additional cooking time. No fresh herbs? Use dried at one-third the quantity, though the flavor profile will be less vibrant. The red wine can be replaced with additional beef broth plus 1 tbsp balsamic vinegar. For a non-alcoholic option, beef consommé adds depth without the wine.
Store the roast in its original packaging on a low fridge shelf until ready to use. Prepared herbs keep in damp paper towels for 3-4 days. The finished dish reheats well—actually improves after 24 hours as flavors meld. Freeze leftovers for up to 3 months in airtight containers.
Why You’ll Love This Recipe
- Set It and Forget: I toss the ribeye roast with salt, pepper, garlic, and rosemary into the Instant Pot, seal the lid, and walk away—no babysitting required.
- Garlic-Rosemary Magic: The garlic cloves and fresh rosemary infuse the ribeye with a rich, aromatic depth that makes every bite ridiculous.
- Sunday Dinner, Any Day: I serve this for weeknight meals, holiday gatherings, or even meal prep—it’s versatile enough for any table.
- Leftovers for Days: One roast feeds my family for two meals, and the leftovers make killer sandwiches the next day.
Step-by-Step Instructions for Instant Pot Ribeye Roast
achieve perfect pressure-cooked results with this proven method every time.
Step 1: Sear and Season the Ribeye Roast
Set your Instant Pot to the Sauté function on Normal heat. Add the 2 tbsp Olive Oil and allow it to heat until shimmering. Pat the 3 lb Ribeye Roast dry with paper towels, then season generously with the 1.5 tsp Kosher Salt and 1 tsp Freshly Ground Black Pepper on all sides.
Sear the roast for 4-5 minutes per side until deeply browned. This creates a flavorful crust that locks in juices. The surface should develop a rich, dark golden-brown color. Transfer the roast to a plate and set aside.
Step 2: Sauté Aromatics and Deglaze
In the same pot, add the 1 whole Shallot (finely minced) and cook for 1-2 minutes until softened. Stir in the 6 cloves Garlic Cloves (minced), 2 tbsp Fresh Rosemary, and 2 tbsp Fresh Thyme, cooking for an additional 30 seconds until fragrant.
Pour in the 0.5 cup Red Wine and scrape the bottom of the pot to release any browned bits. Add the 2 tbsp Worcestershire Sauce and 1 tbsp Dijon Mustard, stirring to combine. Let the mixture simmer for 2 minutes to meld the flavors.
Step 3: Pressure Cook the Roast
Return the roast to the Instant Pot and pour in the 1 cup Beef Broth, ensuring the liquid covers the bottom but doesn’t submerge the meat. Secure the lid and set the valve to Sealing. Cook on High Pressure for 60 minutes.
Allow the pressure to release naturally for 15 minutes, then quick-release any remaining pressure. The roast should reach an internal temperature of 195-200°F for tender, fall-apart texture.
Step 4: Rest and Serve
Carefully transfer the roast to a cutting board and tent loosely with foil. Let it rest for 10-15 minutes to allow the juices to redistribute. This step ensures every slice is moist and flavorful.
Optional: For a glossy finish, stir the 2 tbsp Unsalted Butter into the cooking liquid and spoon it over the roast before serving. Slice against the grain and serve with the strained cooking liquid as a rich au jus.
Pro Tips For Making Instant Pot Ribeye Roast
- Sear First: I learned this the hard way—searing the ribeye roast on all sides before pressure cooking locks in juices and adds a depth of flavor that skipping this step just can’t match.
- Use Thick Garlic: Slice the garlic cloves into thick slivers instead of mincing so they don’t burn during searing and can infuse the meat with flavor during pressure cooking.
- Skip the Overcrowding: Resist the urge to cram the roast and aromatics into the Instant Pot—leave at least an inch of space for even cooking and to avoid a burnt warning.
- Rest 15 Minutes: After pressure cooking, let the ribeye roast rest under foil for a full 15 minutes—this guarantees the juices redistribute instead of spilling out when you slice it.
Essential Equipment for instant pot ribeye roast
Instant Pot Essentials
I recommend the Instant Pot Duo 6-Quart for this recipe—it offers reliable pressure cooking and sauté functions. The 6-quart size accommodates a 3 lb roast with room for liquid. Always ensure your model has the Sauté and High Pressure settings. 💡
Searing Tools
For a perfect crust, use tongs to flip the roast during searing. I prefer OXO Good Grips 12-inch tongs for their reach and control. A wooden spoon helps scrape up browned bits when deglazing.
Measuring Accuracy
Precise measurements matter, so I use OXO measuring spoons and cups. The 1 cup Beef Broth and 0.5 cup Red Wine need exact amounts to balance flavors. A kitchen scale ensures your 3 lb Ribeye Roast is accurately portioned.
Temperature Control
An instant-read thermometer is crucial for checking the roast’s internal temp. I trust my ThermoWorks ThermoPop for accuracy. Aim for 195-200°F before resting. This guarantees tender, juicy results every time.
Resting Setup
After cooking, transfer the roast to a cutting board and tent with aluminum foil. I use a bamboo board to avoid dulling my knives. Let it rest for 10-15 minutes to lock in those precious juices. 🔥
Serving Tools
A sharp carving knife ensures clean slices against the grain. I rely on my Wüsthof 8-inch chef’s knife. Serve with a ladle for spooning the rich au jus over each portion.
Nutrition Facts
Frequently Asked Questions
Do I need to sear the roast first?
Yes, searing is essential. It creates a flavorful crust and locks in juices. Sear for 4-5 minutes per side on Sauté mode until deeply browned.
Can I use a different cut of beef?
You can substitute chuck roast, but increase pressure cooking time to 90 minutes. Ribeye is ideal for its marbling and tenderness. Stick to well-marbled cuts for best results.
What if my roast is smaller or larger?
Adjust cooking time by 10 minutes per pound. For a 2 lb roast, cook 40 minutes. For 4 lb, go for 80 minutes. Always check internal temp reaches 195-200°F.
How do I prevent the meat from drying out?
Ensure you don’t overcook and always let it rest for 10-15 minutes after cooking. The natural release helps retain moisture. Using enough liquid in the pot also prevents dryness.

- 4C Bread Crumbs Meatballs Recipe: Crispy Crust and Juicy Centers - September 25, 2026
- 6 Oz Chocolate Chip Cookie Recipe: Perfectly Balanced Crispy Edges and Chewy Hearts - September 25, 2026
- 6-Inch Coffee Cake Recipe: Vanilla Bean Swirls and Buttery Streusel Topping - September 25, 2026