
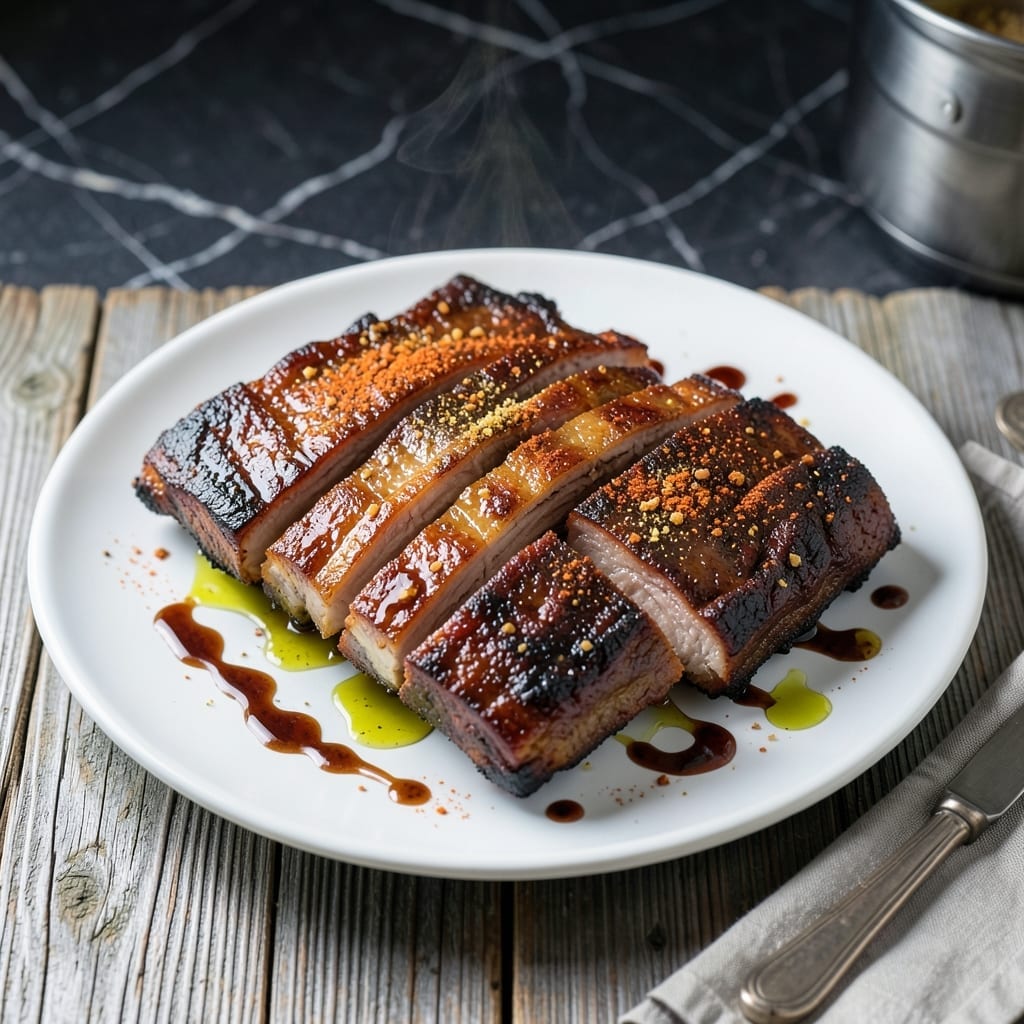
I’ve perfected this Instant Pot method for ribs that delivers fall-off-the-bone tenderness without sacrificing flavor.
The pressure cooker cuts hours of braising down to under an hour, while a simple dry rub and liquid smoke infuse each bite with smoky depth. No grill, no smoker—just your countertop appliance and a few ingredients.
What emerges is meat so tender it nearly collapses at the touch, with a sauce that clings to every ridge. The result rivals slow-cooked ribs, with a fraction of the effort.
Serve with classic sides for a meal that feels like a weekend project but comes together on a weeknight.
Ingredients for Instant Pot Ribs
A few ingredients transform into tender, smoky ribs with minimal effort.
| Ingredient | Amount | Notes |
|---|---|---|
| Pork Baby Back Ribs 🥩 | 2 lb | Cut into 3-4 rib sections |
| Brown Sugar 🧈 | ¼ cup | Light or dark variety |
| Paprika 🌶️ | 1 tbsp | Sweet or smoked variety |
| Garlic Powder 🧄 | 1 tsp | Not garlic salt |
| Onion Powder 🧅 | 1 tsp | Fresh ground preferred |
| Salt 🧂 | 1 tsp | Kosher or sea salt |
| Black Pepper 🌶️ | ½ tsp | Freshly ground preferred |
| Liquid Smoke 💨 | 1 tsp | Hickory flavor recommended |
| Apple Cider Vinegar 🍏 | ¼ cup | Balances smoky sweetness |
| Barbecue Sauce 🍯 | 1 cup | Thick, tangy variety |
| Chicken Broth 🍲 | ½ cup | Low-sodium preferred |
| Olive Oil 🫒 | 1 tbsp | For searing ribs |
The ribs are the centerpiece here. Baby back ribs deliver the best texture—spare ribs work too but need a few extra minutes. Look for well-marbled meat at Costco or your local butcher shop. The dry rub is simple but potent: brown sugar for caramelization, paprika for color and depth. Don’t skip the liquid smoke—it’s what gives these ribs that authentic smoky flavor without a grill.
Out of brown sugar? White sugar plus molasses mimics the flavor. No liquid smoke? Smoked paprika at double the amount adds a similar depth. The barbecue sauce can be store-bought (Sweet Baby Ray’s is reliable) or homemade. For extra richness, swap the chicken broth for beef broth. The vinegar balances the sweetness—white vinegar works in a pinch.
Ribs cook best fresh, but you can prep the dry rub a day ahead. Leftovers keep in the fridge for 4-5 days or freeze for up to 3 months. Reheat gently in the oven to maintain moisture.
Why You’ll Love This Recipe
- Set It & Forget: I toss the ribs in the pot with the spices, seal the lid, and walk away—no babysitting required.
- Sweet & Smoky: Honestly, the brown sugar caramelizes with the paprika and garlic for that sticky, finger-licking glaze.
- Weeknight Hero: Between us, I’ve served these for casual dinners and summer BBQs—always a hit.
- Leftovers? Yes Please: The meat stays tender for days, so I shred extras for sandwiches or tacos later.
Step-by-Step Instructions for Instant Pot Ribs
This pressure cooker method delivers tender ribs with deep flavor in a fraction of the time.
Step 1: Prepare and Season the Ribs
Cut the 2 lb Pork Baby Back Ribs into 3-4 rib sections so they fit comfortably in the Instant Pot. Pat them dry with paper towels to ensure the seasoning adheres properly.
In a small bowl, combine the 0.25 cup Brown Sugar, 1 tbsp Paprika, 1 tsp Garlic Powder, 1 tsp Onion Powder, 1 tsp Salt, and 0.5 tsp Black Pepper. Rub this mixture evenly over all sides of the ribs, pressing gently to help it stick.
Add the 1 tsp Liquid Smoke to the ribs and work it into the seasoning. This gives the ribs that classic smoky flavor without needing a smoker.
Step 2: Sear the Ribs for Depth of Flavor
Set your Instant Pot to the sauté function and add the 1 tbsp Olive Oil. Once hot, add the seasoned ribs in batches, searing for 2-3 minutes per side until browned. Don’t overcrowd the pot—this ensures a good sear rather than steaming.
You’ll know they’re ready to flip when the ribs release easily from the bottom of the pot. The searing step builds a flavor foundation and helps the ribs develop a rich color.
Remove the seared ribs and set them aside momentarily. Pour in the 0.25 cup Apple Cider Vinegar and deglaze the pot, scraping up any browned bits with a wooden spoon. These bits add incredible flavor to the cooking liquid.
Step 3: Pressure Cook to Tenderness
Return the ribs to the Instant Pot, stacking them if necessary. Pour in the 0.5 cup Chicken Broth, ensuring the liquid covers the bottom of the pot but doesn’t submerge the ribs completely. Secure the lid and set the valve to sealing.
Cook on high pressure for 25 minutes, then allow for a natural pressure release for 10 minutes. This gradual release helps the ribs retain moisture and tenderness. After 10 minutes, quick-release any remaining pressure.
Carefully remove the ribs—they’ll be very tender at this stage. The meat should be pulling away from the bone but not falling apart completely.
Step 4: Finish with Barbecue Sauce
Preheat your oven broiler to high. Place the cooked ribs on a baking sheet lined with foil. Brush generously with 1 cup Barbecue Sauce, coating all sides evenly. The sauce should cling to the ribs, creating a glossy finish.
Broil for 3-4 minutes until the sauce begins to caramelize and bubble. Watch closely to prevent burning—barbecue sauce can go from caramelized to burnt quickly under the broiler.
Remove the ribs from the oven and let them rest for 5 minutes. This allows the sauce to set slightly and the juices to redistribute throughout the meat.
Serve the ribs hot, with any remaining barbecue sauce on the side for dipping.
Pro Tips For Making Instant Pot Ribs
- Trim the Membrane: Peel off that tough silver skin on the bone side of the ribs—it keeps the rub from penetrating and makes the ribs chewy. I learned this the hard way after wondering why my first few batches were tough.
- Use a Dry Rub: Mix your brown sugar, paprika, garlic powder, and onion powder into a rub and coat the ribs generously at least 30 minutes before cooking. It forms a better crust than just sprinkling the spices.
- Add Liquid Carefully: Use only 1 cup of broth or water in the Instant Pot—too much and you’ll boil the ribs instead of pressure-cooking them. Sounds weird, but it works.
- Natural Release Only: Let the pressure release naturally for 10-15 minutes after cooking. Resist the urge to quick-release or the ribs can turn out dry and stringy.
Dietary Considerations for This Recipe
Gluten-Free Friendly
This recipe is naturally gluten-free as written. The dry rub uses simple spices and brown sugar, while the cooking liquid relies on chicken broth and vinegar. Just double-check your barbecue sauce—some brands add wheat-based thickeners. I always reach for Sweet Baby Ray’s as it’s certified gluten-free. 💪
Low-Carb Adaptations
To reduce carbs, swap the 0.25 cup Brown Sugar in the dry rub for 2 tbsp erythritol or monk fruit sweetener. Use a sugar-free barbecue sauce like G Hughes—it has the same tangy flavor without the sugar. The ribs stay just as tender and flavorful.
Dairy-Free by Default
There’s no dairy in this recipe, so it’s safe for anyone avoiding milk products. The olive oil for searing and the chicken broth are both dairy-free. If you’re using store-bought barbecue sauce, verify it’s made without butter or cream.
Lower-Sodium Option
Use low-sodium chicken broth and reduce the added salt in the dry rub by half. Many barbecue sauces are high in sodium, so look for low-sodium varieties or make your own. I find Stubb’s offers a great lower-sodium option without sacrificing taste. 💡
Pork-Free Alternative
Swap the 2 lb Pork Baby Back Ribs for 2 lb beef short ribs. The cooking time and pressure remain the same, but beef ribs have a richer, more robust flavor. The dry rub and sauce work perfectly with beef, giving you the same smoky, tender result.
Nut Allergy Note
This recipe is naturally nut-free, but always check your barbecue sauce and liquid smoke labels. Some brands process their products in facilities that handle nuts. Stick with trusted brands like Sweet Baby Ray’s or Stubb’s for safety.
Nutrition Facts
Frequently Asked Questions
Do I need to remove the membrane from the ribs first?
Yes, always remove the tough membrane on the bone side before seasoning. Slide a butter knife under it, lift, then pull it off with a paper towel for better grip. This ensures the rub penetrates the meat properly.
Can I use spare ribs instead of baby back ribs?
Spare ribs work well but need 5 extra minutes of pressure cooking. They have more connective tissue, so the additional time helps them become tender. Baby backs are leaner and cook faster.
Why do my ribs turn out tough?
This usually happens if there’s not enough liquid in the pot. Ensure you have at least 0.5 cup Chicken Broth and don’t stack ribs too high. Also, avoid quick-releasing all pressure—let it release naturally for 10 minutes first.
Can I make these without liquid smoke?
Yes, but the smoky flavor will be milder. Boost it with 1 extra tsp smoked paprika in the rub or a dash of chipotle powder. The pressure cooker won’t replicate a smoker, but these add depth.

- 6 Oz Chocolate Chip Cookie Recipe: Perfectly Balanced Crispy Edges and Chewy Hearts - September 25, 2026
- 6-Inch Coffee Cake Recipe: Vanilla Bean Swirls and Buttery Streusel Topping - September 25, 2026
- 1 Hour Soup Recipe: Velvety Richness Without the Wait - September 25, 2026