
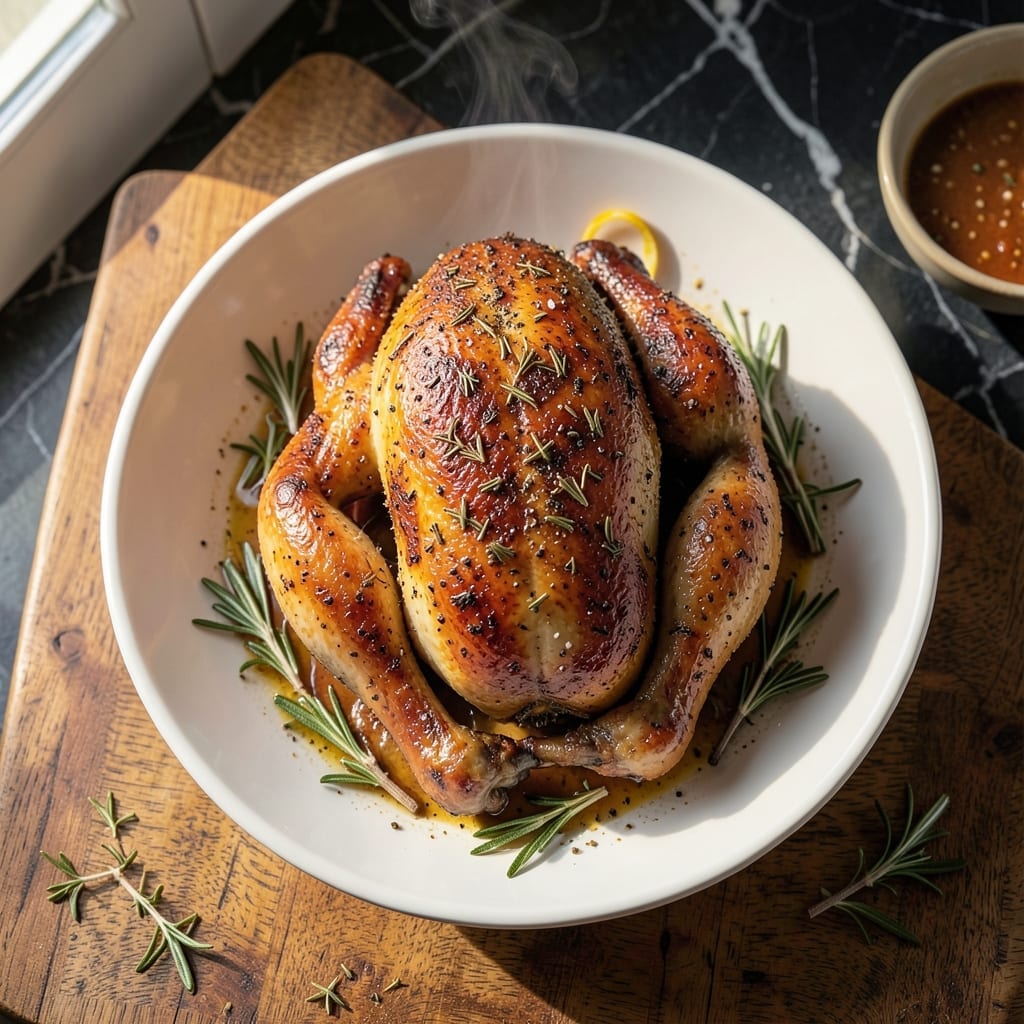
This Instant Pot method delivers fall-off-the-bone tender chicken with herb-crusted crispy skin—all in a fraction of the time.
I developed this technique after years of oven roasting, realizing pressure cooking locks in juices while the broiler finishes the skin to perfection. No dry meat here.
The process is straightforward: sear, pressure cook, then crisp. What emerges is chicken with restaurant-quality flavor and texture, ready in under an hour.
Serve with roasted vegetables or a simple salad. Here’s how to make it.
Ingredients for Instant Pot Roasted Chicken
Whole chicken and herbs create restaurant-quality results in your pressure cooker.
| Ingredient | Amount | Notes |
|---|---|---|
| Whole Chicken 🍗 | 4 lb | Pat dry, room temperature |
| Kosher Salt 🧂 | 1 ½ tbsp | Diamond Crystal preferred |
| Black Pepper 🌶️ | 1 tsp | Freshly ground coarse |
| Dried Thyme 🌿 | 1 tbsp | Crushed between fingers |
| Dried Rosemary 🌿 | 1 tbsp | Finely crumbled |
| Garlic Powder 🧄 | 2 tsp | Not garlic salt |
| Onion Powder 🧅 | 1 tsp | Freshly opened can |
| Smoked Paprika 🌶️ | 1 tsp | For depth and color |
| Olive Oil 🫒 | 2 tbsp | Extra-virgin for searing |
| Chicken Stock 🥣 | 1 cup | Low-sodium preferred |
| Unsalted Butter 🧈 | 2 tbsp | Melted for herb crust |
| Fresh Parsley 🌿 | ¼ cup | Chopped for garnish |
| Lemon 🍋 | 1 whole | Zested and juiced |
The chicken quality is non-negotiable. Air-chilled, free-range birds from Whole Foods or a trusted butcher yield the most tender meat. Look for skin that’s smooth and slightly moist—not slimy or dull. For the herbs, Penzeys offers exceptional dried thyme and rosemary with intense aroma. Avoid pre-ground black pepper; freshly ground makes a noticeable difference in the crust.
No whole chicken? Bone-in, skin-on thighs (about 8 pieces) work well with half the cooking time. Missing a herb? Use poultry seasoning at equal volume—it contains most of these. Smoked paprika can be regular, but you’ll lose some depth. The butter is essential for the crispy skin finish, but avocado oil works for a dairy-free version. Always check your stock isn’t overly salty.
Store raw chicken in its original packaging on a tray (prevents leaks) for 1-2 days max. The herb mixture keeps in an airtight container for 6 months. Leftovers stay moist for 4 days refrigerated—reheat gently to preserve the crispy skin. Never refreeze thawed chicken.
Why You’ll Love This Recipe
- I’ll be real: the best part is shredding the extras for tacos, soups, or sandwiches—no waste, just easy meals ahead.
- Set It and Forget: I toss the chicken in with salt, pepper, thyme, and rosemary, seal the lid, and walk away—no babysitting required.
- Herb-Infused Magic: The Instant Pot locks in the aroma of rosemary and thyme so every bite tastes like it slow-roasted for hours.
- Sunday Dinner, Tuesday Too: Honestly, I’ve served this for a fancy Sunday supper and then again on a chaotic weeknight with zero complaints.
Step-by-Step Instructions for Instant Pot Roasted Chicken
Master the technique for crisp-skinned, fall-off-the-bone chicken using your pressure cooker.
Step 1: Season the Chicken Thoroughly
Pat the 4 lb whole chicken completely dry inside and out with paper towels. This step is crucial for achieving crispy skin. In a small bowl, combine the 1.5 tbsp kosher salt, 1 tsp black pepper, 1 tbsp dried thyme, 1 tbsp dried rosemary, 2 tsp garlic powder, 1 tsp onion powder, and 1 tsp smoked paprika.
Rub this herb mixture evenly over the entire surface of the chicken, including inside the cavity. I use my fingers to work the seasoning under the skin where possible, ensuring every bite is flavorful. Let the seasoned chicken sit at room temperature for 30 minutes to allow the salt to penetrate.
Step 2: Sear the Chicken for Color and Flavor
Set your Instant Pot to the sauté function on high heat. Add the 2 tbsp olive oil and swirl to coat the bottom. When the oil is shimmering, carefully place the chicken in the pot breast-side down. Sear undisturbed for 5-6 minutes until the skin turns deep golden brown.
Using tongs, carefully turn the chicken to sear the other side for another 3-4 minutes. The goal is to develop a rich, golden crust that will translate to crispy skin after pressure cooking. Remove the chicken to a plate and set aside temporarily.
Step 3: Pressure Cook with Aromatics
Pour the 1 cup chicken stock into the Instant Pot, using a wooden spoon to scrape up any browned bits from the bottom. This deglazing step prevents the burn notice and adds flavor to the cooking liquid. Return the chicken to the pot breast-side up.
Secure the lid and set the valve to sealing. Cook on high pressure for 25 minutes. After cooking, allow for a natural pressure release for 10 minutes, then quick-release any remaining pressure. This gradual release helps the chicken retain moisture.
Step 4: Create the Herb Butter Crisp and Finish
While the chicken rests, melt the 2 tbsp unsalted butter in a small bowl. Stir in the zest and juice of the 1 whole lemon. Brush this mixture all over the chicken, focusing on the skin.
Set the Instant Pot to air fryer mode at 400°F for 4-5 minutes to crisp the skin. Watch closely to prevent burning. The skin should become golden and crispy and the internal temperature should reach 165°F in the thickest part of the thigh.
Transfer the chicken to a cutting board and let it rest for 10 minutes before carving. Garnish with the 0.25 cup fresh parsley before serving.
Pro Tips For Making Instant Pot Roasted Chicken
- Pat It Dry: I learned this the hard way—skip this and your chicken steams instead of browns. Use paper towels to dry the skin inside and out before seasoning.
- Season Inside Too: Sounds weird, but it works: rub salt, pepper, thyme, and rosemary into the cavity. It flavors the meat from within, not just the skin.
- Use the Trivet: After burning three batches, I finally figured out the chicken needs to sit on the trivet, not in liquid. Keeps it out of the drippings so the skin crisps.
- Let It Rest: Give it a solid 10 minutes under foil after cooking—I was skeptical until I tried it, and the juices redistribute beautifully.
Dietary Considerations for These Flavors
Gluten-Free Friendly
This recipe is naturally gluten-free as written, since it relies on whole chicken, herbs, and naturally gluten-free liquids. Just ensure your chicken stock is certified gluten-free—I recommend Pacific Foods or Imagine Brand for guaranteed safety. 💪
Dairy-Free Option
To make this dairy-free, simply swap the 2 tbsp unsalted butter for an equal amount of avocado oil or olive oil in the herb mixture. The skin will still crisp beautifully, though you might miss a bit of the rich buttery flavor.
Low-Carb/Keto Perfect
With no added sugars or carbs, this dish fits perfectly into low-carb and keto diets. A 4 lb chicken yields about 1g net carbs per serving. The herbs and spices add flavor without impacting your macros.
Sodium Considerations
If watching sodium, reduce the 1.5 tbsp kosher salt by half and use low-sodium chicken stock. You can always add more salt to taste at the table. I find the natural juices compensate well for the reduction.
Allergen Notes
The only potential allergen here is dairy from the butter. For nut allergies, this recipe is completely safe. Always check your herb blends for cross-contamination if you have severe allergies. 🌱
Paleo Adaptation
This recipe is nearly paleo as-is. Just confirm your chicken stock has no added sugars or non-paleo additives. The herb crust and cooking method align perfectly with paleo principles.
Nutrition Facts
Frequently Asked Questions
Can I use chicken pieces instead of a whole bird?
Use bone-in, skin-on thighs or a mix of pieces. Reduce pressure cooking time to 12 minutes for thighs, 8 minutes for breasts. Still finish with the herb butter crisp.
Why does the chicken need to rest?
Resting for 10 minutes allows juices to redistribute. Skipping this step can cause dry meat as all the moisture leaks out when you cut into it.
What if my Instant Pot doesn’t have air fryer mode?
Transfer the chicken to a baking sheet and broil in your oven at 400°F for 4-5 minutes. Watch closely to prevent burning.
How do I prevent the burn notice?
Always deglaze the pot thoroughly after searing. Scrape up all browned bits with a wooden spoon while adding the 1 cup chicken stock.

- 6 Oz Chocolate Chip Cookie Recipe: Perfectly Balanced Crispy Edges and Chewy Hearts - September 25, 2026
- 6-Inch Coffee Cake Recipe: Vanilla Bean Swirls and Buttery Streusel Topping - September 25, 2026
- 1 Hour Soup Recipe: Velvety Richness Without the Wait - September 25, 2026