
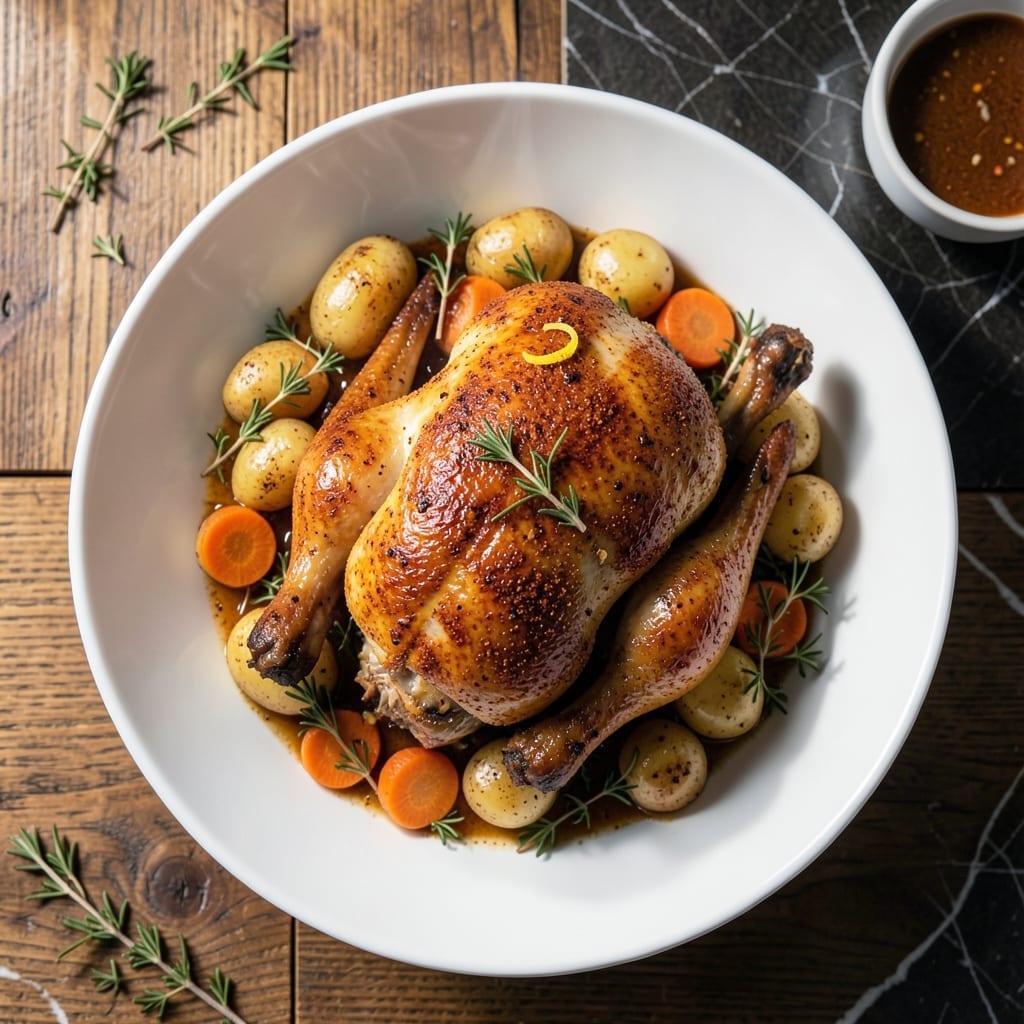
Achieving juicy rotisserie-style chicken without the rotisserie is possible with this proven method. The Instant Pot delivers tender meat and golden skin in a fraction of the time.
This recipe relies on a simple spice blend and a precise pressure cooking technique. The key is finishing with a quick broil to crisp the skin, replicating that classic rotisserie texture.
You’ll end up with meat that’s moist throughout and skin that’s perfectly browned. The seasonings create a flavorful crust that locks in every drop of natural juiciness.
The entire process takes about one hour from start to finish. This method guarantees consistent results every time you make it.
Ingredients for Instant Pot Rotisserie Chicken
Simple spice blend and a whole chicken are all you need for this method.
| Ingredient | Amount | Notes |
|---|---|---|
| Whole Chicken 🍗 | 3 ½ lb | Giblets removed, patted dry |
| Paprika 🌶️ | 2 tsp | Sweet or smoked variety |
| Garlic Powder 🧄 | 2 tsp | Not garlic salt |
| Onion Powder 🧅 | 1 ½ tsp | Fresh ground preferred |
| Dried Thyme 🍃 | 1 tsp | Crushed between fingers |
| Dried Rosemary 🌿 | 1 tsp | Crushed between fingers |
| Sea Salt 🧂 | 1 ½ tsp | Fine grain, Diamond Crystal |
| Black Pepper 🌶️ | 1 tsp | Freshly ground preferred |
| Olive Oil 🫒 | 2 tbsp | Extra-virgin for richness |
| Chicken Broth 💧 | ½ cup | Low-sodium preferred |
| Lemon Juice 🍋 | 1 tbsp | Freshly squeezed |
| Unsalted Butter 🧈 | 1 tbsp | Melted for basting |
The chicken quality is critical for optimal results. Opt for a whole bird around 3.5 pounds—lighter than typical store-bought rotisserie chickens but ideal for even cooking in the Instant Pot. Look for fresh, never frozen, with smooth, unblemished skin. The skin should be pale pink, not grayish. Most Whole Foods locations carry high-quality options, though any reputable grocer will suffice.
No paprika? Substitute with equal parts cayenne and sweet paprika for a milder heat. Out of fresh herbs? Dried at half the quantity works in a pinch. For the broth, vegetable broth in a 1:1 ratio maintains the moisture balance. The lemon juice is non-negotiable—it brightens the flavor profile. If you must omit, add a pinch of citric acid instead.
Store uncooked chicken in the coldest part of your fridge for up to 2 days. Once cooked, it keeps for 4 days refrigerated or 3 months frozen. The spice blend can be pre-mixed and stored in an airtight container for 6 months—perfect for an instant flavor boost anytime.
Why You’ll Love This Recipe
- Set and Forget: I toss everything in the Instant Pot, seal the lid, and walk away—no basting, no flipping, just perfect chicken every time.
- That Spice Rub: Paprika and garlic powder create a smoky, savory crust that makes the skin irresistibly crispy.
- Meal Prep Magic: Shreds beautifully for tacos, soups, or salads—honestly, it’s my weekly shortcut for three different dinners.
- Budget Stretcher: One whole chicken feeds my family for two meals, and the leftovers taste even better the next day.
Step-by-Step Instructions for Instant Pot Rotisserie Chicken
This method delivers perfectly juicy meat with golden skin using your pressure cooker.
Step 1: Season the Chicken Inside and Out
Pat the 3.5 lb Whole Chicken completely dry with paper towels, including the cavity. In a small bowl, combine the 2 tsp Paprika, 2 tsp Garlic Powder, 1.5 tsp Onion Powder, 1 tsp Dried Thyme, 1 tsp Dried Rosemary, 1.5 tsp Sea Salt, and 1 tsp Black Pepper.
Rub this spice blend all over the chicken, including under the skin and inside the cavity. I use my fingers to gently separate the skin from the breast meat so the seasoning penetrates deeply. This ensures every bite is packed with flavor.
Step 2: Sear the Chicken for Golden Skin
Set your Instant Pot to the Sauté function on Normal/Medium heat. Add the 2 tbsp Olive Oil and let it heat until shimmering. Place the chicken breast-side down in the pot and sear undisturbed for 5-6 minutes until the skin turns deep golden brown.
Carefully flip the chicken using tongs and sear the other side for another 4-5 minutes. The skin should release easily when it’s properly browned. This step is crucial for that rotisserie-style appearance and flavor.
Step 3: Pressure Cook with Aromatic Liquid
Pour in the 0.5 cup Chicken Broth and 1 tbsp Lemon Juice, then deglaze the pot by scraping up any browned bits with a wooden spoon. Place the trivet in the pot and set the chicken breast-side up on top.
Secure the lid, set the valve to Sealing, and cook on High Pressure for 25 minutes. Let the pressure release naturally for 10 minutes, then quick-release any remaining pressure. The natural release prevents the meat from seizing up.
Step 4: Finish with Butter Basting
Carefully remove the chicken to a serving platter. Pour the 1 tbsp Unsalted Butter over the hot chicken and let it melt, basting the bird with the buttery juices. This final touch adds richness and enhances the golden color.
Let the chicken rest for 10-15 minutes before carving. This resting period allows the juices to redistribute, ensuring the meat stays moist. The internal temperature should reach 165°F in the thickest part of the thigh.
Pro Tips For Making Instant Pot Rotisserie Chicken
- Dry the Chicken: Pat the whole chicken completely dry with paper towels before seasoning—I learned this the hard way when my first few attempts came out steamed instead of crispy.
- Use the Trivet: Always place the chicken on the trivet, not directly in the liquid, or you’ll end up with soggy skin instead of that rotisserie-style texture.
- Skip the Overcrowding: If your Instant Pot is small, resist the urge to stuff the cavity too full—it blocks heat circulation and leads to uneven cooking.
- Natural Release Only: Let the pressure release naturally for 10-15 minutes after cooking, or the meat will be tough and the juices will escape, leaving you with a dry bird.
Troubleshooting instant pot rotisserie chicken
Skin Not Crispy
If your chicken skin lacks that signature crisp, try broiling for 3-5 minutes after pressure cooking. I place mine on a baking sheet under a preheated broiler. The high, direct heat mimics rotisserie browning. 🔥
Uneven Cooking
For consistent doneness, ensure your 3.5 lb Whole Chicken fits comfortably in the pot without touching the sides. A too-large bird won’t cook evenly. Trim wings if needed for better circulation.
Dry Meat Issues
Prevent dryness by not overcooking—stick to the 25-minute pressure time. Also, always use the 10-minute natural release to avoid shocking the meat. The juices need time to settle.
Burn Notice
If you get a burn warning, release pressure immediately and check for stuck-on bits. Add ¼ cup extra Chicken Broth to deglaze, then restart. This usually resolves the issue without affecting flavor.
Weak Seasoning
For bolder flavor, don’t skip seasoning under the skin. I rub 1 tsp Sea Salt directly on the meat before applying the spice blend. This ensures the seasoning penetrates deeply.
Stuck Skin
If skin sticks during searing, don’t force it. Let it cook longer until it releases naturally. Premature flipping tears the skin, ruining that golden presentation. Patience pays off here. ✨
Nutrition Facts
Frequently Asked Questions
Can I use a larger chicken?
A 3.5 lb bird fits best. Larger ones may not cook evenly. For 4-5 lb chickens, increase pressure time to 30 minutes.
How do I get crispier skin?
After pressure cooking, broil for 3-5 minutes on high. Brush with melted butter first for extra browning.
What if I don’t have a trivet?
Use crumpled foil or a steamer basket. The chicken must stay above liquid. Avoid direct contact with broth.
Can I skip the searing step?
Searing adds flavor and color. Skip it only if short on time, but expect less crispy skin.

- 4C Bread Crumbs Meatballs Recipe: Crispy Crust and Juicy Centers - September 25, 2026
- 6 Oz Chocolate Chip Cookie Recipe: Perfectly Balanced Crispy Edges and Chewy Hearts - September 25, 2026
- 6-Inch Coffee Cake Recipe: Vanilla Bean Swirls and Buttery Streusel Topping - September 25, 2026