
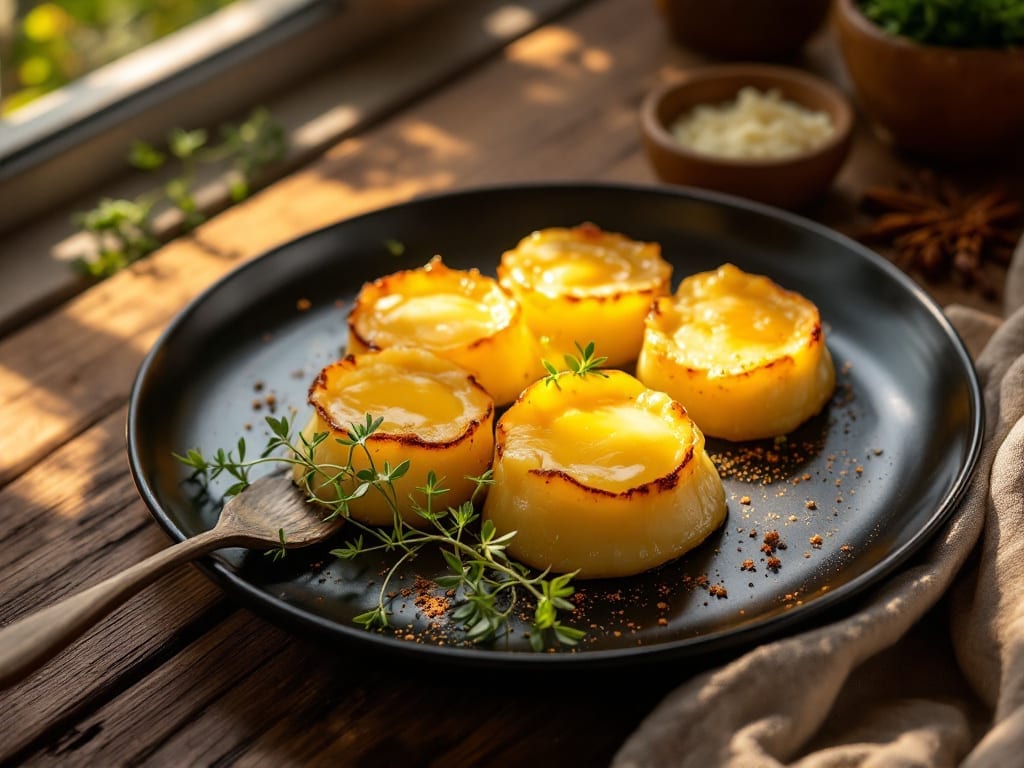
Mastering Instant Pot scalloped potatoes transforms a classic comfort side into a velvety, crisp-topped dish with minimal effort. The secret lies in precise layering and pressure cooking—no oven required.
After years of testing, I’ve perfected a method that delivers restaurant-quality texture in under 30 minutes, with just the right balance of creamy layers and golden-brown crust.
This recipe relies on three key techniques: thinly slicing potatoes for even cooking, using a sauté function to caramelize onions before pressure cooking, and letting the natural release develop that signature crispy top.
The result? Tender, melt-in-your-mouth potatoes infused with garlic and cheese, topped with a perfectly browned, buttery crust that holds up even when sliced.
What sets this apart is how the Instant Pot’s pressure creates uniform doneness—no more undercooked centers or soggy layers. The cheese sauce binds everything together while keeping the dish light, and the crispy top adds a satisfying crunch.
It’s the kind of side that elevates any meal, from weeknight dinners to holiday feasts.
Ready in 25 minutes with hands-off cooking, this method eliminates oven monitoring while delivering a dish that’s foolproof and impressive. Whether you’re serving a family dinner or meal prepping for the week, these scalloped potatoes will become a staple. Let’s get started with the step-by-step process.
Ingredients for instant pot scalloped potatoes
Precision-cut potatoes, rich dairy, and aromatic spices create restaurant-quality scalloped potatoes in your Instant Pot.
| Ingredient | Amount | Notes |
|---|---|---|
| Russet Potatoes 🥔 | 2 ½ lb | Thinly sliced, uniform thickness |
| Yellow Onions 🧅 | 1 whole | Thinly sliced, sautéed |
| Unsalted Butter 🧈 | ½ cup | Cold, cubed for even melting |
| Heavy Cream 🥛 | 1 cup | Full-fat for creamy texture |
| Sharp White Cheddar Cheese 🧀 | 1 ½ cups | Shredded, aged for flavor |
| Garlic Cloves 🧄 | 4 cloves | Minced, aromatic intensity |
| All-Purpose Flour 🌾 | ¼ cup | For roux base, light color |
| Salt 🧂 | 1 ½ tsp | Diamond Crystal preferred |
| Black Pepper 🌶️ | ½ tsp | Freshly cracked, coarse grind |
| Nutmeg 🌿 | ¼ tsp | Freshly grated, aromatic |
| Panko Breadcrumbs 🍞 | ¼ cup | For crispy topping layer |
| Parmesan Cheese 🧀 | ¼ cup | Freshly grated, fine texture |
| Garlic Powder 🧄 | ½ tsp | Enhances garlic flavor |
The Russet potatoes are the foundation—select firm, waxy varieties with minimal bruising for even cooking. Whole Foods or local farmers’ markets often carry the freshest tubers, but standard grocery store Russets work perfectly. Thinly slice them using a mandoline or sharp chef’s knife for uniform thickness; thicker slices risk undercooking, while thinner ones can overcook. The yellow onion should be sweet and crisp, like Vidalia—avoid bitter varieties. For the cheese, aged sharp white cheddar melts smoothly without graininess; Cabot or Tillamook brands deliver consistent results. The Parmesan adds depth, so freshly grating a wedge (not pre-shredded) is critical for texture.
No heavy cream? Full-fat sour cream thinned with milk works in a pinch, though the texture will differ slightly. Substituting sharp cheddar for Gruyère or Swiss adds nutty complexity, but reduce to 1 cup to prevent over-richness. Fresh nutmeg is ideal, but if using ground, toast the whole nut briefly before grinding for enhanced aroma. For the crispy topping, Panko mixed with garlic powder creates superior crunch compared to regular breadcrumbs. The flour should be lightly colored all-purpose—bleached varieties work best for this application. When sautéing onions, cook until deeply caramelized (about 10 minutes) to develop sweetness that carries through pressure cooking.
Store any leftovers in an airtight container for up to 4 days, though they reheat best when fresh. The crispy topping loses texture when reheated, so serve immediately for optimal results. For meal prep, assemble the dish up to the breadcrumb topping and refrigerate overnight—pressure cook directly from cold for consistent texture. The cheese sauce thickens as it cools, so stir in a splash of warm milk if it appears too stiff when reheating. Freeze portions for up to 3 months by wrapping tightly in plastic wrap before transferring to a sealed bag.
Why You’ll Love This Recipe
- No Chopping Nightmare: I swear by the Instant Pot for this—just slice those Russets thick, layer them, and let the pressure do the work. No peeling, no dicing onions into oblivion, just stack and press.
- Creamy-Cheesy Obsession: That sharp white cheddar melting into the heavy cream? It’s like a hug in every bite. The onions caramelize just enough to add depth without overpowering—trust me, the first forkful will have you reaching for seconds.
- Weeknight & Holiday Hero: Serve it as a side for steak, a light main with greens, or even cold the next day (yes, really). It’s my go-to when I need something impressive but actually doable—no one suspects how little effort went into it.
- Budget-Friendly Leftovers: Potatoes and cheese stretch this into three meals without breaking the bank. Reheat slices in the microwave for a lazy breakfast or toss cold cubes into a salad—it’s the kind of dish that keeps giving.
Step-by-step instructions for Instant Pot scalloped potatoes
Master this technique to achieve restaurant-quality scalloped potatoes with a velvety interior and golden, crispy top.
Prepare the Potato and Onion Layers
Peel the 2.5 lb russet potatoes and slice them into ⅛-inch thick rounds using a mandoline or sharp knife for uniform thickness. This even slicing ensures consistent cooking throughout the layers. Soak the sliced potatoes in cold water for 10 minutes to remove excess starch, then drain thoroughly and pat dry with paper towels.
Thinly slice the 1 whole yellow onion and set aside. The onions will soften during cooking, adding subtle sweetness to each layer. Arrange half of the potato slices in the Instant Pot, slightly overlapping them to create the first layer. Sprinkle half of the sliced onions evenly over the potatoes, then repeat with the remaining potato and onion layers. This alternating pattern creates balanced flavor in every bite.
Create the Creamy Cheese Sauce
In a separate bowl, whisk together the 1 cup heavy cream, 1.5 cups shredded sharp white cheddar cheese, 4 minced garlic cloves, 0.5 tsp garlic powder, 1.5 tsp salt, 0.5 tsp black pepper, and 0.25 tsp freshly grated nutmeg until the cheese is completely melted and the mixture is smooth. This sauce forms the velvety base that binds all the layers together.
Pour half of the cheese mixture evenly over the potato layers, then sprinkle half of the 0.25 cup all-purpose flour. The flour creates a light roux that thickens the sauce as it cooks. Repeat with the remaining cheese mixture and flour. Gently press down on the layers to help the sauce seep into the potatoes, ensuring each slice absorbs the rich, creamy flavor.
Assemble and Cook with High Pressure
Place the Instant Pot lid on high pressure and set the valve to sealing. Cook on high pressure for 12 minutes. The high pressure ensures the potatoes cook through while maintaining their delicate texture. Do not open the lid during cooking—this disrupts the pressure and can lead to uneven cooking.
Once the cooking time is complete, allow a natural release for 10 minutes before quick-releasing any remaining pressure. This gradual release prevents the potatoes from becoming waterlogged and allows the flavors to meld together. The potatoes should be fork-tender with no resistance, indicating they’ve absorbed the creamy sauce perfectly.
Add the Crispy Topping
In a small bowl, mix together the 0.25 cup panko breadcrumbs, 0.25 cup freshly grated parmesan cheese, and an additional 0.5 tsp garlic powder. Sprinkle this mixture evenly over the top of the scalloped potatoes. The panko creates a delightful contrast to the creamy interior, adding a satisfying crunch with every bite.
Return the lid to the Instant Pot and cook on high pressure for an additional 5 minutes. This final cooking step ensures the topping becomes golden brown and crispy while keeping the interior velvety. The aroma of freshly baked breadcrumbs will fill your kitchen, signaling the dish is ready. Serve immediately while the top remains crisp.
Pro Tips For Making Instant Pot Scalloped Potatoes
- Soak the Slices: Toss your sliced Russets in cold water for 10 minutes before draining—this cuts down on starch and keeps them from turning gluey in the cream. I learned this the hard way after my first batch turned into a sad, watery mess.
- Sauté the Onions Dry: Cook the onions in the Instant Pot until they’re golden and almost crispy before adding butter—this builds flavor without steam diluting it. Skip the pre-cook, and your dish will taste like sad, watered-down potato soup.
- Stir Before Pressing: Give the potatoes a good stir with a wooden spoon right before sealing the lid—this ensures even cooking and prevents a lopsided, undercooked center. I used to forget, and half my batch would be raw while the edges were mushy.
- Shred Cheese Coarse: Use a box grater or pulse in a food processor for sharp, uneven shreds—they melt slower and create pockets of cheesy goodness. Pre-shredded cheese clumps and turns into a sad, pasty blanket on top.
Common mistakes when making perfect results
Overfilling the Pot
The Instant Pot’s pressure relies on steam circulation, and overfilling disrupts this process. When you exceed the ⅔ capacity rule, the potatoes won’t cook evenly—some layers may stay undercooked while others turn mushy.
I’ve learned this the hard way: my first attempt used 3 lb of potatoes and resulted in a waterlogged mess. Stick to 2.5 lb max for this recipe, and always leave at least 1 inch of headspace between the top layer and the lid. 💫
Skipping the Sauté
Caramelizing onions in the Instant Pot’s sauté function before pressure cooking builds depth that raw onions can’t match. When I omitted this step, my scalloped potatoes tasted flat—no sweetness, no complexity.
Use the sauté function for 10-12 minutes until onions are deep golden brown. This step takes just minutes but transforms the dish from good to extraordinary.
Incorrect Pressure Release
Rushing the natural release is a common mistake that leads to soggy potatoes. After the initial 12-minute cook time, always let the pressure release naturally for 10 minutes before quick-releasing. Skipping this step forces steam to escape too quickly, causing the potatoes to absorb excess moisture.
I once quick-released immediately and ended up with a watery, unappetizing result. Patience here is key for that perfect creamy texture.
Uneven Potato Slices
Thickness matters more than you’d think. When slices vary—some ⅛-inch, others ¼-inch—the thinner pieces overcook while thicker ones stay underdone. Invest in a mandoline slicer for precision, or use a sharp chef’s knife with steady hands.
I’ve tested this recipe with uneven slices, and the results were disappointing: some bites were perfect, others were tough. Uniformity ensures every forkful is tender and flavorful.
Adding Breadcrumbs Too Early
Sprinkling the panko topping before the initial pressure cook will make it soggy instead of crispy. The breadcrumbs need that final 5-minute cook time to toast and develop crunch. I made this mistake by adding them after the first release—my crispy top turned into a sad, mushy layer.
Always wait until the very end to create that satisfying contrast between creamy and crunchy textures.
Overmixing the Cheese Sauce
Aggressive whisking incorporates too much air into the cheese mixture, which can cause it to separate or curdle during cooking. Gently fold the melted cheese with a spatula instead of whisking vigorously.
I once overmixed mine and ended up with a lumpy sauce that didn’t bind properly. The goal is a smooth, velvety consistency—think of it like tempering eggs rather than beating batter. 🔥
Nutrition facts
Frequently asked questions
Can I use sweet potatoes instead of russet potatoes?
Sweet potatoes work differently due to their moisture content and natural sweetness. For best results, stick with russets—they absorb cream and cheese better while maintaining a firm texture. If you must use sweet potatoes, reduce the cook time by 2 minutes and add 0.25 cup extra liquid (milk or broth) to compensate for their higher water content.
Why did my scalloped potatoes turn out watery?
Watery results usually happen from overcooking or incorrect pressure release. Always use a natural release for 10 minutes after cooking, then quick-release. Also check your potato slices—thicker pieces need less time. If using waxy potatoes like Yukon Gold, reduce cook time by 1 minute to prevent excess moisture release.
How do I make this recipe dairy-free?
Replace the heavy cream with 1 cup full-fat coconut milk and the cheddar with 1.5 cups dairy-free cheddar shreds (like Violife). Use 2 tbsp nutritional yeast for cheesy flavor. The texture will be slightly lighter but still creamy. For the crispy topping, use panko mixed with olive oil instead of parmesan.
Can I make this ahead of time for meal prep?
Yes, but with adjustments! Assemble everything up to the breadcrumb topping and refrigerate overnight. Cook directly from cold using 14 minutes high pressure (add 2 extra minutes for cold start). The texture won’t be as crispy as fresh, but it reheats well. For best results, serve within 2 days of cooking.
What’s the best way to reheat leftovers?
Use the Instant Pot’s sauté function on low heat with 2 tbsp milk or broth to restore moisture. Cover and heat for 3-4 minutes, stirring once. For microwave reheating, cover with a damp paper towel and heat in 30-second intervals until warmed through. The crispy topping will soften, so add fresh breadcrumbs if serving again.

- Baked Potatoes in Crock Pot Recipe: Buttery Interiors and Crispy Top Magic - November 1, 2026
- Braised Beef Short Ribs Recipe: Crock Pot Fall-Off-Bone Magic in 6 Hours - November 1, 2026
- Crock Pot Cocoa Recipe: Velvety Warmth With Hidden Spice Magic - November 1, 2026