
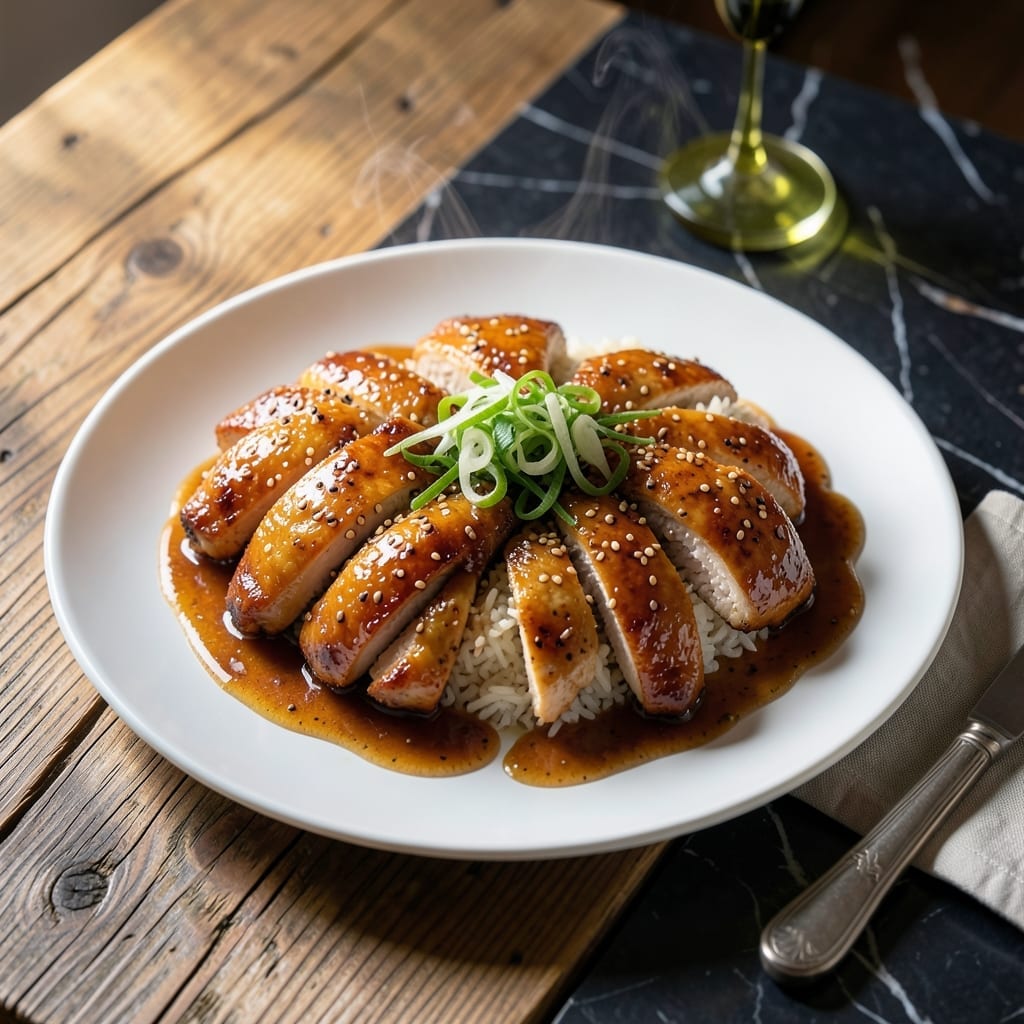
This Instant Pot method delivers perfectly tender chicken with a sticky, glossy glaze every time. The pressure cooker locks in moisture while infusing the meat with sweet and savory flavors.
The secret lies in the balance of honey, soy sauce, and sesame oil, creating a sauce that clings to each piece. A quick sear before pressure cooking adds depth without extra effort.
You’ll get fall-off-the-bone chicken coated in a rich, caramelized sauce that’s ready in under 30 minutes. It’s a restaurant favorite made simple at home.
Serve over rice with steamed vegetables for a complete meal. The results speak for themselves.
Ingredients for Instant Pot Sesame Chicken
Pantry staples plus a quick stop at the market. Nothing exotic, just bold flavor.
| Ingredient | Amount | Notes |
|---|---|---|
| Boneless Skinless Chicken Thighs 🍗 | 1 ½ lb | Cut into bite-sized pieces |
| Soy Sauce 🫒 | ½ cup | Low-sodium preferred for balance |
| Honey 🍯 | ⅓ cup | Pure, not processed |
| Sesame Oil 🫒 | 1 tbsp | Toasted for rich flavor |
| Rice Vinegar 💧 | 2 tbsp | Adds tangy balance |
| Garlic Cloves 🧄 | 4 cloves | Minced for maximum flavor |
| Fresh Ginger 🌿 | 1 tbsp | Peeled and grated |
| Cornstarch 🌾 | 2 tbsp | For thickening the sauce |
| Brown Sugar 🍚 | 2 tbsp | Light or dark works |
| Sesame Seeds 🌰 | 2 tbsp | Toasted for garnish |
| Green Onions 🧅 | ¼ cup | Sliced thinly on bias |
| Olive Oil 🫒 | 1 tbsp | For searing chicken |
| Water 💧 | ¼ cup | For pressure cooking |
| Salt 🧂 | ½ tsp | Kosher or sea salt |
| Black Pepper 🌶️ | ¼ tsp | Freshly ground preferred |
The chicken is everything here. Thighs stay juicier than breasts in the pressure cooker—look for skinless, boneless at Costco or Sam’s Club for bulk savings. The honey needs to be the real deal (none of that corn syrup stuff). Local farmers market honey adds depth you can taste. Sesame oil? Toasted is non-negotiable for that nutty punch. Regular sesame oil just won’t cut it.
No honey? Maple syrup works at a 1:1 ratio but adds a different sweetness. Swap soy sauce for tamari if you need gluten-free. Fresh ginger paste from a tube at Trader Joe’s saves time and tastes just as good as grated. Skipping the sear? The sauce won’t caramelize as deeply, but it’ll still be delicious. For extra richness, add half a tablespoon of hoisin to the sauce mix.
Leftovers keep 4-5 days in the fridge—reheat gently to avoid drying out the chicken. Freezes beautifully for up to 3 months. I portion mine into containers with rice for easy lunches. The sesame seeds and green onions are best added fresh, so store them separately if making ahead.
Why You’ll Love This Recipe
- I’ll be real: this is my go-to when I need dinner on the table faster than takeout arrives.
- Set It and Forget: Honestly, I just dump everything in the Instant Pot, press start, and walk away—no babysitting required.
- Sweet-Savory Magic: That honey and soy sauce combo caramelizes into a sticky glaze that coats every bite of tender chicken.
- Weeknight Hero: I’ll be real: this is my go-to when I need dinner on the table faster than takeout arrives.
Step-by-Step Instructions for Instant Pot Sesame Chicken
Here’s the method that delivers that sticky, glossy glaze and tender chicken you’re after.
Step 1: Sear the Chicken for Maximum Flavor
Set your Instant Pot to the Sauté function and add the 1 tbsp Olive Oil. While it heats, pat the 1.5 lb Boneless Skinless Chicken Thighs dry with paper towels and season with 0.5 tsp Salt and 0.25 tsp Black Pepper.
Add the chicken in a single layer and sear for 3-4 minutes per side until golden brown. Don’t crowd the pot—work in batches if needed. The browning adds depth to the sauce, so don’t skip this step even if you’re tempted to rush.
Step 2: Build the Sauce Base in the Pot
Remove the chicken and set aside. In the same pot, add the minced 4 cloves Garlic Cloves and grated 1 tbsp Fresh Ginger. Sauté for 30 seconds until fragrant, then pour in the 0.5 cup Soy Sauce, 0.33 cup Honey, 2 tbsp Rice Vinegar, and 2 tbsp Brown Sugar.
Stir to combine, scraping up any browned bits from the bottom. These bits are pure flavor—incorporating them ensures a rich, complex sauce. Let the mixture come to a gentle simmer for 2 minutes to meld the flavors.
Step 3: Pressure Cook to Tender Perfection
Return the chicken to the pot, along with any accumulated juices. Add the 0.25 cup Water and stir gently. Secure the lid, set the valve to Sealing, and cook on High Pressure for 8 minutes.
Once the cooking time is complete, let the pressure release naturally for 5 minutes, then quick-release any remaining pressure. The chicken should be fall-apart tender at this point, with an internal temperature of at least 165°F.
Step 4: Thicken the Sauce and Finish
Switch the Instant Pot back to Sauté mode. In a small bowl, whisk the 2 tbsp Cornstarch with 2 tbsp of cold water to create a slurry. Stir the slurry into the pot and cook for 2-3 minutes until the sauce thickens to a glossy, syrupy consistency.
Add the 1 tbsp Sesame Oil and stir to incorporate. This adds a nutty depth that ties all the flavors together. Taste and adjust seasoning if needed—though the soy sauce and honey should provide a perfect balance of salty and sweet.
Step 5: Garnish and Serve
Sprinkle the 2 tbsp Sesame Seeds and sliced 0.25 cup Green Onions over the top of the chicken. Let it sit for 2-3 minutes so the seeds toast slightly in the residual heat.
Serve immediately over steamed rice or noodles, with extra sauce spooned on top. The chicken should be coated in a thick, sticky glaze that clings to every bite. The sesame seeds add a subtle crunch, while the green onions bring a fresh, sharp contrast to the rich, savory-sweet dish.
Pro Tips For Making Instant Pot Sesame Chicken
- Sear the Thighs: Brown the chicken thighs in the Instant Pot first using the sauté function—about 3-4 minutes per side. I learned this the hard way: skipping this step leaves the meat bland and the sauce thin.
- Thin the Honey: Mix the honey with 1 tablespoon of warm water before adding it to the pot. Sounds weird, but it works: prevents clumping and guarantees an even coating on the chicken.
- Skip the Overcrowding: Don’t dump all the chicken in at once if your pot is small. Cook in batches if needed—steaming instead of searing gives you rubbery meat and a watery sauce.
- Thicken Last: After pressure cooking, remove the chicken and reduce the sauce uncovered for 5 minutes. This isn’t the prettiest method, but it’s the tastiest—no one likes sesame chicken swimming in liquid.
Essential Equipment for Great instant pot sesame chicken
Instant Pot Models
I recommend the 6-quart Instant Pot Duo for most home cooks—it handles 4-6 servings perfectly. The 8-quart is great for larger families but may require adjusted cooking times. Avoid the 3-quart; it’s too small for even cooking. 💡
Must-Have Accessories
A good wooden spoon won’t scratch your pot’s non-stick surface. I use OXO’s 12-inch for stirring. Also grab a silicone mini mitt for handling the hot inner pot.
Pressure Cooking Tools
Invest in a steamer basket for perfect rice to serve with this dish. The trivet that comes with your Instant Pot works for elevating the chicken if needed. A quick-release tool prevents burns when venting steam.
Measuring Essentials
Accurate measurements matter for the sauce balance. I use Pyrek glass measuring cups for liquids and OXO good grips for dry ingredients. A kitchen scale ensures perfect 1.5 lb chicken portions every time.
Searing Success
For that perfect sear, ensure your pot is fully preheated before adding oil. The Sauté function should be on Normal (not More) heat. A splatter screen keeps your stovetop clean during this step. 🔥
Storage Solutions
Leftovers taste amazing, so have airtight containers ready. I prefer glass containers with locking lids for storing this dish. They’re microwave-safe and won’t absorb odors like plastic can.
Nutrition Facts
Frequently Asked Questions
Can I use chicken breasts instead of thighs?
Yes, but reduce pressure cooking time to 6 minutes to prevent dryness. Thighs stay juicier, but breasts work if that’s what you have. Add 1 tbsp extra water to keep them moist.
What if my sauce is too thin?
Make another cornstarch slurry with 1 tbsp each cornstarch and cold water. Stir into simmering sauce and cook for 1-2 minutes until thickened. Avoid over-thickening—it firms up as it cools.
How do I prevent the burn notice?
Always deglaze the pot thoroughly after searing. Add at least 0.25 cup Water before pressure cooking. If it happens, release pressure, scrape the bottom, and restart.
Can I make this gluten-free?
Swap regular soy sauce for tamari and use cornstarch labeled gluten-free. All other ingredients are naturally gluten-free. Verify all labels to be safe.

- 4C Bread Crumbs Meatballs Recipe: Crispy Crust and Juicy Centers - September 25, 2026
- 6 Oz Chocolate Chip Cookie Recipe: Perfectly Balanced Crispy Edges and Chewy Hearts - September 25, 2026
- 6-Inch Coffee Cake Recipe: Vanilla Bean Swirls and Buttery Streusel Topping - September 25, 2026