
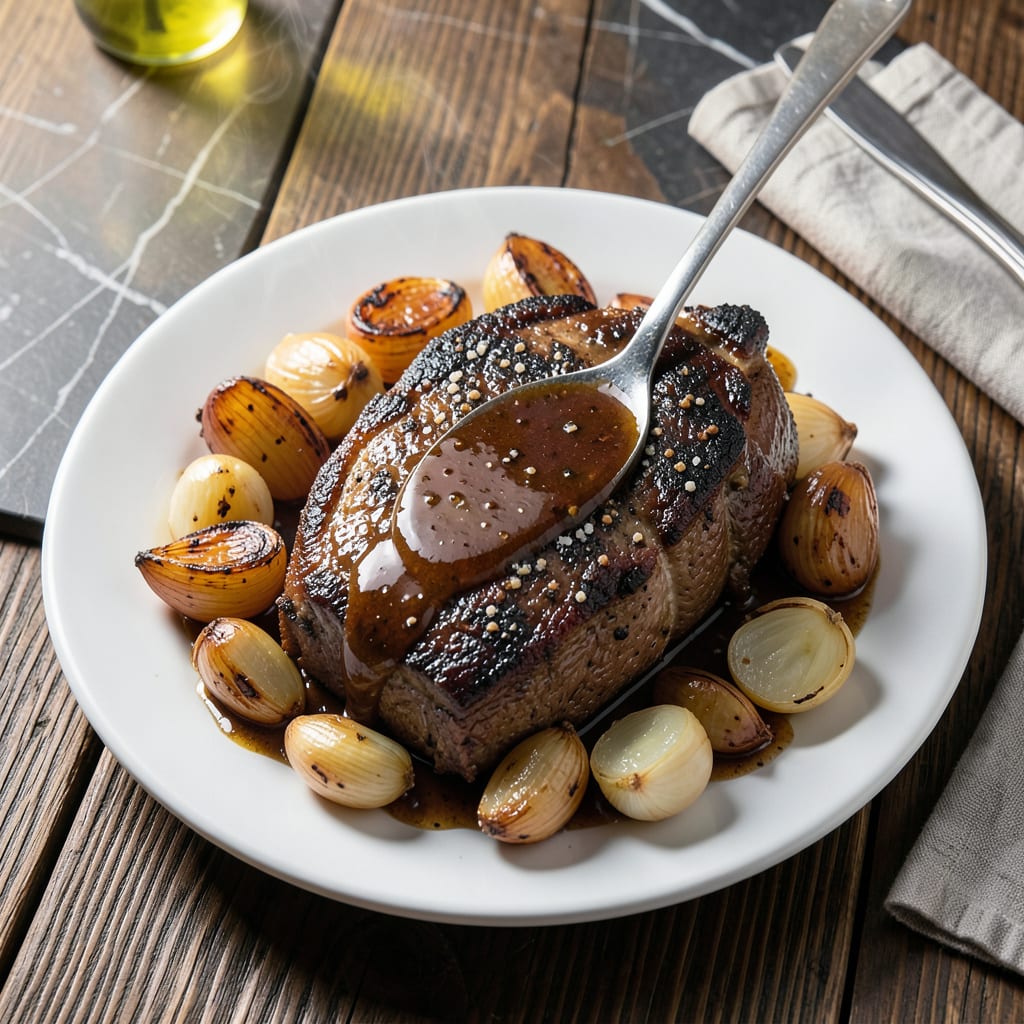
This dual-method pot roast delivers melting tenderness whether you use an Instant Pot or slow cooker. The secret lies in proper searing and layered seasoning.
Both techniques transform tough cuts into fall-apart meat with rich, savory depth. The result is a tender, flavorful centerpiece for any meal.
Ingredients for Instant Pot Slow Cook Pot Roast
A few quality ingredients and proper technique create melting tenderness in every bite.
| Ingredient | Amount | Notes |
|---|---|---|
| Chuck Roast 🥩 | 3 lb | Well-marbled, trimmed of excess fat |
| Olive Oil 🫒 | 2 tbsp | Divided for searing and sautéing |
| Kosher Salt 🧂 | 2 tsp | Diamond Crystal preferred |
| Freshly Ground Black Pepper 🌶️ | 1 tsp | Coarse grind for texture |
| Onion 🧅 | 1 whole | Yellow onion, large dice |
| Garlic Cloves 🧄 | 5 cloves | Minced for depth of flavor |
| Carrots 🥕 | 3 whole | Peeled, cut into 2-inch chunks |
| Celery Stalks 🌿 | 3 whole | Cut into 2-inch pieces |
| Beef Broth 🥣 | 2 cups | Low-sodium preferred for control |
| Red Wine 🍷 | 1 cup | Dry variety like Cabernet Sauvignon |
| Tomato Paste 🍅 | 2 tbsp | For concentrated umami richness |
| Dried Thyme 🌿 | 1 tsp | Rubbed between fingers to release oils |
| Dried Rosemary 🌿 | 1 tsp | Crushed to enhance aroma |
| Bay Leaves 🍃 | 2 whole | Removed before serving |
| Worcestershire Sauce 🍶 | 1 tbsp | Adds savory complexity |
The chuck roast is non-negotiable for optimal results. Look for heavy marbling—this fat renders down during cooking, basting the meat from within. Whole Foods or Costco typically carry well-marbled cuts. Avoid leaner options like round or sirloin; they lack the connective tissue that breaks down beautifully. The beef broth should be high-quality, as it forms the base of your braising liquid.
No red wine? Substitute with additional beef broth plus 1 tbsp balsamic vinegar for acidity. Fresh herbs can replace dried at a 3:1 ratio, but dried work perfectly here. Anchovy-free Worcestershire (like Annie’s) keeps it vegetarian if needed. The tomato paste can be swapped with 1/4 cup crushed tomatoes reduced by half, though the flavor concentration won’t be identical.
This reheats exceptionally well—flavors deepen over 2-3 days in the fridge. Freeze portions for up to 3 months in airtight containers. The fat solidifies when chilled; skim it off before reheating for cleaner texture.
Why You’ll Love This Recipe
- Set and Forget: I toss the chuck roast, salt, pepper, and onion in the Instant Pot, press a button, and walk away—dinner practically makes itself.
- Fall-Apart Tender: The slow cook function turns that tough chuck roast into buttery, melt-in-your-mouth perfection with zero effort.
- Feeds the Crew: Between us, this one pot serves my whole family plus leftovers for sandwiches the next day.
- Budget Hero: Honestly, chuck roast is cheap, and this recipe stretches it into multiple meals without tasting like compromise.
Step-by-Step Instructions for Instant Pot Slow Cook Pot Roast
This dual-method technique delivers fall-apart tenderness with deep, developed flavors every time.
Step 1: Sear the Chuck Roast to Build Flavor Foundation
Set your Instant Pot to the Sauté function on Normal heat. Add 1 tbsp olive oil and allow it to shimmer. Pat the 3 lb chuck roast completely dry, then season all sides aggressively with the 2 tsp kosher salt and 1 tsp freshly ground black pepper.
Place the roast in the pot and sear undisturbed for 4-5 minutes per side until a deep mahogany crust forms. This Maillard reaction creates the flavor base for your entire dish. Remove the roast and set aside—it will finish cooking later.
Step 2: Sauté Aromatics and Deglaze the Pot
Add the remaining 1 tbsp olive oil to the pot, then add the large-diced onion, minced garlic cloves, 2-inch carrot chunks, and 2-inch celery pieces. Sauté for 5-6 minutes until the onion begins to soften and develop color.
Add the 2 tbsp tomato paste and cook for 1-2 minutes, stirring constantly, until it darkens slightly. Pour in the 1 cup red wine and scrape the browned bits from the bottom of the pot with a wooden spoon—this deglazing step captures all the concentrated flavor from searing.
Step 3: Pressure Cook for Maximum Tenderness
Return the seared chuck roast to the pot along with any accumulated juices. Add the 2 cups beef broth, 1 tbsp Worcestershire sauce, 1 tsp dried thyme, 1 tsp dried rosemary, and 2 whole bay leaves. Stir to combine all ingredients.
Secure the lid, set the valve to Sealing, and cook on High Pressure for 60 minutes. Allow the pressure to release naturally for 15 minutes, then quick-release any remaining pressure. The roast should be fork-tender at this point, with fibers that separate easily under gentle pressure.
Step 4: Slow Cook for Enhanced Depth
For the final touch, switch to the Slow Cook function on Low for an additional 2-3 hours. This extended cooking time allows the collagen in the chuck roast to fully break down, transforming into rich gelatin that coats every bite.
The vegetables should be completely tender, and the sauce should have thickened slightly, coating the back of a spoon. Remove the bay leaves before serving. The result is a pot roast with layers of flavor and a melt-in-your-mouth texture that defines this dual-method approach.
Pro Tips For Making Instant Pot Slow Cook Pot Roast
- Sear the Chuck First: I learned this the hard way—skipping the sear leaves the roast bland and pale. Use the Instant Pot’s sauté function with 1 tablespoon olive oil to brown the chuck in batches, 3-4 minutes per side.
- Cut Onions Thick: Sounds weird, but it works: slice the onion into ½-inch pieces instead of thin strips so they hold up during the long cook and add texture to the final dish.
- Skip the Overcrowding: After burning three batches, I finally figured out that cramming too much into the pot steams the meat instead of browning it. Brown the roast in batches if needed.
- Use a Natural Release: Resist the urge to quick-release the pressure—letting it sit for 10-15 minutes after cooking guarantees the chuck stays tender and doesn’t seize up.
Troubleshooting Great instant pot slow cook pot roast
Tough Meat Issues
If your roast isn’t tender after cooking, it likely needs more time. In the Instant Pot, return it to High Pressure for an additional 20-30 minutes. For slow cooker mode, extend by 1-2 hours on Low. I always check with a fork—it should slide in effortlessly. 💡
Burn Notice
Seeing the “Burn” error on your Instant Pot? This usually means not enough liquid or food stuck to the bottom. Quick-release, add ½ cup beef broth, scrape the bottom thoroughly, and restart. Always deglaze properly after sautéing—this step prevents most burn issues.
Thin Sauce Fix
For sauce that’s too thin, remove the lid and use the Sauté function to reduce for 10-15 minutes. Alternatively, mix 1 tbsp cornstarch with 1 tbsp cold water and stir into the pot. Simmer until thickened.
Over-Salty Solution
If the dish tastes too salty, add 1-2 peeled potatoes during the last hour of cooking—they absorb excess salt. Or balance with 1 tsp brown sugar or a splash of apple cider vinegar. I’ve fixed many over-seasoned pots this way. ✨
Vegetable Troubles
Mushy vegetables? Add them later. For Instant Pot, put carrots and celery in after pressure cooking. For slow cooker, add them during the last 2 hours. This maintains their texture while still infusing flavor.
Sticking Problems
Prevent sticking by using enough oil during searing and ensuring your pot has sufficient liquid before pressure cooking. For electric pressure cookers, never fill above the ⅔ max fill line. I always measure to be safe.
Nutrition Facts
Frequently Asked Questions
Can I use a different cut of beef?
Stick with chuck roast for best results. It has the perfect fat-to-meat ratio for tender results. Leaner cuts like round won’t break down as well.
How do I know when it’s done?
The roast is ready when a fork slides in effortlessly. For Instant Pot, this is after 60 minutes pressure cooking plus natural release. For slow cooker, check at 8 hours on Low.
Can I make this without wine?
Yes! Substitute 1 cup beef broth plus 1 tbsp balsamic vinegar for the wine. This maintains the acidity needed to balance the flavors.
Why sear the meat first?
Searing creates a flavorful crust through the Maillard reaction. It also helps develop a rich, deep sauce as the fond browns in the pot. Never skip this step!

- 4C Bread Crumbs Meatballs Recipe: Crispy Crust and Juicy Centers - September 25, 2026
- 6 Oz Chocolate Chip Cookie Recipe: Perfectly Balanced Crispy Edges and Chewy Hearts - September 25, 2026
- 6-Inch Coffee Cake Recipe: Vanilla Bean Swirls and Buttery Streusel Topping - September 25, 2026