
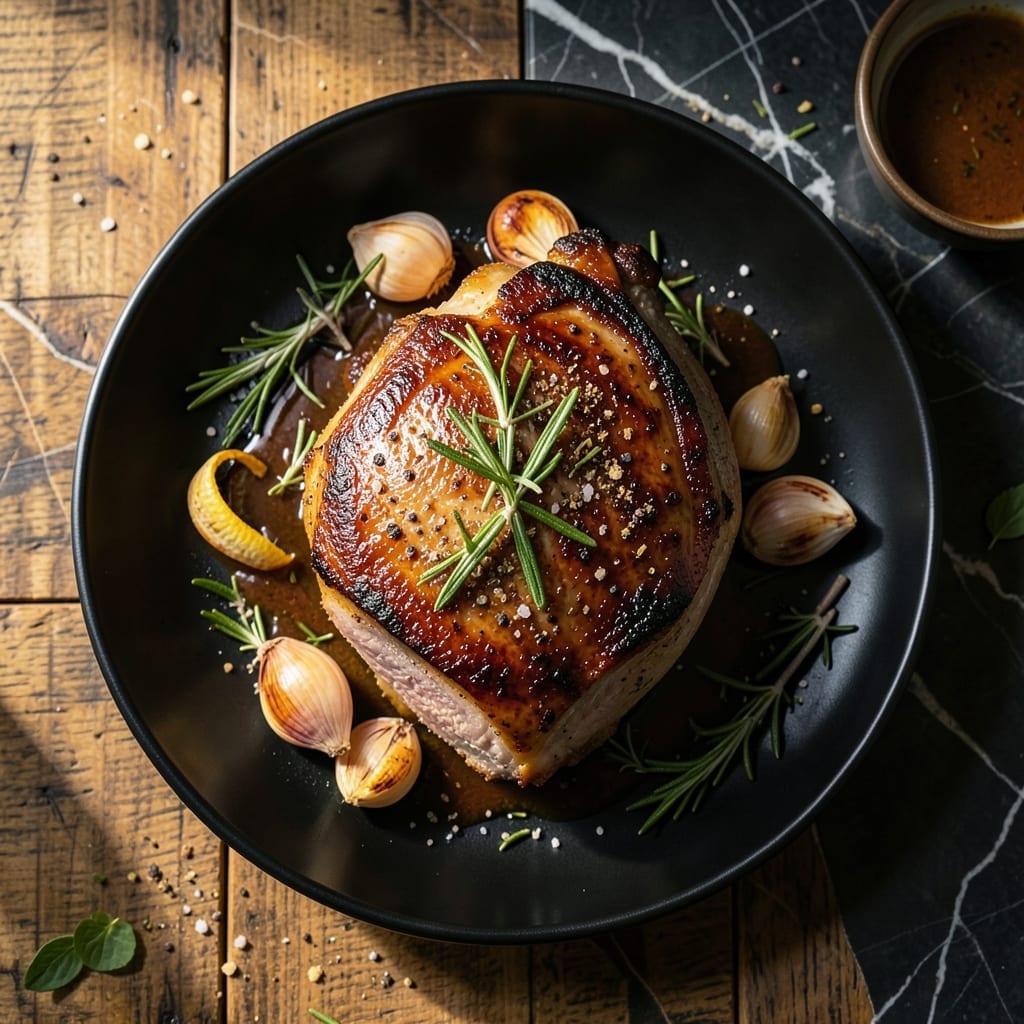
Achieving juicy, tender standing rib roast without hours in the oven is possible with your Instant Pot. This method locks in flavor while cutting traditional cooking time dramatically.
The pressure cooker transforms a typically time-intensive dish into a manageable weeknight meal. A simple seasoning blend enhances the beef’s natural richness, creating a main course worthy of special occasions.
After cooking, a brief rest allows the juices to redistribute throughout the meat. The result is perfectly cooked rib roast with a beautiful crust and melt-in-your-mouth texture.
Serve with roasted vegetables or mashed potatoes for a complete meal. This technique proves that elegant results don’t require all-day effort.
Ingredients for Instant Pot Standing Rib Roast
Elegant flavors start with quality beef and a simple yet precise spice blend for outstanding results.
| Ingredient | Amount | Notes |
|---|---|---|
| Standing Rib Roast 🥩 | 3 lb | Bone-in preferred, well-marbled |
| Kosher Salt 🧂 | 2 tsp | Diamond Crystal preferred for even seasoning |
| Freshly Ground Black Pepper 🌶️ | 1 ½ tsp | Coarsely ground for texture |
| Garlic Powder 🧄 | 1 tsp | Not garlic salt |
| Onion Powder 🧅 | 1 tsp | Fresh ground for potency |
| Dried Rosemary 🌿 | 1 tsp | Crushed between fingers to release oils |
| Dried Thyme 🍃 | 1 tsp | Rubbed to activate flavor |
| Olive Oil 🫒 | 2 tbsp | High smoke point variety |
| Beef Broth 💧 | 1 cup | Low-sodium preferred |
| Red Wine 🍷 | ½ cup | Dry variety like Cabernet Sauvignon |
| Unsalted Butter 🧈 | 2 tbsp | For finishing sear |
| Fresh Rosemary Sprigs 🌿 | 2 whole | Optional garnish |
The rib roast quality is paramount. USDA Prime or Choice grade ensures optimal marbling and tenderness. Source from Whole Foods or a trusted butcher for consistent results. Bone-in roasts provide superior flavor, though boneless works if that’s what’s available. Look for vibrant red color and generous fat streaking throughout the meat.
No red wine on hand? Additional beef broth with a splash of balsamic vinegar substitutes effectively. Dried herbs can be replaced with one-third the amount of fresh, though the flavor profile will differ slightly. For a non-alcoholic option, beef consommé intensifies the richness. Ensure all spices are freshly opened within the past 6 months for maximum potency.
Store the uncooked roast in its original packaging on a tray in the coldest part of your refrigerator for up to 3 days. Once cooked, leftovers keep well for 4-5 days and freeze beautifully for up to 3 months. Always bring meat to room temperature before pressure cooking for even doneness.
Why You’ll Love This Recipe
- Set It and Forget: Honestly, the Instant Pot does all the heavy lifting—just season, sear, and let it work its magic.
- Crust You’ll Crave: That garlic-onion rub forms the most ridiculous crust, and the meat stays juicy every single time.
- Holiday or Tuesday: I’ve served this for Christmas and I’ve made it on a random Wednesday—works for both.
- Leftovers for Days: One roast feeds us for two meals, and the leftovers make killer sandwiches.
Step-by-Step Instructions for Instant Pot Standing Rib Roast
Master pressure cooking with this proven technique for tender, flavorful results.
Step 1: Season the Standing Rib Roast
Pat the 3 lb Standing Rib Roast dry with paper towels to ensure proper browning and seasoning adherence. In a small bowl, combine the 2 tsp Kosher Salt, 1.5 tsp Freshly Ground Black Pepper, 1 tsp Garlic Powder, 1 tsp Onion Powder, 1 tsp Dried Rosemary, and 1 tsp Dried Thyme.
Rub this mixture evenly over all surfaces of the roast, pressing firmly to create a flavorful crust. The dried herbs should release their aromatic oils as you work them into the meat. Let the seasoned roast sit at room temperature for 30 minutes while you prepare the pressure cooker.
Step 2: Sear the Roast in the Instant Pot
Set the Instant Pot to the Sauté function on Normal/Medium heat. Add the 2 tbsp Olive Oil and allow it to heat until shimmering. Place the roast in the pot, bone-side down first, and sear for 4-5 minutes until deeply browned.
Turn the roast to sear the remaining sides for an additional 3-4 minutes total. You’re looking for a rich, dark crust on all surfaces. This searing step develops the Maillard reaction, creating complex flavors that pressure cooking alone cannot achieve.
Step 3: Pressure Cook with Aromatic Liquids
Remove the roast and set it aside temporarily. Deglaze the pot with the 0.5 cup Red Wine, scraping up all the browned bits from the bottom. Add the 1 cup Beef Broth and the 2 whole Fresh Rosemary Sprigs.
Return the roast to the pot, bone-side down. Secure the lid and set the valve to Sealing. Cook on High Pressure for 30 minutes per pound – in this case, 90 minutes total. The natural release method works best here to prevent the roast from drying out.
Step 4: Finish with Butter Baste
Once the pressure releases naturally, carefully remove the roast to a serving platter. Discard the fresh rosemary sprigs from the cooking liquid. Skim off any excess fat from the surface of the liquid.
Set the Instant Pot to Sauté again and add the 2 tbsp Unsalted Butter, swirling until melted. For extra richness, you can thicken the cooking liquid into a light au jus by simmering for 3-5 minutes. Pour this over the roast before serving.
Step 5: Rest and Slice
Tent the roast loosely with foil and let it rest for 15-20 minutes. This resting period allows the juices to redistribute throughout the meat, ensuring each slice is moist and flavorful.
Slice between the bones to serve. The meat should pull away from the bones easily and have a beautiful pink center. The combination of pressure cooking and searing guarantees a juicy result with a perfectly browned exterior.
Pro Tips For Making Instant Pot Standing Rib Roast
- Sear the Roast First: I learned this the hard way—skipping the sear leaves the meat looking pale and tasting bland. Use the Instant Pot’s sauté function with a little oil to brown all sides of the roast before pressure cooking.
- Season Generously: Sounds weird, but it works: coat the roast with more kosher salt, pepper, garlic powder, and onion powder than you think you need. The pressure cooking process dilutes flavors, so go heavy-handed.
- Use a Rack: After burning the bottom of my roast once, I finally figured out that elevating it on the trivet keeps it out of the juices, preventing a soggy crust and ensuring even cooking.
- Let It Rest: Give it a solid 10-15 minutes under foil after cooking—yes, even if you’re impatient like me. This lets the juices redistribute, so your first slice isn’t a dry, sad disappointment.
Creative Variations of This Recipe
Herb-Crusted Variation
Create a paste with 3 tbsp Dijon mustard, 2 tbsp olive oil, and 2 minced garlic cloves. Coat the roast before applying the seasoning blend. This adds a tangy depth that complements the beef beautifully. 🌿
Red Wine Reduction
After pressure cooking, reduce the cooking liquid by half on Sauté mode. Stir in 1 tbsp cold butter at the end for a glossy finish. The result is a rich au jus perfect for drizzling over each serving.
Asian-Inspired Twist
Swap the herb blend for 2 tbsp soy sauce, 1 tbsp grated ginger, and 1 tsp five-spice powder. Add 1 cup beef broth and 2 tbsp hoisin sauce for the pressure cooking liquid. The umami flavors transform this into an Asian-fusion masterpiece.
Coffee-Rubbed Version
Add 1 tbsp finely ground coffee and 1 tbsp brown sugar to your dry rub. The coffee enhances the beef’s natural richness while the sugar helps create a beautiful crust during searing. 🔥
Garlic-Stuffed Roast
Make small incisions in the roast and insert 4-5 garlic cloves and 2-3 sprigs fresh rosemary. This infuses the meat with aromatic flavors from within. The garlic mellows beautifully during pressure cooking.
Balsamic Glaze Finish
After resting, drizzle with a reduction of ½ cup balsamic vinegar and 1 tbsp honey simmered until syrupy. This adds a sweet-tangy contrast to the rich beef. The glaze pairs especially well with the herb-crusted variation.
Nutrition Facts
Frequently Asked Questions
Do I need to sear the roast first?
Yes, searing creates a flavorful crust through the Maillard reaction. Use Normal/Medium heat for 4-5 minutes per side until deeply browned. This step is crucial for developing complex flavors.
How long should the roast rest after cooking?
Let it rest for 15-20 minutes under foil. This allows juices to redistribute for moist, flavorful slices. Skipping this can result in dry meat.
Can I use a boneless roast instead?
though bone-in provides more flavor. Adjust cooking time to 25 minutes per pound for boneless cuts. The pressure cooking method works equally well.
What if my Instant Pot doesn’t reach pressure?
Check the sealing ring and ensure the valve is set to Sealing. Make sure there’s enough liquid (1.5 cups minimum). If problems persist, consult your manual.

- 6 Oz Chocolate Chip Cookie Recipe: Perfectly Balanced Crispy Edges and Chewy Hearts - September 25, 2026
- 6-Inch Coffee Cake Recipe: Vanilla Bean Swirls and Buttery Streusel Topping - September 25, 2026
- 1 Hour Soup Recipe: Velvety Richness Without the Wait - September 25, 2026