
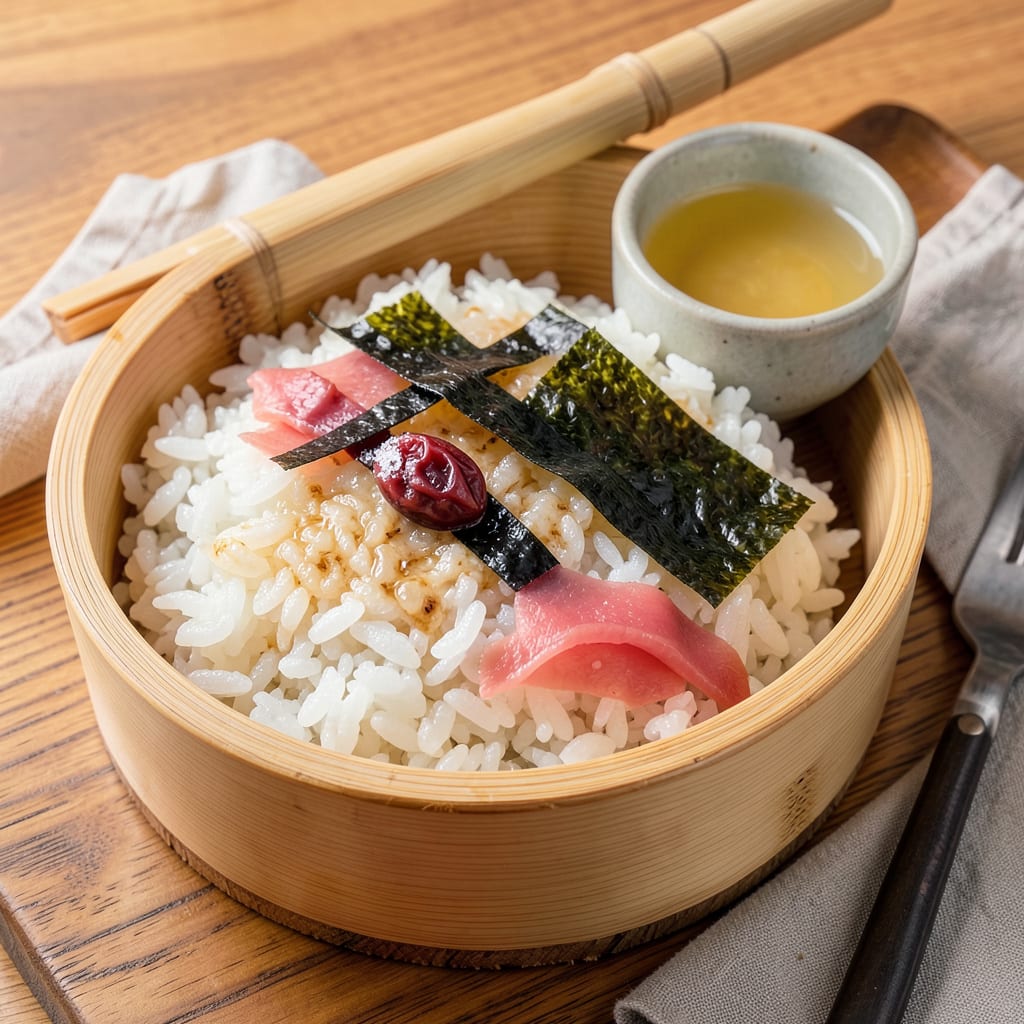
Perfect sushi rice requires precision, and the Instant Pot delivers consistent results without constant monitoring. This method eliminates the guesswork of stovetop cooking, producing grains that are uniformly sticky, tender, and ready for rolling or serving in just 20 minutes. The key lies in the exact rice-to-water ratio and controlled pressure cooking environment.
Unlike traditional methods, this approach integrates the seasoning—rice vinegar, sugar, and salt—after cooking to preserve texture. Whether you’re making nigiri, rolls, or bowls, the rice maintains its structure while offering the authentic slightly sweet, tangy flavor. No special equipment beyond your Instant Pot required.
Ingredients for Instant Pot Sushi Rice
Seven simple ingredients transform into restaurant-quality sushi rice with your Instant Pot doing all the work.
| Ingredient | Amount | Notes |
|---|---|---|
| Japanese short-grain white rice 🍚 | 2 cups | Rinsed until water runs clear |
| filtered water 💧 | 2 ¼ cups | Precise ratio for Instant Pot |
| rice vinegar 🍶 | ⅓ cup | Unseasoned variety preferred |
| granulated sugar 🍬 | 2 tbsp | Dissolved completely in vinegar |
| fine sea salt 🧂 | 1 tsp | Diamond Crystal recommended |
| konbu (dried kelp) 🌊 | 1 piece | 4-inch square, optional umami boost |
| sake 🍶 | 1 tbsp | Dry variety, optional for depth |
The rice is everything here—Japanese short-grain white rice (like Koshihikari or Calrose) is non-negotiable for that sticky, tender texture. Grab it at Asian markets or the international aisle of Whole Foods. I always buy a 10-pound bag (keeps for months in a sealed container). The konbu (dried kelp) is optional but adds that subtle oceanic depth—find it at H Mart or Mitsua Marketplace. Skip the pre-washed rice; rinsing until the water runs clear removes excess starch for perfect grains.
No rice vinegar? Apple cider vinegar in a pinch, but cut the sugar by half since it’s sharper. Out of sake? Dry white wine or omit entirely. The sugar can be swapped for mirin (1 tbsp) if you’ve got it—just reduce the vinegar by 1 tbsp. For a shortcut, seasoned rice vinegar works (skip the sugar and salt). Konbu not in your pantry? No big deal—just add an extra pinch of salt to compensate for the missing umami.
Uncooked rice keeps 6-12 months in a cool, dark place. Cooked rice stays fresh 2 days in the fridge (press plastic wrap directly on the surface to prevent drying). Freeze portions in ziplock bags for up to 3 months—thaw at room temp before using. The vinegar mixture can be made ahead and stored in the fridge for 1 week.
Why You’ll Love This Recipe
- Set-It-and-Forget-It Easy: I dump everything in the Instant Pot, press a button, and walk away—no stirring, no watching, no stress. The rice comes out fluffy and perfect every single time, even when I’m multitasking (which is always).
- That Sweet-Tangy Magic: The combo of rice vinegar, sugar, and salt transforms plain rice into something bright and addictive. It’s not just sushi rice—it’s the kind of flavor that makes me sneak bites straight from the pot.
- Meal Prep MVP: This rice holds up for days, so I make a big batch for sushi bowls, onigiri, or even fried rice later. Honestly, it’s the one thing that keeps my lunches interesting without extra effort.
- Budget-Friendly Staple: A 2-pound bag of short-grain rice costs less than $5 and makes enough for multiple meals. I’ll be real: it’s the cheapest way to feed a crowd (or just me for a week) without sacrificing quality.
Step-by-Step Instructions for Instant Pot Sushi Rice
Here’s the foolproof method I use to get perfectly sticky, glossy sushi rice every time—no guesswork required.
Step 1: Rinse and Prepare the Rice
Start by rinsing the 2 cups Japanese short-grain white rice in a fine-mesh strainer under cold water. I like to swirl the rice with my fingers while rinsing, using a gentle circular motion. You’ll notice the water starts out cloudy—that’s excess starch we don’t want in our final rice.
Keep rinsing until the water runs completely clear, which usually takes 4-5 rinses. This step is crucial because removing the surface starch prevents gummy rice and ensures each grain stays distinct yet perfectly sticky. After rinsing, let the rice drain in the strainer for 10 minutes to remove excess water.
Step 2: Cook the Rice with Konbu and Sake
Transfer the drained rice to your Instant Pot and add the 2.25 cups filtered water. Gently place the 1 piece konbu on top of the rice—don’t stir it in. If you’re using it, add the 1 tbsp sake as well. The konbu adds subtle umami depth, while the sake enhances the rice’s natural sweetness.
Secure the lid and set the Instant Pot to high pressure for 5 minutes. It’ll take about 10 minutes to come to pressure before the cooking begins. Once the cooking cycle completes, let the pressure release naturally for 10 minutes, then carefully quick-release any remaining pressure. You’ll know it’s done when the float valve drops completely.
Step 3: Prepare the Seasoning Mixture
While the rice cooks, combine the 0.33 cup rice vinegar, 2 tbsp granulated sugar, and 1 tsp fine sea salt in a small saucepan. Heat over medium-low just until the sugar and salt dissolve completely—this should take about 2-3 minutes. Don’t let it boil; we just want everything fully incorporated.
The sugar should dissolve without any graininess when you rub the mixture between your fingers. I prefer using Diamond Crystal salt here because it dissolves more evenly than other brands. Once dissolved, remove from heat and let it cool slightly—you want it warm but not hot when you add it to the rice.
Step 4: Season and Fluff the Rice
Transfer the cooked rice to a large wooden or glass bowl (avoid metal as it can react with the vinegar). Remove and discard the konbu piece. Using a rice paddle or silicone spatula, gently fold in the vinegar mixture using a slicing motion rather than stirring. This technique preserves the individual grains while evenly distributing the seasoning.
I like to fan the rice with a handheld fan or piece of cardboard while folding—this helps cool it quickly and gives it that signature glossy finish. The rice should be sticky enough to hold together when pressed but still separate easily when fluffed. Taste and adjust seasoning if needed, though the measurements should give you perfect balance.
Step 5: Rest Before Using
Cover the seasoned rice with a damp kitchen towel and let it rest at room temperature for 10-15 minutes before using. This resting period allows the grains to absorb the seasoning fully and reach the ideal texture for rolling or shaping.
You’ll know it’s ready when the rice is slightly warm (not hot) to the touch and has a subtle sheen. If you’re making sushi rolls, keep the rice covered until just before assembling to prevent it from drying out. For best results, use the rice within 4 hours of cooking—it’s at its peak stickiness and flavor during this window.
Regional Styles of instant pot sushi rice
Edomae Tradition
The Tokyo-style sushi rice I learned from my sushi chef friend emphasizes a slightly firmer grain with higher vinegar content. For this version, increase the rice vinegar to ½ cup and reduce sugar to 1 tbsp. The result is tangier rice that pairs perfectly with delicate fish like otoro or hamachi. 🌟
Osaka-Style Pressed
Osaka’s famous oshizushi (pressed sushi) requires rice with more body to hold its shape. After cooking, I mix in an extra 1 tsp salt and let the rice rest 5 minutes longer before pressing. The konbu becomes essential here—its umami helps balance the saltier profile. Use a wooden sushi mold for authentic presentation.
Kyoto’s Sweet Touch
In Kyoto, sushi rice leans sweeter and softer, often used in chirashizushi bowls. I add 1 extra tbsp sugar to the vinegar mixture and use mirin instead of sake. The rice becomes almost dessert-like, perfect with pickled vegetables and tamagoyaki. Let the rice cool completely before serving to enhance sweetness.
Hokkaido Umami Boost
Northern Japan’s colder climate calls for heartier flavors. I infuse the cooking water with both konbu and 1 dried shiitake mushroom (removed after cooking). The double umami makes this rice ideal for gunkanmaki (battleship rolls) with sea urchin or ikura. The rice should be slightly wetter to complement rich toppings.
Kansai Region
Kansai-style rice uses red vinegar (akazu) for a deeper color and maltier flavor. Substitute 2 tbsp red vinegar for regular rice vinegar and add 1 tsp soy sauce to the seasoning. This version shines in inarizushi (fried tofu pockets) where the rice needs to hold up to bold flavors.
Modern California
For West Coast-style rolls, I reduce the vinegar to ¼ cup and add 1 tsp sesame oil to the seasoning. This creates a neutral base that lets avocado and crab flavors pop. The rice should be slightly drier to prevent soggy rolls—spread it thinly when making uramaki (inside-out rolls).
Nutrition Facts
Frequently Asked Questions
Why does my rice come out mushy?
Mushy rice usually means too much water or not enough rinsing. Stick to the 2:2.25 rice-to-water ratio and rinse until the water runs completely clear. Overmixing after cooking can also break the grains.
Can I use regular white rice instead?
Short-grain Japanese rice is essential for authentic texture. Regular white rice lacks the starch content needed for that perfect sticky consistency. Look for brands like Koshihikari or Calrose at Asian markets.
When should I add the vinegar mixture?
Always add the vinegar mixture after cooking when the rice is still warm. Folding it in while the rice is hot helps absorption and creates that signature glossy finish. Never add it before pressure cooking.
How long can I keep cooked rice?
Freshly cooked rice is best used within 4 hours. Store leftovers in an airtight container in the fridge for up to 2 days. For longer storage, freeze portions for up to 3 months.
What if I don’t have a rice paddle?
A silicone spatula or wooden spoon works fine. Avoid metal utensils as they can react with the vinegar. The key is using gentle folding motions to preserve the grain structure.

- 8 Bean Soup Recipe Crock Pot: Hearty Vegetable Medley in One Pot - September 25, 2026
- 4C Bread Crumbs Meatballs Recipe: Crispy Crust and Juicy Centers - September 25, 2026
- 6 Oz Chocolate Chip Cookie Recipe: Perfectly Balanced Crispy Edges and Chewy Hearts - September 25, 2026