
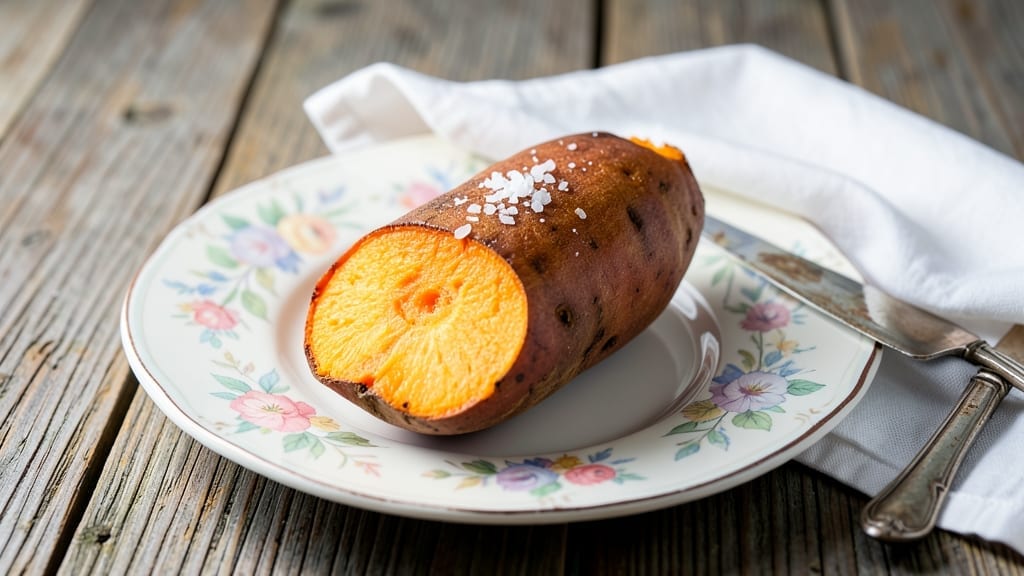
Transforming sweet potatoes into a silky-textured mash with a brown sugar crunch in your Instant Pot is faster than you’d expect—just 20 minutes from start to finish. This recipe solves the age-old problem of unevenly cooked sweet potatoes while delivering restaurant-quality texture that’s impossible to resist.
The secret lies in precise pressure cooking followed by a quick mash, then topping with toasted brown sugar for that irresistible crunch.
What makes this recipe truly professional is how it leverages the Instant Pot’s sauté and pressure functions to achieve perfect results without constant monitoring. You’ll start with cubed sweet potatoes that cook evenly under pressure, then mash them to a velvety consistency before adding butter and cream.
The brown sugar topping isn’t just decorative—it caramelizes slightly when broiled, creating that signature crunch that elevates this from side dish to showstopper.
By the time you’re done, you’ll have creamy, golden sweet potato mash with crispy brown sugar clusters on top—a dish that pairs beautifully with roasted meats or grilled fish.
The texture is what sets this apart: no graininess, no dryness, just pure, velvety perfection that disappears faster than you can say “second helping.” This is the kind of side dish that makes people ask for your recipe.
Best of all, this recipe scales effortlessly for crowds while maintaining its professional finish. Whether you’re serving four or twelve, the technique remains the same—just adjust the quantities. Let’s get cooking with this foolproof Instant Pot method that transforms humble sweet potatoes into something extraordinary.
Ingredients for instant pot sweet potato
Sweet potatoes, butter, cream, and brown sugar—just five key ingredients transform into velvety perfection.
| Ingredient | Amount | Notes |
|---|---|---|
| Sweet Potatoes 🍠 | 2 lbs | Medium-sized, peeled and cubed |
| Unsalted Butter 🧈 | ½ cup | Cold, cut into small cubes |
| Heavy Cream 🥛 | ½ cup | Full-fat for creaminess |
| Brown Sugar 🍯 | ¼ cup | Packed, light or dark |
| Granulated Sugar 🍚 | 1 tbsp | For caramelization |
| Ground Cinnamon 🌿 | ½ tsp | Freshly ground preferred |
| Salt 🧂 | ¼ tsp | Diamond Crystal kosher salt |
| Black Pepper 🌶️ | ¼ tsp | Freshly ground for flavor |
| Vanilla Extract 🌸 | ½ tsp | Pure, high-quality |
| Toasted Walnuts 🥜 | ¼ cup | Chopped, optional crunch |
| Chopped Fresh Parsley 🌿 | 2 tbsp | For garnish |
The sweet potatoes are the foundation here, and Orange Sweet Potatoes from Whole Foods or your local farmers market deliver the best color and texture. Look for firm, unblemished tubers—they’ll mash smoother than anything from the bulk bin. If you’re using Costco’s Kirkland Organic, they’re a solid budget pick. Peeled and cubed evenly (about 1.5-inch pieces), they’ll cook perfectly under pressure. Pro tip: Don’t skip peeling—the skin stays tough even when pressure-cooked.
No brown sugar? Light and dark brown sugar work interchangeably, but if you’re out of both, white sugar plus 1 tsp molasses mimics that caramel depth. The heavy cream is non-negotiable for that restaurant-quality silkiness—half-and-half works in a pinch, but you’ll notice the difference. Freshly ground cinnamon (from Penzeys if you’re fancy) beats the dusty stuff in jars. Want extra crunch? Toasted pecans or candied walnuts swap in beautifully. The vanilla extract should be pure—Nielsen-Massey is my go-to, but any reputable brand works.
This mash reheats beautifully—just warm with a splash of cream. Store leftovers in an airtight container for up to 5 days in the fridge, or freeze for 3 months (portion into ice cube trays for single servings). The brown sugar topping? Make it ahead and store separately—just broil for 2-3 minutes before serving. For a crowd, double the recipe—the Instant Pot handles 8 lbs of sweet potatoes without issue. Garnish with parsley right before serving to keep it vibrant.
Why You’ll Love This Recipe
- Caramelized Magic: That buttery cream and brown sugar combo? It turns sweet potatoes into something dangerously good—creamy, slightly crisp edges, and a hint of sweetness that feels like a hug in food form.
- Weeknight to Holiday: Serve it as a side for Tuesday dinners or bring it to a potluck—no one will guess it’s this unfussy. The heavy cream keeps it rich enough for company but simple enough for a lazy night.
- Budget-Friendly Luxury: Sweet potatoes stretch far, and the other ingredients are pantry staples. I’ve fed my whole family (plus two extra neighbors) with one batch—no guilt, just pure satisfaction.
Step-by-step instructions for Instant Pot sweet potato mash
Here’s how to transform simple sweet potatoes into velvety mash with a perfect caramelized crunch.
Pressure Cook the Sweet Potatoes Until Fork-Tender
Place the 2 lbs of cubed sweet potatoes into your Instant Pot. Add 1 cup of water to the bottom of the pot and secure the lid with the valve in the sealing position. Select the “Pressure Cook” function and set the timer for 20 minutes on high pressure. This cooking time ensures the sweet potatoes become completely tender with minimal moisture loss.
Here’s the thing—don’t peek during cooking. Every time you open the lid, you release pressure and potentially extend the cooking time. Let the pressure build naturally. When the timer beeps, allow a 10-minute natural release before carefully releasing any remaining pressure. The sweet potatoes should be soft enough to pierce with a fork with no resistance—this is your perfect texture checkpoint.
Create the Brown Sugar-Caramelized Butter Base
While the sweet potatoes cook, melt the 0.5 cup unsalted butter in a small saucepan over medium-low heat. Once fully melted, remove from heat and stir in the 0.25 cup brown sugar and 1 tbsp granulated sugar. Return to low heat and cook for 3-4 minutes, stirring constantly, until the mixture reaches a deep amber color and becomes slightly thickened. This caramelized butter will give your mash that signature sweet crunch.
Watch the color carefully—it should be rich amber, not burnt. If it starts to darken too quickly, remove from heat immediately. The caramelized butter should coat the back of a spoon and have a distinct buttery aroma. This is your flavor foundation, so don’t rush it. Let it cool slightly before mixing with the sweet potatoes.
Mash and Infuse the Sweet Potatoes
Transfer the cooked sweet potatoes to a large mixing bowl. Using a potato masher or electric mixer, mash until smooth. The texture should be completely silky with no lumps remaining. Here’s where we build the flavor—add the cooled caramelized butter mixture and mix thoroughly. Then stir in the 0.5 cup heavy cream, 0.5 tsp vanilla extract, 0.5 tsp ground cinnamon, 0.25 tsp salt, and 0.25 tsp black pepper. The mixture should be creamy and fragrant, with the sweet potato’s natural sugars caramelizing beautifully.
Taste and adjust seasoning if needed. I often find the natural sweetness of the potatoes needs just a pinch more salt to balance the sweetness. The mash should be perfectly seasoned—sweet from the caramelized butter and brown sugar, with warm cinnamon and just a hint of pepper to cut through the richness.
Top with Toasted Walnuts and Fresh Parsley
Transfer the finished mash to a serving bowl. Sprinkle the 0.25 cup toasted walnuts evenly over the top for a delightful crunch contrast. The walnuts should be warm from toasting—if they’re cold, quickly toast them in a dry skillet over medium heat for 1-2 minutes until fragrant. Finally, garnish with 2 tbsp chopped fresh parsley for a pop of color and freshness.
Serve immediately while warm. The contrast of the creamy mash with the crunchy walnuts and sweet caramelized butter makes this dish truly special. Each bite should deliver that perfect balance of textures and flavors—silky sweet potato, rich caramelized butter, warm spices, and nutty crunch. This is comfort food at its finest, and it all comes together in your Instant Pot.
Pro Tips For Making Instant Pot Sweet Potato
- CUT POTATOES EVENLY: Cut them into 1-inch chunks—no smaller, or they’ll turn to mush, and no larger, or they’ll stay rock-hard inside. I learned this after serving a batch where half were undercooked and half were falling apart.
- PEEL AFTER COOKING: Skip peeling before cooking—sweet potato skins stay intact and add texture. Just scrub them clean and peel after they’re tender, when the skins slide off easily (yes, even if you’re impatient like me).
- SAUCE FIRST, THEN MASH: Make the butter-cream-sugar sauce before adding the potatoes. Dumping cold cream on hot spuds makes a clumpy mess—heat the sauce separately, then mix it in at the end for silky smoothness.
- PRESSURE-RELEASE HALF: Let the pressure vent naturally for 10 minutes first, then quick-release. This prevents the potatoes from exploding out of the pot when you open it (I’ve seen it happen—it’s a sticky disaster).
Essential equipment for great instant pot sweet potato
Instant Pot Essentials
Your Instant Pot is the star here, but you’ll need a few key accessories to pull this off like a pro. First, grab a potato masher or hand mixer—I use a OXO Good Grips masher for its sturdy build and easy cleanup.
The steam release handle on your Instant Pot is critical for safe pressure release, so make sure yours is secure and functioning properly. 🌡️
Precision Tools Matter
A digital kitchen scale (like the OXO Good Grips) ensures accurate measurements for sweet potatoes and sugars—critical for consistent texture. I also recommend a small saucepan with medium-low heat control for caramelizing the butter.
If you don’t have one, a light-colored saucepan lets you monitor the caramel’s color better. A fine-mesh sieve helps strain any excess liquid if your mash gets too wet.
Optional Upgrades
For the brown sugar topping, a baking sheet and broiler pan are essential if you want that perfect caramelized crunch. I use a Le Creuset stoneware baking dish because it distributes heat evenly.
If you’re toasting walnuts separately, a nonstick skillet (like Mauviel M’Cook) prevents burning while toasting. These tools make the process smoother and more professional.
Budget-Friendly Swaps
No fancy tools? No problem. A wooden spoon works fine for stirring the caramelized butter, and a fork can mash sweet potatoes in a pinch (though it’ll be lumpier). For toasting nuts, a dry oven-safe pan on the stovetop works just as well.
The key is temperature control—watch your caramel closely to avoid burning. Even basic tools can deliver restaurant-quality results with attention to detail.
Safety First
Always use thick oven mitts when handling the Instant Pot after pressure cooking—the steam can be scalding. I keep a silicon spatula handy for scraping the pot clean after use. Never fill your Instant Pot more than halfway with liquid when pressure cooking, and always secure the lid tightly.
These small precautions prevent accidents and ensure smooth cooking every time. 💪
Nutrition facts
Frequently asked questions
Can I make this recipe with regular potatoes instead of sweet potatoes?
The flavor and texture will be completely different—sweet potatoes have a natural sweetness and creamier consistency that works perfectly for this mash. Regular potatoes would turn out starchy and bland. If you’re craving a similar texture, try using yams, which are closely related to sweet potatoes and have a similar sweet profile.
How do I fix sweet potatoes that turn out too watery after pressure cooking?
If your mash is too thin, strain out excess liquid using a fine-mesh sieve before mashing, or simmer the potatoes uncovered for 2-3 minutes after pressure cooking to evaporate moisture. For future batches, reduce the water to ½ cup instead of 1 cup—this helps maintain a drier texture.
Can I make this recipe ahead of time?
The mash reheats beautifully—store it in an airtight container in the fridge for up to 5 days. To serve, warm it gently with a splash of cream or milk, then broil the brown sugar topping fresh for 2-3 minutes to restore that perfect crunch. The flavor actually improves overnight as the spices meld.
What’s the best way to store leftovers?
For short-term storage, keep the mash and topping separate in airtight containers. The mash stays fresh for 5 days in the fridge, while the topping keeps for 3 days (best reheated separately). For longer storage, freeze the mash in 1-cup portions for easy reheating—just thaw overnight in the fridge and warm gently on the stovetop.
How can I make this vegan?
Swap the butter for vegan butter (like Miyoko’s) and use full-fat coconut cream instead of heavy cream. For the topping, replace brown sugar with coconut sugar and toast walnuts with a drizzle of maple syrup. The texture will be slightly different but still delicious—just expect a nuttier flavor profile.

- Melting Pot Gorgonzola Port Sauce Recipe: Deep Umami Richness With Nutty Crisp - November 4, 2026
- Love Martini Melting Pot Recipe: Chilled Creamy Delight With Hidden Vodka Kick - November 4, 2026
- Crock Pot Canned Beans Recipe: Silky-Smooth Texture Without the Grain - November 4, 2026