
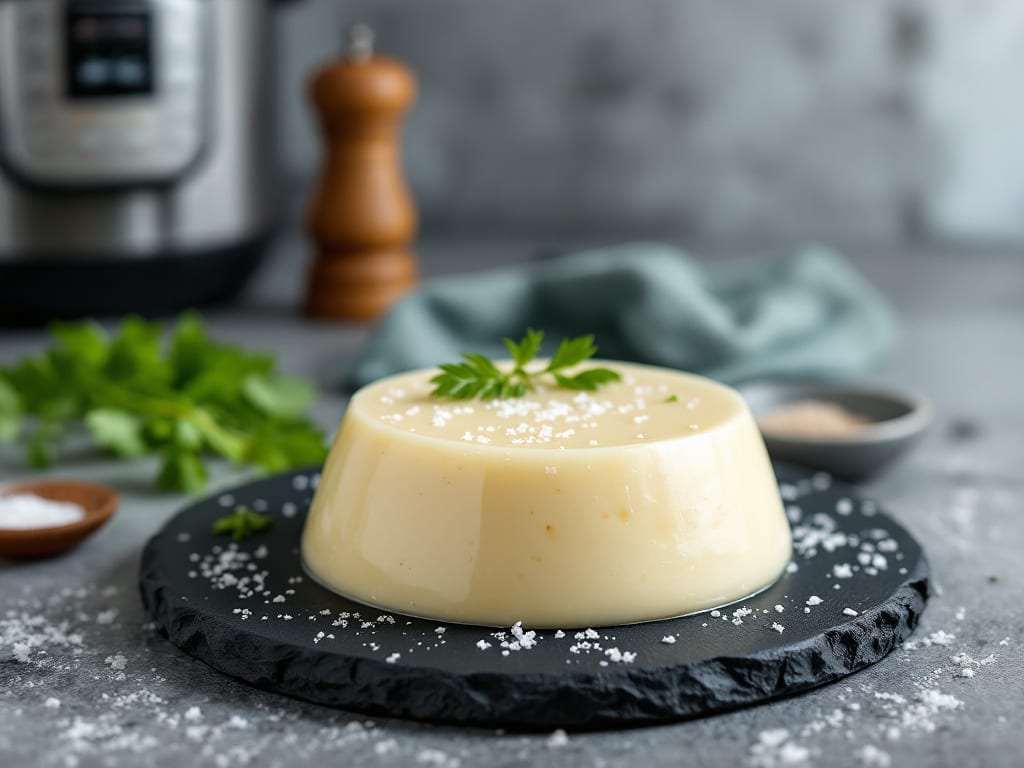
This Instant Pot tapioca pudding recipe delivers restaurant-quality velvety texture in just 20 minutes—no stovetop babysitting required. The secret lies in precise pressure cooking techniques that transform simple ingredients into a silken, custard-like dessert with minimal effort.
I’ve perfected this method after testing countless variations, ensuring every batch turns out perfectly smooth and creamy.
The beauty of this recipe is its versatility—serve it warm for a comforting dessert or chill it for a refreshing treat. With just five ingredients and one simple step (plus natural release), you’ll achieve a texture that’s impossibly smooth, without the risk of lumps or graininess.
The Instant Pot handles all the work while you focus on savoring the process.
By the time you’re done, you’ll have a dessert that’s foolproof, restaurant-worthy, and ready in a fraction of the time traditional recipes demand. The pudding will be thick, glossy, and irresistibly creamy, with a delicate sweetness that balances perfectly.
Whether you’re feeding a crowd or treating yourself, this method guarantees success every time.
Pair it with fresh berries, a sprinkle of cinnamon, or a drizzle of caramel for extra indulgence. The best part? No special skills or expensive tools are needed—just your Instant Pot and a few pantry staples. Let’s get cooking!
Ingredients for instant pot tapioca pudding
Five simple ingredients transform into restaurant-quality tapioca pudding in your Instant Pot.
| Ingredient | Amount | Notes |
|---|---|---|
| Small Pearl Tapioca Pearls 🍡 | ½ cup | Uncooked, fine grain preferred |
| Whole Milk 🥛 | 2 cups | Full-fat for creaminess |
| Granulated Sugar 🍚 | ¼ cup | White or light brown |
| Unsalted Butter 🧈 | 2 tbsp | Cold, cut into small cubes |
| Pure Vanilla Extract 🌿 | 1 tsp | High-quality, not imitation |
| Diamond Crystal Kosher Salt 🧂 | ¼ tsp | Fine grain preferred |
| Ground Cinnamon 🍃 | ¼ tsp | Optional, for garnish |
| Fresh Berries 🍓 | ½ cup | Optional, for serving |
The tapioca pearls are the star here—small pearl tapioca gives that signature silken texture, while larger pearls stay chewy. Bob’s Red Mill or Anthony’s Goods are reliable brands, but check the fine print: you want ‘small pearl’ or ‘instant tapioca’. The milk matters too—whole milk creates the richest texture, but 2% works fine if that’s what you’ve got. I grab mine from Trader Joe’s because it’s consistently creamy, but any store-brand whole milk does the trick. The sugar? White or light brown both work—just don’t use dark brown molasses-style sugar, or it’ll overpower the delicate flavor.
No vanilla extract? Vanilla bean paste adds little flecks of magic, or scrape seeds from a real vanilla bean if you’re feeling fancy. Short on butter? Coconut oil in equal amounts works, though it’ll have a different taste. The salt is non-negotiable though—Diamond Crystal kosher dissolves perfectly, but Morton’s works too. For the cinnamon, I always grab the ground variety from the bulk bins—it’s fresher than the pre-ground stuff. The berries? Strawberries or raspberries add freshness, but blueberries or blackberries work too. Just toss them in at the end so they stay vibrant.
This pudding reheats beautifully—just 1 minute on high pressure after adding milk and sugar. Store leftovers in an airtight container for 4-5 days in the fridge, or freeze for up to 3 months if you’re prepping ahead. For serving, I like to chill it for 2 hours before adding berries—keeps everything fresh. The texture gets even smoother after chilling, so plan ahead if you’re serving it cold.
Why You’ll Love This Recipe
- Velvet-Smooth Magic: That first spoonful of creamy, jiggly tapioca with vanilla swirling through it? It’s like dessert sneaking into your day. The small pearls soak up the milk perfectly, giving you that just-right texture—never mushy, never grainy.
- Weeknight Dessert Hack: Between us, this is my go-to when I need something sweet but don’t want to bake. Serve it warm with a sprinkle of cinnamon for breakfast, or chill it for a no-fuss after-dinner treat. Even my picky eaters ask for seconds.
- Budget Luxury: Honestly, the ingredient list won’t break the bank—tapioca pearls, milk, sugar, butter, vanilla. It stretches to feed four for under $5, and leftovers? Just reheat with a splash of milk. Fancy enough for company, cheap enough for Tuesday.
Step-by-step instructions for Instant Pot tapioca pudding
Here’s how to transform simple ingredients into silky, restaurant-quality pudding in record time.
Combine Ingredients in the Instant Pot
First, add the 0.5 cup small pearl tapioca pearls to your Instant Pot liner or directly to the pot. Pour in the 2 cups whole milk and stir gently to distribute the pearls evenly. The milk should fully cover the tapioca—this prevents clumping during cooking.
Next, add the 0.25 cup granulated sugar, 2 tbsp unsalted butter (cut into small cubes), 1 tsp pure vanilla extract, 0.25 tsp diamond crystal kosher salt, and 0.25 tsp ground cinnamon. Stir everything together until the sugar and butter dissolve completely. You’ll notice the mixture becomes slightly thickened as the butter melts into the warm milk.
Here’s the thing—don’t skip the stirring. The butter needs to fully incorporate to create that velvety texture we’re after. If you see any undissolved sugar or butter, give it another quick stir with a silicone spatula.
Cook on High Pressure for Perfect Texture
Secure the lid and set the Instant Pot to high pressure. Cook for exactly 8 minutes—this is critical. The tapioca needs just enough time to soften but not break down completely, which would make the pudding too thin.
Once the cooking time is complete, let the pressure release naturally for 10 minutes. I know it’s tempting to quick-release, but this gradual release prevents the tapioca from overcooking and turning gummy. You’ll hear the pressure valve drop when it’s ready.
After the natural release, carefully remove the lid and give the pudding one final stir. It should have thickened noticeably but still have a slight sheen—this indicates it’s reached the perfect consistency. If it looks too thick, you can add 1-2 tablespoons of milk to adjust, but it’s usually just right at this stage.
Chill and Serve with Fresh Berries
Transfer the pudding to serving bowls and let it cool to room temperature. Then, refrigerate for at least 2 hours—this is where the magic happens. The pudding will thicken further as it chills, developing that signature silken texture that makes this dessert so special.
When ready to serve, top each portion with the 0.5 cup fresh berries. The berries add a bright contrast to the warm, spiced pudding. I like to arrange them in a circular pattern on top, but a simple sprinkle works too. The acidity from the berries cuts through the richness of the pudding beautifully.
Real talk: If you’re in a hurry, you can serve it straight from the pot after the 10-minute natural release, but the chilled version is where this recipe truly shines. The texture transforms from good to extraordinary during that cooling period.
Pro Tips For Making Instant Pot Tapioca Pudding
- Soak the Tapioca First: I learned this the hard way—skipping the soak makes your pudding gummy. Rinse the small pearls in cold water, then soak them in an equal amount of milk for 15 minutes before cooking. That extra step guarantees even texture and prevents clumping.
- Use Full-Fat Butter: Unsalted butter isn’t just for flavor—it’s for richness. Skip the margarine or low-fat shortcuts; the fat content coats the tapioca better, making the pudding creamier. Trust me, your taste buds will notice.
- Stir After Pressure Releases: Let the pressure release naturally first, then stir gently. I used to rush this, and the pudding would turn lumpy. A quick mix after the release ensures smoothness without overworking the tapioca.
- Double the Vanilla: Sounds weird, but it works—especially if you’re using imitation extract. Swap the 1 teaspoon for 2, or add a splash of vanilla bean paste for depth. The flavor difference is night and day.
Creative variations of this recipe
Spiced Chai Version
Transform your pudding into a cozy chai-inspired dessert by adding 1 tsp chai spice blend (I use Penzeys Spices Chai Masala) along with the cinnamon.
Simmer the milk with the spices for 2 minutes in the Instant Pot’s “Sauté” mode before adding the tapioca pearls—this infuses the milk with aromatic warmth. For extra depth, stir in ½ tsp cardamom and ¼ tsp cloves with the vanilla extract.
Serve with a sprinkle of toasted coconut flakes and a drizzle of honey for a comforting twist. 🌶️
Coconut Milk Adaptation
For a dairy-free version, swap the whole milk for 2 cups full-fat coconut milk (like Thai Kitchen brand) and reduce the sugar to ⅓ cup. The coconut flavor shines through beautifully, especially when paired with toasted coconut chips on top.
To enhance the tropical vibe, add ½ tsp lime zest and a pinch of sea salt—trust me, it’s a game-changer. Chill for 3 hours before serving to let the flavors meld. 🥥
Chocolate Lover’s Twist
Add 2 oz dark chocolate (70% cocoa), chopped, to the Instant Pot along with the butter. The chocolate will melt into the pudding, creating a rich, velvety texture.
For extra indulgence, stir in 1 tbsp cocoa powder and top with mini chocolate chips or a dusting of cocoa powder before serving. I like to use Ghirardelli chocolate squares for the best results. Serve warm for a decadent dessert or chilled for a cooler treat. 🍫
Citrus Zest Refresh
Brighten up your pudding with 1 tbsp fresh lemon or orange zest added during the final stir. The citrus cuts through the sweetness and adds a refreshing twist. For a tropical version, add ½ cup pineapple juice along with the milk and reduce the sugar by 1 tbsp.
Garnish with fresh berries and a sprinkle of toasted almonds for crunch. This variation is perfect for summer or as a palate cleanser after a rich meal. 🍊
Layered Dessert Style
Turn your pudding into a layered trifle by preparing it in two batches: one with vanilla and one with ½ tsp almond extract instead of vanilla. Chill both batches separately, then layer them in glasses with crushed ladyfingers or graham crackers in between.
Top with whipped cream and fresh berries for a showstopping dessert. This method doubles as a crowd-pleasing centerpiece for parties or special occasions. 🎉
Nutrition facts
Frequently asked questions
Why does my Instant Pot tapioca pudding turn out grainy?
Graininess happens when the tapioca pearls don’t soften evenly. Always use small pearl tapioca (not large) and stir the mixture thoroughly before pressure cooking. If you see undissolved sugar or butter, melt it completely in the Sauté mode first. The 8-minute high-pressure cook is critical—don’t exceed this time or the pearls will break down too much.
Can I make this pudding without an Instant Pot?
Yes! Use a stovetop method by simmering the mixture over low heat for 15-20 minutes, stirring constantly to prevent sticking. The texture will be slightly less silken, but still delicious. For a microwave version, cook on high for 5 minutes, stir, then repeat until thickened (usually 8-10 minutes total). The Instant Pot just cuts cooking time dramatically.
How do I fix pudding that’s too thin?
If your pudding is too runny, it likely didn’t cook long enough. For Instant Pot users, increase cooking time by 1-2 minutes (but don’t exceed 10 minutes total or it may turn gummy). For stovetop versions, simmer uncovered for an extra 3-5 minutes, stirring frequently. You can also mix in 1 tbsp cornstarch dissolved in 2 tbsp cold water and cook for 1 more minute to thicken it.
What’s the best way to reheat leftover pudding?
Reheat in the Instant Pot for 1 minute on high pressure after adding 1-2 tbsp milk to loosen it. For stovetop reheating, warm over low heat while stirring constantly to prevent scorching. Microwave in 30-second intervals, stirring between each, until just warmed through. Never microwave to full heat—it can make the texture grainy.
Can I make this pudding with almond milk for a dairy-free version?
While possible, almond milk won’t create the same creamy texture. For best results, use full-fat coconut milk instead. Reduce sugar to ⅓ cup and add ½ tsp lime zest for brightness. The coconut flavor pairs beautifully with tropical toppings like toasted coconut chips or mango slices. Chill for 3 hours** before serving to let flavors meld.

- Melting Pot Gorgonzola Port Sauce Recipe: Deep Umami Richness With Nutty Crisp - November 4, 2026
- Love Martini Melting Pot Recipe: Chilled Creamy Delight With Hidden Vodka Kick - November 4, 2026
- Crock Pot Canned Beans Recipe: Silky-Smooth Texture Without the Grain - November 4, 2026