
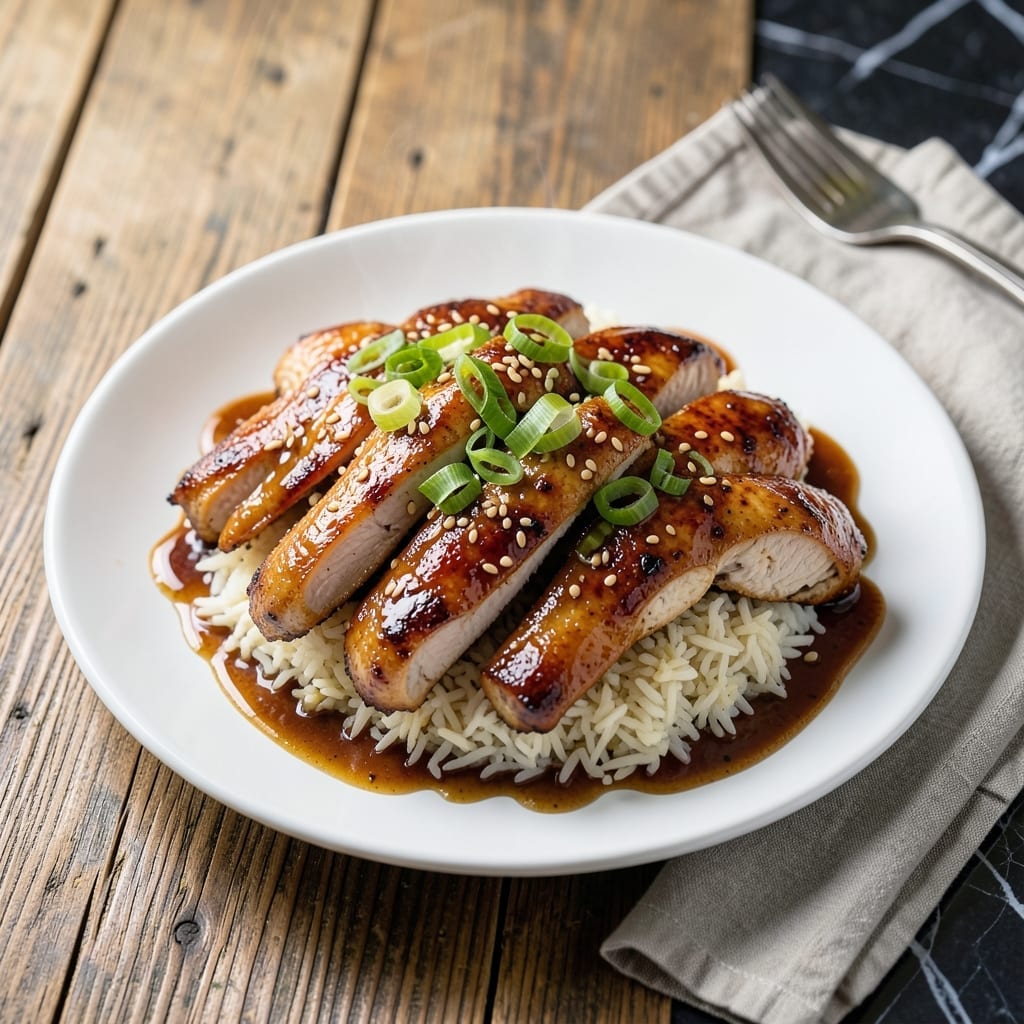
This recipe delivers perfectly balanced sweet and savory flavors with minimal effort. The Instant Pot transforms simple ingredients into tender chicken coated in a glossy teriyaki glaze.
I’ve refined this method to ensure the sauce thickens just right without burning. The pressure cooker locks in moisture, creating chicken that’s juicy and infused with rich umami notes.
What you get is a dish that tastes like takeout but better—tender, flavorful, and ready in under 30 minutes. The sauce clings beautifully to every piece, making it irresistible.
Serve it over rice or with steamed vegetables for a complete meal. This is pressure-cooked perfection at its simplest.
Ingredients for Instant Pot Teriyaki Chicken
These everyday ingredients transform into restaurant-quality teriyaki chicken with minimal effort and maximum flavor.
| Ingredient | Amount | Notes |
|---|---|---|
| Boneless Skinless Chicken Thighs 🍗 | 1 ½ lb | Trimmed of excess fat |
| Soy Sauce 🥢 | ½ cup | Low-sodium preferred |
| Brown Sugar 🍚 | ½ cup | Packed, light or dark |
| Rice Vinegar 🍶 | 3 tbsp | Unseasoned variety |
| Fresh Garlic Cloves 🧄 | 4 cloves | Minced finely |
| Fresh Ginger Root 🌿 | 1 tbsp | Peeled and grated |
| Cornstarch 🌾 | 2 tbsp | For thickening sauce |
| Water 💧 | ¼ cup | For deglazing and cooking |
| Sesame Oil 🫒 | 1 tsp | Toasted variety for depth |
| Vegetable Oil 🫒 | 1 tbsp | For searing chicken |
| Green Onions 🧅 | 4 whole | Thinly sliced for garnish |
| Sesame Seeds 🌾 | 1 tbsp | Toasted for garnish |
| Red Pepper Flakes 🌶️ | ½ tsp | Optional for heat |
The chicken thighs are non-negotiable here. Boneless, skinless ensures even cooking and perfect texture—breasts dry out too quickly. Most grocery stores carry them pre-trimmed, but check for good marbling if buying in bulk. I source mine from Whole Foods for consistent quality. The soy sauce should be low-sodium to control the saltiness of the final dish.
No rice vinegar? Apple cider vinegar works in a pinch, but the flavor profile shifts slightly. Brown sugar can be swapped for coconut sugar at a 1:1 ratio. If you’re out of fresh ginger, ground ginger at one-quarter the amount is acceptable. The cornstarch is essential for that glossy finish—don’t skip it. For extra depth, toasted sesame oil beats untoasted every time.
This reheats like a dream—actually tastes better the next day. Store in an airtight container for up to 4 days in the fridge or freeze for 3 months. The garnishes (green onions, sesame seeds) are best added fresh, so keep them separate until serving.
Why You’ll Love This Recipe
- Set and Forget: I toss everything in the Instant Pot, press a button, and walk away—no babysitting required.
- Sweet-Savory Magic: The brown sugar and soy sauce caramelize into this glossy glaze that clings to every bite of chicken.
- Meal Prep Hero: I make a double batch on Sunday and we’ve got lunches for days, hot or cold.
- Budget Friendly: Chicken thighs stay juicy and cost half what breasts do, so I splurge on the good rice vinegar.
Step-by-Step Instructions for Instant Pot Teriyaki Chicken
Achieving perfect results with this method is straightforward when you follow these precise techniques.
Step 1: Sear the Chicken Thighs
Set the Instant Pot to Sauté mode and add the 1 tbsp Vegetable Oil. While it heats, pat the 1.5 lb Boneless Skinless Chicken Thighs dry with paper towels—this ensures a proper sear. Season lightly with salt and pepper.
Working in batches if needed, add the chicken to the pot and sear for 3-4 minutes per side until golden brown. Don’t overcrowd the pot, or the chicken will steam instead of sear. Transfer the seared chicken to a plate and set aside.
Step 2: Build the Teriyaki Sauce Base
In the same pot, add the 4 cloves Fresh Garlic Cloves and 1 tbsp Fresh Ginger Root, stirring constantly for 30 seconds until fragrant. This blooms the aromatics, deepening their flavor.
Pour in the 0.5 cup Soy Sauce, 0.5 cup Brown Sugar, 3 tbsp Rice Vinegar, and 0.5 tsp Red Pepper Flakes. Stir well, scraping up any browned bits from the bottom. These bits add a layer of complexity to your sauce.
Step 3: Pressure Cook and Thicken the Sauce
Return the seared chicken to the pot, coating it in the sauce. Secure the lid, set the valve to Sealing, and pressure cook on High for 8 minutes. The chicken will be fall-apart tender when done.
Once cooking completes, allow a natural pressure release for 5 minutes, then quick-release any remaining pressure. Remove the chicken to a serving dish.
Switch the Instant Pot back to Sauté mode. In a small bowl, whisk together the 2 tbsp Cornstarch and 0.25 cup Water until smooth. Stir this slurry into the sauce and cook for 2-3 minutes until it thickens to a glossy, syrup-like consistency.
Step 4: Finish and Garnish
Stir in the 1 tsp Sesame Oil to add depth, then drizzle the thickened sauce over the chicken. The sauce should cling beautifully to each piece.
Garnish with the 4 whole Green Onions (thinly sliced) and 1 tbsp Sesame Seeds. The green onions add a fresh contrast to the rich, savory-sweet flavors, while the sesame seeds provide a subtle crunch. Serve immediately over rice or noodles.
Pro Tips For Making Instant Pot Teriyaki Chicken
- Sear the Thighs: Brown the chicken thighs in the Instant Pot first using the sauté function—about 3-4 minutes per side. This builds deep flavor and prevents a watery sauce.
- Mince the Garlic: Finely mince the fresh garlic cloves instead of just crushing them. It distributes the flavor more evenly through the teriyaki sauce.
- Skip the Overcrowding: Don’t stack the chicken thighs—arrange them in a single layer. I learned this the hard way after ending up with unevenly cooked pieces.
- Thicken After Cooking: After pressure cooking, remove the chicken and reduce the sauce for 5-7 minutes using sauté mode. It turns the sauce from thin to glossy and restaurant-worthy.
Essential Equipment for Great instant pot teriyaki chicken
Instant Pot Essentials
You’ll need a 6-quart Instant Pot or larger for this recipe—I use my Instant Pot Duo Crisp for its reliable pressure and sauté functions. The 6-quart size is ideal for 4 servings without overcrowding. 🔥
Wooden Spoon
A wooden spoon is perfect for stirring the sauce and scraping up those flavorful browned bits from the bottom. It won’t scratch the non-stick surface like metal utensils might.
Mixing Bowls
Have 2 mixing bowls ready—one for whisking the cornstarch slurry and another for holding the seared chicken. I prefer Pyrex glass bowls for their durability and heat resistance.
Tongs
Use kitchen tongs to flip the chicken while searing and to transfer it in and out of the pot. They give you better control than a fork or spatula.
Measuring Cups
A set of nested measuring cups makes it easy to measure the soy sauce, brown sugar, and rice vinegar accurately. I keep mine from OXO in a drawer near my Instant Pot for quick access.
Whisk
A small whisk is essential for blending the cornstarch and water into a smooth slurry. It ensures there are no lumps, which means a silky-smooth sauce every time. 💛
Nutrition Facts
Frequently Asked Questions
Can I use chicken breasts instead of thighs?
You can, but reduce pressure time to 6 minutes to prevent dryness. Thighs stay juicier and absorb flavors better, but breasts work if that’s what you have.
What if my sauce is too thin?
Simmer it uncovered on Sauté mode for 1-2 minutes longer. If still thin, mix 1 tsp cornstarch with 1 tbsp water and stir in.
How long does it keep in the fridge?
Store in an airtight container for up to 4 days. Reheat gently on the stove with a splash of water to maintain moisture.
Can I make this gluten-free?
Yes! Swap soy sauce for tamari or a certified gluten-free alternative. All other ingredients are naturally gluten-free.

- 4C Bread Crumbs Meatballs Recipe: Crispy Crust and Juicy Centers - September 25, 2026
- 6 Oz Chocolate Chip Cookie Recipe: Perfectly Balanced Crispy Edges and Chewy Hearts - September 25, 2026
- 6-Inch Coffee Cake Recipe: Vanilla Bean Swirls and Buttery Streusel Topping - September 25, 2026