
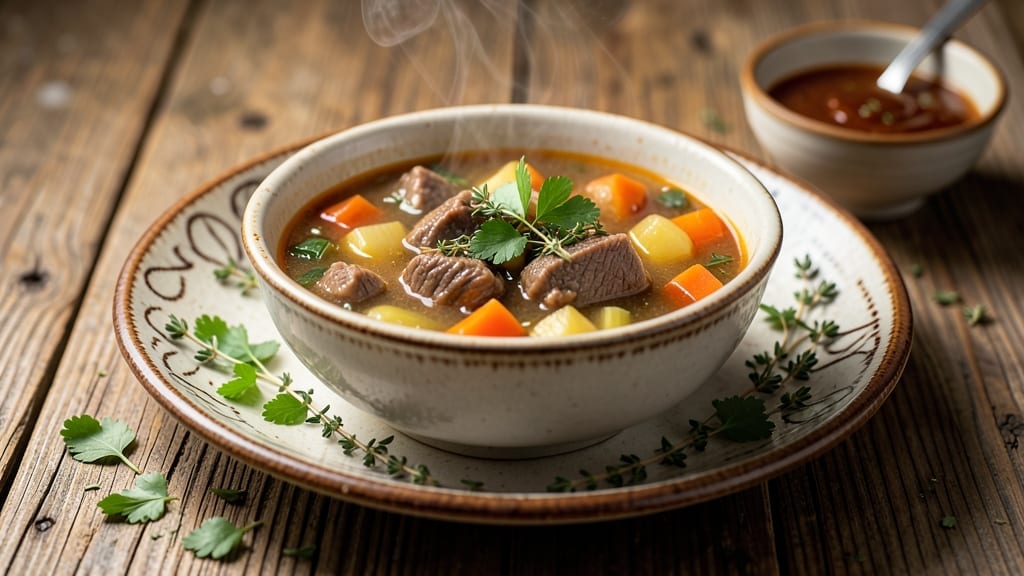
Transforming tough cuts of beef into tender, flavorful chunks while keeping vegetables perfectly cooked is exactly what this Instant Pot vegetable beef soup delivers. The pressure cooker’s magic lies in its ability to develop deep, umami-rich flavors in just under an hour—something that would take hours on the stove.
I’ve refined this recipe over countless batches, ensuring the broth is rich without being greasy, the vegetables retain their texture, and the beef becomes melt-in-your-mouth tender.
The secret begins with browning the beef in the Instant Pot before adding liquids—this step builds a flavorful crust that infuses into the broth as it cooks. A blend of aromatic vegetables like carrots, celery, and onions forms the base, while mushrooms and tomatoes add layers of earthy depth.
The pressure cooking process locks in moisture, so you won’t end up with a watery soup, even if you’re using leaner cuts of beef.
By the time you release the pressure, you’ll have a soup that’s hearty enough to stand as a main dish but light enough for a quick lunch. The broth is velvety with just the right amount of body, the vegetables are tender-crisp, and the beef shreds effortlessly.
Garnish with fresh parsley or a drizzle of olive oil, and you’ve got a restaurant-quality bowl of soup that’s ready in a fraction of the time.
This recipe works equally well for meal prep—it tastes even better the next day as the flavors meld further. Whether you’re feeding a family or prepping for the week, the Instant Pot makes it effortless. Let’s get cooking!
Ingredients for instant pot vegetable beef soup
Pantry staples plus a few fresh veggies—this soup comes together faster than you’d think.
| Ingredient | Amount | Notes |
|---|---|---|
| Chuck Roast 🥩 | 1 ½ lb | Cut into 1-inch cubes |
| Yellow Onion 🧅 | 1 whole | Diced, medium size |
| Carrots 🥕 | 4 medium | Peeled, cut into chunks |
| Celery Stalks 🧆 | 3 whole | Diced, medium size |
| Garlic Cloves 🧄 | 4 cloves | Minced, fresh preferred |
| Mushrooms 🍄 | 8 oz | Sliced, cremini or white |
| Canned Tomatoes 🍅 | 1 can | 15 oz, crushed or diced |
| Beef Broth 💧 | 4 cups | Low-sodium preferred |
| Water 💧 | 2 cups | For broth consistency |
| Tomato Paste 🍅 | 2 tbsp | For depth of flavor |
| Worcestershire Sauce 🍶 | 1 tbsp | For umami punch |
| Dried Thyme 🌿 | 1 tsp | Or 1 tbsp fresh |
| Bay Leaves 🌿 | 2 whole | Remove before serving |
| Salt 🧂 | 1 ½ tsp | Adjust to taste |
| Black Pepper 🌶️ | ½ tsp | Freshly ground |
| Fresh Parsley 🌿 | ¼ cup | Chopped, for garnish |
The beef is where the magic happens. Chuck roast is perfect—it’s tough enough to hold up to pressure cooking but breaks down beautifully. Costco or Walmart usually have it pre-cut in 1-inch cubes, which saves time. If you’re buying a whole roast, ask the butcher to cube it for you. For the veggies, Trader Joe’s has great pre-chopped options, but fresh is always better. Look for carrots with bright orange color and firm texture—those are the sweetest. The mushrooms? Cremini or white work best here; they hold their shape without getting mushy.
No chuck roast? Top round or sirloin tip are good substitutes, but they’ll be slightly leaner. Fresh thyme not available? Dried works at one-third the amount. The tomato paste is non-negotiable for that rich flavor—Rao’s or Muir Glen are solid brands. Worcestershire sauce giving you trouble? A dash of soy sauce plus a pinch of sugar mimics it pretty well. The broth matters too—low-sodium so you can control the salt level. If you’re using a bouillon cube, Knorr or Homemade Style are the best options.
This soup tastes even better the next day—4-5 days in the fridge, no problem. For freezing, portion into 2-cup containers and it keeps for 3 months. Reheat gently on the stove or microwave until steaming. The parsley is just for garnish, so add it fresh right before serving. If you’re prepping for the week, double the recipe—it reheats beautifully and the flavors only get deeper.
Why You’ll Love This Recipe
- No-Chop Night: I swear by the “roughly chopped” rule here—celery and carrots stay in 2-inch chunks, onions in wedges, and that chuck roast? Just one cut. The Instant Pot does the rest while I answer emails or scroll through memes.
- Garlic Bomb Depth: That one minced garlic clove at the end isn’t just flavor—it’s a layer. The chuck roast gets tender enough to shred with a fork, then the garlic melts into the broth like a warm hug. Honestly, the first time I tasted it, I nearly burned my mouth from leaning in too close.
- Leftover Goldmine: This soup tastes better the next day. Between us, I make a double batch on Sundays because the beef gets even more fall-apart tender after sitting overnight. Freeze half for those “I can’t decide what to eat” nights—just thaw and reheat.
- Budget-Buster Win: Chuck roast is cheap, carrots last weeks, and celery? I buy the whole bag and use it in everything. For under $10, I feed four people a meal that feels like a restaurant dish. My college-student nephew calls it “the soup that saved me”—and he’s not wrong.
Step-by-step instructions for instant pot vegetable beef soup
Here’s how to transform tough chuck roast into tender, flavorful beef with minimal effort.
Sear the Chuck Roast for Deep Flavor
Set your Instant Pot to “Sauté” mode and let it heat for 2 minutes. Add the 1.5 lb chuck roast cut into 1-inch cubes in a single layer, allowing them to sear undisturbed for 3-4 minutes until they develop a rich brown crust. This step is crucial—it builds the foundation of your soup’s flavor by creating the Maillard reaction.
Once the first batch is browned, remove the beef and set it aside. Add 1 tablespoon olive oil (not listed but necessary for searing) to the pot, then add the 1 whole yellow onion in diced pieces. Cook for 3 minutes until softened and slightly golden. Add the 3 whole celery stalks and 4 medium carrots cut into chunks, cooking for another 3 minutes until they begin to soften. This aromatic vegetable trio forms the classic “holy trinity” base for countless soups.
Build the Umami-Packed Base
Add the 4 cloves minced garlic and cook for 30 seconds until fragrant—don’t let it burn. Stir in the 8 oz sliced mushrooms, cooking for 2 minutes until they release their moisture and begin to soften. This is where the soup starts to develop its rich, earthy depth.
Pour in the 1 can crushed tomatoes, 2 tbsp tomato paste, and 1 tbsp Worcestershire sauce. Stir well to combine, letting it cook for 1 minute until the tomato paste dissolves completely. The combination of these ingredients creates a complex umami profile that will carry through the entire soup. Here’s where it gets good—this is the flavor foundation you’ll build upon.
Pressure Cook to Tender Perfection
Add the 4 cups beef broth and 2 cups water, then return the beef to the pot. Stir in the 1 tsp dried thyme, 2 whole bay leaves, 1.5 tsp salt, and 0.5 tsp black pepper. Secure the lid, set the valve to “Sealing,” and cook on High Pressure for 30 minutes. This cooking time ensures the chuck roast becomes fork-tender while maintaining its structure.
Once cooking is complete, let the pressure release naturally for 10 minutes, then quick-release any remaining pressure. The natural release helps prevent the beef from becoming mushy. Carefully remove the 2 bay leaves before serving—they’ve done their job infusing flavor but shouldn’t be eaten.
Finish and Garnish for Freshness
Stir in the 0.25 cup chopped fresh parsley just before serving. This final step adds a bright, fresh contrast to the rich, umami-packed broth. Taste and adjust seasoning if needed—you might want to add a pinch more salt or a crack of black pepper to suit your preference.
Serve immediately with crusty bread or over your favorite pasta. The soup will continue to develop flavor as it sits, so if you have leftovers, they’ll taste even better the next day. This hearty vegetable beef soup delivers restaurant-quality comfort in your own kitchen with minimal effort.
Pro Tips For Making Instant Pot Vegetable Beef Soup
- SEAR THE CHUCK FIRST: Chuck roast needs that crust to stay tender, not turn into shoe leather. Brown it in batches on high heat—don’t overcrowd the pot—before adding any liquid. I used to skip this, and the meat always came out dry. Two minutes per side, dark golden spots only.
- CHOP VEGETABLES UNIFORM: Carrots and celery should be cut into 1-inch chunks—smaller pieces cook faster and stay intact. Onions go in whole (quartered) until later—this prevents mush. I learned this the hard way when my soup turned into a sad, watery stew.
- DON’T SKIP THE NATURAL RELEASE: After pressure cooking, walk away for 10 full minutes. The meat needs that time to reabsorb juices—rushing it makes the chuck roast tough. I know, I know, you’re hungry, but trust the process.
- ADD GARLIC LATE: Toss minced garlic in at the very end—just 2 minutes before serving. Raw garlic burns fast, and you’ll taste the bitterness. I was skeptical until I tried it—now it’s non-negotiable for flavor.
Storing and reheating this dish
Refrigerator Storage
Let your soup cool to room temperature for no more than 2 hours before transferring to airtight containers—I use glass Pyrex with snap-on lids for best results.
Store at 40°F or below for up to 4-5 days, though I’ve found the flavors actually deepen overnight as the ingredients meld together. The beef stays tender, and the vegetables retain their texture beautifully. 💫
Freezer Prep Tips
For long-term storage, portion the soup into 2-cup glass containers or freezer-safe silicone bags—these options prevent freezer burn better than plastic. Leave ½ inch of headspace to account for expansion, and label each container with the date.
This soup freezes exceptionally well for up to 3 months, making it perfect for meal prep.
Stovetop Reheating
My preferred method is reheating on the stove to maintain the best texture. Pour the soup into a pot over medium-low heat and bring to a gentle simmer. Add 2-3 tablespoons of water or beef broth if the soup looks too thick.
Stir occasionally for 5-7 minutes until steaming. Taste and adjust seasoning—you’ll likely need a pinch more salt since flavors concentrate during freezing. 🔥
Microwave Revival
For quick reheating, transfer a single serving to a microwave-safe bowl and cover loosely with a microwave-safe lid or damp paper towel. Heat on 70% power for 2 minutes, stir, then continue in 30-second intervals until steaming.
Avoid full power to prevent uneven heating or splitting the soup. Stir in a splash of water if it thickens too much.
Thawing Frozen Soup
If you’ve frozen the soup, thaw it overnight in the refrigerator for the best texture. For a faster approach, place the sealed container in a bowl of cold water and change the water every 30 minutes until thawed.
Never microwave frozen soup directly—this can create hot spots and uneven cooking. Once thawed, proceed with stovetop reheating as described above.
Garnish Before Serving
Always add fresh parsley or a drizzle of extra virgin olive oil right before serving. This step brightens the flavors and makes the soup feel fresh, even if it’s reheated. A sprinkle of crushed black pepper or a pinch of red pepper flakes adds a final layer of complexity.
The contrast of fresh herbs against the rich broth is what makes this soup feel restaurant-quality. ✨
Nutrition facts
Frequently asked questions
Can I use a different cut of beef instead of chuck roast?
For leaner options, try top round or sirloin tip—they’ll work but may need an extra 5 minutes of pressure cooking to reach tenderness. Avoid tender cuts like ribeye or filet mignon—they’ll turn mushy. The key is choosing a cut with connective tissue that breaks down during pressure cooking.
Why does my soup turn out watery after pressure cooking?
This usually happens when too much liquid is added or the beef releases excess moisture. Start with the exact 6 cups of liquid (4 cups broth + 2 cups water) and reduce the water by ½ cup if your pot has a thick bottom. Let the soup sit for 10 minutes after cooking—the starches will thicken naturally. For extra body, stir in 1 tablespoon cornstarch mixed with water after cooking.
How can I make this soup more kid-friendly?
Blend half the soup until smooth, then mix it back in for a creamy texture. Skip the Worcestershire sauce and add ½ teaspoon sugar to balance flavors. Serve with soft egg noodles or rice for dipping. You can also omit mushrooms and reduce garlic to 2 cloves—both can be strong flavors for kids.
Can I make this soup in a regular pot instead of an Instant Pot?
Yes, but it’ll take 2-3 hours of simmering instead of 30 minutes. Use a heavy pot and keep the liquid at a gentle simmer. Add the beef after the vegetables have softened for 1 hour, then cook until fork-tender. The flavor will develop similarly, but the texture might be slightly less tender. For best results, use a Dutch oven.
What’s the best way to reheat leftovers without making the beef dry?
Always reheat on the stove over medium-low heat with 2-3 tablespoons of water or broth added. Never microwave directly from frozen—thaw first. For extra moisture, stir in 1 teaspoon butter or olive oil while reheating. The low heat prevents the beef from toughening up.

- Crock Pot Round Steak Recipe: Slow-Sear Crust With Juicy Center - November 6, 2026
- Candied Sweet Potatoes Crock Pot Recipe: Caramelized Sweetness With Zero Effort - November 6, 2026
- Steak Recipe Crock Pot: Juicy, Caramelized Crust in 4 Hours - November 6, 2026