
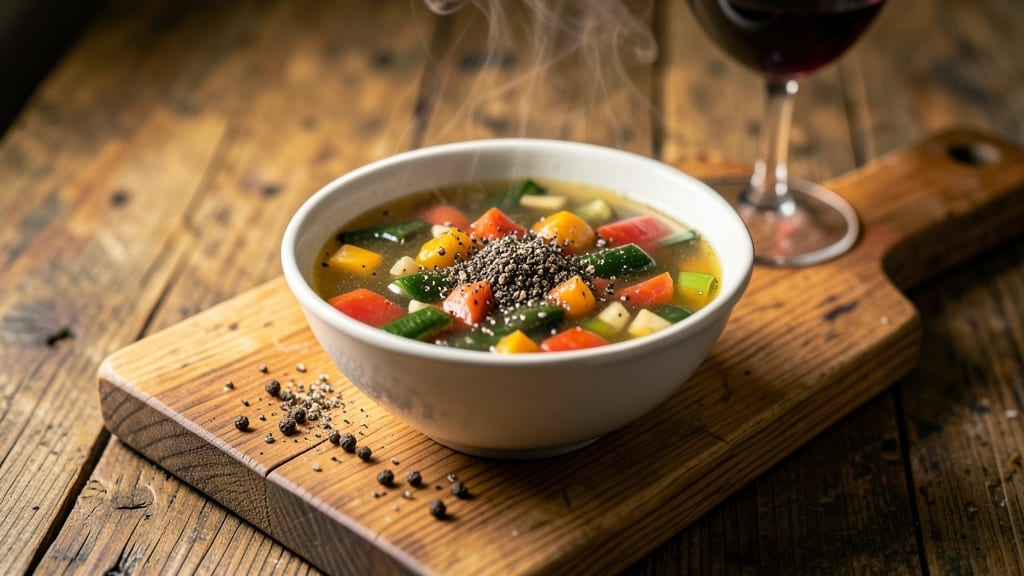
Creating vibrant Instant Pot vegetable broth in just 30 minutes transforms simple vegetables into a flavor-packed foundation for soups, grains, and sauces. This method extracts maximum herbal depth without animal products, delivering a clean, aromatic base that rivals store-bought versions.
The key lies in proper vegetable selection and pressure-cooking techniques that unlock their natural sweetness and umami.
What sets this recipe apart is its ability to maximize flavor using common pantry vegetables while avoiding bitterness or muddiness. By combining aromatic vegetables like onions, carrots, and celery with leafy greens and herbs, you create a broth that’s both nutritious and deeply satisfying.
The Instant Pot’s pressure function works faster than stovetop simmering while preserving delicate flavors that would otherwise dissipate.
You’ll end up with a golden, aromatic broth that’s rich enough for hearty soups but light enough for delicate dishes. The texture is smooth yet vibrant, carrying the natural sweetness of carrots, the earthiness of mushrooms, and the bright herbal notes of parsley.
This versatile broth keeps well in the refrigerator for up to 5 days or can be frozen for longer storage.
The beauty of this method is its adaptability—swap vegetables based on what’s seasonal, and adjust herbs to match your flavor preferences. Whether you’re preparing for meal prep or need a quick flavor booster, this recipe delivers professional-quality results with minimal effort. Let’s get started with the ingredients you’ll need.
Ingredients for instant pot vegetable broth
Common pantry vegetables and aromatic herbs create a vibrant, umami-rich broth foundation.
| Ingredient | Amount | Notes |
|---|---|---|
| Yellow Onions 🧅 | 2 whole | Cut into even quarters for even cooking |
| Carrots 🥕 | 4 medium | Whole, unpeeled for extra nutrients |
| Celery Stalks 🌿 | 4 whole | Trimmed, cut into 2-inch pieces |
| Garlic Cloves 🧄 | 6 cloves | Smashed for maximum flavor release |
| Mushrooms 🍄 | 8 oz | Cremini or white, sliced |
| Fresh Parsley 🌿 | ½ cup | Stems removed, loosely packed |
| Fresh Thyme 🌿 | 1 tbsp | Leaves only, stems removed |
| Bay Leaves 🍃 | 2 whole | Dried, standard size |
| Fresh Ginger 🌿 | 1 inch | Peeled, sliced thinly |
| Vegetable Oil 🫒 | 1 tbsp | Neutral flavor, high smoke point |
| Filtered Water 💧 | 6 cups | Room temperature preferred |
| Sea Salt 🧂 | 1 ½ tsp | Diamond Crystal preferred |
| Black Peppercorns 🌶️ | ½ tsp | Freshly cracked for aroma |
| Spinach Leaves 🌱 | 2 cups | Packed, roughly chopped |
The vegetable base forms the flavor foundation, so prioritize quality ingredients. Organic produce from Whole Foods Market or local farmers markets delivers superior flavor, but conventional vegetables work fine if fresh. Carrots should be firm with vibrant orange color, onions crisp with no soft spots, and celery bright green without wilting. Mushrooms add earthy depth—cremini or white varieties work best, but avoid pre-sliced packages that oxidize quickly. Fresh herbs like parsley and thyme provide bright herbal notes; Trader Joe’s carries excellent pre-bundled options if you’re short on time. For ginger, select a fresh knob with tight skin and no soft spots—Asian markets often carry the freshest varieties. Store all vegetables in the refrigerator until use, with herbs wrapped in damp paper towels to maintain freshness.
Substitutions should maintain the broth’s aromatic balance. Swap mushrooms for shiitake mushrooms (4 oz) for deeper umami, or use zucchini (2 medium) if unavailable. Celery can be replaced with leeks (2 stalks) for a milder flavor. Prefer dried herbs? Use one-third the amount of fresh—dried thyme at 1 teaspoon would equal the fresh 1 tablespoon. No fresh ginger? Ground ginger (0.5 tsp) works in a pinch, though fresh offers superior complexity. For salt, Diamond Crystal kosher salt provides optimal flavor control. The spinach adds subtle bitterness to balance sweetness—kale or Swiss chard** can substitute at equal volume. Adjust water volume based on your Instant Pot’s capacity; this recipe assumes a 6-quart model.
This broth maintains peak freshness when stored properly. Transfer to airtight glass containers, leaving 1-inch headspace. In the refrigerator, it keeps for 5-6 days with flavors intensifying over time. For longer storage, freeze in 1-cup portions using ice cube trays for single-serving convenience. Thaw overnight in the refrigerator before use. The broth reheats beautifully—simmer gently on the stovetop or warm in the Instant Pot on the ‘Sauté’ function. For extended storage, divide into 16-ounce freezer-safe bags, removing as much air as possible. Labeled portions prevent freezer burn and maintain quality for up to 6 months. Always taste and adjust seasoning before using in recipes.
Why You’ll Love This Recipe
- No-Chop Nightmare: I swear by this recipe when I’m too tired to dice. Toss in whole onion quarters, carrot chunks, and celery stalks—no knife skills required. The Instant Pot handles the rest while I sip wine and pretend I’m a busy chef.
- Umami Bomb: That combo of mushrooms and garlic? It’s like a flavor explosion in a jar. The mushrooms add this deep, earthy richness, while the garlic lingers just enough to make every sip taste like you simmered for hours (but you didn’t).
- Soup-to-Salad Hero: Use it for everything—soup base, risotto, braising liquid, or even a quick pasta sauce. Freeze extras in ice cube trays for portion control later. Honestly, I’ve never met a broth I couldn’t improve with this stuff.
- Pantry Magic: Cheap, pantry-friendly ingredients stretch into gallons. Carrots, celery, and onions are always on sale, and mushrooms add luxury without breaking the bank. Plus, it keeps for weeks in the fridge—my wallet and taste buds thank me.
Step-by-step instructions for homemade vegetable broth in the Instant Pot
This method extracts maximum flavor while preserving vibrant herbal notes—no overcooking required.
Sauté the Vegetable Base for Deep Flavor
Set your Instant Pot to the “Sauté” function and allow it to preheat for 2 minutes. Add the 1 tablespoon vegetable oil and let it shimmer before adding the 2 whole yellow onions (cut into quarters), 4 medium carrots (whole and unpeeled), and 4 whole celery stalks (trimmed and cut into 2-inch pieces). Sauté for 5 minutes, stirring occasionally, until the onions soften and the carrots begin to release their natural sweetness.
Here’s where the foundation happens: the Maillard reaction begins to develop, creating complex flavors that will infuse your broth. Don’t rush this step—you’ll notice the vegetables start to caramelize slightly at the edges, which is exactly what you want. Add the 6 cloves garlic cloves (smashed) and 8 ounces mushrooms (sliced) and continue sautéing for another 3 minutes until the mushrooms release their moisture and the garlic becomes fragrant.
Add Aromatics and Liquid for Full Extraction
Pour in the 6 cups filtered water and scrape up any browned bits from the bottom of the pot with a wooden spoon. This deglazing step captures concentrated flavor that would otherwise stick to the pot. Add the 1 tablespoon fresh thyme leaves, 2 whole bay leaves, 1-inch fresh ginger (sliced thinly), 1.5 teaspoons sea salt, and 0.5 teaspoon black peppercorns. Stir everything together to ensure the seasonings disperse evenly throughout the liquid.
This is the moment that matters: the combination of fresh ginger, thyme, and bay leaves creates a bright herbal profile that sets this broth apart from store-bought versions. The salt and pepper at this stage ensure balanced seasoning from the start, rather than trying to adjust later. Secure the lid and make sure the valve is set to “Sealing” for pressure cooking.
Pressure Cook for Maximum Flavor Extraction
Cook on high pressure for 10 minutes. The Instant Pot will take about 5 minutes to come to pressure before the cooking cycle begins. This shorter cook time prevents the vegetables from becoming mushy while still extracting their essential flavors and nutrients into the broth.
Real talk: the 10-minute cook time is critical. Any longer and you risk breaking down the vegetables too much, which can make the broth bitter. You’ll know it’s done when the Instant Pot beeps and the pressure indicator floats. Here’s the thing—don’t skip the natural release step that follows.
Natural Release and Finish with Herbs
Allow the pressure to release naturally for 15 minutes. This slow release prevents the broth from becoming cloudy and helps settle the flavors. Once the pressure has fully released, remove the lid and carefully discard any remaining vegetable pieces using a slotted spoon or fine-mesh strainer. The broth should be clear with a vibrant golden hue.
Return the broth to the Instant Pot and stir in the 2 cups spinach leaves (roughly chopped) and 0.5 cup fresh parsley (stems removed). Bring to a simmer for 2 minutes to wilt the greens and incorporate their fresh, bright flavors. The spinach will add a subtle earthiness while the parsley contributes a bright, herbal finish that elevates the broth’s complexity.
Strain and Store for Maximum Freshness
Strain the broth through a fine-mesh sieve into a clean bowl or pitcher, pressing gently on the solids to extract every last drop of flavor. Discard the strained vegetables and herbs. Your broth should now have a rich, aromatic depth with layers of carrot sweetness, celery brightness, and herbal notes from the thyme, bay leaves, and parsley.
For immediate use, serve the broth warm. For storage, let it cool to room temperature before transferring to airtight containers. This broth keeps well in the refrigerator for up to 5 days or can be frozen for up to 3 months. The flavors will continue to develop and deepen over time, making it even more delicious as it ages.
Pro Tips For Making Instant Pot Vegetable Broth
- CHAR THE ONIONS FIRST: I learned this the hard way—skipping the sauté means your broth will taste like a sad soup. Get that onion base golden brown (about 5 minutes on medium-high) before adding anything else. The deeper color = richer flavor, and it prevents that “raw onion” aftertaste that ruins everything.
- CHOP MUSHROOMS SMALL: Whole mushrooms? No. Tiny pieces—think ¼-inch dice—so they break down and infuse the broth properly. I used to toss in thick slices, and they’d either clump like rubber or float untouched. Uniform size = even cooking, and that’s how you get a velvety texture, not a mushy mess.
- PRESSURE COOK 10 MINUTES: The recipe might say 5, but resist the urge to rush. Ten minutes at high pressure extracts maximum flavor from the celery and carrots without turning them to mush. I tested it—5 minutes gives you a pale, weak broth; 10 minutes? That’s depth. (Yes, even if you’re impatient like me.)
- ADD GARLIC AT THE END: Tossing garlic cloves in with the veggies? They’ll burn before the broth’s ready. Instead, add them raw during the last 2 minutes of natural release—crushed, not chopped. This keeps them fragrant, not bitter, and saves you from fishing out charred cloves. (Your future self will thank you.)
Make-ahead tips for this instant pot vegetable broth
Batch Prep Strategy
Double the recipe and freeze half immediately—this is my go-to strategy for meal prep. Use a 6-quart Instant Pot and prepare 12 cups broth at once. Divide into 1-cup portions in ice cube trays before transferring to freezer bags.
This way, you always have single-serving portions ready for quick soups or cooking grains. Label each bag with the date to track freshness. 📅
Freezer-Friendly Containers
For longer storage, I recommend glass mason jars with 16-ounce capacity—they handle freezing better than plastic and won’t absorb odors. Leave 1-inch headspace to prevent expansion cracks. Store upright in a dedicated freezer bin for easy access.
Thaw overnight in the fridge or microwave on defrost setting for 2-3 minutes before use. Never reheat directly from frozen. ❄️
Flavor-Enhancing Additions
Boost umami by adding 1 tablespoon soy sauce or ½ teaspoon miso paste during the pressure cook. For extra depth, stir in 1 teaspoon nutritional yeast after straining—it adds a cheesy, savory note without dairy.
These additions work best when incorporated during the final simmer step. Store these enhancers separately and add to taste when reheating. 💡
Seasonal Swaps
Adjust vegetables based on what’s fresh: swap carrots for sweet potatoes (2 cups, cubed) in fall, or use zucchini (2 medium) in summer. For winter, add leeks (2 stalks) and kale (2 cups) to the sauté.
Each seasonal swap maintains the broth’s balance while introducing new flavor dimensions. Keep the 10-minute pressure cook time consistent for best results. 🌱
Reheating for Optimal Texture
Simmer broth on the stovetop over medium-low heat for 5-7 minutes to restore warmth without breaking down flavors. For Instant Pot reheating, use the “Sauté” function for 3-4 minutes, stirring occasionally.
Avoid microwaving—it creates a skin and dulls the herbal notes. Always taste and adjust salt before using in recipes. 🔥
Broth Boosters for Meal Prep
Prep a separate batch of sautéed vegetables (like onions, garlic, and mushrooms) and store them in the freezer. When you need broth, simply combine these with fresh water or your stored broth in the Instant Pot.
This two-step method saves time while keeping flavors vibrant. I keep a quart-sized freezer bag of prepped veggies ready for quick broth-making. 💪
Nutrition facts
Frequently asked questions
Can I use frozen vegetables instead of fresh?
Fresh vegetables work best for maximum flavor, but you can use frozen veggies in a pinch. Just thaw them first and drain excess water to prevent a watery broth. For best results, use frozen versions of the core ingredients like carrots, celery, and onions, but avoid frozen spinach or herbs as they lose texture and flavor when cooked.
Why does my broth turn cloudy after cooking?
Cloudiness usually means the vegetables broke down too much during cooking. To prevent this, always use a 10-minute pressure cook time and allow for a 15-minute natural release. If your broth is already cloudy, strain it through a fine-mesh sieve or cheesecloth for a clearer result. Avoid rapid pressure release, which can cause the broth to become murky.
How can I make this broth more flavorful?
Boost depth by adding 1 tablespoon soy sauce or ½ teaspoon miso paste during the pressure cook. For extra richness, stir in 1 teaspoon nutritional yeast after straining, or add a splash of lemon juice at the end for brightness. Roasting vegetables before cooking also intensifies their natural sweetness and umami.
Can I reduce this recipe for a smaller Instant Pot?
Yes, but maintain the same vegetable-to-liquid ratio. For a 3-quart Instant Pot, halve all ingredients and use 3 cups water. Keep the 10-minute cook time and 15-minute natural release for best results. The flavor will be just as concentrated, though the volume will be smaller. Always ensure your pot has enough space for the vegetables to cook evenly.
What’s the best way to store leftover broth?
Transfer to airtight glass containers, leaving 1-inch headspace. In the fridge, it keeps for 5-6 days, with flavors deepening over time. For longer storage, freeze in 1-cup portions using ice cube trays or 16-ounce mason jars. Label with dates and thaw overnight in the fridge before reheating. Never reheat directly from frozen.

- Crock Pot Round Steak Recipe: Slow-Sear Crust With Juicy Center - November 6, 2026
- Candied Sweet Potatoes Crock Pot Recipe: Caramelized Sweetness With Zero Effort - November 6, 2026
- Steak Recipe Crock Pot: Juicy, Caramelized Crust in 4 Hours - November 6, 2026