
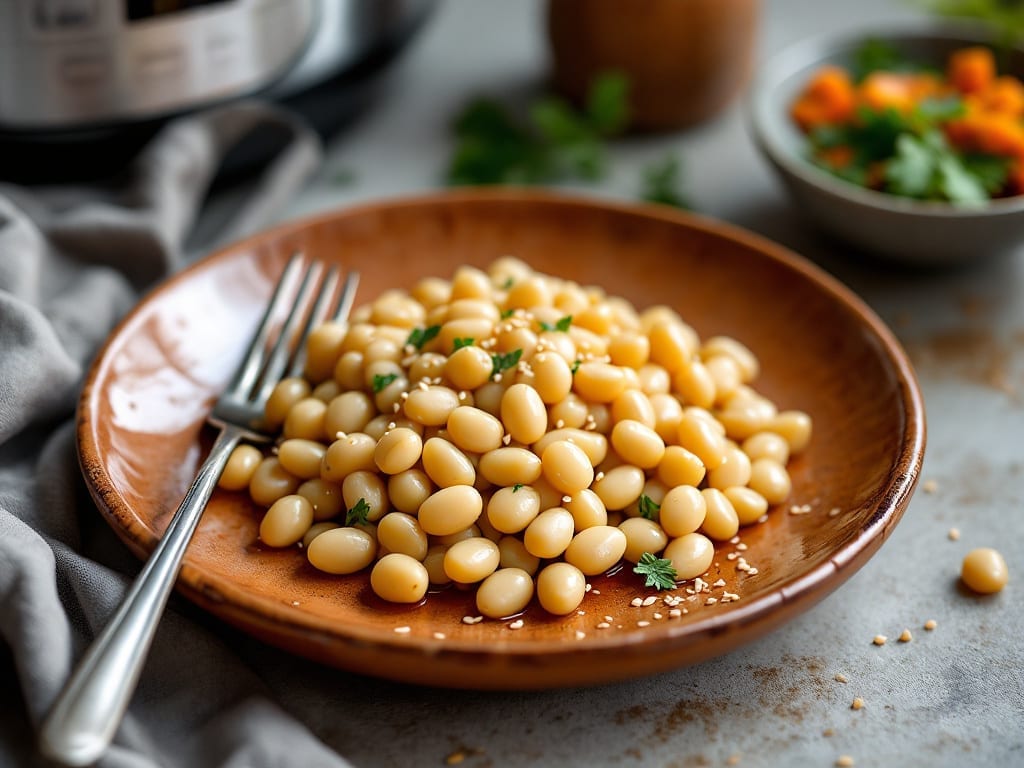
This Instant Pot white bean recipe transforms humble cannellini beans into a velvety, fiber-rich side dish that comes together in just 20 minutes—no soaking or long simmering required. The secret lies in pressure cooking, which unlocks naturally creamy textures while preserving all the plant-powered nutrition.
I developed this method after realizing how often store-bought canned beans fall short of homemade in both flavor and texture.
The beauty of this recipe is its adaptability—whether you’re following a vegan diet or simply looking for a budget-friendly protein boost, these beans deliver.
A simple broth base (vegetable or chicken) infuses flavor without overpowering the beans’ earthy sweetness, while optional aromatics like garlic, bay leaves, and lemon zest elevate each bite. The result is a dish that’s equally at home alongside roasted vegetables, grilled meats, or as a standalone meal with crusty bread.
What sets this apart is the creamy consistency achieved through proper liquid ratios and cooking times—no gums or mushy textures here. The beans stay intact yet tender, with just enough body to coat the pot in a luscious, spoonable sauce.
This is the kind of side dish that transforms ordinary meals into something special, all while being packed with protein and fiber for a satisfying bite.
For added depth, consider finishing with fresh herbs like parsley or thyme, a drizzle of olive oil, or a squeeze of lemon. The recipe scales effortlessly, making it perfect for meal prep or feeding a crowd.
Ready to elevate your weeknight dinners with minimal effort? Let’s get cooking—your Instant Pot is about to become your new best tool for quick, nutritious sides.
Ingredients for instant pot white bean
Eleven simple ingredients transform cannellini beans into a velvety, protein-packed side in minutes.
| Ingredient | Amount | Notes |
|---|---|---|
| Dried Cannellini Beans 🌾 | 1 ½ cups | Rinsed before cooking |
| Vegetable Broth 💧 | 2 cups | Low-sodium preferred |
| Extra-Virgin Olive Oil 🫒 | 2 tbsp | For flavor infusion |
| Garlic Cloves 🧄 | 3 cloves | Minced for depth |
| Fresh Thyme Leaves 🌿 | ¼ cup | Or 1 tsp dried thyme |
| Bay Leaves 🍃 | 2 whole | Removed after cooking |
| Lemon Zest 🍋 | 1 tbsp | Brightens flavor profile |
| Lemon Juice 🍋 | 1 tbsp | Freshly squeezed |
| Diamond Crystal Kosher Salt 🧂 | 1 ½ tsp | Adjust to taste |
| Fresh Parsley Leaves 🌿 | ¼ cup | Chopped for garnish |
| Fresh Lemon Juice 🍋 | 1 tbsp | For final brightness |
| Extra-Virgin Olive Oil 🫒 | 1 tbsp | For finishing drizzle |
The quality of your beans matters—dried cannellini from Whole Foods or Trader Joe’s yield the best texture, but any dried variety works. Rinse them thoroughly before adding to the pot to remove debris, which prevents cloudy broth. For broth, Pacific Foods or Imagine low-sodium options are ideal, but homemade vegetable broth elevates the dish further. Fresh thyme and bay leaves are non-negotiable—they infuse subtle earthy notes that enhance the beans’ natural sweetness. If using dried thyme, Penzeys or bulk spice sections offer superior quality compared to generic supermarket brands.
Short on fresh thyme? Dried thyme at one-third the amount works, though fresh provides a brighter flavor. No lemon zest? Orange zest substitutes equally well, though lemon’s acidity remains ideal. The olive oil should be extra-virgin—cheaper varieties lack the fruity complexity needed to complement the beans. For a deeper umami profile, add 1 tsp soy sauce to the broth. If you prefer a smoother texture, blend half the cooked beans before serving. The parsley isn’t just for garnish—it adds freshness that balances the dish’s richness.
Store leftovers in an airtight container in the fridge for up to 5 days—the flavor actually deepens overnight. For meal prep, portion into individual containers with a drizzle of olive oil on top to preserve freshness. Freezes beautifully for 3 months when stored in a sealed bag, though texture may soften slightly. Reheat gently on the stove with a splash of water or broth to restore creaminess. This recipe scales effortlessly—double the ingredients for a crowd, but never exceed the Instant Pot’s 6-cup capacity for optimal pressure cooking.
Why You’ll Love This Recipe
- No-Soak Magic: I swear by this trick—just toss in dried beans with broth, and the Instant Pot handles the rest. No overnight soaking, no fuss, and they turn out tender without a single mushy bite. (Yes, even on a Tuesday night when I forget to prep ahead.)
- Garlic-Thyme Bomb: That first whiff of sizzling garlic in olive oil? Pure flavor payoff. The thyme leaves melt into the broth, giving it a bright, herby depth that makes these beans taste like they simmered for hours—not 20 minutes. Honestly, my partner sniffs the pot before it’s even done.
- Endless Upgrade: Need a quick soup base? Toss in kale and lemon. Craving a dip? Blend with tahini and serve with crusty bread. I’ve turned this into a pasta sauce, a salad topper, and even a filling for stuffed peppers—all with the same core. (Between us, the freezer stash is my secret weapon.)
- Budget Powerhouse: Dried beans are my wallet’s best friend—cheaper than canned, and they stretch into meals for days. Make a big batch, and you’ve got lunches for the week, a potluck side, or emergency dinner when you’re too tired to order in. Not the prettiest, but the taste makes up for it every time.
Step-by-step instructions for Instant Pot white beans
Follow this method for silky, flavor-packed cannellini beans that develop depth without overcooking.
Sauté Aromatics in the Instant Pot
Set your Instant Pot to the “Sauté” function and add the 2 tablespoons extra-virgin olive oil. Once the oil shimmers (about 2 minutes), add the 3 minced garlic cloves and 0.25 cup fresh thyme leaves. Cook for 1 minute until the garlic turns golden and fragrant—this prevents bitterness and builds the flavor foundation.
Here’s the thing—don’t let the garlic brown too much. You want it aromatic, not burnt. If it starts to darken too quickly, reduce the heat slightly. The thyme leaves will soften slightly but retain their bright flavor. This step ensures your beans develop complex layers rather than just basic seasoning.
Add Beans and Broth for Pressure Cooking
Add the 1.5 cups rinsed dried cannellini beans, 2 cups vegetable broth, and the 2 whole bay leaves to the pot. Stir gently to distribute everything evenly. The beans should be fully submerged—the broth should cover them by at least an inch. If needed, add a splash of water.
Season with the 1.5 teaspoons diamond crystal kosher salt and 1 tablespoon lemon zest. The zest will brighten the final dish, but don’t worry if it doesn’t fully dissolve—it will infuse during cooking. Stir once more to combine all ingredients thoroughly. The lemon zest adds immediate acidity that balances the earthy beans.
Pressure Cook Until Tender
Secure the lid and set the Instant Pot to “High Pressure” for 12 minutes. This timing ensures the beans become fork-tender without breaking down into mush. During this time, the pressure builds to create a steam environment that cooks the beans evenly and quickly.
Once the cooking cycle completes, allow a natural release for 10 minutes before quick-releasing any remaining pressure. This gradual release prevents the beans from becoming waterlogged. You’ll know they’re ready when they pierce easily with a fork but still hold their shape—this texture is ideal for creamy preparations.
Finish with Fresh Herbs and Brightness
After releasing the pressure, remove the 2 bay leaves and stir in the 1 tablespoon freshly squeezed lemon juice and 1 tablespoon fresh lemon juice. The acidity cuts through the richness of the beans while enhancing their natural sweetness. Add the 0.25 cup chopped fresh parsley leaves and the 1 tablespoon extra-virgin olive oil for finishing touches.
Taste and adjust the seasoning if needed—you might want to add a pinch more salt or a splash more lemon juice. The beans should be creamy with a velvety texture, not grainy. If they’re too thick, stir in 1-2 tablespoons water to reach your desired consistency. This final step transforms simple beans into a restaurant-quality side dish.
Pro Tips For Making Instant Pot White Bean
- Soak Them Right: Skip the overnight soak—just cover dried cannellini beans in cold water for 2 hours before cooking. I used to ignore this, and my beans always came out tough; the extra hydration makes all the difference, especially in the Instant Pot’s pressure environment.
- Sauté Garlic Low: Cook your garlic in olive oil on medium-low heat until fragrant but not browned—this prevents bitterness. I learned this the hard way after burning three batches and ending up with a burnt flavor that ruined the whole dish.
- Skip the Overfilling: Fill your Instant Pot only halfway with broth—beans expand a lot. I’ve seen people crowd the pot, and the pressure valve will vent prematurely, leaving you with mushy beans instead of creamy perfection.
- Stir in Thyme Late: Add fresh thyme leaves after cooking, not before—this keeps their delicate flavor intact. I was skeptical until I tried it; the aroma stays vibrant, and the leaves don’t turn to mush in the broth.
Serving suggestions for leftovers
Crusty Bread Pairing
Serve your creamy white beans alongside warm, crusty bread to soak up every last drop of that velvety sauce. I love using a baguette-style loaf from Breads Bakery or a rustic ciabatta from my local grocery store.
The open crumb structure traps the beans beautifully, making each bite a flavorful experience. For extra flair, brush the bread with garlic-infused olive oil before serving—it adds a fragrant aroma that complements the beans’ earthiness.
Roasted Vegetable Medley
Create a vibrant contrast by pairing these beans with roasted seasonal vegetables. Toss zucchini, bell peppers, and cherry tomatoes with 1 tbsp olive oil, ½ tsp smoked paprika, and salt, then roast at 400°F for 20 minutes.
The caramelized edges and slightly charred flavors create a perfect balance with the creamy beans. This combination works especially well for a vegetarian meal, offering both texture and color variety.
Grilled Protein Pairings
For a heartier meal, serve these beans alongside grilled proteins like chicken breast or shrimp skewers. The smoky char from grilling complements the beans’ subtle sweetness beautifully.
I often marinate the protein in lemon-garlic sauce (mix 3 tbsp olive oil, 2 tbsp lemon juice, 3 minced garlic cloves, and 1 tsp dried oregano) before grilling. The acidity in both dishes ties them together seamlessly.
Cheesy Toppings
Elevate your beans with a sprinkle of grated Parmesan cheese or crumbled feta right before serving. The salty, tangy notes cut through the creaminess, adding another layer of complexity. For a vegan option, use nutritional yeast—it provides a cheesy flavor without dairy.
I also love adding toasted pine nuts or slivered almonds for crunch, especially when serving with a fresh salad.
Salad Complements
A bright, crisp salad balances the richness of these beans perfectly. Toss mixed greens, sliced cucumbers, and cherry tomatoes with a light lemon vinaigrette (mix 3 tbsp olive oil, 1 tbsp lemon juice, 1 tsp Dijon mustard, and salt).
The acidity in the dressing enhances the beans’ natural sweetness, creating a harmonious bite. This pairing works especially well for a light lunch or as a side for grilled meats.
Meal Prep Serving Ideas
When prepping these beans for the week, store them in airtight containers with a drizzle of olive oil on top to preserve freshness. Serve them cold as a bean salad with diced celery, red onion, and a tangy dressing, or reheat gently for a warm side.
I often pack them in bento-style containers with roasted sweet potatoes and a small side of grains for balanced, portable meals. The beans hold up beautifully in the fridge for 5 days, making them a go-to for quick lunches.
Nutrition facts
Frequently asked questions
Can I use canned white beans instead of dried?
Yes! For a quicker version, use 2 (15-oz) cans of drained and rinsed cannellini beans instead of dried. Reduce the broth to 1 cup and pressure cook for just 3 minutes on high pressure—no natural release needed. The texture will be slightly softer but still delicious. This cuts prep time to under 10 minutes!
Why do my beans turn out mushy?
Mushy beans usually happen from overcooking or improper liquid ratios. Always use 2 cups broth for 1.5 cups dried beans and never exceed the Instant Pot’s 6-cup capacity. For dried beans, stick to 12 minutes high pressure with a 10-minute natural release. If using canned beans, 3 minutes high pressure is all you need.
How can I make this vegan?
This recipe is already vegan-friendly, but double-check your broth—use vegetable broth instead of chicken. For extra richness, stir in 1 tbsp nutritional yeast or 1 tbsp tahini after cooking. The lemon zest and herbs keep it vibrant while maintaining plant-powered nutrition. Serve with vegan bread or roasted veggies for a complete meal.
Can I make this in a regular pot?
Simmer 1.5 cups dried beans in 4 cups water or broth with aromatics for 1.5-2 hours until tender. Add the garlic, thyme, and bay leaves halfway through. The texture will be slightly firmer, but the flavor remains rich. For creaminess, mash half the beans before serving or stir in 1 tbsp olive oil at the end.
What are the best toppings for extra flavor?
Try these crowd-pleasing additions: crumbled feta or Parmesan, toasted pine nuts, fresh parsley, or a drizzle of smoky paprika-infused olive oil. For heat, add red pepper flakes or a dash of hot sauce. The key is balancing textures—creamy beans pair perfectly with crunchy or cheesy elements for a restaurant-worthy dish.

- Baked Potatoes in Crock Pot Recipe: Buttery Interiors and Crispy Top Magic - November 1, 2026
- Braised Beef Short Ribs Recipe: Crock Pot Fall-Off-Bone Magic in 6 Hours - November 1, 2026
- Crock Pot Cocoa Recipe: Velvety Warmth With Hidden Spice Magic - November 1, 2026