
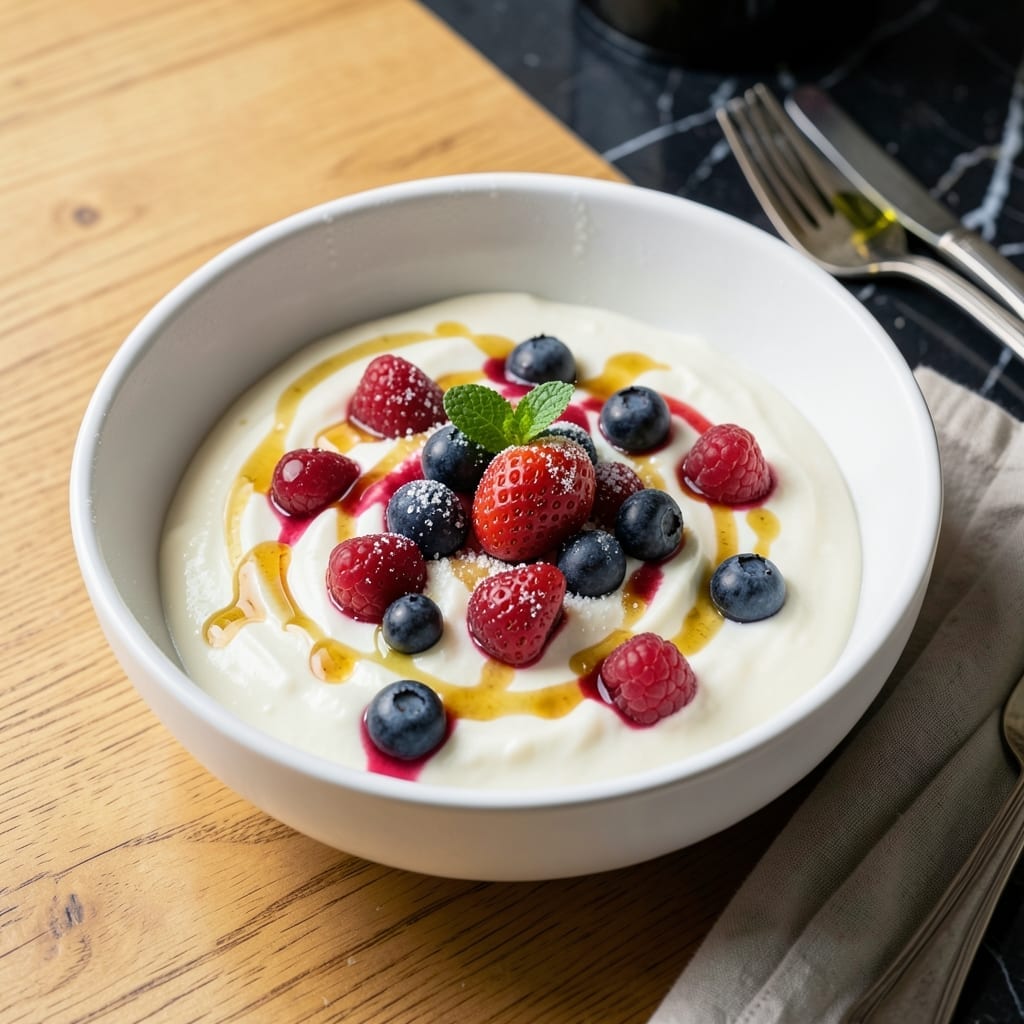
Making yogurt at home delivers a thicker, tangier result than any store-bought version. The Instant Pot provides the precise temperature control needed for perfect cultures every time.
This method requires just two ingredients and minimal hands-on time. The process involves heating milk, cooling it, adding starter culture, then letting the Instant Pot maintain the ideal 110°F environment for fermentation.
The final product is creamy, rich yogurt with no additives or preservatives. You control the thickness and tanginess by adjusting fermentation time.
Once mastered, this becomes a weekly staple. The technique works with any milk type, though whole milk yields the best texture.
Ingredients for Instant Pot Yogurt
Just milk and culture create creamy, rich yogurt with precise Instant Pot control.
| Ingredient | Amount | Notes |
|---|---|---|
| Whole Milk 🥛 | ½ cup | Per serving, ultra-pasteurized preferred |
| Plain Yogurt with Live Cultures 🥣 | 2 tbsp | Store-bought or previous batch |
| Granulated Sugar 🍚 | 1 tsp | Optional for sweetness |
| Vanilla Extract 🌿 | ½ tsp | Optional for flavor |
| Honey 🍯 | 1 tbsp | Optional for sweetening |
| Fresh Berries 🍓 | 1 cup | Optional for topping |
| Chopped Nuts 🌰 | ¼ cup | Optional for crunch |
| Ground Cinnamon 🌶️ | ¼ tsp | Optional for seasoning |
| Pure Maple Syrup 🍁 | 1 tbsp | Optional for sweetness |
| Lemon Zest 🍋 | ½ tsp | Optional for brightness |
The milk quality is paramount. Whole milk from organic dairies yields the thickest, richest texture, though 2% works in a pinch. Ultra-pasteurized is ideal as it’s heated higher than regular milk, reducing unwanted bacteria. Organic Valley and Stonyfield are reliable brands. The starter culture must contain live, active cultures—check the label for phrases like ‘contains live cultures’ or ‘probiotic.’
No plain yogurt on hand? Use a powdered yogurt starter (available at health food stores or online) for consistent results. For dairy-free versions, coconut milk with added thickeners works, though texture varies. The sugar and flavorings are optional but recommended for palatability. Vanilla extract and honey pair beautifully, while maple syrup offers a vegan alternative.
Fresh homemade yogurt keeps for 7-10 days in the refrigerator. For best texture, store in clean glass jars. The longer it ferments, the tangier it becomes—adjust time to taste. Starter culture remains viable for 5-7 batches before needing replacement.
Why You’ll Love This Recipe
- Hands-Off Magic: I just pour in whole milk, press a button, and the Instant Pot does the rest—no stirring, no fuss.
- Velvety Vanilla Dream: The vanilla extract and honey give it that smooth, slightly sweet flavor that beats store-bought every time.
- Breakfast for Days: One batch makes enough yogurt for the whole week—great for parfaits, smoothies, or just eating straight from the jar.
- Budget-Friendly Staple: Honestly, it costs half as much as grocery store yogurt, and I control exactly what goes in it.
Step-by-Step Instructions for Instant Pot Yogurt
This professional method delivers consistent, tangy results with precise temperature control and timing.
Step 1: Pasteurize and Heat the Whole Milk
Pour the 0.5 cup Whole Milk into the Instant Pot liner. Secure the lid and set the valve to sealing. Use the “Yogurt” function and select “Boil” to heat the milk to 180°F—this pasteurization step eliminates unwanted bacteria and creates the ideal environment for your culture to thrive.
The milk should reach temperature in 15-20 minutes. You’ll notice the display will switch to “Yogt” when it’s ready. This heating process also denatures the whey proteins, which helps create a thicker final product with better texture.
Once heated, carefully remove the liner (use oven mitts—it’s hot) and let the milk cool to 110°F. This cooling step is critical; too hot and you’ll kill your starter culture, too cool and the bacteria won’t activate properly.
Step 2: Temper and Inoculate with Starter Culture
While the milk cools, take your 2 tbsp Plain Yogurt with Live Cultures out of the refrigerator to bring it to room temperature. This prevents temperature shock when you combine it with the warm milk.
Once the milk reaches 110°F, whisk in the 1 tsp Granulated Sugar if you’re using it—this gives the bacteria an initial food source to jumpstart fermentation. Then add the 2 tbsp Plain Yogurt with Live Cultures and whisk thoroughly until fully dissolved with no lumps.
The mixture should look smooth and slightly frothy. I’ve found that using ultra-pasteurized milk gives the most consistent results, as it’s been heated to a higher temperature during processing, which helps with the final texture.
Step 3: Incubate for Optimal Fermentation
Pour the inoculated milk back into the Instant Pot liner. Secure the lid and set the valve to sealing. Select the “Yogurt” function and adjust the time to 8-12 hours—the longer the incubation, the tangier your yogurt will be.
The Instant Pot will maintain a steady 110°F throughout the incubation period. This consistent temperature is what makes this method so reliable. After about 4 hours, you can check the progress by carefully tilting the pot—you should see the mixture starting to thicken.
For the thickest results, I recommend the full 12 hours of incubation. The yogurt will continue to thicken as it cools in the refrigerator. Avoid disturbing it during this time, as movement can disrupt the culture development.
Step 4: Chill and Flavor the Finished Yogurt
Once incubation is complete, transfer the liner to the refrigerator and let it chill for at least 4 hours. This cooling period allows the yogurt to set fully and develop its final texture.
After chilling, you can stir in your choice of flavorings. For a classic touch, I recommend the 0.5 tsp Vanilla Extract and 1 tbsp Honey. The 0.5 tsp Lemon Zest adds a bright note that complements the tanginess beautifully.
Portion the yogurt into serving bowls and top with the 1 cup Fresh Berries, 0.25 cup Chopped Nuts, and a drizzle of 1 tbsp Pure Maple Syrup. The 0.25 tsp Ground Cinnamon makes an excellent final garnish for added warmth and depth of flavor.
Pro Tips For Making Instant Pot Yogurt
- Boil the Milk First: I learned this the hard way—heating the milk to 180°F before cooling kills off competing bacteria, giving your yogurt a cleaner taste and thicker texture.
- Use Ultra-Fresh Starter: That plain yogurt with live cultures? Make sure it’s fresh—old or weakened cultures won’t set properly, and you’ll end up with sad, runny yogurt.
- Avoid Metal Utensils: Sounds weird, but it works: stir with a wooden or plastic spoon when adding the starter to prevent temperature shock or contamination from reactive metals.
- Sweeten After Fermenting: Add sugar, honey, or vanilla only after the yogurt has set—sweeteners can interfere with the bacteria’s work if mixed in too early, and the flavors taste better post-fermentation.
Troubleshooting Perfect Results
Too Thin or Runny
If your yogurt didn’t thicken properly, the milk might not have been heated to 180°F during pasteurization. This step denatures proteins, which is crucial for texture. Also, check that your starter had live cultures—expired yogurt won’t work.
For a quick fix, strain through a cheesecloth-lined colander for 30-60 minutes to remove excess whey. I use Organic Valley milk for consistently thick results. 💡
Grainy Texture
Graininess usually means the milk cooled too much before adding the culture. The ideal inoculation temperature is exactly 110°F. If it drops below 100°F, the bacteria struggle to activate evenly.
Whisk vigorously when combining the culture with warm milk to prevent lumps. A hand whisk works better than a spoon for this step.
Not Tangy Enough
Short fermentation time produces mild yogurt. For more tang, extend incubation to the full 12 hours. I notice the flavor develops significantly between 8-12 hours.
Also, ensure your Instant Pot maintains a steady 110°F throughout. If your kitchen is cold, wrap the pot in a towel for insulation.
Separation or Whey
A small amount of yellowish liquid (whey) on top is normal. Simply stir it back in. Excess separation might indicate the yogurt was moved too much during incubation.
Avoid opening the lid or jostling the pot during the 8-12 hour fermentation period. Patience is key for smooth results. ✨
Nutrition Facts
Frequently Asked Questions
What milk works best for thick results?
Whole milk produces the creamiest texture. Ultra-pasteurized is ideal as it’s heated higher during processing, which helps with thickness. Organic Valley is a reliable brand for consistent results.
Can I use a different starter besides yogurt?
Yes, powdered yogurt starter works well and often yields more consistent results. It’s available at health food stores or online. Always ensure it contains live, active cultures.
How do I fix yogurt that didn’t set?
Strain through a cheesecloth-lined colander for 30-60 minutes to remove excess whey. This thickens the yogurt significantly.
Why is my yogurt grainy?
The milk likely cooled below 100°F before adding the culture. Maintain exactly 110°F and whisk vigorously when combining to prevent lumps.

- 5-Star Pork Loin Recipe: Pan-Seared Crust With Juicy Pink Heart - September 25, 2026
- 6-Lb Pork Loin Roast Recipe: Herb-Crusted, Juicy Pink Heart in 3 Hours - September 25, 2026
- 6-Month-Old Smash Cake Recipe: Tiny Bites of Celebration Magic - September 25, 2026