
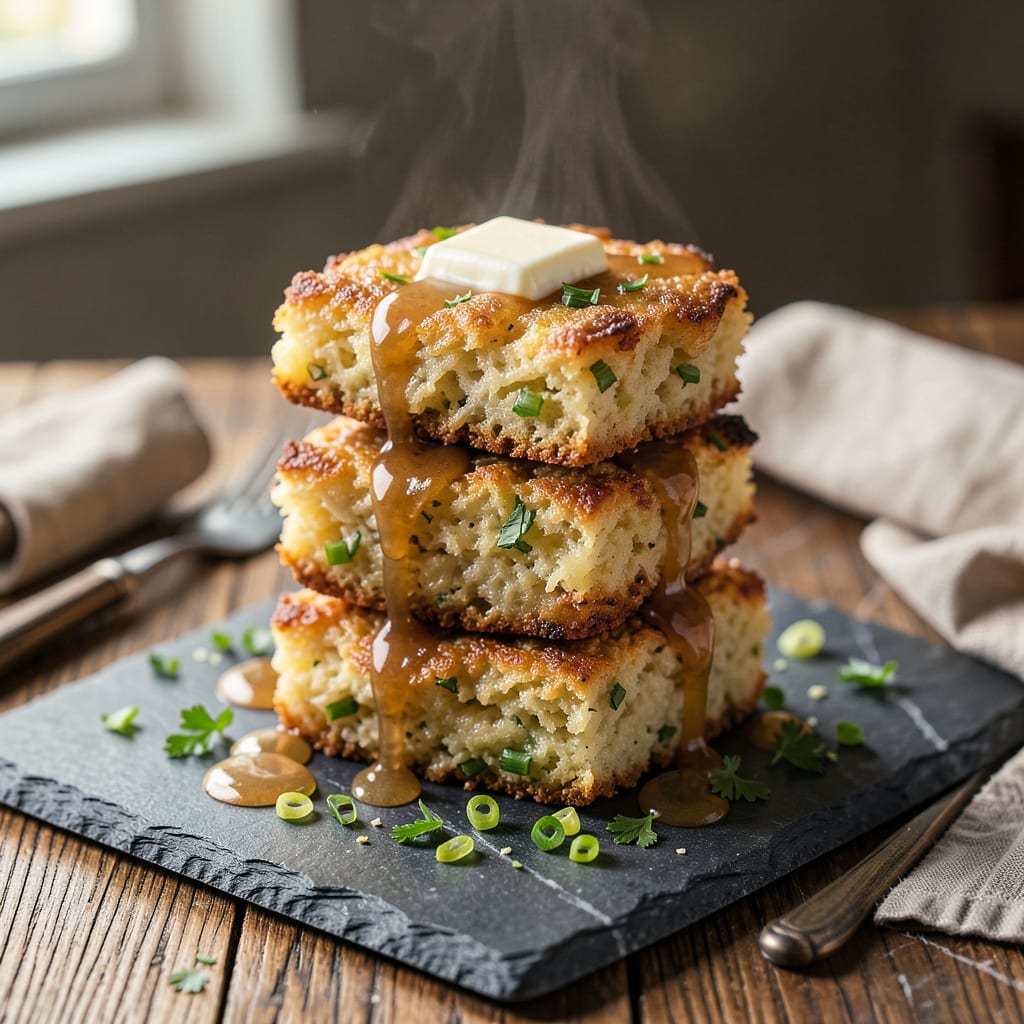
Irish potato cakes transform humble leftovers into something extraordinary—golden, crispy on the outside with creamy potato centers that melt in your mouth. This traditional recipe honors its roots as a thrifty staple in Irish kitchens, where nothing went to waste. The secret lies in the perfect balance of starchy potatoes, butter for richness, and just enough flour to bind without heaviness.
What makes these cakes special is their versatility. Pan-fried until golden brown, they develop a satisfying crunch that gives way to tender potato inside. Serve them as part of a hearty Irish breakfast, alongside smoked salmon, or simply with a dollop of butter. The result is comfort food at its finest—simple ingredients elevated through careful technique.
Ingredients for Irish Potato Cakes
These traditional Irish potato cakes require just ten ingredients, transforming simple starchy potatoes into golden, crispy perfection with creamy centers.
| Ingredient | Amount | Notes |
|---|---|---|
| Russet Potatoes 🥔 | 2 lb | Peeled and boiled until tender |
| Unsalted Butter 🧈 | 4 tbsp | Cold, cubed, plus extra for frying |
| All-Purpose Flour 🌾 | ½ cup | Plus additional for dusting |
| Large Egg 🥚 | 1 whole | Lightly beaten for binding |
| Scallions 🧅 | 3 pieces | Finely chopped, green parts only |
| Fresh Flat-Leaf Parsley 🌿 | 2 tbsp | Finely chopped for freshness |
| Kosher Salt 🧂 | 1 tsp | Diamond Crystal preferred |
| Freshly Ground Black Pepper 🌶️ | ½ tsp | Medium-coarse grind recommended |
| Whole Milk 🥛 | 2 tbsp | Optional, for creamier texture |
| Neutral Vegetable Oil 🫒 | 2 tbsp | For pan-frying, high smoke point |
[recipeingredientscaler]
The potatoes are the foundation—Russet variety provides optimal starch content for that signature creamy interior. Professional kitchens insist on Diamond Crystal kosher salt for its clean flavor and precise measurement. For the butter, European-style unsalted (like Kerrygold) offers superior richness and lower water content, which is critical for achieving the proper texture. Scallions should be vibrant green with firm stalks; avoid any with wilted tops. The flour serves as a binder—all-purpose unbleached (King Arthur preferred) yields the best results without altering flavor profiles.
For those requiring substitutions, Yukon Gold potatoes can replace Russets, though they yield a slightly denser texture. Dairy-free adaptations may use cold coconut oil in place of butter, though the flavor profile will shift subtly. The egg acts as a critical binder—1 tbsp ground flaxseed mixed with 3 tbsp water provides an effective vegan alternative. Fresh parsley can be replaced with 1 tsp dried parsley, though fresh is strongly recommended for optimal brightness. The milk addition is optional but enhances creaminess; unsweetened almond milk works for dairy-free versions.
Prepared potato cakes should be cooked immediately for optimal texture, though the mixture can be refrigerated for up to 24 hours in an airtight container. Leftover cooked cakes maintain quality when stored in the refrigerator for 3-4 days or frozen for 2 months. Reheat by pan-frying in butter until crisp, avoiding microwave methods which compromise the signature texture. For professional results, maintain consistent thickness (3/4-inch) when forming cakes to ensure even cooking and that coveted golden crust.
Why You’ll Love This Recipe
- One-Bowl Wonder: I don’t even need to drag out the mixer—just mash the russets with butter, stir in flour and egg, and fold in scallions. Honestly, the mess stays contained to a single bowl and my trusty wooden spoon.
- That Crispy-Creamy Magic: The outside gets golden and crackly in the pan while the inside stays pillowy-soft, all thanks to the butter and flour combo. Here’s what sold me—the scallions add just enough fresh bite to cut through the richness.
- Breakfast or Dinner MVP: I’ve served these with fried eggs for a hearty morning, alongside roasted chicken for dinner, and even cold the next day in lunchboxes. My kid swipes them straight from the fridge (yes, even the scallion bits).
- Leftover Reinvention: Between us, I make extra mashed potatoes just to turn them into these the next day. A handful of ingredients, 10 minutes of shaping, and suddenly yesterday’s side dish becomes tonight’s main event.
Step-by-Step Instructions for Irish Potato Cakes
Master the technique for achieving golden, crispy exteriors with perfectly creamy potato centers.
Step 1: Prepare and Mash the Potatoes
Begin with the 2 lb Russet Potatoes that have been peeled and boiled until fork-tender. Drain them thoroughly in a colander, then return them to the pot. Place the pot back on the stove over low heat for 1-2 minutes to evaporate any remaining moisture—this ensures your potato cakes won’t be gummy.
Transfer the dried potatoes to a large mixing bowl. Add the 4 tbsp Unsalted Butter (cold and cubed) along with the 1 tsp Kosher Salt and 0.5 tsp Freshly Ground Black Pepper. Mash until smooth but slightly textured—avoid overworking, as this can make the cakes dense. The mixture should hold together when pressed but not be sticky.
Step 2: Incorporate Binders and Aromatics
To the mashed potatoes, add the 0.5 cup All-Purpose Flour, 1 whole Large Egg (lightly beaten), 3 pieces Scallions (finely chopped, green parts only), and 2 tbsp Fresh Flat-Leaf Parsley (finely chopped). Gently fold everything together with a silicone spatula until just combined. The dough should be cohesive but not wet.
For a creamier texture, stir in the 2 tbsp Whole Milk at this stage. The mixture should resemble thick, slightly sticky mashed potatoes. If it feels too loose, add an additional 1-2 tablespoons of flour to achieve the right consistency for shaping. Cover the bowl and refrigerate for 20 minutes to firm up.
Step 3: Shape and Bread the Potato Cakes
Divide the chilled potato mixture into 8 equal portions (about ½ cup each). Roll each portion into a ball, then flatten into a ¾-inch thick patty. Place the shaped cakes on a parchment-lined tray. For extra crispiness, lightly dust each cake with additional flour, shaking off any excess.
Heat a large skillet over medium heat and add the 2 tbsp Neutral Vegetable Oil. The oil is ready when it shimmers but doesn’t smoke. Working in batches to avoid crowding, carefully transfer the potato cakes to the skillet. Cook undisturbed for 3-4 minutes per side until deeply golden brown and crisp.
Step 4: Finish with Butter for Extra Crispness
After flipping the potato cakes, add 1-2 tablespoons of additional unsalted butter to the skillet. As the butter melts, spoon it over the cakes repeatedly for the final 2 minutes of cooking. This basting technique creates an ultra-crispy crust while keeping the interior creamy.
The cakes are done when both sides are uniformly golden brown and the edges appear slightly crispy. Transfer them to a paper towel-lined plate to drain any excess oil. Serve immediately while hot and crisp, or keep warm in a 200°F oven for up to 15 minutes if preparing in batches.
Common Mistakes When Making This Recipe
Overworking the Potatoes
The moment you start mashing those Russet potatoes, remember that less is more. Overworking them releases too much starch, creating a gummy texture instead of that perfect creamy interior. I use a potato ricer for the lightest texture, but a fork works too—just stop when you see small lumps remaining. 🥔
Skipping the Drying Step
After boiling, your potatoes need to be completely dry before mashing. Return them to the hot pot for 1-2 minutes to evaporate moisture—this prevents soggy cakes. I learned this the hard way when my first batch turned into potato pancakes instead of crispy cakes.
Incorrect Oil Temperature
Your skillet should be at medium heat with oil that shimmers but doesn’t smoke. Too hot and the outside burns before the center warms; too cool and you’ll get greasy, pale cakes. I test with a scallion piece—it should sizzle immediately but not blacken instantly.
Overcrowding the Pan
Give each potato cake 2 inches of space in the skillet. Crowding lowers the oil temperature, leading to steamed instead of crispy cakes. I cook in batches of 3-4 cakes at a time for perfect golden results every time. ⚡
Neglecting the Butter Baste
The final butter baste isn’t optional—it’s what creates that signature crispy crust. When you flip the cakes, add 1-2 tbsp butter and spoon it over them continuously. This technique transforms good cakes into extraordinary ones with that restaurant-quality finish.
Improper Thickness
Each cake should be exactly ¾-inch thick before cooking. Too thin and they’ll burn; too thick and the center stays raw. I use a ruler to check my first cake, then eyeball the rest—this consistency ensures even cooking throughout the batch.
Nutrition Facts
Frequently Asked Questions
Can I make these with leftover mashed potatoes?
In fact, traditional Irish potato cakes were often made with leftovers. Just ensure your mashed potatoes are thick and not too wet—add an extra 1-2 tablespoons of flour if needed. Skip the milk if your leftovers are already creamy.
Why did my potato cakes fall apart when frying?
This usually happens if the mixture is too wet or lacks proper binding. Chill the potato mixture for 20 minutes before shaping, and
What’s the best way to reheat them? For that fresh-from-the-pan crispness, reheat in a skillet over medium heat with a little butter for 2-3 minutes per side. Avoid the microwave—it makes them soggy. You can also use an air fryer at 375°F for 4-5 minutes.
Can I freeze the potato cakes before cooking?
Yes! Shape the cakes and place them on a tray lined with parchment paper. Freeze until solid, then transfer to a freezer bag. They’ll keep for up to 2 months. Cook from frozen, adding 1-2 extra minutes per side in the skillet.
What can I serve with these besides breakfast?
They pair beautifully with smoked salmon and crème fraîche for a light lunch, or alongside roasted meats for dinner. For a vegetarian meal, top with a fried egg and sautéed greens. Even better—serve with a pint of stout for an authentic Irish experience!

- 8 Bean Soup Recipe Crock Pot: Hearty Vegetable Medley in One Pot - September 25, 2026
- 4C Bread Crumbs Meatballs Recipe: Crispy Crust and Juicy Centers - September 25, 2026
- 6 Oz Chocolate Chip Cookie Recipe: Perfectly Balanced Crispy Edges and Chewy Hearts - September 25, 2026