
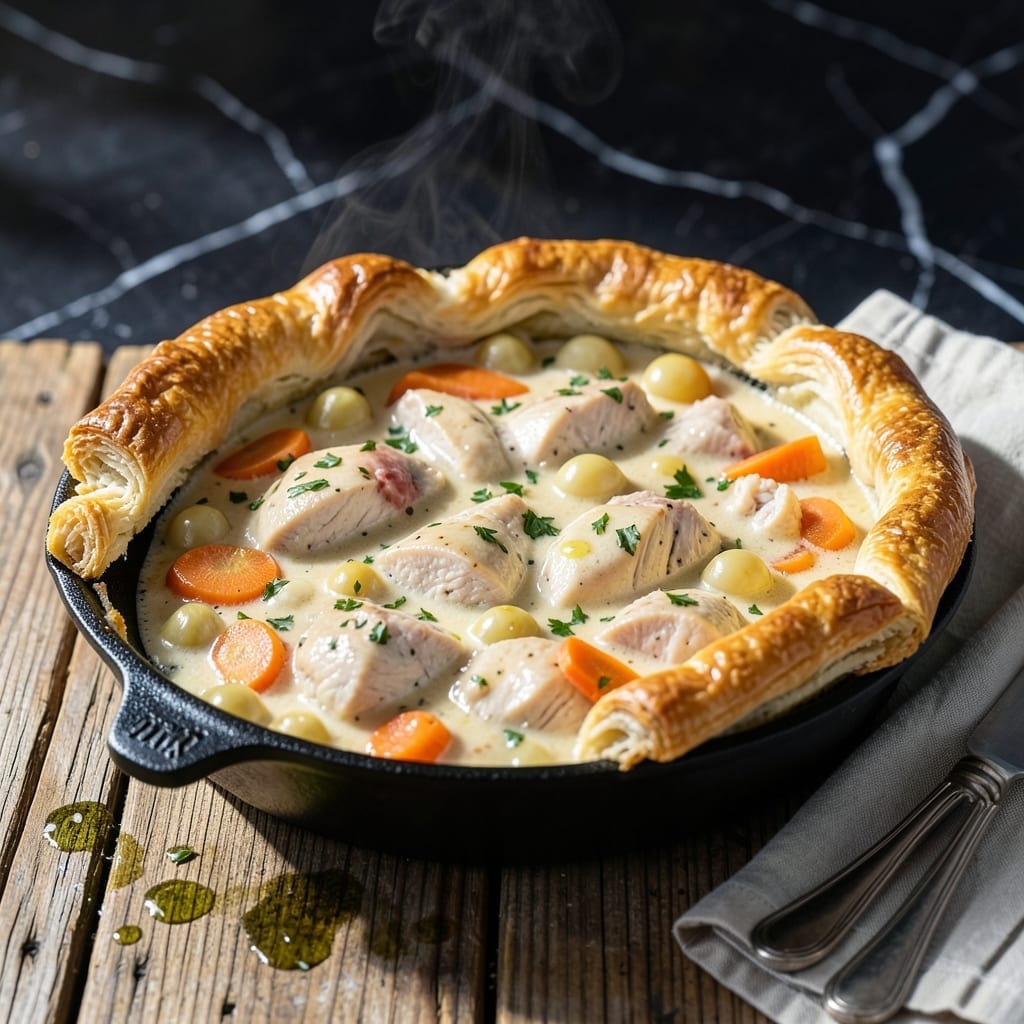
This iron skillet chicken pot pie delivers a golden crust over a rich, creamy filling that’s both comforting and impressive. It’s a one-pan wonder that simplifies a classic without sacrificing depth of flavor.
The beauty lies in the method: building the filling directly in the skillet, then topping it with a flaky, buttery crust. The iron skillet ensures even heat distribution, creating a perfectly crisp bottom that’s often missing in traditional versions.
What you get is a dish with layers of tender chicken, hearty vegetables, and a velvety sauce, all encased in a crust that’s both sturdy and delicate. It’s a meal that feels like a hug on a plate.
Ideal for family dinners or cozy gatherings, this recipe proves that homemade can be both simple and extraordinary.
Ingredients for Iron Skillet Chicken Pot Pie
Rich, creamy filling meets flaky crust with pantry staples and fresh herbs. Simple yet impressive.
| Ingredient | Amount | Notes |
|---|---|---|
| Chicken Breast 🍗 | 1 ½ lb | Boneless, skinless, cut into bite-sized pieces |
| Unsalted Butter 🧈 | 6 tbsp | Divided for filling and crust |
| All-Purpose Flour 🌾 | ½ cup | For thickening the filling |
| Chicken Broth 🥣 | 2 cups | Low-sodium preferred for control |
| Whole Milk 🥛 | ¾ cup | Full-fat for creaminess |
| Carrots 🥕 | 2 whole | Peeled and diced |
| Celery Stalks 🌿 | 2 whole | Diced for texture |
| Yellow Onion 🧅 | 1 whole | Finely diced for flavor base |
| Garlic Cloves 🧄 | 2 cloves | Minced for depth of flavor |
| Frozen Peas 🌱 | ¾ cup | No need to thaw |
| Fresh Thyme 🌿 | 1 tbsp | Chopped, or 1 tsp dried |
| Salt 🧂 | 1 tsp | Kosher or sea salt preferred |
| Black Pepper 🌶️ | ½ tsp | Freshly ground for best flavor |
| Refrigerated Pie Crust 🥧 | 1 package | Or homemade if preferred |
| Large Egg 🥚 | 1 whole | For egg wash on crust |
The chicken should be fresh and high-quality. Boneless, skinless breasts work best for even cooking and easy slicing. For the crust, Pillsbury refrigerated pie crust is a reliable shortcut, but homemade will take this to the next level. Look for organic chicken broth at Whole Foods or Trader Joe’s—it has a cleaner taste that lets the other flavors shine.
No fresh thyme? Dried thyme at one-third the amount works fine. Swap the peas for corn or green beans if that’s what you have. The milk can be 2% if you’re watching fat, but whole milk gives the creamiest sauce. For a richer flavor, use half-and-half instead. If you’re out of chicken broth, vegetable broth plus a splash of soy sauce mimics the savoriness.
Assemble and bake right away, or prep the filling ahead and refrigerate for up to 24 hours. Leftovers keep well in the fridge for 3-4 days—reheat in the oven to keep the crust crisp. This freezes beautifully for up to 3 months, perfect for busy weeknights.
Why You’ll Love This Recipe
- One Pan Magic: I love that everything—from searing the chicken to baking the crust—happens in one skillet. No extra dishes, just pure simplicity.
- Buttery Richness: The combo of unsalted butter, flour, and whole milk creates a velvety gravy that soaks into every bite. Honestly, it’s the kind of comfort food that sticks with you.
- Weeknight Hero: This dish works for busy Tuesdays or cozy Sunday suppers. I’ll be real—it’s my secret weapon for impressing guests without the stress.
- Stretches Further: Leftovers taste even better the next day. Between us, it’s the kind of meal that feeds a crowd without breaking the bank.
Step-by-Step Instructions for Iron Skillet Chicken Pot Pie
This method ensures a perfectly golden crust over a rich, creamy filling every time.
Step 1: Cook the Chicken and Vegetables
Heat 2 tbsp unsalted butter in a 10-inch cast iron skillet over medium-high heat. Add the 1.5 lb chicken breast pieces and cook for 6-8 minutes until lightly browned and no longer pink inside. Remove the chicken and set aside.
In the same skillet, add the 2 whole carrots, 2 whole celery stalks, and 1 whole yellow onion. Cook for 5 minutes until the vegetables begin to soften. Stir in the 2 cloves garlic cloves and cook for 1 minute until fragrant.
Step 2: Create the Creamy Filling
Melt the remaining 4 tbsp unsalted butter in the skillet. Whisk in the 0.5 cup all-purpose flour and cook for 1-2 minutes to form a roux. The mixture should be golden brown and bubbly.
Gradually whisk in the 2 cups chicken broth and 0.75 cup whole milk until smooth. Stir in the 1 tsp salt, 0.5 tsp black pepper, and 1 tbsp fresh thyme. Simmer for 3-4 minutes until the sauce thickens and coats the back of a spoon.
Return the chicken to the skillet along with the 0.75 cup frozen peas. Stir to combine and cook for 2-3 minutes until everything is heated through. Remove from heat and let cool slightly.
Step 3: Assemble and Bake the Pot Pie
Preheat your oven to 375°F. Unroll the 1 package refrigerated pie crust and place it over the filling in the skillet, tucking the edges inside. Cut a few small slits in the center to allow steam to escape.
Whisk the 1 whole large egg with 1 tablespoon water and brush it evenly over the pie crust. This ensures a deep golden brown finish. Bake for 30-35 minutes until the crust is golden brown and the filling is bubbly.
Step 4: Rest and Serve
Let the pot pie rest for 10 minutes before serving. This allows the filling to set slightly, making it easier to serve. The crust should be flaky and golden, while the filling remains thick and creamy.
Use a large spoon to serve portions directly from the skillet, ensuring each serving has a generous amount of crust and filling. The aromatic steam and rich flavors will be irresistible.
Pro Tips For Making Iron Skillet Chicken Pot Pie
- Pre-Cook Your Chicken: Poach the chicken breast in the broth first, then shred it—this keeps it moist and infuses extra flavor into the filling. I learned this the hard way after ending up with dry, rubbery chunks more than once.
- Bloom the Flour: Cook the flour and butter together for a full 2 minutes before adding liquid to eliminate that raw flour taste. Sounds tedious, but it actually changes the outcome of your roux.
- Skip the Overcrowding: Don’t dump all the filling into the skillet at once; simmer it in batches if needed so the sauce thickens properly instead of turning into soup.
- Use Cold Milk: Stir in the whole milk straight from the fridge—it helps create a smoother, less gummy sauce. My grandmother swore by this, and she was right.
Pro Cooking Tips for This Dish
Skillet Preheating
Always preheat your 10-inch cast iron skillet over medium-high heat for at least 5 minutes before adding butter. This ensures even heat distribution and prevents hot spots that can burn your roux. I learned this the hard way after a few unevenly cooked batches. 🔥
Roux Perfection
When making the roux, cook the butter-flour mixture until it reaches a golden brown color. This usually takes 1-2 minutes of constant whisking. Undercooked roux tastes raw, while overcooked can turn bitter. The color is your best indicator.
Sauce Consistency
For the creamiest filling, gradually whisk in the chicken broth and milk a little at a time. This prevents lumps and ensures a smooth sauce. If it thickens too much, add a splash more broth. The sauce should coat the back of a spoon but still drizzle easily.
Crust Venting
Cut 4-5 small slits in the pie crust before baking. This allows steam to escape, preventing a soggy bottom. I use a sharp knife to make clean cuts, and I position them toward the center of the crust for even venting.
Egg Wash Tip
For that perfect golden finish, use 1 egg whisked with 1 tbsp water for your wash. Brush it evenly over the entire crust, including the edges. This creates a beautiful sheen and helps the crust brown uniformly. 💛
Resting Time
Let the pot pie rest for the full 10 minutes after baking. This gives the filling time to set, making it easier to serve and preventing a runny mess. The crust will stay crisp if you resist the urge to peek too soon.
Nutrition Facts
Frequently Asked Questions
Can I use chicken thighs instead?
Yes! Chicken thighs stay juicier than breasts. Use 1.5 lb boneless, skinless thighs and cook for 8-10 minutes until 165°F. They add richer flavor to the filling.
What if my crust burns before the filling is hot?
Cover the skillet loosely with foil if the crust browns too fast. The filling needs 30-35 minutes at 375°F to bubble. Check at 25 minutes and adjust.
Can I make this ahead?
Assemble the filling and refrigerate for up to 24 hours. Add the crust and bake just before serving. Leftovers keep 3-4 days refrigerated.

- 6 Oz Chocolate Chip Cookie Recipe: Perfectly Balanced Crispy Edges and Chewy Hearts - September 25, 2026
- 6-Inch Coffee Cake Recipe: Vanilla Bean Swirls and Buttery Streusel Topping - September 25, 2026
- 1 Hour Soup Recipe: Velvety Richness Without the Wait - September 25, 2026