
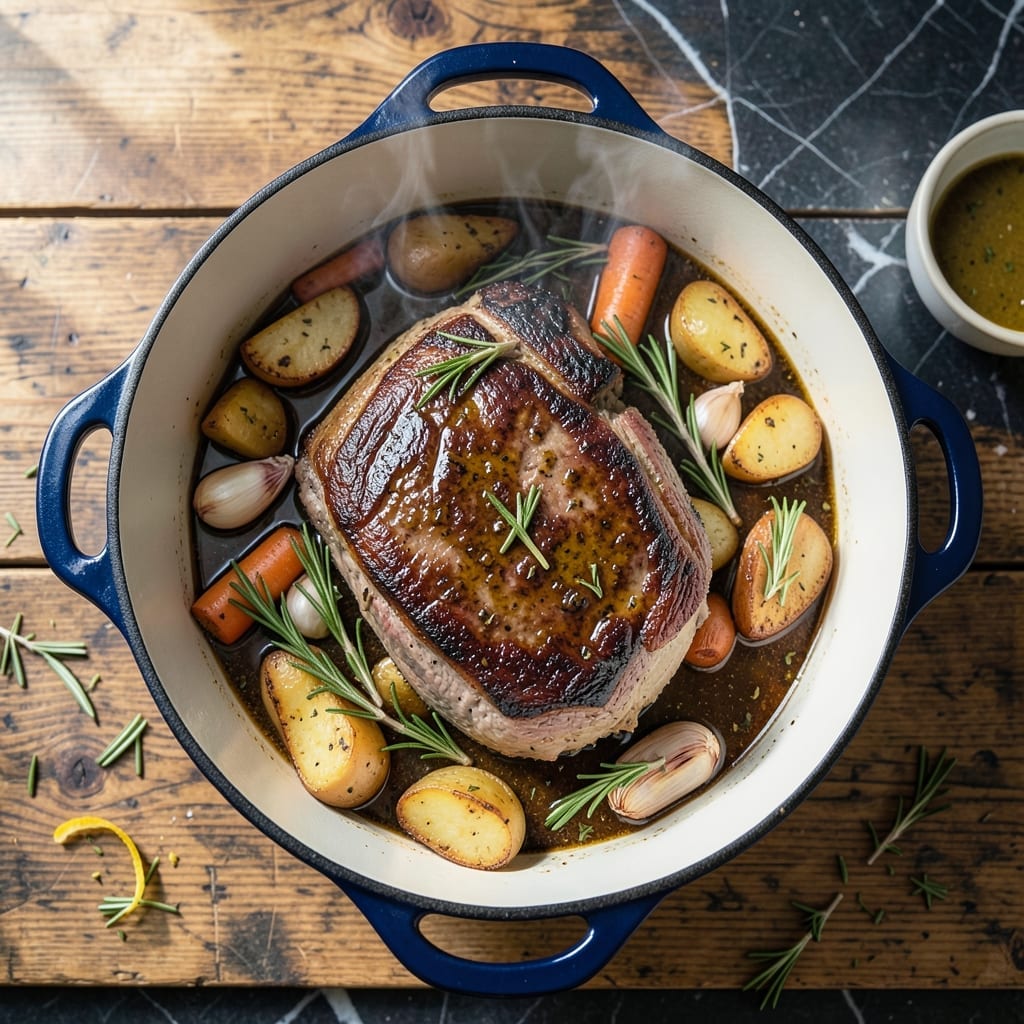
This pot roast delivers the kind of Sunday dinner that makes the whole house smell incredible. The secret is in the slow braising process, which turns tough cuts into fall-apart tender perfection while building layers of rich, herb-infused flavor.
I’ve refined this method to ensure the beef stays juicy and the vegetables soak up every bit of the savory sauce. A simple herb crust adds texture and depth, making each bite unforgettable. It’s a hands-off recipe that rewards patience with restaurant-quality results.
The final dish is hearty and comforting, with meat so tender it nearly melts on contact. Serve it with the braising liquid spooned over the top for a truly satisfying meal. The leftovers, if there are any, taste even better the next day.
Perfect for a cozy family dinner or a special occasion, this recipe proves that classic techniques still produce the best results. Let’s get started.
Ingredients for Jamie Oliver Pot Roast Beef
Hearty beef, fresh herbs, and a few pantry staples create this showstopping Sunday dinner.
| Ingredient | Amount | Notes |
|---|---|---|
| Beef Chuck Roast 🥩 | 3 lb | Well-marbled, boneless preferred |
| Kosher Salt 🧂 | 1 ½ tsp | Plus more to taste |
| Black Pepper 🌶️ | 1 tsp | Freshly ground preferred |
| Olive Oil 🫒 | 2 tbsp | Divided for searing and crust |
| Garlic Cloves 🧄 | 6 cloves | Minced for herb crust |
| Fresh Rosemary 🌿 | 2 tbsp | Finely chopped, stems removed |
| Fresh Thyme 🍃 | 2 tbsp | Leaves only, stems discarded |
| Dijon Mustard 🟡 | 2 tbsp | For herb crust binding |
| Red Wine 🍷 | 2 cups | Dry variety like Cabernet |
| Beef Stock 🥣 | 2 cups | Low-sodium preferred |
| Yellow Onions 🧅 | 2 whole | Large, quartered |
| Carrots 🥕 | 4 whole | Peeled, cut into chunks |
| Celery Stalks 🥬 | 3 whole | Cut into large pieces |
| Tomato Paste 🍅 | 2 tbsp | For depth of flavor |
| Bay Leaves 🍃 | 2 whole | Dried, for braising liquid |
The beef is everything here. Chuck roast with good marbling gives you that fall-apart texture—avoid lean cuts like sirloin. I grab mine from Whole Foods or a local butcher when I can (their quality is consistently better). The fresh herbs? Rosemary and thyme are non-negotiable for that aromatic backbone. Grab a bunch, even if you only need a few sprigs—you’ll use the rest later.
No red wine? Beef broth with a splash of balsamic works in a pinch. Out of fresh herbs? Dried at one-third the amount (but fresh really is better). The Dijon can be swapped for whole-grain mustard—same tang, different texture. For the stock, Better Than Bouillon is my go-to for deep flavor without the salt bomb of canned stuff.
This tastes even better the next day—seriously, the flavors just meld. Keeps 4-5 days in the fridge, freezes beautifully for 3 months. Portion leftovers with some braising liquid for easy reheating. The herb crust? Best made fresh, but the roast itself holds up great.
Why You’ll Love This Recipe
- One Pan Magic: It’s just beef, salt, pepper, olive oil, and garlic—toss it in and let the oven do the heavy lifting.
- Garlic Bomb: The cloves soften into the beef, making every bite rich and aromatic without a single fancy herb.
- Feeds the Crew: I made this for Sunday dinner, then turned leftovers into sandwiches and tacos all week.
- Budget Hero: Chuck roast is cheap, and a little olive oil plus pantry staples turns it into a meal that feels special.
Step-by-Step Instructions for Jamie Oliver’s Herb-Crusted Pot Roast Beef
This method delivers fall-apart tender beef with a fragrant herb crust every time.
Step 1: Sear the Beef Chuck Roast to Lock in Flavor
Pat the 3 lb Beef Chuck Roast dry with paper towels and season generously with 1.5 tsp Kosher Salt and 1 tsp Black Pepper. Heat 1 tbsp Olive Oil in a large Dutch oven over medium-high heat until it shimmers.
Sear the beef on all sides for 4-5 minutes per side until deeply browned. You want a rich, dark crust—this is where the deep flavor develops. Don’t rush this step; if the oil starts smoking, reduce the heat slightly. Transfer the roast to a plate and set aside.
Step 2: Create the Aromatic Herb Crust
In a small bowl, combine 2 tbsp Fresh Rosemary, 2 tbsp Fresh Thyme, 6 cloves Garlic Cloves (minced), and 2 tbsp Dijon Mustard. Stir into a thick paste. This mixture will form the incredible herb crust that makes this dish special.
Rub the herb mixture all over the seared beef, pressing it into the surface so it adheres. The mustard helps the herbs stick and adds a subtle tang that balances the richness of the meat. Let the roast sit while you prepare the vegetables.
Step 3: Build the Braising Liquid with Vegetables
Add the remaining 1 tbsp Olive Oil to the Dutch oven. Toss in 2 whole Yellow Onions (quartered), 4 whole Carrots (peeled and chunked), and 3 whole Celery Stalks (cut into large pieces). Cook for 5 minutes until the onions start to soften.
Stir in 2 tbsp Tomato Paste and cook for 1 minute until it darkens slightly. Pour in 2 cups Red Wine and 2 cups Beef Stock, scraping up any browned bits from the bottom. Add 2 whole Bay Leaves and bring to a gentle simmer.
Step 4: Slow-Braise to Perfection
Return the herb-crusted beef to the Dutch oven, spooning some of the liquid and vegetables over the top. Cover tightly and transfer to a preheated 325°F oven. Braise for 3 to 3.5 hours, turning the roast halfway through.
You’ll know it’s done when the beef shreds easily with a fork and the internal temperature reaches 195-200°F. The vegetables will be tender, and the braising liquid will have reduced into a rich, flavorful sauce. Resist the urge to check too often—every time you open the oven, you lose precious heat.
Step 5: Rest and Serve the Masterpiece
Carefully transfer the beef to a cutting board and tent loosely with foil. Let it rest for 15-20 minutes before slicing or shredding. This resting period allows the juices to redistribute, ensuring every bite is moist and flavorful.
Skimming excess fat from the braising liquid and serve the sauce over the beef and vegetables. The herb crust will have infused every part of the dish with incredible aroma, and the meat will be so tender it nearly melts in your mouth. Serve with crusty bread or mashed potatoes to soak up every last drop of sauce.
Pro Tips For Making Jamie Oliver Pot Roast Beef
- Sear It Hard: I learned this the hard way—get your pan screaming hot before adding the beef, and don’t move it for at least 2-3 minutes per side. A deep, dark crust on that chuck roast is what builds the rich flavor base for the whole dish.
- Salt the Night Before: Rub the beef with kosher salt at least 12 hours ahead (yes, even if you’re impatient like me). Sounds weird, but it works: the salt penetrates deep, seasons evenly, and helps the meat retain moisture during the long cook.
- Don’t Drown the Garlic: Smash the garlic cloves but leave them whole, and resist the urge to toss them in too early. Adding them after the initial sear prevents burning and gives a sweeter, mellow flavor to the pot.
- Use a Meat Thermometer: After burning three batches, I finally figured out—guessing doneness with chuck roast is a gamble. Pull it at 195°F for fall-apart tenderness; anything lower and you’ll be chewing for hours.
Essential Equipment for Perfect Results
Dutch Oven Essentials
For this dish, a 5-7 quart Dutch oven is non-negotiable. I swear by my Le Creuset—it distributes heat evenly and retains it beautifully for the long braise. The heavy lid creates a perfect seal, trapping moisture to transform tough beef into fall-apart tender perfection. 💛
Thermometer Precision
Don’t guess at doneness—invest in a ThermoWorks Instant Read thermometer. It gives accurate internal temperature readings in 2-3 seconds. I check multiple spots in the roast to ensure even cooking, aiming for 195-200°F for that perfect pull-apart texture.
Wooden Spoon Workhorse
A sturdy wooden spoon is your best friend here. Use it to scrape up browned bits when deglazing and to baste the beef with braising liquid. I keep a dedicated spoon just for my Dutch oven—it’s developed a beautiful patina over years of use.
Cutting Board Matters
Rest your beef on a large wooden cutting board with a groove to catch juices. Mine is 18×12 inches—big enough for the roast and all the vegetables. The groove prevents precious juices from spilling onto your counter, so you can pour them back into the sauce.
Herb Prep Tools
For the herb crust, a chef’s knife and cutting board are essential. I use my 8-inch Wüsthof to finely mince the garlic and chop the rosemary and thyme. Sharp knives make quick work of prep and prevent bruising the herbs, which keeps their flavors bright.
Oven Thermometer Check
Oven temperatures can be unreliable. I always use an oven thermometer to confirm my 325°F setting is accurate. It’s a $5 investment that prevents undercooked or overcooked disasters. Place it in the center rack where your Dutch oven will sit. 🔥
Nutrition Facts
Frequently Asked Questions
What cut of beef works best for pot roast?
Use chuck roast with good marbling for the most tender results. Avoid lean cuts like sirloin, as they won’t break down as beautifully during braising.
Can I make this in a slow cooker?
Yes, but sear the beef first for depth of flavor. Cook on low for 8-10 hours or high for 5-6 hours until fork-tender.
How do I know when the roast is done?
Check the internal temperature—it should reach 195-200°F. The meat will shred easily with a fork when ready.
Can I substitute the red wine?
Use beef broth with 1 tbsp balsamic vinegar for similar depth. Avoid white wine, as it lacks the required richness.

- 6 Oz Chocolate Chip Cookie Recipe: Perfectly Balanced Crispy Edges and Chewy Hearts - September 25, 2026
- 6-Inch Coffee Cake Recipe: Vanilla Bean Swirls and Buttery Streusel Topping - September 25, 2026
- 1 Hour Soup Recipe: Velvety Richness Without the Wait - September 25, 2026