
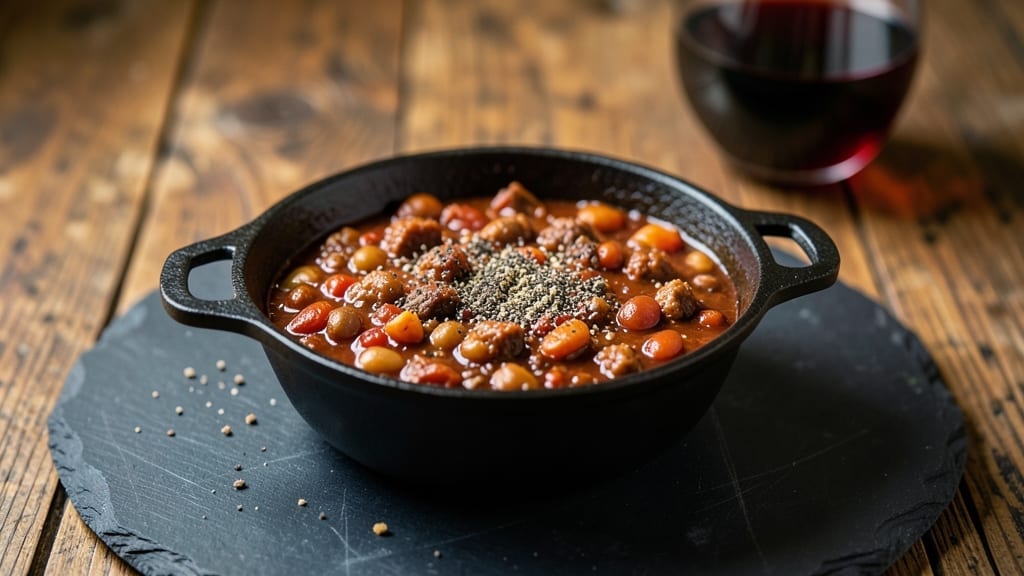
Johnny Cash’s Old Iron Pot Chili recipe brings the soul of the American South into your kitchen with just a cast iron skillet and a few simple ingredients.
This rustic chili transforms tough cuts of meat and hearty beans into a deeply flavorful, smoky masterpiece—exactly the kind of dish that warms a room and fills it with the kind of aroma that makes people linger at the table.
The secret lies in slow cooking over low heat, letting the flavors meld together until every bite carries the essence of tradition.
The beauty of this recipe is its simplicity: no fancy techniques, just good ingredients and patience.
You’ll start with ground beef or chuck roast, simmered until tender, then combine it with kidney beans, tomatoes, and a blend of spices that pay homage to Cash’s own legendary tastes—smoky, earthy, and just spicy enough to linger.
The cast iron pot isn’t just for cooking; it’s part of the tradition, holding the heat and deepening the flavors with every hour on the stove.
By the time you’re done, you’ll have a pot of chili so rich and satisfying that it feels like a hug in a bowl.
The meat will be fork-tender, the beans perfectly soft, and the spices balanced just right—smoky from the cast iron, sweet from the tomatoes, and warm from the slow simmer. This isn’t just chili; it’s a piece of history, a dish that tells a story with every spoonful.
Serve it with cornbread or crusty bread to soak up every last drop, and you’ll understand why this recipe has stood the test of time. It’s the kind of meal that brings people together, whether you’re cooking for a crowd or just craving a taste of home.
Let’s get started on making this classic your own.
Ingredients for johnny cash’s old iron pot chili
Pantry staples meet cast iron magic for this legendary smoky chili that tastes like home.
| Ingredient | Amount | Notes |
|---|---|---|
| Chuck Roast 🥩 | 2 lb | Cut into 1-inch chunks |
| Kidney Beans 🌾 | 2 cups | Dried, soaked overnight |
| Tomato Paste 🍅 | ½ cup | Squeeze tube or canned |
| Diced Tomatoes 🍅 | 2 cups | Canned, fire-roasted preferred |
| Chicken Broth 💧 | 2 cups | Low-sodium preferred |
| Onion 🧅 | 1 whole | Yellow, diced small |
| Garlic Cloves 🧄 | 4 cloves | Minced fine |
| Chili Powder 🌶️ | 2 tbsp | Smoked variety preferred |
| Ground Cumin 🌿 | 1 tbsp | Toasted for depth |
| Salt 🧂 | 1 ½ tsp | Kosher or sea salt |
| Black Pepper 🌶️ | ½ tsp | Freshly cracked |
| Bay Leaves 🍃 | 2 whole | Removed before serving |
| Dark Brown Sugar 🍬 | 1 tbsp | For depth, not sweetness |
| Apple Cider Vinegar 🍎 | 1 tbsp | For tangy balance |
| Cast Iron Skillet 🔥 | 1 whole | Seasoned, 10-inch preferred |
The chuck roast is the heart of this dish—look for good marbling at the butcher counter, and ask for it pre-cut if you’re short on time. Costco or local butchers usually have the best quality, but the regular supermarket stuff works fine if it’s fresh. The kidney beans? Dried is ideal—soak them overnight, but canned works in a pinch if you’re in a hurry. For the tomatoes, fire-roasted canned adds that smoky depth without extra work. The cast iron skillet is non-negotiable here—it’s what gives this chili its signature flavor. If yours isn’t seasoned, rub it down with a little oil before you start.
No chuck roast? Ground beef or stew meat works just as well—just adjust cooking time. Short on kidney beans? Pinto or black beans are great substitutes. The chili powder is where the magic happens—Penzeys or bulk bins have the best quality, but any good store brand will do. Want more heat? Add a pinch of cayenne. The apple cider vinegar might sound odd, but it’s what balances all the rich flavors—substitute lemon juice if you’re out. The brown sugar isn’t for sweetness—it’s for that deep, caramelized flavor that makes this chili sing.
This chili tastes even better the next day, so make extra—it freezes beautifully for up to 3 months. Store leftovers in the fridge for 5-6 days, and always keep a little broth in the pot while cooking to prevent sticking. The cast iron skillet? Clean it immediately after cooking—hot water and a stiff brush are your friends. Serve it with cornbread or crusty bread to soak up every last drop of that smoky goodness.
Why You’ll Love This Recipe
- One-Pot Magic: I swear by this recipe—just dump the chuck roast and beans into the pot, brown them fast, then let the tomato paste and broth do the heavy lifting. No extra pans, no stress, and honestly? That deep, smoky richness builds itself while you’re scrolling through your phone.
- Chuck Roast Magic: Between us, the chuck roast is the star—tender enough to melt in your mouth after hours of simmering, but still packed with that meaty satisfaction. The kidney beans soak up all that juicy flavor like a sponge, making every bite hearty and full.
- Tailgate or Tuesday: This chili doesn’t care if you’re feeding a crowd at a tailgate or just reheating a bowl on a lazy Tuesday. The broth keeps it rich but not soggy, and the tomato paste gives it that thick, restaurant-style texture that’s always a hit.
- Budget-Friendly Feast: A single chuck roast and can of beans stretch into five or six meals, and the broth stretches even further. I’ll be real: my grocery bill stays happy, and my family stays full—win, win. Plus, it’s the kind of dish that tastes even better the next day.
Step-by-step instructions for johnny Cash’s old iron pot chili
Here’s the straightforward method that delivers deep, smoky flavor in one cast iron skillet.
Brown the Chuck Roast in the Cast Iron Skillet
Place the 2 lb chuck roast, cut into 1-inch chunks, in your seasoned cast iron skillet over medium-high heat. Let the meat sear undisturbed for 4-5 minutes until deep brown crusts form on all sides. This step builds the foundation of flavor—don’t rush it.
Once browned, transfer the meat to a plate. You’ll notice the skillet has developed a rich, meaty fond at the bottom—this is pure flavor we’ll incorporate later. Keep the heat at medium-high for the next steps.
Sauté Onion and Garlic in the Same Skillet
In the same skillet (no need to wipe it clean), add the 1 whole onion, diced small, and cook for 5-6 minutes until softened and golden. The onions should caramelize slightly, adding sweet depth to the chili.
Add the 4 cloves garlic cloves, minced fine, and cook for 30 seconds until fragrant. You’ll smell that aromatic punch—this is when the garlic releases its full flavor. Be careful not to let it burn, as it can turn bitter quickly.
Build the Chili Base with Beans and Tomatoes
Return the browned chuck roast chunks to the skillet. Stir in the 2 cups kidney beans (drained if canned), 0.5 cup tomato paste, 2 cups diced tomatoes, 2 cups chicken broth, 2 tbsp chili powder, 1 tbsp ground cumin, 1.5 tsp salt, 0.5 tsp black pepper, 2 whole bay leaves, 1 tbsp dark brown sugar, and 1 tbsp apple cider vinegar.
Here’s the thing—stir everything together gently. You want the beans and meat to absorb the flavors, not break apart. Bring the mixture to a gentle simmer, then reduce heat to low and cover the skillet. Let it cook for 2 hours without disturbing it.
Simmer Until Thick and Flavorful
After 2 hours, remove the lid and check the consistency. The chili should have thickened and reduced slightly, with the meat tender enough to pull apart with a fork. If it’s too thin, uncover and simmer for another 15-20 minutes to let the flavors meld and the liquid reduce.
Taste and adjust seasoning if needed—this is where you can add more salt, chili powder, or even a pinch of sugar if you want to balance the acidity. The bay leaves should be removed before serving, as they can be tough to chew.
Pro Tips For Making Johnny Cash’S Old Iron Pot Chili
- SEAR THE ROAST FIRST: Chuck roast needs that crust to stay juicy—don’t skip it. Hit high heat with 2 tablespoons of oil, then brown the meat in batches (yes, even if it’s messy). I learned this the hard way after a chili that tasted more like broth than meat.
- SOAK BEANS OVERNIGHT: Kidney beans are stubborn—soak them 8+ hours or at least 2 hours in hot water with a pinch of salt. Skipping this makes them gummy, and nobody wants mushy beans in their chili. (Pro move: Drain and rinse them right before adding.)
- DEGLAZE WITH BROTH: After browning the meat, don’t walk away—immediately pour in ½ cup chicken broth and scrape the browned bits off the pot. That crust packs flavor, and letting it burn just adds bitterness. (I used to ignore this, and the chili always tasted flat.)
- SIMMER LOW AND LONG: This isn’t a 30-minute meal—give it 3+ hours on low heat. The beans need time to soften, and the meat to fall apart. Cover it, then check occasionally to keep liquid at a gentle bubble. (Patience here makes the difference between good and legendary.)
Common mistakes when making great johnny cash’s old iron pot chili
Overcooking the Meat
One of the biggest mistakes is letting the chuck roast turn to mush during the long simmer. The goal is fork-tender, not falling-apart texture. I’ve seen people walk away for hours, only to return to rubbery meat.
Instead, check the meat after 1.5 hours—it should be easily pierced with a fork but still hold its shape. If it’s falling apart, you’ve overdone it. 🔥
Skipping the Sear
The deep brown crust on your meat—called the Maillard reaction—is where 50% of the chili’s flavor lives. I’ve made this chili both ways, and the version without the sear tastes flat.
Don’t skip browning the meat, even if you’re in a hurry. Use medium-high heat and let those chunks develop that golden crust for 4-5 minutes per side.
Ignoring the Fond
That dark, sticky residue left in your cast iron after removing the meat? That’s the fond, and it’s pure flavor. Many people wipe it out, but I always deglaze with a splash of broth or water.
Scrape up every bit with a wooden spoon—it’s what adds that rich, meaty depth to your chili. This is where the magic happens, so don’t miss it. ⚡
Rushing the Simmer
Low and slow is non-negotiable here. I’ve seen people crank the heat to speed things up, but that’s a recipe for watery, bland chili. Keep it at a gentle simmer—you should see tiny bubbles breaking the surface, not a rolling boil.
The 2-hour minimum is crucial for the flavors to meld. If you’re short on time, you can use a slow cooker on low for 6-8 hours, but don’t rush it on the stovetop.
Forgetting to Taste
Many recipes just list ingredients and times without telling you to taste along the way. I can’t stress this enough—taste your chili as you go. After the initial simmer, taste it again before serving.
You might need more salt, a pinch of sugar to balance acidity, or even a dash of cayenne for heat. Don’t assume the seasoning is perfect just because you followed the recipe. 💡
Wrong Bean Choice
Kidney beans are traditional, but not all beans work equally well. I’ve tried subbing pintos or black beans, and while they work, kidney beans hold their shape better and absorb flavors more evenly.
If you’re using dried beans, soak them overnight—never skip this step, or they’ll stay tough and bland. Canned beans are fine in a pinch, but drain and rinse them well to avoid a watery chili.
Nutrition facts
Frequently asked questions
Can I make this chili in a slow cooker instead of cast iron?
For a slow cooker version, brown the meat and sauté the onions/garlic in a skillet first, then transfer everything to your slow cooker. Cook on low for 6-8 hours or high for 3-4 hours. The cast iron gives that signature smoky flavor, but slow cooking still delivers deep, tender meat and rich flavors. Just add a splash of broth if it gets too thick.
What’s the best way to store leftovers?
Store leftovers in an airtight container in the fridge for up to 5-6 days. For longer storage, freeze portions in 1-cup servings for up to 3 months. When reheating, warm gently on the stove with a splash of broth to restore moisture. The flavors actually improve after the first day!
Can I use ground beef instead of chuck roast?
Yes, but adjust the cooking time. Ground beef cooks faster, so after browning, reduce the simmering time to 1.5-2 hours instead of 2 hours. You’ll get a slightly different texture, but the flavors will still be rich and satisfying. For extra depth, add 1 tsp beef bouillon powder to the broth.
How can I make this chili spicier?
Add ½ tsp cayenne pepper or 1 tsp hot paprika during the initial simmer. For even more heat, stir in 1 chopped chipotle pepper in adobo sauce with the tomatoes. Remember to taste as you go—build the heat gradually! For a smoky kick, add ½ tsp smoked salt at the end.
What’s the deal with the apple cider vinegar?
It’s not just for tang—vinegar helps balance the richness of the meat and beans while brightening the flavors. The acidity also tenderizes the beans slightly. If you’re out, substitute with lemon juice (use 1 tbsp) or a pinch of white vinegar. It might sound unusual, but it’s what makes this chili sing!

- Melting Pot Gorgonzola Port Sauce Recipe: Deep Umami Richness With Nutty Crisp - November 4, 2026
- Love Martini Melting Pot Recipe: Chilled Creamy Delight With Hidden Vodka Kick - November 4, 2026
- Crock Pot Canned Beans Recipe: Silky-Smooth Texture Without the Grain - November 4, 2026