
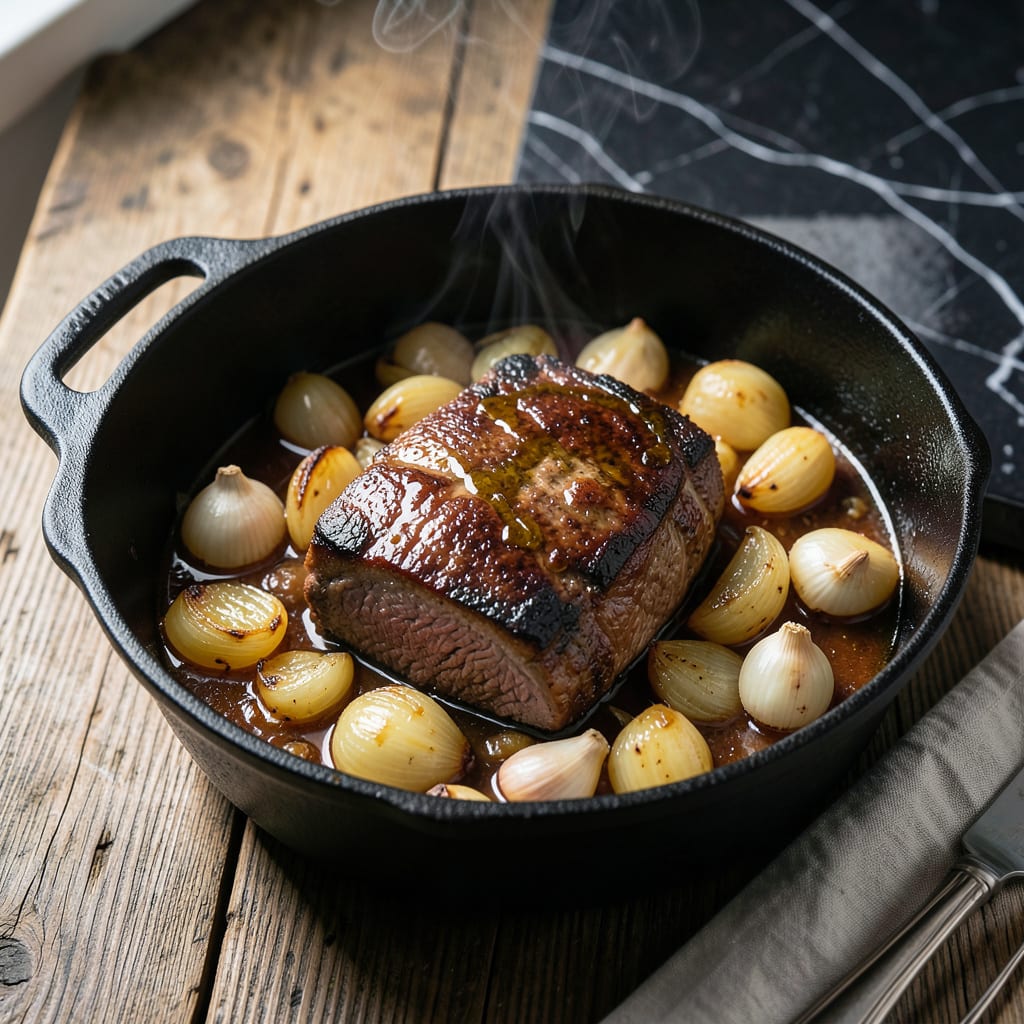
This Dutch oven method transforms a tough cut into the most tender pot roast you’ll ever make. The secret lies in a long, slow braise that breaks down the meat fibers while locking in moisture.
I’ve perfected this technique over years of Sunday dinners, ensuring every bite is fall-apart tender and packed with rich, savory flavor. The result is a dish that feels like a warm hug on a plate.
Ingredients for Juiciest Pot Roast
A few quality ingredients and time turn this into fork-tender perfection every time.
| Ingredient | Amount | Notes |
|---|---|---|
| Chuck Roast 🥩 | 3 lb | Well-marbled, boneless preferred |
| Kosher Salt 🧂 | 2 tsp | Diamond Crystal preferred |
| Black Pepper 🌶️ | 1 tsp | Freshly ground |
| Olive Oil 🫒 | 2 tbsp | Divided for searing and sautéing |
| Yellow Onion 🧅 | 2 whole | Large, roughly chopped |
| Garlic Cloves 🧄 | 6 cloves | Peeled, smashed |
| Carrots 🥕 | 4 whole | Peeled, cut into chunks |
| Celery Stalks 🌿 | 3 whole | Cut into large pieces |
| Red Wine 🍷 | 2 cups | Dry variety like Cabernet Sauvignon |
| Beef Broth 💧 | 2 cups | Low-sodium preferred |
| Tomato Paste 🍅 | 2 tbsp | For depth of flavor |
| Dried Thyme 🍃 | 1 tsp | Crushed between fingers |
| Bay Leaf 🌿 | 2 whole | Dried, for aroma |
| Fresh Rosemary 🌿 | 2 sprigs | Wooden stems removed |
The chuck roast is non-negotiable for this method—look for heavy marbling (those white fat streaks mean flavor and moisture). Most butchers will cube it for you if you ask. Costco and Whole Foods have great pre-cut options. Avoid leaner cuts like round or sirloin; they’ll dry out no matter how long you cook them. The fat renders down during the braise, leaving you with that melt-in-your-mouth texture.
No red wine? Beef broth with a splash of balsamic vinegar works in a pinch. Fresh rosemary can be swapped for one-third the amount of dried. If you’re out of tomato paste, a tablespoon of ketchup adds similar depth (don’t tell the purists). The vegetables are flexible—parsnips or turnips hold up just as well as carrots. Just keep the total volume similar.
This tastes even better the next day, so make extra. Leftover pot roast keeps 4-5 days refrigerated or up to 3 months frozen. Reheat gently on the stove with a splash of broth to restore moisture (the microwave works too, but stovetop is worth the extra minute).
Why You’ll Love This Recipe
- Set It and Forget: I brown the chuck roast in olive oil, add the onions, season, cover, and walk away—honestly, the oven does all the work.
- Rich Beefy Depth: The slow-roasted chuck with caramelized onions and coarse salt delivers that melt-in-your-mouth tenderness every time.
- Sunday or Tuesday: Between us, this tastes just as impressive for a lazy Sunday supper as it does reheated for weekday lunches.
- Leftovers for Days: I always make double—sandwiches, tacos, or stew the next day taste even better.
Step-by-Step Instructions for Dutch Oven Braised Pot Roast
Master these steps for meat so tender it falls apart with the slightest touch.
Step 1: Season and Sear the Chuck Roast
Pat the 3 lb Chuck Roast completely dry with paper towels. This is non-negotiable—moisture prevents proper browning. Season aggressively with the 2 tsp Kosher Salt and 1 tsp Black Pepper, pressing the seasoning into all surfaces so it adheres.
Heat 1 tbsp Olive Oil in a Dutch oven over medium-high heat until shimmering. Sear the roast on all sides for 3-4 minutes per side until deeply browned. You want a rich, dark crust—this builds the flavor foundation. Don’t rush; let each side develop that perfect sear before turning.
Step 2: Sauté the Aromatic Vegetables
Remove the roast and set it aside. In the same Dutch oven, add the remaining 1 tbsp Olive Oil. Toss in the 2 whole Yellow Onion, 4 whole Carrots, and 3 whole Celery Stalks. Cook over medium heat for 5-6 minutes until the onions soften and begin to caramelize around the edges.
Add the 6 cloves Garlic Cloves, 2 tbsp Tomato Paste, 1 tsp Dried Thyme, 2 whole Bay Leaf, and 2 sprigs Fresh Rosemary. Stir constantly for 1-2 minutes until the tomato paste darkens slightly. This step deepens the umami flavor that defines this dish.
Step 3: Deglaze and Begin the Braise
Pour in the 2 cups Red Wine, scraping the bottom of the Dutch oven to release all those flavorful browned bits. Bring to a simmer and cook for 3-4 minutes until the liquid reduces by about half. This concentrates the wine’s acidity and richness.
Return the seared chuck roast to the Dutch oven. Add the 2 cups Beef Broth, ensuring the liquid comes about halfway up the roast. Bring to a gentle simmer, then cover with the lid slightly ajar to allow some steam to escape.
Step 4: Braise Until Fork-Tender
Transfer the Dutch oven to a preheated 325°F oven. Braise for 2.5 to 3 hours, turning the roast every 45 minutes to ensure even cooking. The meat is done when it yields easily to a fork and the internal temperature reaches 195-200°F.
Resist the urge to check too often—every time you open the oven, you lose heat and extend the cooking time. The vegetables should be soft and the braising liquid rich and deeply flavored.
Step 5: Rest and Serve
Carefully remove the roast from the Dutch oven and transfer it to a cutting board. Skim any excess fat from the braising liquid, then adjust the seasoning if needed. Let the roast rest for 15-20 minutes before slicing or pulling apart.
Serve the pot roast with the braised vegetables and a generous spoonful of the rich, reduced braising liquid. The result should be impossibly tender, with every bite infused with the deep, savory flavors of the wine and herbs.
Pro Tips For Making Juiciest Pot Roast
- Sear it hard: Get your pan screaming hot before adding the chuck roast—about 2 tablespoons of olive oil, then don’t touch it for 3-4 minutes per side to build that deep brown crust.
- Salt it overnight: I learned this the hard way—rub the chuck roast with kosher salt at least 12 hours before cooking. It penetrates deep and locks in the juices better than salting right before.
- Skip the lean cuts: Resist the urge to swap chuck for a leaner cut. The marbling in chuck roast is non-negotiable for that fall-apart tenderness after hours of slow cooking.
- Rest before slicing: Pull the roast out and let it sit under foil for 15-20 minutes. It reabsorbs the juices—cut too soon and you’ll watch all that flavor spill onto the cutting board.
Essential Equipment for This Recipe
Dutch Oven Essentials
Invest in a heavy enameled cast iron Dutch oven—my go-to is Le Creuset for even heat distribution. A 5-6 quart size perfectly fits a 3 lb roast with room for veggies. The tight-fitting lid locks in moisture for that fall-apart tenderness.
Thermometer Matters
An instant-read ThermoWorks Thermapen ensures perfect doneness. I check internal temp at 195-200°F for that buttery texture. A cheap thermometer can mislead you by 10-15°F—accuracy is non-negotiable here. 🌡️
Searing Tool
For the initial sear, I use tongs (not a fork) to avoid piercing the meat. A fish spatula works great for flipping the roast without breaking the crust. Look for 12-inch tools to keep hands safe from splatters.
Prep Helpers
A box grater makes quick work of carrots and celery, while a garlic press crushes cloves in seconds. I keep a paper towel roll nearby for patting the roast dry—this step is crucial for a good sear.
Serving Upgrades
Wide, shallow pasta bowls showcase the roast beautifully with braising liquid pooled around it. A ladle helps serve the juices without spills. I swear by OxO Good Grips for comfortable handling. 💛
Optional but Useful
A fat separator lets you skim excess grease from the braising liquid for a cleaner sauce. If you love leftovers, glass meal prep containers keep portions fresh for up to 5 days in the fridge.
Nutrition Facts
Frequently Asked Questions
Why use chuck roast instead of other cuts?
Chuck roast has abundant marbling, which renders down during braising for maximum juiciness. Leaner cuts like round or sirloin lack this fat content and tend to dry out.
Can I use a slow cooker instead?
Yes, sear the meat first, then cook on low for 8-10 hours. However, a Dutch oven in the oven yields better browning and flavor development.
How do I prevent the meat from drying out?
Don’t skip the sear, keep the braising liquid at a gentle simmer, and ensure the pot is covered. This traps moisture for fork-tender results every time.
Can I make this ahead of time?
The flavors deepen overnight. Reheat gently on the stove with a splash of broth to restore moisture. It tastes even better the next day.

- 4C Bread Crumbs Meatballs Recipe: Crispy Crust and Juicy Centers - September 25, 2026
- 6 Oz Chocolate Chip Cookie Recipe: Perfectly Balanced Crispy Edges and Chewy Hearts - September 25, 2026
- 6-Inch Coffee Cake Recipe: Vanilla Bean Swirls and Buttery Streusel Topping - September 25, 2026