
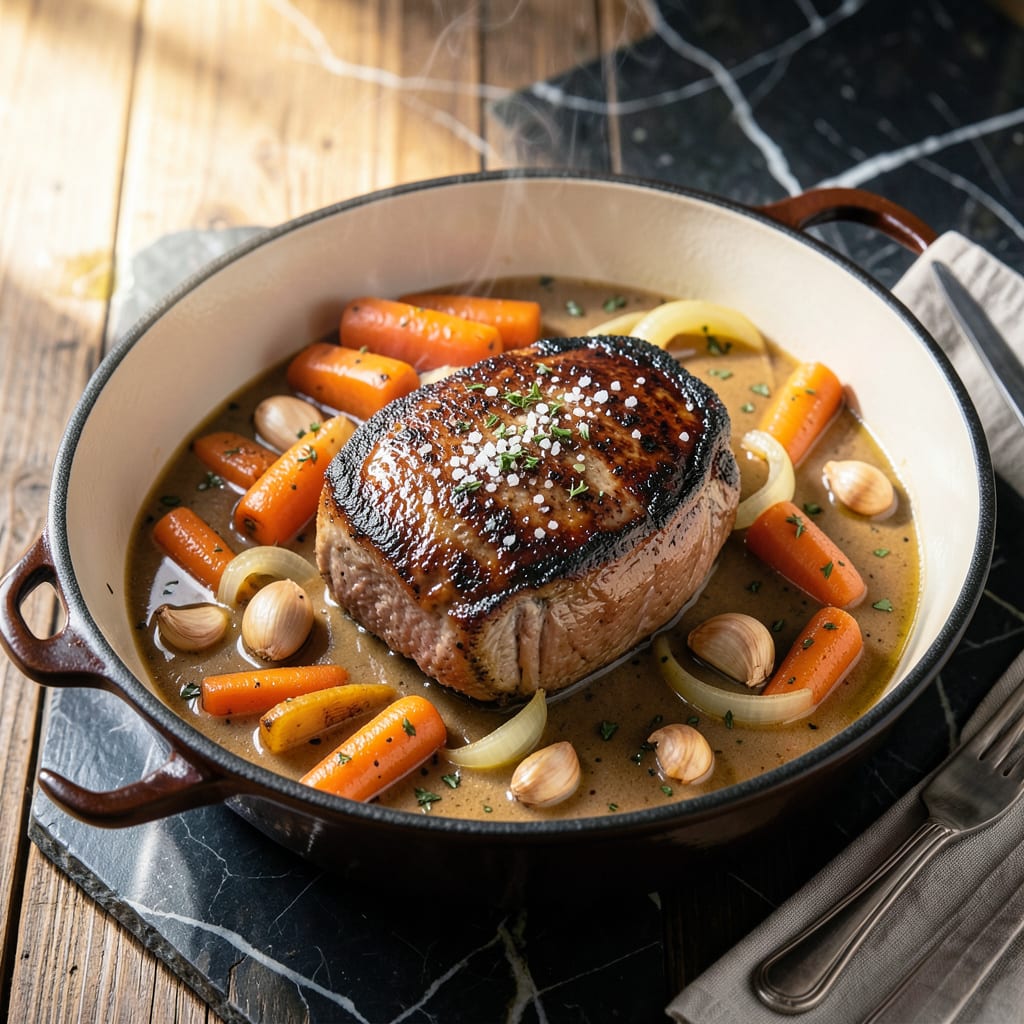
This sous vide method transforms pot roast into something extraordinary—fall-apart tender with layers of umami you won’t find in traditional recipes. The precision cooking ensures every bite is perfectly juicy.
I developed this approach to eliminate guesswork while maximizing flavor. The result is a dish that rivals any professional kitchen, with rich, concentrated beefy depth that makes it unforgettable.
Ingredients for Kenji Pot Roast
A handful of bold ingredients for a pot roast that’s tender beyond belief.
| Ingredient | Amount | Notes |
|---|---|---|
| Beef Chuck Roast 🥩 | 3 lb | Well-marbled, trimmed of excess fat |
| Kosher Salt 🧂 | 1 ½ tbsp | Diamond Crystal preferred for even seasoning |
| Black Pepper 🌶️ | 1 tsp | Freshly ground for maximum aroma |
| Garlic Cloves 🧄 | 6 cloves | Smashed, peeled for infusion |
| Yellow Onion 🧅 | 1 whole | Large, roughly chopped |
| Carrots 🥕 | 3 whole | Peeled, cut into large chunks |
| Celery Stalks 🥬 | 3 whole | Cut into large chunks |
| Tomato Paste 🍅 | 2 tbsp | Double-concentrated preferred for depth |
| Red Wine 🍷 | 1 cup | Dry, bold variety like Cabernet Sauvignon |
| Beef Stock 🥩 | 2 cups | Low-sodium preferred for control |
| Soy Sauce 🫒 | 2 tbsp | For umami depth |
| Worcestershire Sauce 🫒 | 1 tbsp | Adds complexity to the braising liquid |
| Bay Leaves 🍃 | 2 whole | Dried, for aromatic backbone |
| Fresh Thyme Sprigs 🌿 | 4 whole | Stems removed for easy removal |
| Olive Oil 🫒 | 2 tbsp | For searing the beef |
The beef is everything here. Chuck roast with good marbling is non-negotiable—it’s the fat that gives you that fall-apart texture. Look for a piece that’s bright red with visible white streaks. Costco has great options if you’re doing a big batch, but most grocery stores stock it. Ask the butcher to cut it into 3-4 inch chunks if you want to save time. Avoid lean cuts like round—they’ll stay tough no matter how long you cook them.
No red wine? Substitute beef broth with a splash of balsamic vinegar—it’ll add the acidity and depth you’re after. Out of fresh thyme? Dried thyme at one-third the amount works, but fresh really shines here. The soy and Worcestershire add serious umami; if you don’t have Worcestershire, an extra tablespoon of soy sauce plus a pinch of sugar gets you close. Frozen carrots or celery? Totally fine (no need to thaw first).
Sous vide this ahead—it’s even better the next day. Keeps 4-5 days in the fridge, or freeze the cooked beef in its juices for up to 3 months. The flavor just gets richer. Reheat gently in the braising liquid to keep it juicy.
Why You’ll Love This Recipe
- Set and Forget: I toss the chuck roast with salt, pepper, garlic, and onion in the morning, and dinner’s basically done by itself when I get home.
- Flavor Bomb: The beef soaks up the garlic and onion until every bite is ridiculously tender and packed with savory depth.
- Feeds the Week: One roast gives me dinner, then sandwiches, then tacos—honestly, it’s my meal prep secret weapon.
- Budget Hero: A cheap cut turns into something fancy with almost zero effort, and it stretches to feed my whole family twice over.
Step-by-Step Instructions for Sous Vide Pot Roast
This method delivers fall-apart tenderness with deep umami flavor every time.
Step 1: Sear and Season the Beef Chuck Roast
Pat the 3 lb Beef Chuck Roast completely dry with paper towels. This removes surface moisture for a better sear. Season all sides aggressively with the 1.5 tbsp Kosher Salt and 1 tsp Black Pepper. I press the seasoning into the meat so it adheres well and penetrates the surface.
Heat the 2 tbsp Olive Oil in a large Dutch oven over medium-high heat until shimmering. Sear the roast for 4-5 minutes per side until deeply browned with a rich crust. You’ll know it’s ready to flip when it releases easily from the pan. Transfer the seared roast to a plate and set aside.
Step 2: Build the Aromatic Braising Liquid
In the same Dutch oven, add the roughly chopped Yellow Onion, Carrots, and Celery Stalks. Cook for 5-6 minutes, stirring occasionally, until the vegetables start to soften and brown slightly. Add the 6 cloves Garlic Cloves and 2 tbsp Tomato Paste, stirring to coat the vegetables.
Cook for 2-3 minutes until the tomato paste darkens in color and begins to stick to the bottom of the pan. This builds the fond that will deepen the braising liquid’s flavor. Deglaze with the 1 cup Red Wine, scraping up all the browned bits with a wooden spoon. Let it simmer for 3-4 minutes until reduced by about half.
Step 3: Add Liquids and Aromatics for Braising
Pour in the 2 cups Beef Stock, 2 tbsp Soy Sauce, and 1 tbsp Worcestershire Sauce. Stir to combine, then add the 2 whole Bay Leaves and 4 whole Fresh Thyme Sprigs. Return the seared roast to the Dutch oven, along with any accumulated juices from the plate.
The liquid should come about halfway up the sides of the roast. If it doesn’t, add a bit more stock. Bring the mixture to a gentle simmer, then reduce the heat to low. Cover tightly with a lid and transfer to a preheated 275°F oven.
Step 4: Braise to Fall-Apart Tenderness
Braise the roast for 3 to 3.5 hours, turning it over halfway through the cooking time. You’ll know it’s done when the meat is fork-tender and easily pulls apart with a gentle tug. The internal temperature should reach at least 195°F for that perfect, melt-in-your-mouth texture.
Remove the roast from the oven and let it rest in the braising liquid for 15-20 minutes before serving. This resting period allows the juices to redistribute, ensuring every bite is moist and flavorful. Skim any excess fat from the surface of the braising liquid if desired, then serve the roast with the vegetables and sauce spooned over the top.
Pro Tips For Making Kenji Pot Roast
- Sear Hard, Don’t Rush: Crank the heat to high and let the chuck roast develop a deep brown crust before adding liquids—I learned this the hard way after pulling it too soon and ending up with gray, flavorless meat.
- Salt Overnight: Dry-brine the roast with kosher salt at least 12 hours ahead; it penetrates deeper and guarantees a well-seasoned bite, not just a salty surface.
- Don’t Crowd the Pan: Sear the meat in batches if needed—overcrowding steams the beef instead of browning it, and your pot roast will taste bland.
- Use Stale Bread: Sounds weird, but it works: add a slice of stale bread to the pot while cooking—it thickens the sauce naturally and soaks up all those garlic and onion flavors.
Make-Ahead Tips for Leftovers
Sous Vide Prep
Start by seasoning and searing the 3 lb Beef Chuck Roast the day before. Vacuum-seal it with the aromatics and 1 cup Red Wine, then refrigerate overnight. This lets the flavors penetrate deeply before cooking. 💡
Cook Ahead Schedule
Sous vide the roast at 165°F for 24-36 hours up to 2 days in advance. The long cook time at low temperature ensures it stays tender. I often start it on Saturday morning for Sunday dinner.
Post-Cook Chill
After cooking, cool the sealed bag in an ice bath for 30 minutes, then refrigerate. The meat will finish cooking gently as it cools. This method preserves moisture better than reheating from frozen.
Reheating Method
To serve, reheat the bag in the sous vide at 130°F for 1-2 hours. This gently brings it back to temperature without overcooking. Finish by searing in a hot pan with 2 tbsp Olive Oil for a crisp exterior. 🔥
Flavor Boost
Strain the cooking juices and reduce them on the stovetop for 10-15 minutes to make a rich sauce. The flavors concentrate as it reduces, creating a perfect accompaniment to the tender beef.
Storage Tips
Store cooked pot roast in its juices in the fridge for up to 5 days. The flavors actually improve over time. For longer storage, freeze for up to 3 months without quality loss.
Nutrition Facts
Frequently Asked Questions
What cut works best for this method?
Use well-marbled chuck roast—it breaks down beautifully during the long cook. Avoid lean cuts like round, as they’ll stay tough even after 3-3.5 hours of braising.
Can I skip the red wine?
Yes! Substitute with extra beef stock and 1 tbsp balsamic vinegar for acidity. The flavor won’t be identical, but it’ll still be rich and savory.
Why is the internal temp 195°F instead of 165°F?
Collagen in tough cuts needs higher temps to melt into gelatin, creating that fall-apart texture. 195°F ensures maximum tenderness without drying out the meat.
Can I make this in a slow cooker?
Yes, but sear the meat first for depth. Cook on low for 8-10 hours or high for 5-6 hours. The oven method gives better control, though.

- 4C Bread Crumbs Meatballs Recipe: Crispy Crust and Juicy Centers - September 25, 2026
- 6 Oz Chocolate Chip Cookie Recipe: Perfectly Balanced Crispy Edges and Chewy Hearts - September 25, 2026
- 6-Inch Coffee Cake Recipe: Vanilla Bean Swirls and Buttery Streusel Topping - September 25, 2026