
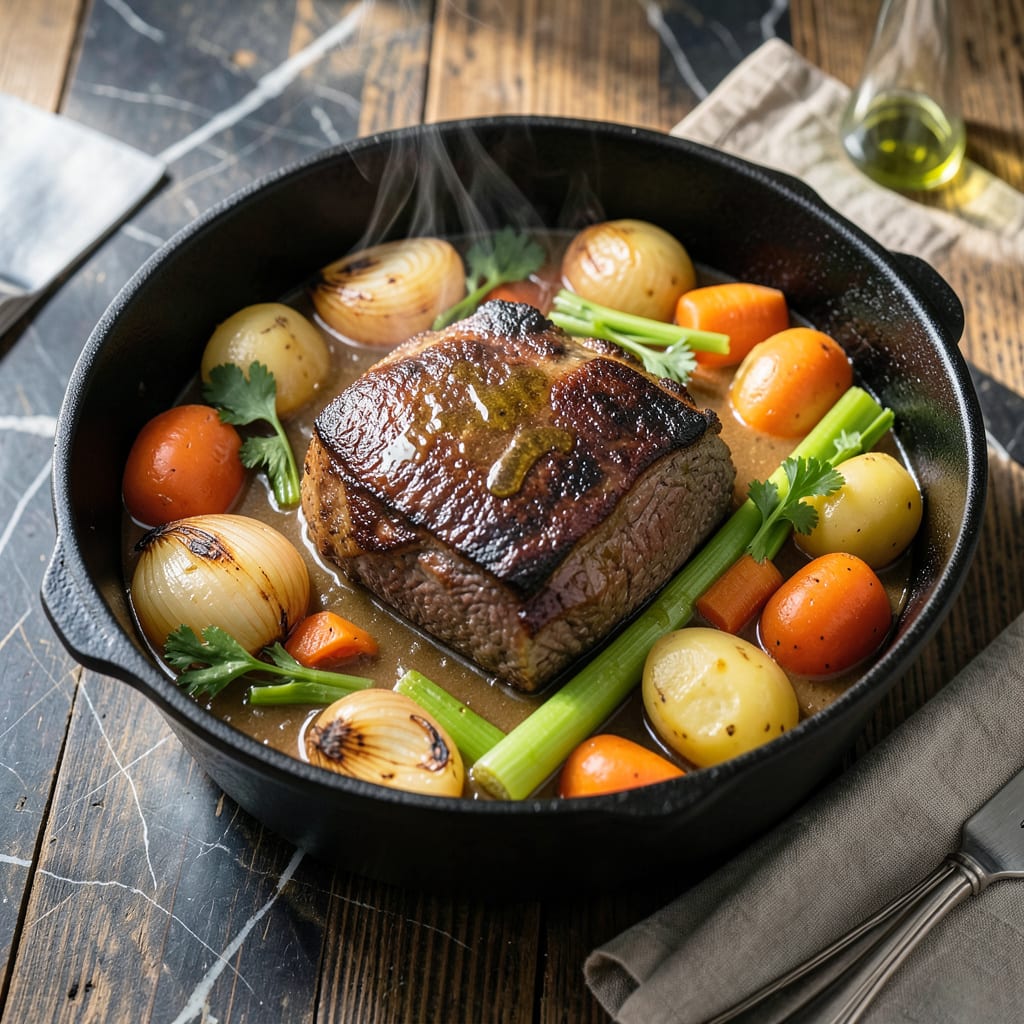
This pot roast delivers the classic comfort of a Sunday supper with minimal effort and maximum flavor.
Using Knorr seasoning enhances the natural richness of the beef, creating a tender, savory dish that’s perfect for family gatherings. The slow cooking process ensures every bite is packed with deep, hearty taste.
Ingredients for Knorr Pot Roast
A classic Sunday supper with hearty beef, root vegetables, and Knorr seasoning for depth.
| Ingredient | Amount | Notes |
|---|---|---|
| Beef Chuck Roast 🥩 | 3 lb | Well-marbled, trimmed of excess fat |
| Knorr Beef Flavor Bouillon Cube 🧂 | 1 piece | Crushed into powder form |
| Onions 🧅 | 2 whole | Yellow or white, quartered |
| Carrots 🥕 | 4 whole | Peeled, cut into chunks |
| Potatoes 🥔 | 4 whole | Yukon Gold or russet, quartered |
| Celery Stalks 🌿 | 3 whole | Trimmed, cut into pieces |
| Garlic Cloves 🧄 | 6 cloves | Peeled and smashed |
| Worcestershire Sauce 💧 | 2 tbsp | Adds umami depth |
| Dried Thyme 🍃 | 1 tsp | Or sub fresh thyme leaves |
| Dried Rosemary 🍃 | 1 tsp | Crushed between fingers |
| Bay Leaves 🌿 | 2 whole | Removed before serving |
| Beef Broth 🥛 | 2 cups | Low-sodium preferred |
| Olive Oil 🫒 | 2 tbsp | For searing roast |
| Salt 🧂 | 1 tsp | Kosher or sea salt |
| Black Pepper 🌶️ | 1 tsp | Freshly ground preferred |
The beef chuck roast is essential for that fall-apart texture. Look for good marbling at your butcher or the meat section of Whole Foods—it guarantees tenderness after slow cooking. The Knorr bouillon cube is the flavor backbone here; crush it finely so it disperses evenly. Yukon Gold potatoes hold their shape better than russets in long braises (though either works).
No Knorr bouillon? Replace with 1 tbsp Knorr beef granules or 1 tsp Better Than Bouillon. Out of Worcestershire? Soy sauce plus a dash of lemon juice mimics the tang. Fresh herbs can swap in at a 3:1 ratio (3 tbsp fresh for 1 tsp dried). Don’t skip the searing step—it builds the fond that deepens the gravy’s flavor.
Leftovers taste even better the next day—store in the fridge for up to 4 days or freeze for 3 months. Reheat gently on the stove with a splash of broth to restore moisture. The vegetables absorb more flavor if you let the pot roast sit for 15 minutes off the heat before serving.
Why You’ll Love This Recipe
- One Pot Wonder: I toss the chuck roast, bouillon cube, and veggies in and let the oven do the work—no babysitting required.
- Deep, Rich Flavor: The Knorr bouillon melts into every bite, turning simple carrots and potatoes into something crave-worthy.
- Family Approved: Honestly, it’s the only meal where my picky nephew cleans his plate without complaining.
- Leftovers for Days: A single roast feeds us twice—once fresh, then again in sandwiches or tacos the next day.
Step-by-Step Instructions for Knorr Pot Roast
This time-honored method guarantees a tender, flavorful roast every single time.
Step 1: Sear and Season the Beef Chuck Roast
Pat the 3 lb Beef Chuck Roast dry with paper towels and season generously with 1 tsp Salt and 1 tsp Black Pepper on all sides. This ensures a deep, flavorful crust and prevents steaming during searing.
Heat the 2 tbsp Olive Oil in a large Dutch oven over medium-high heat until shimmering. Sear the roast for 4-5 minutes per side until deeply browned. You’ll know it’s ready to flip when it releases easily from the pan. Transfer the roast to a plate and set aside.
Step 2: Sauté the Aromatics
In the same pot, add the 2 whole Onions, 4 whole Carrots, 4 whole Potatoes, 3 whole Celery Stalks, and 6 cloves Garlic Cloves. Cook for 5-6 minutes, stirring occasionally, until the vegetables begin to soften and develop color.
Add the 1 piece Knorr Beef Flavor Bouillon Cube, 1 tsp Dried Thyme, 1 tsp Dried Rosemary, and 2 whole Bay Leaves. Stir to combine, allowing the herbs to toast slightly for 1-2 minutes to release their aromatic oils. This builds a robust flavor foundation.
Step 3: Deglaze and Braise
Pour in the 2 tbsp Worcestershire Sauce and 2 cups Beef Broth, scraping the bottom of the pot to release the browned bits. This step is critical—those fond bits dissolve into the liquid, infusing the sauce with deep, savory flavor.
Return the seared roast to the pot, along with any accumulated juices. The liquid should come about halfway up the roast. Bring to a gentle simmer over medium heat.
Step 4: Slow Cook to Perfection
Cover the pot and reduce the heat to low. Simmer gently for 3 to 3.5 hours, turning the roast occasionally, until the meat is fork-tender. Avoid boiling, as this can toughen the meat. You’ll know it’s done when it pulls apart easily with a fork.
The vegetables should be soft and the sauce rich and flavorful. If the liquid reduces too much, add a splash of water or additional broth to maintain the braising level.
Step 5: Rest and Serve
Remove the 2 whole Bay Leaves and transfer the roast to a cutting board. Tent loosely with foil and let it rest for 15-20 minutes. This allows the juices to redistribute, ensuring every slice is moist and flavorful.
Serve the roast with the braised vegetables and sauce spooned over the top. The meat should be fall-apart tender, and the sauce should coat the vegetables with a glossy, rich finish.
Pro Tips For Making Knorr Pot Roast
- Sear the Chuck First: I learned this the hard way—browning the chuck roast in a hot pan with a little oil before adding liquids locks in way more flavor than just dumping it in raw. Takes 3-4 minutes per side, but the crust is worth it.
- Dissolve the Bouillon: Sounds obvious, but stir that Knorr cube into 2 cups of hot water until fully dissolved before adding it to the pot. I’ve ended up with little salty bits stuck to my potatoes when I skipped this.
- Cut Veggies Evenly: Chop your onions, carrots, and potatoes into similar-sized chunks—about 1.5 inches—so they cook at the same rate. Nothing worse than mushy carrots and rock-hard potatoes in the same bite.
- Use a Dutch Oven: After burning a batch in a thin pot, I switched to a heavy Dutch oven and never looked back. It distributes heat evenly and keeps the liquid at a gentle simmer instead of a rolling boil.
Essential Equipment for knorr pot roast
Dutch Oven Essentials
A heavy 5-7 quart Dutch oven is non-negotiable for even heat distribution. I swear by my Le Creuset—it retains heat perfectly for the 3-3.5 hour braise. The enameled cast iron also prevents sticking when searing the 3 lb roast at the start. 🔥
Precision Thermometer
Don’t guess the doneness—use an instant-read thermometer to check for 195-205°F internal temp. I keep my ThermoWorks ThermoPop handy to test multiple spots. This ensures the chuck roast reaches that perfect fall-apart texture every time.
Wooden Spoons
Wooden spoons won’t scratch your Dutch oven’s surface while stirring. I use a long-handled wooden spoon to reach the bottom when deglazing with the 2 cups beef broth. The flat edge helps scrape up all those flavorful browned bits.
Tongs for Turning
A good pair of 12-inch locking tongs lets you flip the roast safely during searing. I prefer OXO Good Grips for their comfortable handle and strong grip. They’re also perfect for turning the roast occasionally during the long braise.
Cutting Board
Give your roast space to rest on a large wooden cutting board. I use a 18×12 inch board that catches all the juices. The grooves around the edge prevent spills when carving the roast after its 15-20 minute rest.
Fat Separator
For the richest gravy, skim excess fat using a fat separator. I pour the braising liquid into my OXO separator, then pour the defatted juices back into the pot. This step takes just 2-3 minutes but makes a noticeable difference. ✨
Nutrition Facts
Frequently Asked Questions
What cut of beef works best for this method?
Chuck roast is ideal for its marbling and connective tissue, which break down beautifully during the 3-3.5 hour braise. Brisket or bottom round also work well.
Can I use a slow cooker instead of a Dutch oven?
Yes! Sear the meat first, then transfer everything to a slow cooker. Cook on low for 8-10 hours or high for 5-6 hours for the same tender results.
How do I thicken the gravy?
Remove the meat and veggies, then simmer the liquid uncovered for 5-10 minutes. For quicker results, mix 1 tbsp cornstarch with 2 tbsp water and stir in.
What if my roast is tough?
It likely needs more time. Return it to the pot with extra liquid and cook until it reaches 195-205°F internally. This temperature ensures collagen melts into gelatin.

- 4C Bread Crumbs Meatballs Recipe: Crispy Crust and Juicy Centers - September 25, 2026
- 6 Oz Chocolate Chip Cookie Recipe: Perfectly Balanced Crispy Edges and Chewy Hearts - September 25, 2026
- 6-Inch Coffee Cake Recipe: Vanilla Bean Swirls and Buttery Streusel Topping - September 25, 2026