
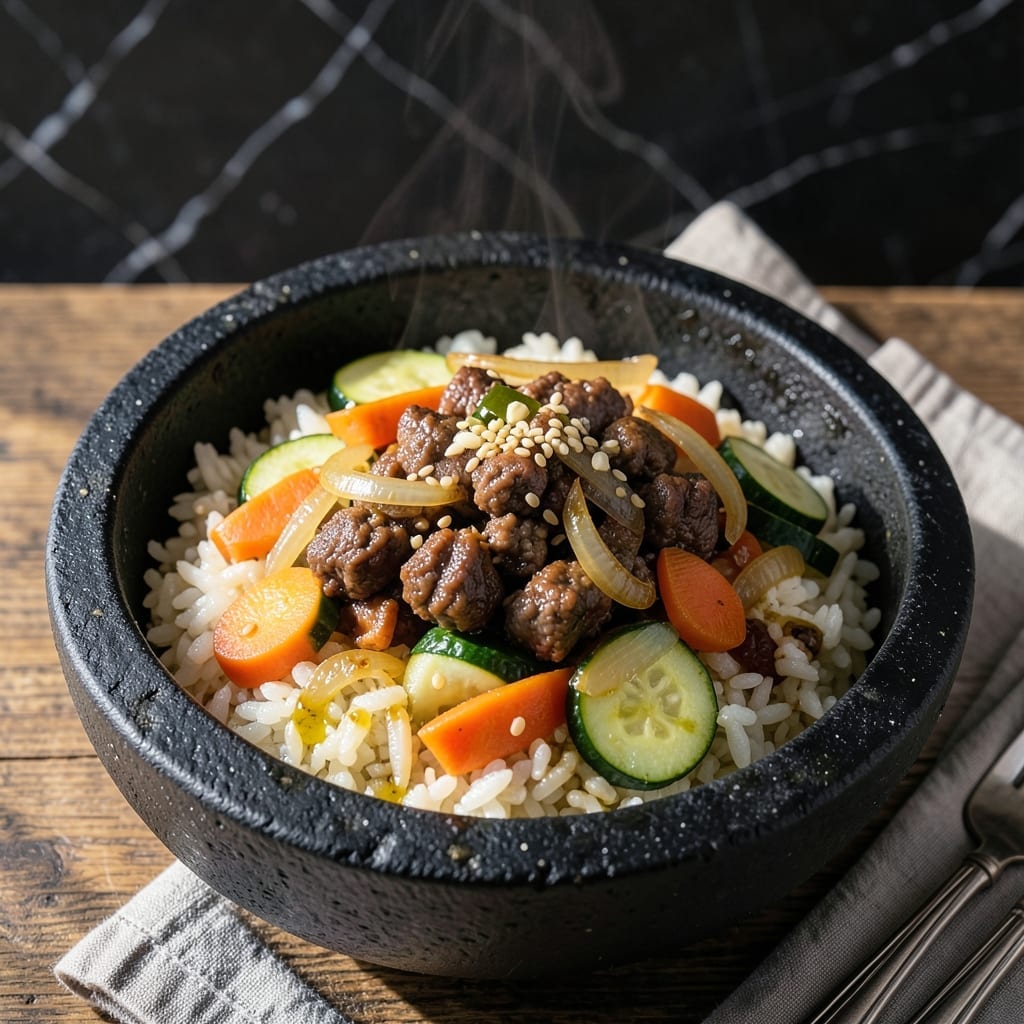
There’s something deeply satisfying about Korean pot rice, where every grain gets its moment to shine—especially the crispy bottom layer. This dish transforms simple ingredients into a meal with texture and depth that feels both comforting and special.
I’ve refined this method to ensure the rice develops that signature golden crust while staying fluffy above. The toppings add savory richness, but the real magic happens in the pot itself, where heat and patience work together.
What you’ll get is a dish with contrast in every bite: tender rice, a crispy base, and toppings that tie it all together. It’s a traditional approach made simple for home cooks.
Serve it straight from the pot for a meal that feels both rustic and deeply satisfying.
Ingredients for Korean Pot Rice
Simple, high-quality ingredients create that signature crispy bottom and savory depth.
| Ingredient | Amount | Notes |
|---|---|---|
| Short-Grain White Rice 🍚 | 2 cups | Rinsed until water runs clear |
| Ground Beef 🥩 | ½ lb | 80/20 fat ratio preferred |
| Carrots 🥕 | 2 whole | Julienned or diced small |
| Zucchini 🥒 | 1 whole | Diced into small pieces |
| Yellow Onion 🧅 | 1 whole | Finely diced for even cooking |
| Garlic Cloves 🧄 | 4 cloves | Minced for maximum flavor |
| Soy Sauce 🫙 | 3 tbsp | Low-sodium for balance |
| Sesame Oil 🫒 | 1 tbsp | Toasted for nutty aroma |
| Vegetable Oil 🛢️ | 2 tbsp | For crisping the rice |
| Eggs 🥚 | 2 whole | Optional for topping |
| Green Onions 🧅 | 3 whole | Thinly sliced for garnish |
| Salt 🧂 | ½ tsp | Adjust to taste |
| Black Pepper 🌶️ | ¼ tsp | Freshly ground preferred |
| Sesame Seeds 🌿 | 1 tsp | Toasted for garnish |
The rice is non-negotiable—short-grain white rice like Calrose or sushi rice creates the perfect texture. H-Mart or any Asian grocery will have the best selection, but standard grocery stores carry decent options too. Rinse until the water runs clear to remove excess starch, which helps achieve that golden crust. Look for good marbling in the ground beef for flavor and moisture.
No ground beef? Ground turkey or pork work well, or go vegetarian with mushrooms. Short on veggies? Bell peppers or spinach add great color and texture. If you’re avoiding eggs, simply skip them—the dish will still be delicious. Tamari instead of soy sauce for gluten-free. The key is keeping the toppings finely diced for even cooking.
Store uncooked rice in an airtight container in a cool, dark place for up to 1 year. Fresh veggies will keep for about 5 days in the fridge. Leftovers? Reheat in a skillet to revive the crispy texture. Best eaten fresh, but keeps well for 3 days refrigerated.
Why You’ll Love This Recipe
- One Pot Magic: I just dump everything in, let it simmer, and the rice absorbs all the beef and veggie flavors.
- Umami Bomb: The ground beef and onions caramelize at the bottom—that crispy, savory crust is irresistible.
- Meal Prep Hero: This keeps beautifully, so I make a big batch for lunches all week. Honestly, it tastes even better the next day.
- Budget Stretcher: A pound of ground beef and a handful of veggies feed my whole family without breaking the bank.
Step-by-Step Instructions for Korean Pot Rice
Here’s the method. Straightforward, tested, works every time.
Step 1: Prepare the Rice and Vegetables
Rinse the 2 cups Short-Grain White Rice under cold water until the water runs clear. This removes excess starch and prevents the rice from becoming gummy. Drain well in a fine-mesh strainer and let it sit for 10 minutes to remove surface moisture.
While the rice drains, dice the 2 whole Carrots, 1 whole Zucchini, and 1 whole Yellow Onion into small, uniform pieces. Mince the 4 cloves Garlic Cloves. Uniform size ensures even cooking and consistent texture in every bite.
Step 2: Cook the Rice with Crispy Bottom
In a heavy-bottomed pot with a tight-fitting lid, heat 2 tbsp Vegetable Oil over medium-high heat. Add the drained rice and stir for 1-2 minutes until the grains turn slightly translucent and smell nutty. This toasting step is crucial for developing that coveted crispy bottom.
Add 4 cups water, 0.5 tsp Salt, and 1 tbsp Sesame Oil. Stir once to distribute the rice evenly, then bring to a boil. Once boiling, reduce heat to low, cover, and cook undisturbed for 15 minutes. Resist the urge to peek—steam escaping disrupts the crisping process.
Step 3: Prepare the Ground Beef Topping
In a separate skillet, cook the 0.5 lb Ground Beef over medium heat until browned, about 5-6 minutes. Break it into small pieces with a wooden spoon. Drain excess fat if needed, then add the diced yellow onion, carrots, zucchini, and minced garlic cloves.
Cook for another 4-5 minutes until the vegetables soften. Stir in 3 tbsp Soy Sauce and 0.25 tsp Black Pepper. Simmer for 2 minutes until the liquid reduces slightly. This savory topping will sit atop the rice, infusing it with rich flavor.
Step 4: Crisp the Rice and Assemble
After 15 minutes, uncover the rice and increase heat to medium. Cook for an additional 5-7 minutes until you hear a crackling sound and see the edges pulling away from the pot. The bottom should be golden brown and crispy—this is the signature nurungji.
Spoon the ground beef mixture over the rice. Cover and let it sit off heat for 5 minutes to allow the flavors to meld. This resting period ensures the crispy bottom stays intact while the toppings warm through.
Step 5: Garnish and Serve
If using, fry the 2 whole Eggs sunny-side up in a separate pan with a bit of vegetable oil. Thinly slice the 3 whole Green Onions and toast the 1 tsp Sesame Seeds in a dry pan for 30 seconds until fragrant.
Top each serving with a fried egg, sprinkle with green onions and sesame seeds, and drizzle with extra sesame oil if desired. Serve immediately while the bottom is still crispy and the egg yolk is runny for the full experience.
Pro Tips For Making Korean Pot Rice
- Rinse the Rice: I learned this the hard way—skip rinsing your short-grain rice and you’ll end up with a gummy, starchy mess. Wash it until the water runs nearly clear to get that perfect fluffy texture.
- Brown the Beef First: Sounds obvious, but I used to dump everything in at once. Cook the ground beef until it’s deeply browned before adding veggies—it adds a ton of flavor to the final dish.
- Cut Veggies Small: After ending up with half-raw carrots in my pot rice, I started dicing the carrots, zucchini, and onion into tiny, even pieces. They cook faster and blend better with the rice.
- Use a Heavy Pot: My grandmother swore by this, and she was right: a thick-bottomed pot prevents burning and distributes heat evenly. A cheap thin one will leave you with a crispy, stuck-on layer of rice.
Health Benefits of korean pot rice
Rice Nutrition Boost
Short-grain white rice provides complex carbohydrates for sustained energy, making this dish a great fuel source. A 1-cup serving of cooked rice offers about 200 calories and 4 grams of protein, perfect for active days. I find it keeps me full for hours. 💪
Protein-Rich Toppings
The 0.5 lb ground beef adds significant protein—about 20 grams per serving—along with iron and B vitamins. Using 80/20 fat ratio ensures flavor without excessive grease. The beef and veggies together create a balanced amino acid profile.
Vitamin-Packed Veggies
Carrots and zucchini contribute fiber, vitamin A, and vitamin C. The yellow onion and garlic provide immune-boosting compounds like allicin. Together, they add texture and nutrients without overpowering the dish.
Healthy Fats
Sesame oil contains polyunsaturated fats and antioxidants like sesamol. The 2 tbsp vegetable oil used for crisping adds minimal saturated fat while helping create that perfect golden crust.
Egg Benefits
Each fried egg on top adds 6 grams of high-quality protein and essential nutrients like choline. The runny yolk also enhances flavor absorption, making every bite more satisfying. 🥗
Low-Sodium Options
Using low-sodium soy sauce reduces excess salt while keeping the savory depth. You can further cut sodium by using tamari or reducing the amount by 1 tbsp without losing much flavor.
Nutrition Facts
Frequently Asked Questions
Can I use a different type of rice?
Stick with short-grain white rice for the best texture. Jasmine or basmati won’t give you that sticky consistency or crispy bottom layer. Sushi rice works perfectly if you can’t find Calrose.
How do I get the crispy bottom just right?
Toast the rice in oil for 1-2 minutes before adding water, then cook undisturbed on low heat for 15 minutes. Increase to medium for 5-7 minutes at the end to crisp. Listen for a crackling sound—this means success!
Can I make this vegetarian?
Swap the beef for mushrooms or tofu. Use the same cooking times and soy sauce for flavor. The crispy rice technique stays the same regardless of topping.

- 4C Bread Crumbs Meatballs Recipe: Crispy Crust and Juicy Centers - September 25, 2026
- 6 Oz Chocolate Chip Cookie Recipe: Perfectly Balanced Crispy Edges and Chewy Hearts - September 25, 2026
- 6-Inch Coffee Cake Recipe: Vanilla Bean Swirls and Buttery Streusel Topping - September 25, 2026