
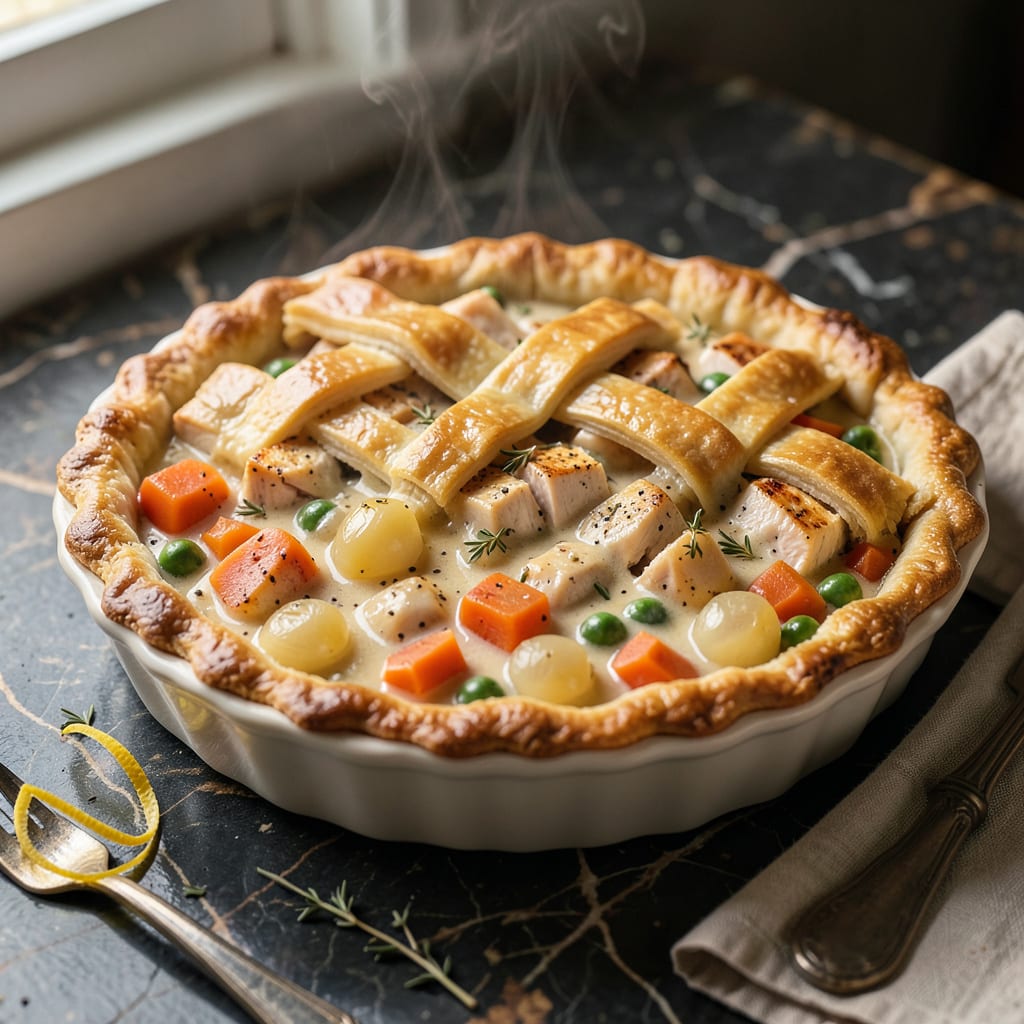
There’s something deeply satisfying about a homemade chicken pot pie that delivers all the creamy comfort of the classic dish with minimal effort. This recipe captures that nostalgic flavor—tender chicken, hearty vegetables, and a rich, velvety sauce—all encased in a flaky, golden crust that shatters with every bite.
The beauty of this version lies in its simplicity. By using smart shortcuts like pre-made pie crust and a straightforward cream sauce, you achieve that same creamy, comforting filling without hours in the kitchen. It’s the kind of meal that turns an ordinary weeknight into something warm and memorable, with leftovers that taste even better the next day.
Ingredients for Kraft Chicken Pot Pie
Quality ingredients transform this nostalgic dish into creamy, flaky perfection with minimal effort required.
| Ingredient | Amount | Notes |
|---|---|---|
| Boneless, Skinless Chicken Breasts 🍗 | 1 ½ lb | Cut into 1-inch cubes |
| Refrigerated Pie Crusts 🥧 | 2 sheets | Standard 9-inch rounds |
| Unsalted Butter 🧈 | ¼ cup | Divided for sauce and crust |
| All-Purpose Flour 🌾 | ⅓ cup | For roux thickening |
| Whole Milk 🥛 | 1 ½ cups | Full-fat for creaminess |
| Low-Sodium Chicken Broth 🍲 | 1 cup | For balanced seasoning |
| Frozen Mixed Vegetables 🥦 | 2 cups | Peas, carrots, corn blend |
| Yellow Onion 🧅 | 1 whole | Finely diced |
| Garlic Cloves 🧄 | 2 cloves | Minced for aromatic base |
| Fresh Thyme Leaves 🌿 | 1 tsp | Stripped from stems |
| Kosher Salt 🧂 | 1 tsp | Diamond Crystal preferred |
| Freshly Ground Black Pepper 🌶️ | ½ tsp | Medium-coarse grind |
| Large Egg 🥚 | 1 whole | For egg wash finish |
[recipeingredientscaler]
The foundation of this pot pie lies in the chicken and crust. Boneless, skinless chicken breasts ensure tender, uniform pieces—avoid pre-cooked varieties as they dry out during baking. For the crust, Pillsbury refrigerated pie dough delivers consistent flakiness without homemade effort. Opt for full-fat whole milk and European-style butter (like Plugrá) for the velvety sauce; lower-fat alternatives compromise texture. The chicken broth should be low-sodium to control seasoning precision, with Swanson or Kitchen Basics offering reliable quality.
Vegetable flexibility accommodates pantry realities: frozen peas-and-carrots blends (like Bird’s Eye) work perfectly, though fresh diced carrots and peas may be substituted if preferred. Yellow onions develop optimal sweetness when cooked to translucency—avoid red onions, which impart unwanted color. For herb variations, 1 teaspoon dried thyme may replace fresh, though fresh provides superior aroma. The egg wash is non-negotiable for that golden sheen; omit at the cost of visual appeal.
Component preparation streamlines assembly: cube chicken and dice onions in advance, storing separately in the refrigerator for up to 24 hours. The uncooked pie may be assembled 8 hours ahead, refrigerated until baking. Leftovers maintain quality for 3 days refrigerated or 2 months frozen—reheat covered at 350°F until internal temperature reaches 165°F. Always use parchment-lined baking sheets to prevent crust sticking during storage.
Why You’ll Love This Recipe
- No Boiling Required: I skip the whole “poach the chicken” step—just dice it raw, let it cook right in the creamy filling. The butter and flour make a foolproof roux that handles everything in one pan.
- That Crust Magic: Between us, the flaky refrigerated crust (yes, store-bought) against the rich milk-and-butter filling is what makes this. It’s not fancy, but that golden, crispy top with the tender chicken underneath? Solid comfort.
- My Sunday Supper: This feeds my family of four with leftovers for lunch, and honestly, it’s just as good reheated. I’ll make it ahead on weekends, then pop it in the oven when we’re all running late.
- $10 Dinner Hero: Boneless chicken breasts on sale + a $3 pie crust = a meal that looks (and tastes) like I spent hours. I’ll be real: this is my go-to when the grocery budget’s tight but I need something hearty.
Step-by-Step Instructions for Chicken Pot Pie
This method ensures a creamy filling with perfectly flaky crust every time, delivering comfort in each bite.
Step 1: Prepare the Chicken and Vegetable Filling
Begin by cutting the 1.5 lb boneless, skinless chicken breasts into 1-inch cubes. Heat 1 tablespoon of the unsalted butter in a large skillet over medium-high heat. Add the chicken and cook for 5-6 minutes until the pieces are lightly browned and cooked through. Remove the chicken with a slotted spoon and set aside.
In the same skillet, add the finely diced yellow onion and cook for 3-4 minutes until translucent. Add the 2 cloves minced garlic cloves and 1 tsp fresh thyme leaves, cooking for an additional 30 seconds until fragrant. This aromatic base builds the foundation for your filling’s rich flavor profile.
Step 2: Create the Creamy Roux-Based Sauce
Reduce heat to medium and add the remaining unsalted butter to the skillet. Once melted, whisk in the 0.33 cup all-purpose flour to form a roux. Cook for 2 minutes, stirring constantly, until the mixture turns a light golden color—this removes the raw flour taste and develops nutty undertones.
Gradually pour in the 1.5 cups whole milk and 1 cup low-sodium chicken broth, whisking continuously to prevent lumps. Bring the mixture to a gentle simmer and cook for 4-5 minutes until it thickens enough to coat the back of a spoon. The sauce should have a velvety consistency that will beautifully envelop the filling ingredients.
Step 3: Assemble the Complete Filling
Return the cooked chicken to the skillet along with the 2 cups frozen mixed vegetables. Stir to combine and cook for an additional 3-4 minutes until the vegetables are tender-crisp and heated through. Season with 1 tsp kosher salt and 0.5 tsp freshly ground black pepper, adjusting to taste.
The filling should be thick but still pourable—if it seems too viscous, add a splash of chicken broth to loosen. This balance ensures the pie won’t be soggy while maintaining that signature creamy texture. Remove from heat and let the filling cool slightly while you prepare the crust.
Step 4: Assemble and Bake the Pot Pie
Unroll one refrigerated pie crust and press it into a 9-inch pie dish, allowing the edges to overhang slightly. Pour the warm filling into the crust, spreading it evenly. Top with the second refrigerated pie crust, crimping the edges to seal. Cut several small slits in the top crust to allow steam to escape during baking.
Beat the large egg with 1 tablespoon water to create an egg wash. Brush this mixture over the top crust for a golden-brown finish. Bake at 375°F for 35-40 minutes until the crust is deep golden and the filling is bubbling through the slits. Let rest for 10 minutes before serving to allow the filling to set.
Make-Ahead Tips for This Recipe
Prep Ahead Strategy
You can prepare the entire filling up to 2 days in advance and store it in an airtight container in the refrigerator. I actually prefer this method because it allows the flavors to meld together beautifully. Just be sure to let it come to room temperature for about 30 minutes before assembling your pie to prevent a soggy crust. 💡
Crust Prep Tips
If you’re using refrigerated pie crusts, take them out of the fridge about 15 minutes before you plan to assemble. This makes them more pliable and easier to work with. I like to roll them out slightly between parchment paper to get that perfect 9-inch fit for my pie dish.
Freezer-Friendly Option
For true make-ahead convenience, assemble the entire pot pie (unbaked) and freeze it for up to 2 months. Wrap it tightly in plastic wrap followed by heavy-duty aluminum foil. When ready to bake, thaw overnight in the fridge, then brush with egg wash and bake as directed—adding about 10 extra minutes to the cooking time. ❄️
Individual Portions
Make single-serving pot pies by using ramekins or small oven-safe bowls. Divide the filling among them, top with crust circles cut to fit, and freeze. These bake beautifully from frozen at 375°F for 30-35 minutes—perfect for quick lunches or when you’re cooking for one.
Crust Protection
If you’re worried about the crust getting soggy during storage, brush the bottom crust with a thin layer of beaten egg white before adding the filling. This creates a moisture barrier. I learned this trick from my grandmother, and it makes a noticeable difference in maintaining that perfect flaky texture.
Reheating Perfection
When reheating leftovers, cover the pie loosely with aluminum foil and warm at 350°F for 15-20 minutes. This prevents the crust from over-browning while ensuring the filling heats through evenly. A quick 5-minute broil at the end restores that just-baked crispness. 🔥
Nutrition Facts
Frequently Asked Questions
Can I use rotisserie chicken instead of raw?
Using 2 cups shredded rotisserie chicken saves time and adds extra flavor. Just skip the initial cooking step and add it directly to the sauce. This shortcut works beautifully while keeping the dish just as creamy and satisfying.
Why did my filling turn out watery?
This usually happens if the sauce doesn’t thicken enough before baking.
Can I make this without a top crust? Yes, but you’ll need to adjust the baking. Use 1 cup crushed Ritz crackers mixed with 2 tablespoons melted butter as topping instead. Bake at 375°F for 20-25 minutes until golden. The texture will be different but equally delicious.
How do I prevent a soggy bottom crust?
Two key tricks: First, blind-bake the bottom crust for 8 minutes before adding filling. Second, brush it with beaten egg white before filling—this creates a protective barrier. Let the pie rest 10 minutes after baking too.

- 8 Bean Soup Recipe Crock Pot: Hearty Vegetable Medley in One Pot - September 25, 2026
- 4C Bread Crumbs Meatballs Recipe: Crispy Crust and Juicy Centers - September 25, 2026
- 6 Oz Chocolate Chip Cookie Recipe: Perfectly Balanced Crispy Edges and Chewy Hearts - September 25, 2026