
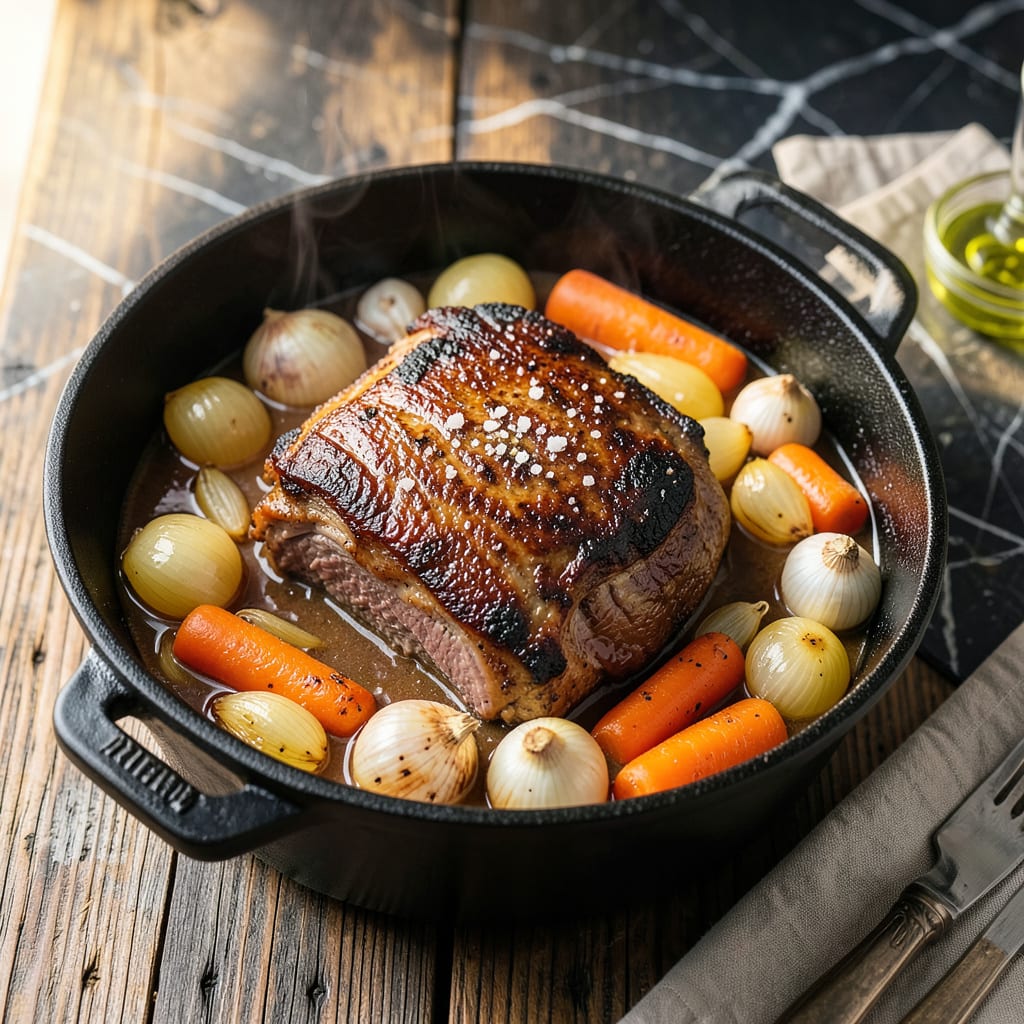
This slow-braised pot roast transforms tough beef into tender, fall-apart perfection with rich caramelized onions. I’ve perfected this method over years, ensuring every bite delivers deep, savory flavor and melt-in-your-mouth texture.
The secret lies in low, steady heat and patience. With minimal effort, you’ll achieve a dish that rivals any restaurant—juicy, flavorful beef, vegetables soaked in rich gravy, and a meal that feels like a warm embrace.
Ingredients for Large Pot Roast
Pantry staples and a well-chosen roast create this deeply satisfying slow-braised dish with caramelized onions.
| Ingredient | Amount | Notes |
|---|---|---|
| Beef Chuck Roast 🥩 | 4 lb | Well-marbled, boneless preferred |
| Kosher Salt 🧂 | 2 tbsp | Diamond Crystal preferred |
| Black Pepper 🌶️ | 2 tsp | Freshly ground for best flavor |
| Yellow Onions 🧅 | 4 whole | Large, thinly sliced for caramelizing |
| Garlic Cloves 🧄 | 6 cloves | Smashed, peeled left whole |
| Carrots 🥕 | 6 whole | Peeled, cut into 3-inch chunks |
| Celery Stalks 🌿 | 4 whole | Cut into 2-inch pieces |
| Red Wine 🍷 | 2 cups | Dry variety like Cabernet Sauvignon |
| Beef Stock 💧 | 3 cups | Low-sodium preferred for control |
| Tomato Paste 🍅 | 3 tbsp | For depth of flavor in gravy |
| Fresh Thyme Sprigs 🌿 | 4 whole | Plus 1 tbsp chopped for garnish |
| Fresh Rosemary Sprigs 🌿 | 2 whole | Woody stems removed before serving |
| Bay Leaves 🍃 | 2 whole | Dried, removed before serving |
| Olive Oil 🫒 | 3 tbsp | Extra-virgin for searing beef |
| All-Purpose Flour 🌾 | 3 tbsp | For thickening gravy at end |
The beef is non-negotiable here. Chuck roast from Costco or Whole Foods gives you the marbling you need for that fall-apart texture—avoid lean cuts like sirloin. Look for good fat streaking (that’s flavor insurance). I always buy a few extra pounds and freeze it—vacuum-sealed keeps for 6-12 months. The onions? Yellow works best for caramelization, but sweet onions (like Vidalia) add a nice touch if you find them.
No red wine? Beef broth with 2 tbsp balsamic vinegar gets you 90% there. Fresh herbs are ideal, but dried at one-third the amount works—just add them with the liquids, not at the end. Tomato paste in a tube (like at Trader Joe’s) means no waste. The carrots and celery can be swapped for parsnips or potatoes if that’s what you’ve got (or whatever’s cheaper at the store).
This tastes even better the next day once everything melds. Refrigerate in the cooking liquid for up to 4 days, or freeze portions for 3 months. Skim the fat off the top before reheating—it’ll look as good as it tastes.
Why You’ll Love This Recipe
- Set It and Forget It: I season the chuck roast, sear it, then let the oven do the work for hours—no stirring, no fuss.
- Garlic-Onion Magic: The yellow onions and garlic cloves melt into the beef, creating a rich, savory depth that’s impossible to resist.
- Feeds My Whole Crew: One large pot roast means dinner for the family, plus leftovers for sandwiches the next day.
- Budget-Friendly Centerpiece: A big cut of chuck roast stretches far without breaking the bank, and it tastes like a million bucks.
Step-by-Step Instructions for Slow-Braised Beef with Caramelized Onions
Here’s the method that transforms tough cuts into melt-in-your-mouth perfection every time.
Step 1: Sear the Beef Chuck Roast
Pat the 4 lb Beef Chuck Roast dry with paper towels, then season it aggressively on all sides with the 2 tbsp Kosher Salt and 2 tsp Black Pepper. I use my hands to press the seasoning into the meat so it adheres well during searing.
Heat 2 tbsp Olive Oil in a large Dutch oven over medium-high heat until shimmering. Add the roast and sear for 4-5 minutes per side until deeply browned. You’re looking for a dark, caramelized crust—this builds the foundation of flavor for your braise. Don’t rush this step; a proper sear is non-negotiable.
Once browned, transfer the roast to a plate and set aside. The fond (those browned bits stuck to the bottom) will dissolve into your braising liquid, so don’t clean the pot just yet.
Step 2: Caramelize the Vegetables
In the same Dutch oven, add the remaining 1 tbsp Olive Oil and the 4 whole Yellow Onions, sliced thin. Cook over medium heat for 10-12 minutes, stirring occasionally, until the onions soften and turn a deep golden brown.
Add the 6 cloves Garlic Cloves, 6 whole Carrots, and 4 whole Celery Stalks, cooking for another 5 minutes until they begin to soften. Stir in the 3 tbsp Tomato Paste and cook for 1-2 minutes until it darkens slightly—this intensifies its sweetness and removes any raw flavor.
Step 3: Deglaze and Braise
Pour in the 2 cups Red Wine and bring to a simmer, scraping up all the browned bits from the bottom of the pot with a wooden spoon. Let it reduce by half, about 5 minutes. This step is where the magic happens—the wine picks up all that concentrated beef flavor.
Return the roast to the pot and add the 3 cups Beef Stock, 4 whole Fresh Thyme Sprigs, 2 whole Fresh Rosemary Sprigs, and 2 whole Bay Leaves. The liquid should come about halfway up the roast. Bring to a simmer, then cover and transfer to a 325°F oven.
Step 4: Slow-Braise to Tenderness
Braise for 3 to 3.5 hours, turning the roast halfway through, until it’s fork-tender. You’ll know it’s done when a fork slides in with no resistance. Check occasionally and add a splash of water if the liquid level drops too low—you want the roast to stay mostly submerged.
Once tender, carefully transfer the roast to a cutting board. Skim any excess fat from the surface of the braising liquid, then place the pot over medium heat.
Step 5: Finish with a Rich Gravy
Whisk the 3 tbsp All-Purpose Flour into ¼ cup of the braising liquid until smooth, then stir this slurry back into the pot. Simmer for 5-7 minutes until the gravy thickens enough to coat the back of a spoon. Taste and adjust seasoning with additional salt and pepper if needed.
Slice the roast against the grain and serve it smothered in the rich, caramelized onion gravy. The meat should pull apart easily with a fork, and the sauce should be velvety and deeply flavored from the long, slow cooking process.
Pro Tips For Making Large Pot Roast
- Sear It Hard: I learned this the hard way—get that chuck roast screaming hot in the pot first, at least 3-4 minutes per side until it’s deep brown. Sounds weird, but it works: that crust is where all the flavor builds.
- Season Overnight: Salt the roast the night before and leave it uncovered in the fridge. My grandmother swore by this, and she was right: the meat absorbs the seasoning deeper and cooks more evenly.
- Don’t Crowd the Pot: Resist the urge to throw all the onions in at once—brown them in batches so they caramelize instead of steam. I used to rush this part and wondered why my pot roast lacked depth.
- Use a Meat Thermometer: After burning three batches, I finally figured out: pull it at 195°F internal temp, not when it “looks done.” This isn’t the prettiest method, but it’s the tastiest.
Common Mistakes When Making Perfect Results
Skipping the Sear
Never skip searing your 4 lb Beef Chuck Roast—this step builds the deep, caramelized fond that flavors your entire braise. I see too many home cooks rush this, but 4-5 minutes per side at medium-high heat creates that essential crust. 🔥
Overcrowding the Pot
Your Dutch oven should have room for the roast and vegetables to cook evenly. If it’s too crowded, the meat will steam instead of sear. Use at least a 5-6 quart pot for this recipe. I learned this the hard way with a pot that was just a bit too small.
Not Enough Liquid
The braising liquid should come about halfway up the roast. If you’re shy on liquid, the meat can dry out or burn. With 2 cups Red Wine and 3 cups Beef Stock, you’re set. Check occasionally and add water if levels drop too low during the 3-3.5 hour braise.
Peeking Too Often
Every time you open the oven, you lose 50-100°F of heat, extending your cook time. Trust the process—only check once, halfway through, to turn the roast. Patience is key for that fall-apart texture.
Rushing the Caramelization
Those 4 Yellow Onions need 10-12 minutes at medium heat to properly caramelize. If you rush, they’ll stay sharp and raw-tasting. Stir occasionally, but let them develop that deep golden color and sweetness.
Forgetting to Skim Fat
After braising, always skim the excess fat from the surface before making gravy. I use a large spoon for this. Leaving it in makes your gravy greasy instead of rich and velvety. This small step makes a huge difference in the final dish. ✨
Nutrition Facts
Frequently Asked Questions
What’s the best cut for a tender result?
Use a well-marbled chuck roast for the juiciest outcome. The fat melts during the 3-3.5 hour braise, keeping it moist. Avoid lean cuts like sirloin—they dry out.
Can I make this in a slow cooker?
Yes! Sear the beef first, then transfer to your slow cooker with all ingredients. Cook on low for 8-10 hours or high for 5-6 hours. The texture will be similar but lacks the oven’s even heat distribution.
How do I store and reheat leftovers?
Store in an airtight container with the gravy for up to 4 days in the fridge. Reheat gently on the stovetop over medium-low heat to prevent drying out. Freezes well for 3 months.

- 4C Bread Crumbs Meatballs Recipe: Crispy Crust and Juicy Centers - September 25, 2026
- 6 Oz Chocolate Chip Cookie Recipe: Perfectly Balanced Crispy Edges and Chewy Hearts - September 25, 2026
- 6-Inch Coffee Cake Recipe: Vanilla Bean Swirls and Buttery Streusel Topping - September 25, 2026